2002 BMW 325Ci COUPE window
[x] Cancel search: windowPage 81 of 147
81n
OverviewControlsMaintenanceRepairsDataIndex
Air conditioningAir supply
You can select blower speeds
from 1 to 4. The heating and
ventilation become more and
more effective as the air
supply settings are increased. In
position 0, the blower and the heater
are switched off. The outside air supply
is blocked in position 0.
Temperature
In order to increase the
temperature of the passenger
compartment, turn to the right
(red). The temperature of the
incoming air is kept constant.
Air distribution
You can direct air to flow onto
the windows , toward your
upper body or into the
footwell . All intermediate
settings are possible. In the setting,
there is a low flow of air onto the
windows to keep them free of conden-
sation.
Rear window defroster
When the rear window defroster
is activated, the indicator lamp
comes on. The rear window defroster
switches off automatically.
The rear window defroster auto-
matically assumes operation
within 5 minutes after the engine is
started at outside temperatures below
approx. 39 7 (+4 6).<
Air conditioning
The air is cooled and dehumidi-
fied and Ð depending on the
temperature setting Ð rewarmed.
Depending on the weather, the wind-
shield may fog over briefly when the
engine is started. Switching on the air
conditioning will reduce condensation
forming on the windows.
Condensation forms during opera-
tion of the air conditioning system,
which then exits under the vehicle.
Traces of condensed water of this kind
are thus normal.<
Recirculated-air mode
You can respond to unpleasant
external odors by temporarily
excluding the supply of outside air. The
system then recirculates the air
currently within the vehicle.
If the windows should fog over in
the recirculated-air mode, switch
this mode off and increase the air
supply as required.<
Page 82 of 147
82n
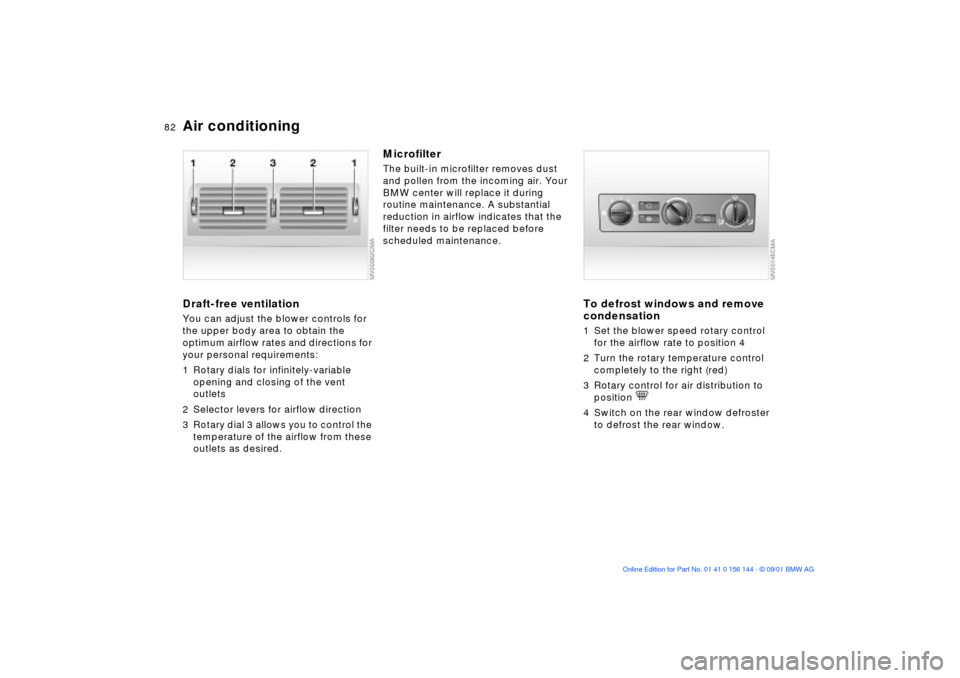
Air conditioningDraft-free ventilationYou can adjust the blower controls for
the upper body area to obtain the
optimum airflow rates and directions for
your personal requirements:
1 Rotary dials for infinitely-variable
opening and closing of the vent
outlets
2 Selector levers for airflow direction
3 Rotary dial 3 allows you to control the
temperature of the airflow from these
outlets as desired.
MicrofilterThe built-in microfilter removes dust
and pollen from the incoming air. Your
BMW center will replace it during
routine maintenance. A substantial
reduction in airflow indicates that the
filter needs to be replaced before
scheduled maintenance.
To defrost windows and remove
condensation1 Set the blower speed rotary control
for the airflow rate to position 4
2 Turn the rotary temperature control
completely to the right (red)
3 Rotary control for air distribution to
position
4 Switch on the rear window defroster
to defrost the rear window.
Page 83 of 147

83n
OverviewControlsMaintenanceRepairsDataIndex
Automatic climate control
*
1 Air onto the windshield and onto the
side windows
2 Air for the upper body area85
3 Air for the footwell
4 Recirculated-air mode/Automatic
recirculated-air control (AUC)855 Air supply84
6 Temperature84
7 Automatic air distribution84
8 Individual air distribution84
9 Interior temperature sensor Ð please
keep clear and unobstructed10 Display for temperature and air
supply84
11 Defrost windows and remove
condensation84
12 Air conditioning84
13 Rear window defroster85
Page 84 of 147
84n
Automatic climate control
*
Tips for pleasant drivingUse the automatic system Ð switch on
with AUTO button 7. Select an interior
temperature that is comfortable for you.
Detailed setting options are described
for you in the following section.Automatic air distribution
The AUTO program adjusts the
air distribution and the air
supply for you and in addition adapts
the temperature to external influences
(summer, winter) to meet preferences
you can specify.
Individual air distribution
You can cancel the AUTO
program by selecting specific
distribution patterns to suit your
own individual requirements.
While the AUTO program is then deacti-
vated, the automatic airflow control
remains in operation. The system
directs air to the windows , the upper
body and into the footwells . You
can reactivate the automatic air distri-
bution mode by selecting the AUTO
button.
Temperature
The interior temperature that
appears in the display panel is a
general figure intended for reference
purposes. We recommend 72 7
(+22 6) as a comfortable setting, even
if the air conditioning is on. When you
start the vehicle, the system ensures
that the selected temperature is
achieved as quickly as possible regard-
less of the season. It then maintains this
temperature.
Air supply
By pressing the left or right half
of the button, you can vary the
air supply. This deactivates the auto-
matic control of the air supply, AUTO
disappears from the display panel.
Nevertheless, the automatic air distri-
bution remains unchanged. You can
reactivate the automatic air distribution
mode by selecting the AUTO button.
When the lowest blower speed is set
and you press the left half of the button,
all of the displays are canceled: the
blower, heating and air conditioner are
switched off. The outside air supply is
blocked. You can reactivate the system
by pressing any button for the auto-
matic climate control.
To defrost windows and remove
condensation
This program quickly removes
ice and condensation from the
windshield and the side windows.
Air conditioning
The air is cooled and dehumidi-
fied and Ð depending on the
temperature setting Ð rewarmed.
Depending on the weather, the wind-
shield may fog over briefly when the
engine is started. Switching on the air
conditioning will reduce condensation
forming on the windows.
Condensation forms during opera-
tion of the air conditioning system,
which then exits under the vehicle.
Traces of condensed water of this kind
are thus normal.<
Page 85 of 147
85n
OverviewControlsMaintenanceRepairsDataIndex
Automatic climate control
*
Automatic recirculated-air control
(AUC)
You can respond to unpleasant
external odors or pollutants by
temporarily stopping the flow of outside
air. The system then recirculates the air
currently within the vehicle.
Press the button repeatedly to select
one of three different operating modes.
>Indicator lamps off: outside airflow is
on
>Left-hand indicator lamp on Ð AUC
mode: the system recognizes pollut-
ants in the outside air and blocks the
flow of air when necessary. The
system then recirculates the air
currently within the vehicle.
Depending on the air quality, the
automatic system then switches back
and forth between outside air supply
and recirculation of the air within the
vehicle
>Right-hand indicator lamp on: the
flow of external air into the vehicle is
permanently blocked. The system
then recirculates the air currently
within the vehicle.
If the windows fog over in the
recirculated-air mode, switch the
recirculated-air mode off and increase
the air supply as required.<
Rear window defroster
When the rear window defroster
is activated, the indicator lamp
comes on. The rear window defroster
switches off automatically.
The rear window defroster auto-
matically assumes operation
within 5 minutes after the engine is
started at outside temperatures below
approx. 39 7 (+4 6).<
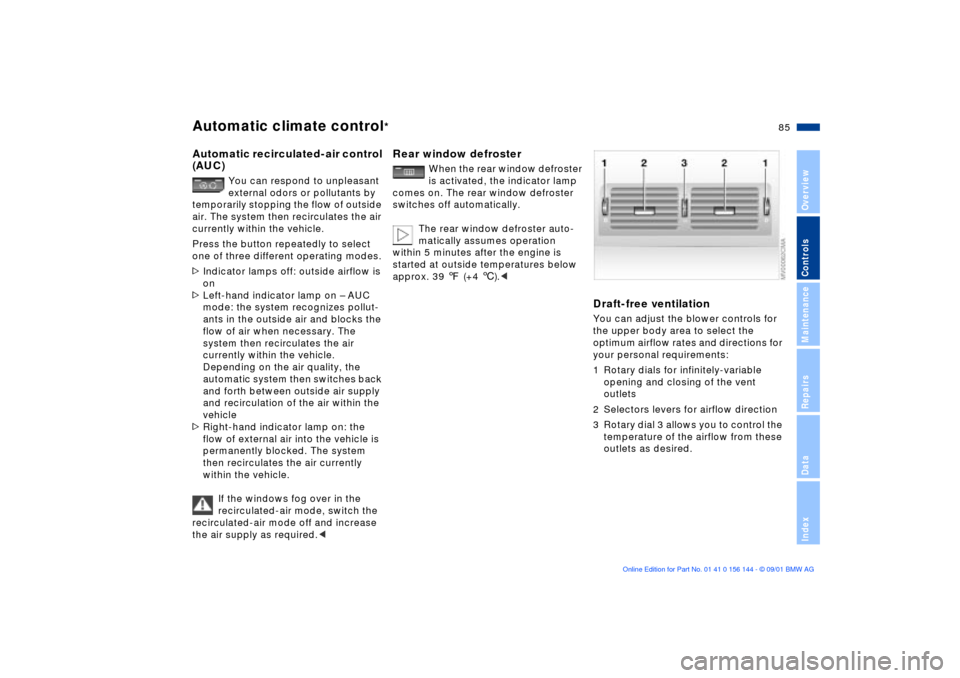
Draft-free ventilationYou can adjust the blower controls for
the upper body area to select the
optimum airflow rates and directions for
your personal requirements:
1 Rotary dials for infinitely-variable
opening and closing of the vent
outlets
2 Selectors levers for airflow direction
3 Rotary dial 3 allows you to control the
temperature of the airflow from these
outlets as desired.
Page 122 of 147
122n
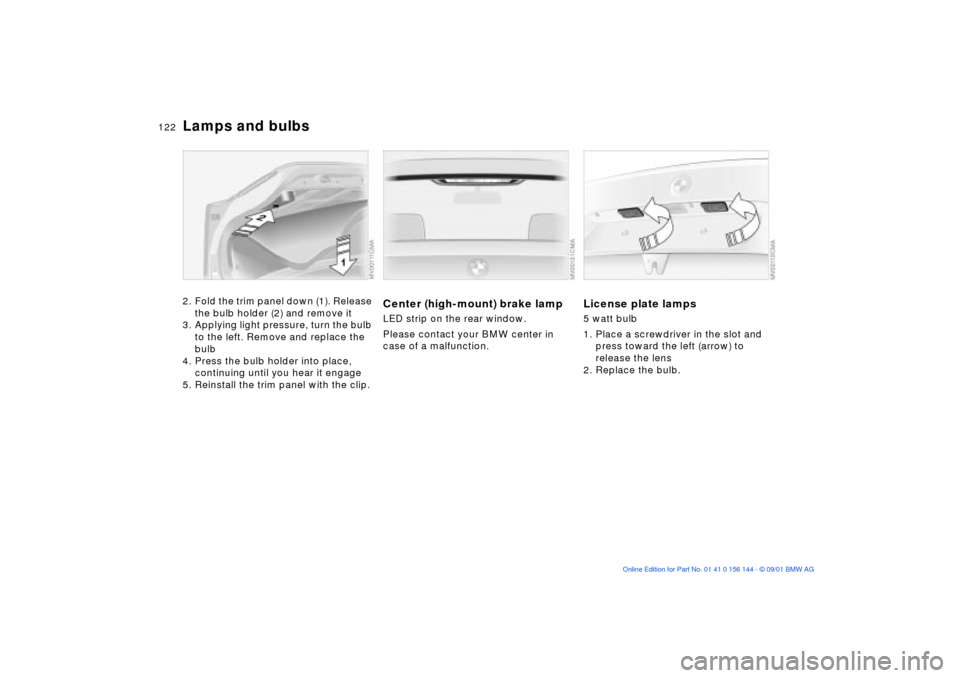
Lamps and bulbs2. Fold the trim panel down (1). Release
the bulb holder (2) and remove it
3. Applying light pressure, turn the bulb
to the left. Remove and replace the
bulb
4. Press the bulb holder into place,
continuing until you hear it engage
5. Reinstall the trim panel with the clip.
Center (high-mount) brake lampLED strip on the rear window.
Please contact your BMW center in
case of a malfunction.
License plate lamps5 watt bulb
1. Place a screwdriver in the slot and
press toward the left (arrow) to
release the lens
2. Replace the bulb.
Page 139 of 147

Everything from A to Z
139n
OverviewControlsMaintenancRepairsDataIndex
C
California Proposition
65 Warning114
Canned beverage holder88
Capacities135
Car care, refer to the "Caring
for your vehicle" manual
Car keys28
Car wash systems, refer to
the "Caring for your
vehicle" manual
Care of upholstery materials,
refer to the "Caring for your
vehicle" manual
Cargo loading93
CBC (Cornering Brake
Control)18, 71
Cellular phone89
refer also to the separate
"Owner's Manual"
Center (high-mount) brake
lamp122
Center 3-point belt in the
rear91
Center armrest87
Central locking system28
button32 Changing a wheel123
Check Control66
Check engine oil level109
Checking tire inflation
pressure24
Child restraint
installation52
Child-restraint anchorage
points51
Clean the headlamps61
Cleaning windshield61
Clock66
refer also to the "Radio
Owner's Manual" or to the
"Onboard Computer
Owner's Manual"
Clothes hooks90
Cockpit14
Coin box88
Compartments87
Compression132
Computer refer also to the "Onboard
Computer Owner's
Manual"
Configuring individual
settings with Vehicle and
Key Memory53
Consumption68
display65
Convenience operation via
the door lock
sliding/tilt sunroof31
windows31
Coolant111
Coolant temperature
gauge65
Cooling system,
capacity135
Copyright4
Cornering Brake Control
(CBC)18, 71
Correct sitting posture40
Cover, sun blinds86
Cruise control62
Cruising range68
Cup holder, refer to
beverage holder88
Curb weight134 Current check indicator17
D
Dash lighting78
Dashboard14
Data
dimensions133
engine132
technical132
weights134
Daytime driving lamp77
DBC (Dynamic Brake
Control)19, 72
Deep water99
Defrost setting82, 84
Defrost windows82, 84
Defrostable rear
window81, 85
Digital clock66
Dimensions133
Dipstick, engine oil109
Displacement132
Display lighting78
Displays15
Distance warning69
Page 140 of 147
Everything from A to ZDivided rear-seat
backrest91
Door keys28
Doors
electrical malfunction31
locking and unlocking29
manual operation31
DOT Quality Grades102
Draft-free ventilation82, 85
Driving notes99
DSC (Dynamic Stability
Control)19, 71
Dynamic Brake Control
(DBC)19, 72
Dynamic Stability Control
(DSC)19, 71 E
Electric power windows38
Electrical heating, exterior
mirror47
Electrical malfunction
doors31
fuel filler door22
luggage compartment
lid33
sliding/tilt sunroof39 Elements of operation14
Emergency release of
luggage compartment lid
from luggage
compartment's interior35
Energy control64
Engine compartment
essentials107
Engine coolant, refer to
coolant111
Engine data132
Engine oil
capacity135
consumption109
level19
level, check109
level, indicator lamp17
pressure17
pressure, indicator
lamp17
quality110
specifications110
viscosity110
Engine speed132
Engine, starting54
Engine, switching off55
Entering the rear43
Exterior mirrors47
electrical heating47
F
Failure messages66
Fault displays66
Filling capacities135
Finger guard38
Fittings, tow starting and
towing129
Flashlight87
Flat Tire
Monitor75, 103, 126
Flat tires101, 123, 126
Floor mat, luggage
compartment35
Floor panel, luggage
compartment35
Fog lamps78
Follow me home lamps77
Fuel consumption68
display65
Fuel filler door22
electrical malfunction22
manual operation22
Fuel gauge65
Fuel preparation132
Fuel reserve indicator
lamp65
Fuel specifications23
Fuel tank capacity135
Fuel tank gauge65
Fuses127
G
Gasoline gauge65
Glove compartment87
Grilles83
Gross vehicle weight134 H
Handbrake56
Hands-free system89
Hazard warning triangle22
Head restraints43
Headlamp cover, care119
Headlamp flasher78
Headlamp washer
system108
capacity135
Headlamps77
Headlight control77
Headrests43
Heated seats46
Heater and ventilation83
Heavy cargo93
Height133
High beams20, 59, 78
bulb replacement119
Holder for canned
beverages88
Hood release106
Horn14