2002 BMW 325Ci COUPE fuel
[x] Cancel search: fuelPage 32 of 147

32n
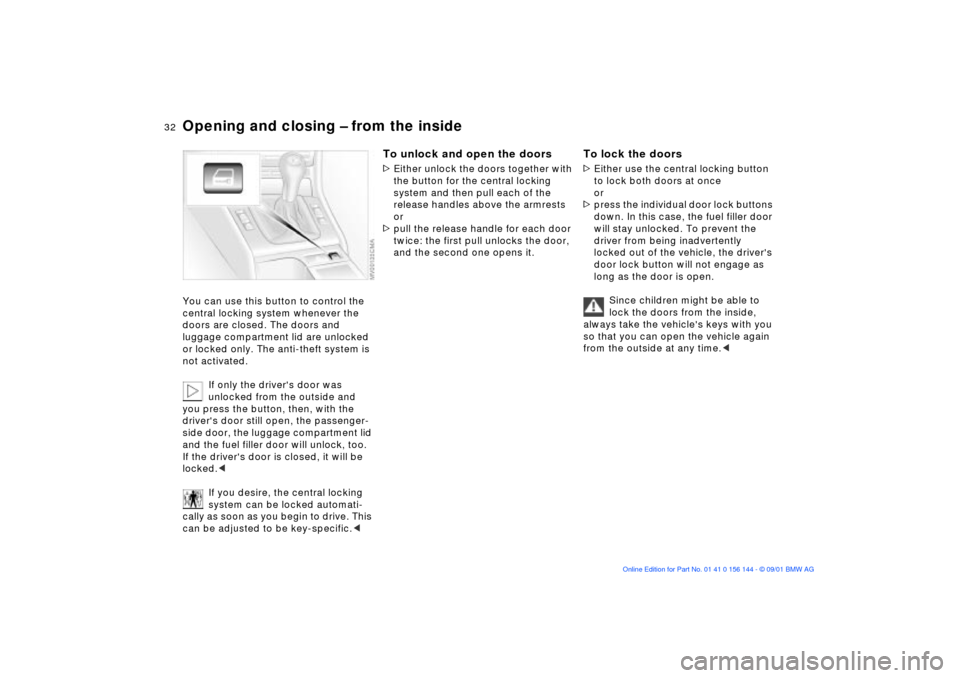
Opening and closing Ð from the insideYou can use this button to control the
central locking system whenever the
doors are closed. The doors and
luggage compartment lid are unlocked
or locked only. The anti-theft system is
not activated.
If only the driver's door was
unlocked from the outside and
you press the button, then, with the
driver's door still open, the passenger-
side door, the luggage compartment lid
and the fuel filler door will unlock, too.
If the driver's door is closed, it will be
locked.<
If you desire, the central locking
system can be locked automati-
cally as soon as you begin to drive. This
can be adjusted to be key-specific.<
To unlock and open the doors>Either unlock the doors together with
the button for the central locking
system and then pull each of the
release handles above the armrests
or
>pull the release handle for each door
twice: the first pull unlocks the door,
and the second one opens it.
To lock the doors>Either use the central locking button
to lock both doors at once
or
>press the individual door lock buttons
down. In this case, the fuel filler door
will stay unlocked. To prevent the
driver from being inadvertently
locked out of the vehicle, the driver's
door lock button will not engage as
long as the door is open.
Since children might be able to
lock the doors from the inside,
always take the vehicle's keys with you
so that you can open the vehicle again
from the outside at any time.<
Page 64 of 147

64n
Odometer Tachometer Energy control 1 Odometer
2 Trip odometerOdometer You can activate the displays shown in
the illustration with the ignition key in
position 0 by pressing the button in the
instrument cluster.Trip odometerTo reset the trip odometer to zero,
press the button with the ignition key in
position 1 or 2.
Never allow the engine to operate with
the needle in the red overspeed zone of
the gauge.
To protect the engine, the fuel supply is
interrupted when you approach this
sector.
Indicates the current fuel consumption
in mpg (in liters/100 km on Canadian
models). You can check your current
driving style to see whether it is condu-
cive to economy and minimum exhaust
emissions.
When the vehicle is stationary, the
display goes to Maximum (zero on
Canadian models).
Page 65 of 147

65n
OverviewControlsMaintenanceRepairsDataIndex
Fuel gauge Temperature gauge Service Interval DisplayOnce the indicator lamp stays on
continuously, there are still approx.
2 gallons (8 liters) of fuel in the fuel
tank.
For fuel tank capacity, refer to
page 135.
Certain operating conditions (such as
those encountered in mountainous
areas) may cause the needle to fluc-
tuate slightly.
Please refuel early, since driving
to the last drop of fuel can result in
damage to the engine and/or catalytic
converter.<
When you switch on the ignition, the
indicator lamp lights up briefly as an
operation check.
BlueThe engine is still cold. Drive at
moderate engine and vehicle speeds.RedWhen you switch on the ignition, the
warning lamp comes on briefly to
confirm that the system is operational.
If the lamp comes on during normal
vehicle operation: the engine has over-
heated. Stop and switch the engine off
immediately and allow it to cool down.
Checking coolant level, refer to
page 111.Between the blue and red zonesNormal operating range. The needle
may rise as far as the edge of the red
sector in normal operation.
Remaining distance to serviceThe displays shown in the illustration
appear for a few seconds when the
ignition key is in position 1 or after the
engine is started.
The next service due appears with the
message OIL SERVICE or INSPECTION,
together with the distance remaining in
miles (kilometers) before the next sched-
uled service.
The computer bases its calculations of
the remaining distance on the preceding
driving style.
A flashing message and a "Ð" in front of
the number mean that the service inter-
val has already been exceeded by the
distance shown on the display. Please
contact your BMW center for an
appointment.
Page 66 of 147

66n
Check Control Computer The following information and/or condi-
tions are indicated using symbols,
starting with the ignition key in
position 2, until the condition has been
corrected.
1 Check the low beams and high
beams, as well as the parking lamps
2 Door open
3 Luggage compartment lid open
4 Check tail or brake lamps
When you open the driver's door after
parking, a signal sounds to remind you
if the headlamps have not been
switched off.
Mode selectionWith ignition key in position 1 or 2, you
can request information from the
computer using the button in the turn
signal lever. By pressing the button
briefly toward the steering column, you
can call up a new function for display.
The displays appear in the following
order:
Time, outside temperature, average fuel
consumption, cruising range, average
vehicle speed.
Starting with ignition key position 1,
the last active setting is displayed.
ClockIf you wish to have a permanent time
display, you can make this adjustment
in the radio display (refer to the Radio
Owner's Manual).
You can adjust the clock and the time
display in the car radio as follows.
Page 68 of 147

68n
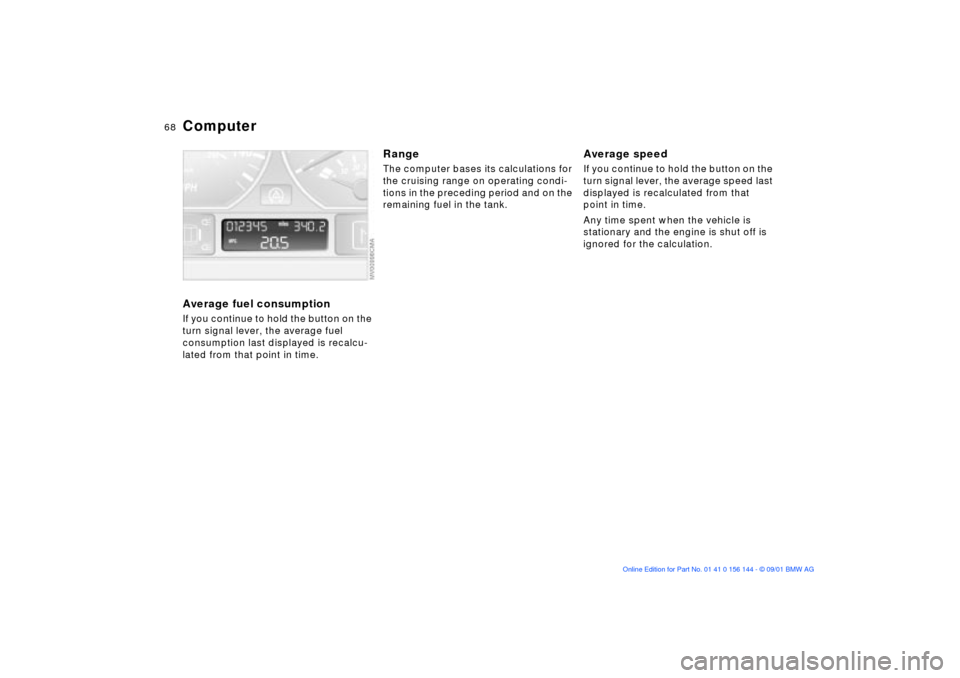
ComputerAverage fuel consumptionIf you continue to hold the button on the
turn signal lever, the average fuel
consumption last displayed is recalcu-
lated from that point in time.
RangeThe computer bases its calculations for
the cruising range on operating condi-
tions in the preceding period and on the
remaining fuel in the tank.
Average speedIf you continue to hold the button on the
turn signal lever, the average speed last
displayed is recalculated from that
point in time.
Any time spent when the vehicle is
stationary and the engine is shut off is
ignored for the calculation.
Page 94 of 147

94n
Cargo loading Roof-mounted luggage rack
*
Always position and secure the
load correctly. If you do not, it can
endanger the passengers during
braking or evasive maneuvers.
Do not exceed the approved gross
weight or the approved maximum axle
loads, refer to page 134, otherwise the
vehicle's operating safety is no longer
assured and you are in violation of the
law.
Do not stow heavy or hard objects in
the passenger compartment without
securing them. Otherwise they would
be thrown around during braking and
evasive maneuvers and endanger the
passengers.<
A special roof-rack system is available
as an optional extra for your BMW.
Please observe the precautions
included with the installation instruc-
tions.AnchoragesAccess to the anchorages:
To fold up the cover (arrow), please use
the tool provided with the roof-rack
system.Loading and driving notesRoof-mounted luggage racks raise the
center of gravity of the vehicle when
they are loaded. For this reason, they
have a major effect on the vehicle's
handling and steering response.
You should therefore always remember
not to exceed the approved roof load
capacity, the approved gross vehicle
weight or the axle loads when loading
the rack. These weights are listed under
Technical Data on page 134.
Make sure that the load is not too bulky,
and attempt to distribute it evenly.
Always load the heaviest pieces first (on
the bottom). Be sure that adequate
clearance is maintained for raising the
sliding/tilt sunroof, and that objects do
not project into the opening path of the
luggage compartment lid.
Secure the roof luggage correctly and
securely to prevent it from shifting or
being lost during driving (danger to
following traffic).
Drive smoothly and avoid sudden
acceleration and braking. Do not corner
at high speeds.
The luggage rack and the roof load
increase aerodynamic resistance:
increased fuel consumption and addi-
tional stress on the vehicle's body are
the result.
Page 105 of 147

105n
OverviewControlsMaintenanceRepairsDataIndex
Winter tiresChoosing the right tireBMW recommends winter tires (M+S
radial tires) for operation under
inclement winter driving conditions.
While all-season tires (M+S designa-
tion) provide better winter traction than
summer tires with the load ratings H, V,
W, Y and ZR, they generally do not
achieve the performance of winter tires.
In the interest of safe tracking and
steering response, install winter tires
made by the same manufacturer having
the same tread configuration on all four
wheels.Never exceed the maximum
speed for which the winter tires
are rated.
Unprofessional attempts by laymen to
service tires can lead to damage and
accidents.
Have this work performed by trained
professionals only. Any BMW center
has the required technical knowledge
and the proper equipment and will be
happy to assist you.<
Tire condition, tire pressureOnce the tire wears to below 0.16 in
(4 mm), winter tires display a percep-
tible decrease in their ability to cope
with winter driving conditions, and
should be replaced in the interest of
safety.
Comply with the specified tire inflation
pressures Ð and be sure to have the
wheel and tire assemblies balanced
every time you change the tires.
StorageAlways store tires in a cool, dry place.
Store them away from light whenever
possible. Protect the tires against
contact with oil, grease and fuel.Snow chains
*
BMW narrow-link snow chains are
intended for mounting on summer or
winter tires in pairs at the rear wheels
only. Comply with all manufacturer's
safety precautions when mounting the
chains.
You cannot mount snow chains on the
following tires:
225/50 R 16 92
225/45 R 17 91
245/40 ZR 17
Page 109 of 147

109n
OverviewControlsMaintenanceRepairsDataIndex
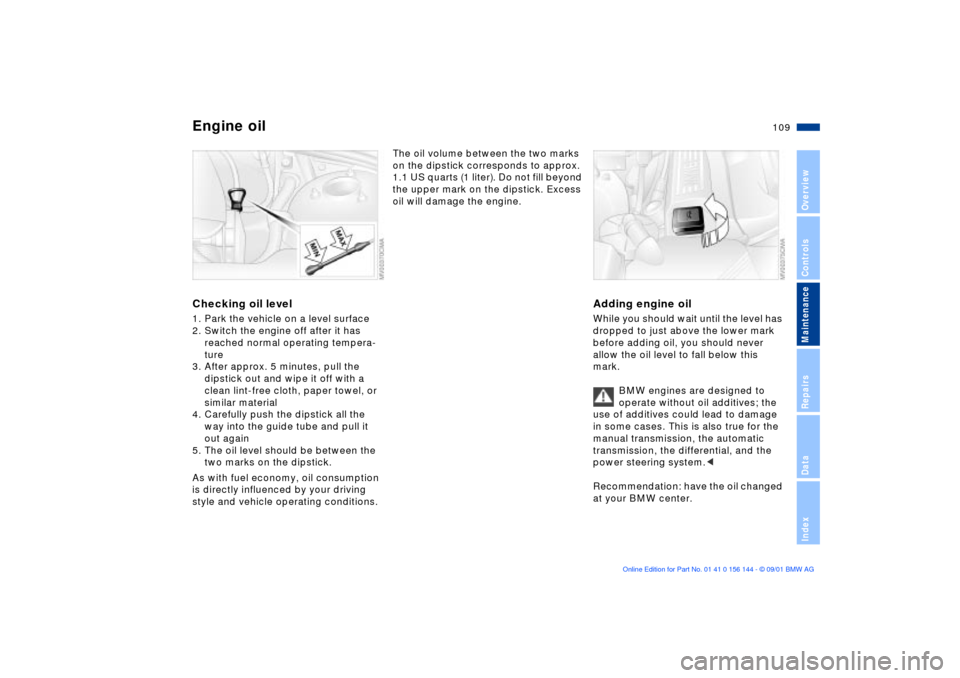
Engine oilChecking oil level1. Park the vehicle on a level surface
2. Switch the engine off after it has
reached normal operating tempera-
ture
3. After approx. 5 minutes, pull the
dipstick out and wipe it off with a
clean lint-free cloth, paper towel, or
similar material
4. Carefully push the dipstick all the
way into the guide tube and pull it
out again
5. The oil level should be between the
two marks on the dipstick.
As with fuel economy, oil consumption
is directly influenced by your driving
style and vehicle operating conditions.
The oil volume between the two marks
on the dipstick corresponds to approx.
1.1 US quarts (1 liter). Do not fill beyond
the upper mark on the dipstick. Excess
oil will damage the engine.
Adding engine oilWhile you should wait until the level has
dropped to just above the lower mark
before adding oil, you should never
allow the oil level to fall below this
mark.
BMW engines are designed to
operate without oil additives; the
use of additives could lead to damage
in some cases. This is also true for the
manual transmission, the automatic
transmission, the differential, and the
power steering system.<
Recommendation: have the oil changed
at your BMW center.