2002 BMW 325Ci CONVERTIBLE ESP
[x] Cancel search: ESPPage 81 of 159

81n
OverviewControlsMaintenanceRepairsDataIndex
ASC+T Dynamic Stability Control (DSC)
*
Switch the ASC+T back onPress the button again; the indicator
lamp goes out.
The laws of physics cannot be
repealed, even with ASC+T. An
appropriate driving style always
remains the responsibility of the driver.
We therefore urge you to avoid using
the additional safety margin of the
system as an excuse for taking risks.<
The conceptThe Dynamic Stability Control (DSC)
maintains vehicle stability, even in crit-
ical driving situations.
The system optimizes vehicle stability
during acceleration and when starting
from a full stop, as well as optimizing
traction. In addition, it recognizes
unstable vehicle conditions, such as
under- or oversteering, and, as far as is
possible within the laws of physics,
helps keeping the vehicle on a steady
course by reducing the engine speed
and brake applications to the individual
wheels.
DSC is operational every time you start
the engine. DSC incorporates the func-
tionality of the Automatic Differential
Brake (ADB) and the Cornering Brake
Control (CBC).
The Automatic Differential Brake (ADB)
relies on selective braking applications
at the drive wheels to furnish the func-
tionality of a conventional limited-slip
differential for enhanced traction in crit-
ical driving conditions such as those
encountered on snow-covered road
surfaces, etc.
The ADB is in standby mode when DSC
is deactivated.
Indicator lamp
The indicator lamp in the instru-
ment cluster will go out shortly
after the ignition has been
switched on, refer to pages 18, 19.
The indicator lamp flashes:
DSC is actively controlling drive torque
and braking intervention.
The indicator lamp stays lit:
DSC has been deactivated manually;
ADB is operational.
ADB control intervention is not indi-
cated.
The indicator lamp and the
brake warning lamps will remain
on continuously:
The DSC, ADB and DBC have
been deactivated with the
button or are defective.
The vehicle will remain completely
operational, however, without DSC. In
the event of a fault, please consult your
BMW center, refer to pages 18, 19.
Indicator and warning lamps for
Canadian models.
Page 82 of 159

82n
Dynamic Stability Control (DSC)
*
To switch DSC off/activate ADBPress the DSC button briefly; the indi-
cator lamp comes on and stays on.
DSC is deactivated; ADB is operational.
In the following rare situations, it may
prove useful to deactivate the ADB for a
brief period:
>When rocking the vehicle or starting
off in deep snow or on loose surfaces
>When driving on snow-covered
grades, in deep snow, or on a snow-
covered surface that has been
packed down from being driven on
>When driving with snow chains.
Under these special circumstances
traction is increased by deactivating the
control systems that enhance traction
under normal conditions.
To switch DSC and ADB offHold the DSC button down for at least
3 seconds. The indicator lamp and the
yellow brake warning lamps light up
and remain on continuously.
The systems for enhancing stability and
traction are deactivated, and there is no
active braking intervention or torque
control.
To maintain vehicle stability,
always drive with the DSC
switched on whenever possible.
The laws of physics cannot be
repealed, even with DSC. An
appropriate driving style always
remains the responsibility of the driver.
We therefore urge you to avoid using
the additional safety margin of the
system as an excuse for taking risks.
When ADB is in its standby mode, DSC
is deactivated; DSC does not intervene
to enhance vehicle stability under these
conditions.
Do not make any modifications to the
DSC system. Allow only authorized
technicians to perform service proce-
dures on the DSC.<
Dynamic Brake Control (DBC)DBC is an integral component of the
DSC system.
The system responds to sudden, high-
intensity applications of force to the
brake pedal by automatically braking
the vehicle with maximum boost to
achieve the shortest-possible braking
distances during "panic stops." This
system exploits all the benefits of ABS.
Do not reduce the pressure exerted
against the brake pedal until the
braking maneuver has been completed.
DBC is deactivated when you release
the brake pedal.
Page 85 of 159

85n
OverviewControlsMaintenanceRepairsDataIndex
Flat Tire Monitor
*
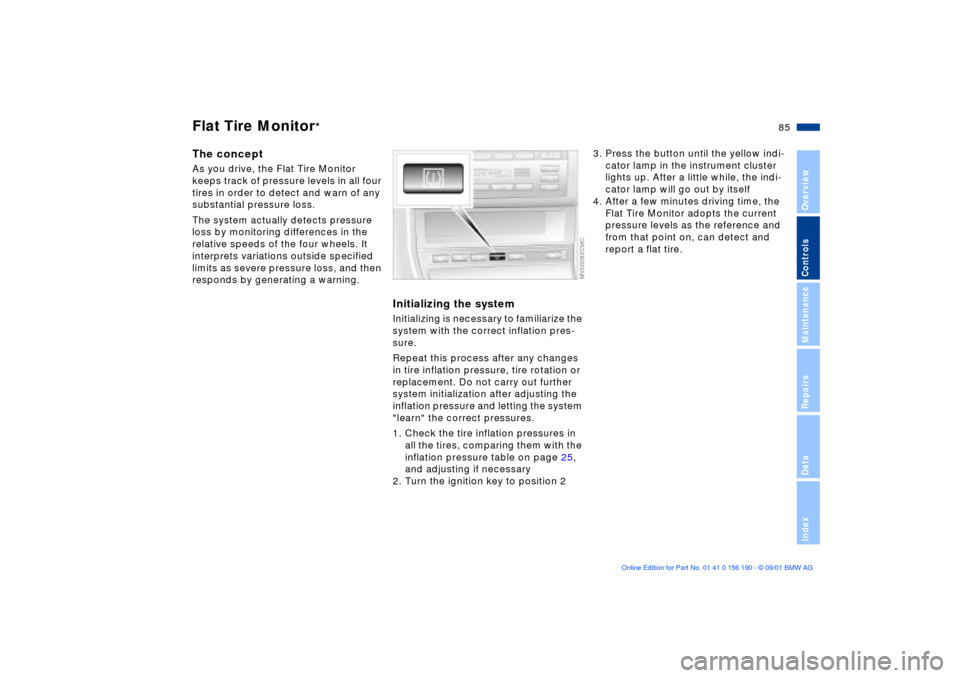
The conceptAs you drive, the Flat Tire Monitor
keeps track of pressure levels in all four
tires in order to detect and warn of any
substantial pressure loss.
The system actually detects pressure
loss by monitoring differences in the
relative speeds of the four wheels. It
interprets variations outside specified
limits as severe pressure loss, and then
responds by generating a warning.
Initializing the systemInitializing is necessary to familiarize the
system with the correct inflation pres-
sure.
Repeat this process after any changes
in tire inflation pressure, tire rotation or
replacement. Do not carry out further
system initialization after adjusting the
inflation pressure and letting the system
"learn" the correct pressures.
1. Check the tire inflation pressures in
all the tires, comparing them with the
inflation pressure table on page 25,
and adjusting if necessary
2. Turn the ignition key to position 2
3. Press the button until the yellow indi-
cator lamp in the instrument cluster
lights up. After a little while, the indi-
cator lamp will go out by itself
4. After a few minutes driving time, the
Flat Tire Monitor adopts the current
pressure levels as the reference and
from that point on, can detect and
report a flat tire.
Page 86 of 159

86n
Flat Tire Monitor
*
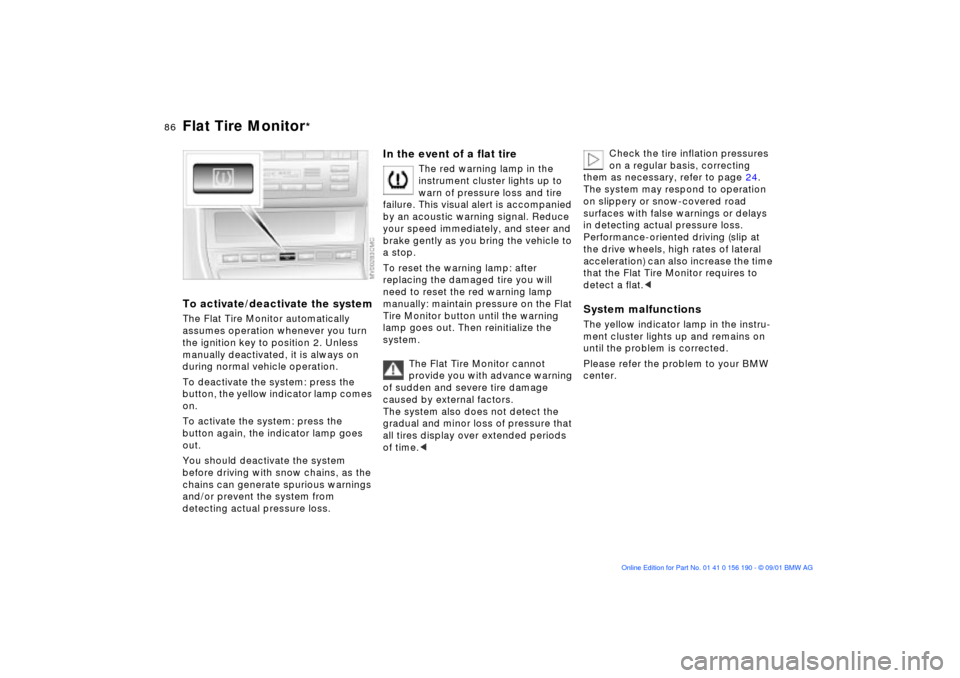
To activate/deactivate the systemThe Flat Tire Monitor automatically
assumes operation whenever you turn
the ignition key to position 2. Unless
manually deactivated, it is always on
during normal vehicle operation.
To deactivate the system: press the
button, the yellow indicator lamp comes
on.
To activate the system: press the
button again, the indicator lamp goes
out.
You should deactivate the system
before driving with snow chains, as the
chains can generate spurious warnings
and/or prevent the system from
detecting actual pressure loss.
In the event of a flat tire
The red warning lamp in the
instrument cluster lights up to
warn of pressure loss and tire
failure. This visual alert is accompanied
by an acoustic warning signal. Reduce
your speed immediately, and steer and
brake gently as you bring the vehicle to
a stop.
To reset the warning lamp: after
replacing the damaged tire you will
need to reset the red warning lamp
manually: maintain pressure on the Flat
Tire Monitor button until the warning
lamp goes out. Then reinitialize the
system.
The Flat Tire Monitor cannot
provide you with advance warning
of sudden and severe tire damage
caused by external factors.
The system also does not detect the
gradual and minor loss of pressure that
all tires display over extended periods
of time.<
Check the tire inflation pressures
on a regular basis, correcting
them as necessary, refer to page 24.
The system may respond to operation
on slippery or snow-covered road
surfaces with false warnings or delays
in detecting actual pressure loss.
Performance-oriented driving (slip at
the drive wheels, high rates of lateral
acceleration) can also increase the time
that the Flat Tire Monitor requires to
detect a flat.<
System malfunctionsThe yellow indicator lamp in the instru-
ment cluster lights up and remains on
until the problem is corrected.
Please refer the problem to your BMW
center.
Page 87 of 159

87n
OverviewControlsMaintenanceRepairsDataIndex
Parking lamps/Low beamsParking lamps
The front, rear and side vehicle
lighting is switched on. You can
use the parking lamps for
parking. For lighting on one side for
parking as an additional feature, refer to
page 88.
Low beams
When the ignition is switched off
while the low beams are on, the
headlamps go out and only the
parking lamps remain on.
Follow me home lamps:
When you activate the headlamp
flasher after parking the vehicle with the
lamps turned off, the low-beam head-
lamps will come on for a short time. You
can also have this function deacti-
vated.<
LIGHTS ON warningWhenever you open the driver's door
after having turned the ignition key to
position 0, you will hear an acoustic
signal for a few seconds to remind you
if the lamps have not been switched off.Daytime driving lamps
*
If you desire, the light switch can be left
in the second position:
When the ignition is switched off, the
external lighting is also switched off.
You can have your vehicle's
daytime driving lamps set to
reflect your personal requirements.<
Automatic headlight control
*
When the switch is set to this
position the system automati-
cally activates and cancels the
low beams in response to changes in
ambient light ( in tunnels, at dusk, etc.)
as well as rain and snow.
The vehicle's external lights
remain on constantly when you
switch on the front fog lamps after the
headlights have come on automati-
cally.<
Automatic headlight control
cannot serve as a substitute for
the driver's judgement in determining
when the vehicle lights should be
switched on. For example, the sensors
are not able to detect fog. To avoid
safety risks, you should respond to
these kinds of low-visibility situations
by switching the headlights on manu-
ally.<
You can have the sensitivity of
your vehicle's automatic head-
light control adjusted.<
Page 91 of 159

91n
OverviewControlsMaintenanceRepairsDataIndex
Air conditioningAir supply
You can select blower speeds
from 1 to 4. The heating and
ventilation become more and
more effective as the air
supply settings are increased. In
position 0, the blower and the heater
are switched off. The outside air supply
is blocked in position 0.
Temperature
In order to increase the
temperature of the passenger
compartment, turn the
temperature control to the
right (red). The temperature of the
incoming air is kept constant.
Air distribution
You can direct the emerging
air toward the windows ,
toward your upper body or
into the footwell . All inter-
mediate settings are possible. In the
setting, there is a low flow of air onto
the windows to keep them free of
condensation.
Rear window defroster
When the rear window defroster
is activated, the indicator lamp
comes on. The rear window defroster
switches off automatically.
The rear window defroster auto-
matically assumes operation
within 5 minutes after the engine is
started at outside temperatures below
approx. 39 7 (+4 6).<
Air conditioning
The air is cooled and dehumidi-
fied and Ð depending on the
temperature setting Ð rewarmed.
Depending on the weather, the wind-
shield may fog over briefly when the
engine is started. Switching on the air
conditioning will reduce condensation
forming on the windows.
Condensation forms in the air
conditioning system during opera-
tion, which then exits under the vehicle.
Traces of condensed water of this kind
are thus normal.<
Recirculated-air mode
You can respond to unpleasant
external odors by temporarily
suspending the supply of outside air.
The system then recirculates the air
currently within the vehicle.
If the windows should fog over in
the recirculated-air mode, switch
it off and increase the air supply as
required.<
Page 95 of 159

95n
OverviewControlsMaintenanceRepairsDataIndex
Automatic climate control
*
Automatic recirculated-air control
(AUC)
You can respond to unpleasant
external odors by temporarily
stopping the flow of outside air. The
system then recirculates the air
currently within the vehicle.
Press the button repeatedly to select
one of three different operating modes.
>Indicator lamps off: outside airflow is
on
>Left indicator lamp on Ð AUC mode:
the system recognizes pollutants in
the outside air and blocks the flow of
air when necessary. The system then
recirculates the air currently within the
vehicle. Depending on the air quality,
the automatic system then switches
back and forth between outside air
supply and recirculation of the air
within the vehicle
>Right indicator lamp on: the flow of
outside air into the vehicle is perma-
nently blocked. The system then
recirculates the air currently within
the vehicle.
If the windows fog over in the
recirculated-air mode, switch it off
and increase the air supply as
required.<
Rear window defroster
When the rear window defroster
is activated, the indicator lamp
comes on. The rear window defroster
switches off automatically.
The rear window defroster auto-
matically assumes operation
within 5 minutes after the engine is
started at outside temperatures below
approx. 39 7 (+4 6).<
Draft-free ventilationYou can adjust the blower controls for
the upper body area to select the
optimum airflow rates and directions for
your personal requirements:
1 Rotary dials for infinitely-variable
opening and closing of the vent
outlets
2 Selector levers for airflow direction
3 Rotary dial 3 allows you to control the
temperature of the airflow from these
outlets as desired.
Page 98 of 159

98n
BMW Universal Transmitter
*
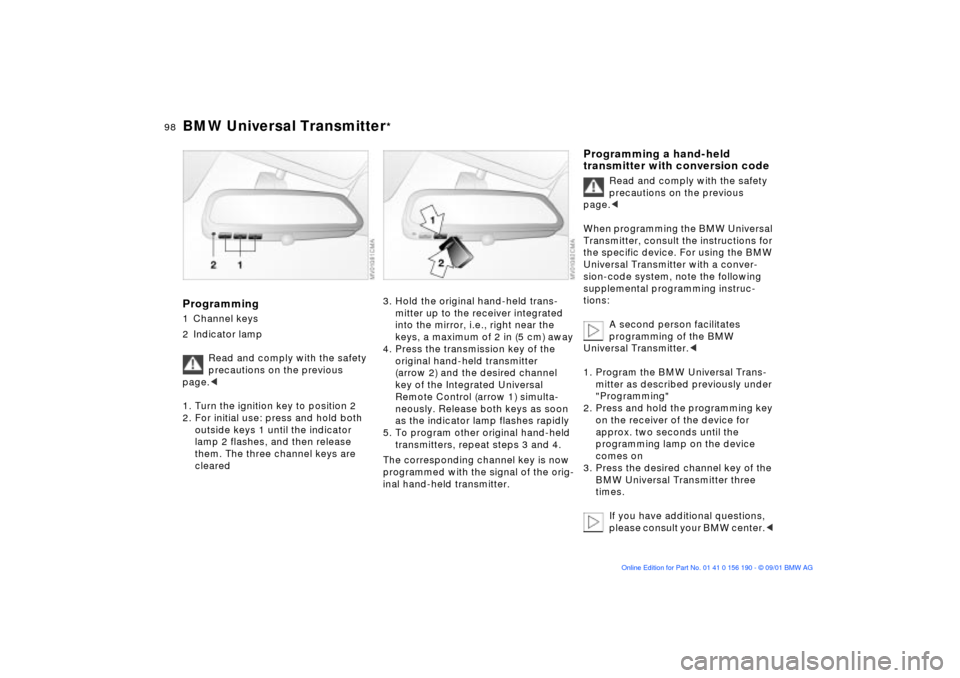
Programming 1 Channel keys
2 Indicator lamp
Read and comply with the safety
precautions on the previous
page.<
1. Turn the ignition key to position 2
2. For initial use: press and hold both
outside keys 1 until the indicator
lamp 2 flashes, and then release
them. The three channel keys are
cleared
3. Hold the original hand-held trans-
mitter up to the receiver integrated
into the mirror, i.e., right near the
keys, a maximum of 2 in (5 cm) away
4. Press the transmission key of the
original hand-held transmitter
(arrow 2) and the desired channel
key of the Integrated Universal
Remote Control (arrow 1) simulta-
neously. Release both keys as soon
as the indicator lamp flashes rapidly
5. To program other original hand-held
transmitters, repeat steps 3 and 4.
The corresponding channel key is now
programmed with the signal of the orig-
inal hand-held transmitter.
Programming a hand-held
transmitter with conversion code
Read and comply with the safety
precautions on the previous
page.<
When programming the BMW Universal
Transmitter, consult the instructions for
the specific device. For using the BMW
Universal Transmitter with a conver-
sion-code system, note the following
supplemental programming instruc-
tions:
A second person facilitates
programming of the BMW
Universal Transmitter.<
1. Program the BMW Universal Trans-
mitter as described previously under
"Programming"
2. Press and hold the programming key
on the receiver of the device for
approx. two seconds until the
programming lamp on the device
comes on
3. Press the desired channel key of the
BMW Universal Transmitter three
times.
If you have additional questions,
please consult your BMW center.<