2002 BMW 325Ci CONVERTIBLE belt
[x] Cancel search: beltPage 58 of 159

58n
Airbagscenter. Labels in the door opening
should indicate the status of your rear-
seat side airbags. If you are uncertain of
their status, or wish to have the airbags
activated or deactivated, please
contact your BMW center.<
Even when all these guidelines are
followed, there is still a small residual
risk of injuries to the face, hands and
arms occurring from airbag deployment
in isolated instances. The ignition and
inflation noise may provoke a mild
temporary hearing loss in extremely
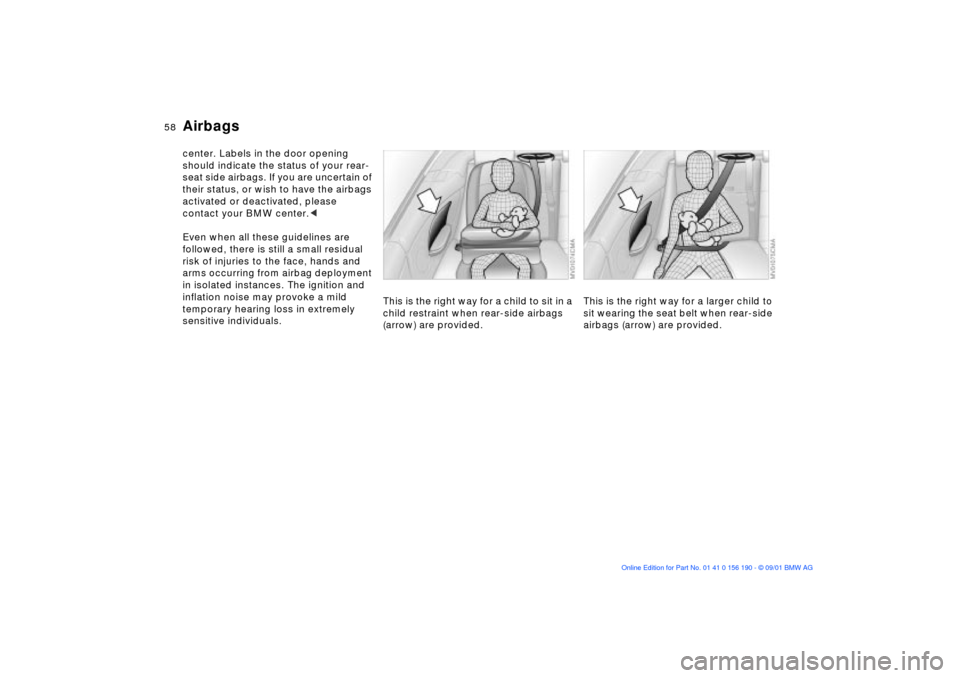
sensitive individuals.This is the right way for a child to sit in a
child restraint when rear-side airbags
(arrow) are provided.
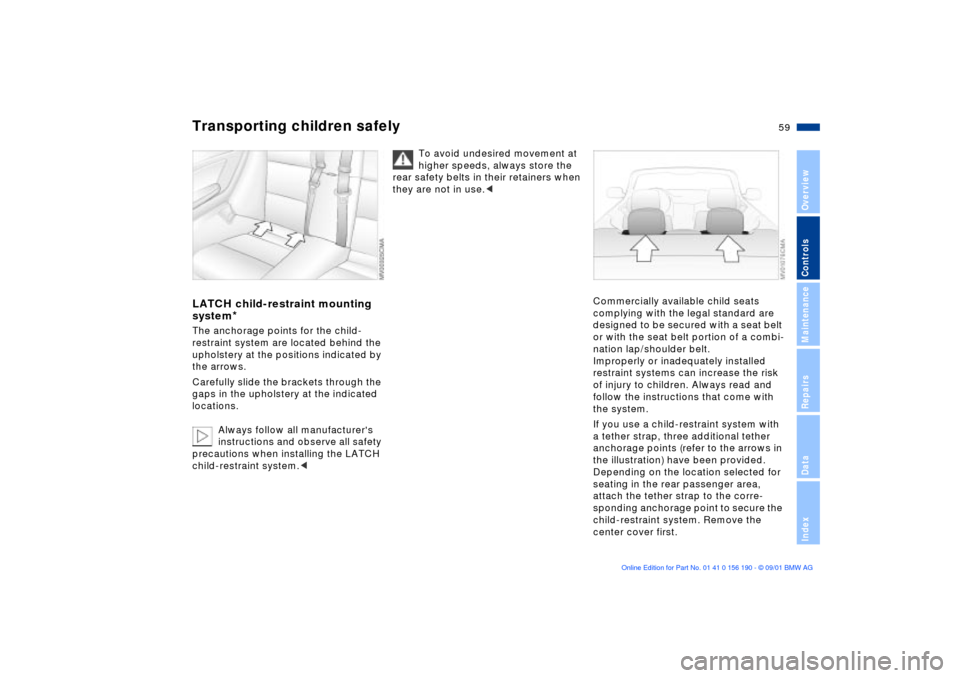
This is the right way for a larger child to
sit wearing the seat belt when rear-side
airbags (arrow) are provided.
Page 59 of 159

59n
OverviewControlsMaintenanceRepairsDataIndex
Transporting children safelyLATCH child-restraint mounting
system
*
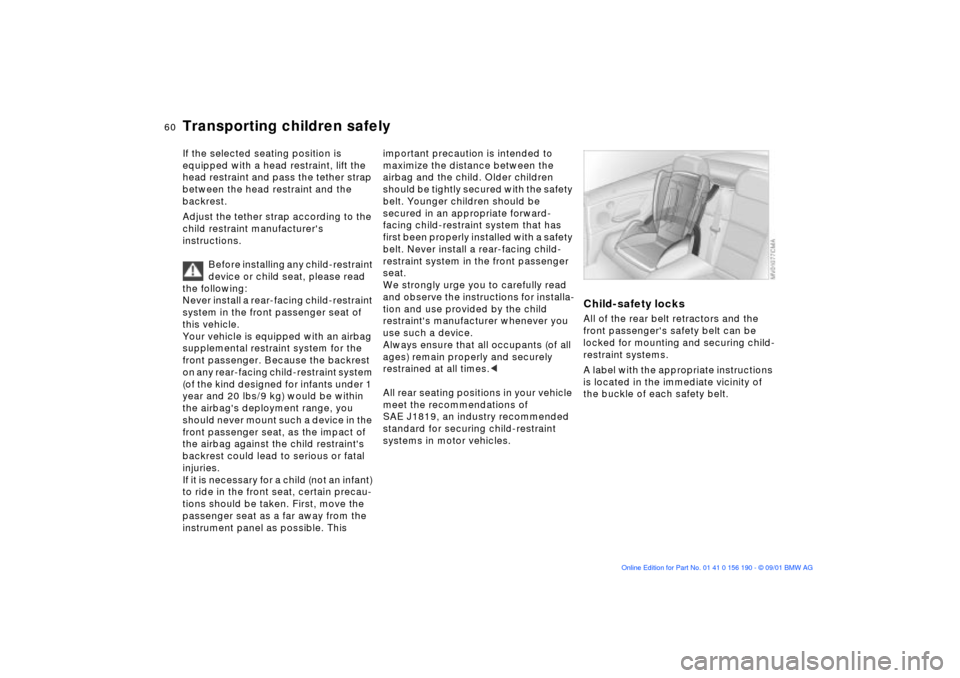
The anchorage points for the child-
restraint system are located behind the
upholstery at the positions indicated by
the arrows.
Carefully slide the brackets through the
gaps in the upholstery at the indicated
locations.
Always follow all manufacturer's
instructions and observe all safety
precautions when installing the LATCH
child-restraint system.<
To avoid undesired movement at
higher speeds, always store the
rear safety belts in their retainers when
they are not in use.<
Commercially available child seats
complying with the legal standard are
designed to be secured with a seat belt
or with the seat belt portion of a combi-
nation lap/shoulder belt.
Improperly or inadequately installed
restraint systems can increase the risk
of injury to children. Always read and
follow the instructions that come with
the system.
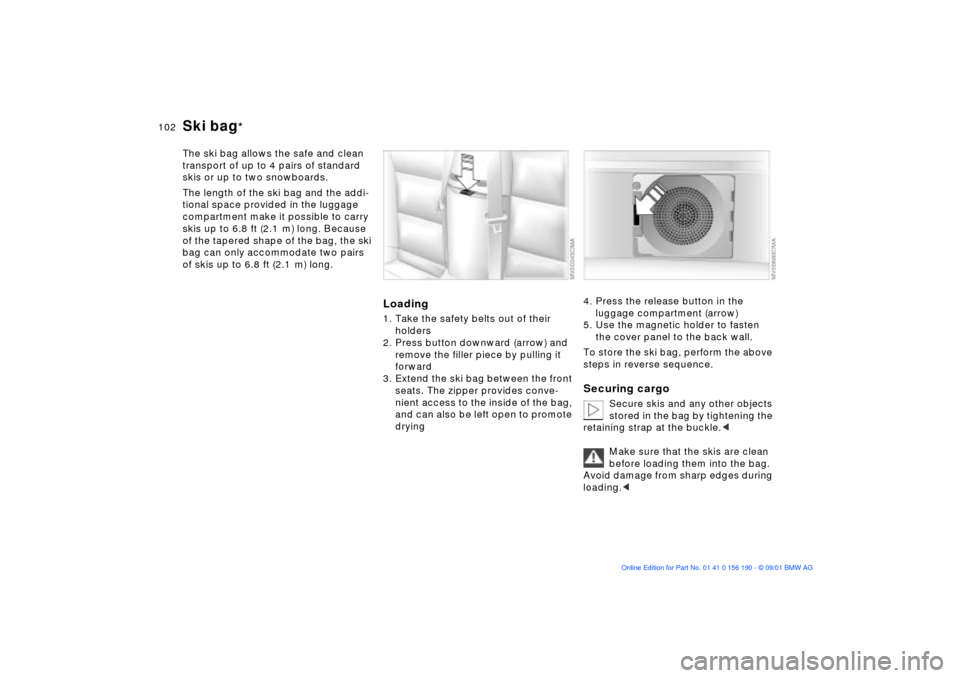
If you use a child-restraint system with
a tether strap, three additional tether
anchorage points (refer to the arrows in
the illustration) have been provided.
Depending on the location selected for
seating in the rear passenger area,
attach the tether strap to the corre-
sponding anchorage point to secure the
child-restraint system. Remove the
center cover first.
Page 60 of 159

60n
Transporting children safelyIf the selected seating position is
equipped with a head restraint, lift the
head restraint and pass the tether strap
between the head restraint and the
backrest.
Adjust the tether strap according to the
child restraint manufacturer's
instructions.
Before installing any child-restraint
device or child seat, please read
the following:
Never install a rear-facing child-restraint
system in the front passenger seat of
this vehicle.
Your vehicle is equipped with an airbag
supplemental restraint system for the
front passenger. Because the backrest
on any rear-facing child-restraint system
(of the kind designed for infants under 1
year and 20 lbs/9 kg) would be within
the airbag's deployment range, you
should never mount such a device in the
front passenger seat, as the impact of
the airbag against the child restraint's
backrest could lead to serious or fatal
injuries.
If it is necessary for a child (not an infant)
to ride in the front seat, certain precau-
tions should be taken. First, move the
passenger seat as a far away from the
instrument panel as possible. This
important precaution is intended to
maximize the distance between the
airbag and the child. Older children
should be tightly secured with the safety
belt. Younger children should be
secured in an appropriate forward-
facing child-restraint system that has
first been properly installed with a safety
belt. Never install a rear-facing child-
restraint system in the front passenger
seat.
We strongly urge you to carefully read
and observe the instructions for installa-
tion and use provided by the child
restraint's manufacturer whenever you
use such a device.
Always ensure that all occupants (of all
ages) remain properly and securely
restrained at all times.<
All rear seating positions in your vehicle
meet the recommendations of
SAE J1819, an industry recommended
standard for securing child-restraint
systems in motor vehicles.
Child-safety locksAll of the rear belt retractors and the
front passenger's safety belt can be
locked for mounting and securing child-
restraint systems.
A label with the appropriate instructions
is located in the immediate vicinity of
the buckle of each safety belt.
Page 61 of 159

61n
OverviewControlsMaintenanceRepairsDataIndex
Transporting children safelyRollover protection systemTo lock the safety beltExtract the entire length of the belt from
the inertia reel mechanism. Allow the
reel to retract the belt somewhat and
engage the buckle, then tighten the belt
against the child-restraint system. The
retraction mechanism is now locked.
The belt cannot be extracted further.
Always observe the installation instruc-
tions provided by the manufacturer of
the child-restraint system.To release the safety beltRelease the safety belt, remove the
child's seat and retract the safety belt to
its end position on the belt retractor.In the event of an accident or some
other critical driving situation (extreme
tilting in the longitudinal or transverse
axis, loss of contact with the ground),
the rollover protection system will be
automatically activated. The protective
bars located in the rear head restraints
extend within fractions of a second.
In addition to the integrated rollover bar
in the windshield frame, the rollover
protection system affords all the vehicle
occupants necessary headroom.
Always keep the travel path for the
rollover protection system free
and clear. Under no circumstances
should you cover the head restraints.
In the event of less serious accidents,
the safety belt will protect you and,
depending on the severity of the acci-
dent, so will the safety belt tensioner
and the multi-stage airbag restraint
system as well.<
If, after being automatically triggered,
its protective function is not needed,
then the rollover protection system can
be lowered back into place. No special
tool is needed for this.
1. Using a screwdriver from the on-
board tool kit, remove the cover
panel; to do this, position the screw-
driver under the notch (arrow)
Page 102 of 159

102n
Ski bag
*
The ski bag allows the safe and clean
transport of up to 4 pairs of standard
skis or up to two snowboards.
The length of the ski bag and the addi-
tional space provided in the luggage
compartment make it possible to carry
skis up to 6.8 ft (2.1 m) long. Because
of the tapered shape of the bag, the ski
bag can only accommodate two pairs
of skis up to 6.8 ft (2.1 m) long.
Loading1. Take the safety belts out of their
holders
2. Press button downward (arrow) and
remove the filler piece by pulling it
forward
3. Extend the ski bag between the front
seats. The zipper provides conve-
nient access to the inside of the bag,
and can also be left open to promote
drying
4. Press the release button in the
luggage compartment (arrow)
5. Use the magnetic holder to fasten
the cover panel to the back wall.
To store the ski bag, perform the above
steps in reverse sequence.Securing cargo
Secure skis and any other objects
stored in the bag by tightening the
retaining strap at the buckle.<
Make sure that the skis are clean
before loading them into the bag.
Avoid damage from sharp edges during
loading.<
Page 103 of 159

103n
OverviewControlsMaintenanceRepairsDataIndex
Ski bag Cargo loading
When reattaching the cover, guide
both bars into the guide and press
the cover back into place. Secure the
safety belts in their holders again.<
Stowing cargo If you are transporting cargo in your
BMW:
>Load heavy cargo as far forward as
possible Ð directly behind the
luggage compartment partition Ð and
as low as possible
>Cover sharp edges and corners.
With the convertible top closed,
you can increase the space in the
luggage compartment, refer to page 35.
We recommend that you always fold
the convertible top compartment panel
down as soon as you have removed
your cargo from the luggage compart-
ment. This way, you can be sure that
you can always operate your convert-
ible top at any time.
At the same time, when the top is
raised you should fold the convertible
top compartment panel back up before
stowing large objects in the luggage
compartment; this precaution will help
reduce the likelihood of damage to
either the convertible top compartment
or your luggage.<
Page 150 of 159

Everything from A to ZA
ABS (Antilock Brake
System)19, 109
Access to the rear51
Accessories10
Activated-charcoal filter96
Adaptive Transmission
Control (ATC)68
ADB (Automatic Differential
Brake)81
Adding
brake fluid124
coolant123
engine oil121
washer fluids120
Adjusting
electric power seats49
head restraints50
lumbar support50
mirrors55
steering wheel54
Air conditioning90
temperature setting91
Air distribution91, 94
Air nozzles90
Air outlets
ventilation90, 93 Air supply91, 94
Airbags18, 56
sitting correctly48
Alarm system28, 36
Antifreeze and anti-
corrosion agents123
disposal123
Antilock Brake System
(ABS)19, 109
Anti-theft system28, 29, 32
Aquaplaning109
Armrest99
ASC+T (Automatic Stability
Control plus Traction)80
Ashtray
front100
rear101
ATC (Adaptive Transmission
Control)68
Attach vehicle vacuum
cleaner101
AUC (Automatic recircu-
lated-air control)95
Automatic climate
control93, 94
Automatic cruise control72 Automatic Differential Brake
(ADB)81
Automatic dimming feature,
mirrors56
Automatic headlight
control87
Automatic recirculated-air
control (AUC)95
Automatic Stability Control
plus Traction (ASC+T)80
Automatic transmission67
Automatic transmission with
Steptronic18, 67
Average fuel
consumption78
Average speed78
Axle loads146
B
Backup lamps66
bulb replacement133
Battery139
care139
charging139
disposal139
Battery charge current
indicator17 Belts, safety52
Beverage holder100
Blower91, 94
BMW High Performance
Synthetic Oil122
BMW Maintenance
System125
BMW sports seat,
adjustment49
BMW Universal
Transmitter97
Bore144
Bottle holder, refer to
beverage holder100
Brake fluid124
disposal124
warning lamp17, 124
Brake fluid level109
Brake hydraulic system,
warning lamp17
Brake lamps
bulb replacement133
Brake pads19
A-Z
Page 152 of 159

Everything from A to ZDisplay lighting88
Displays15
Disposal
antifreeze and anti-
corrosion agents123
battery139
brake fluid124
engine oil122
Distance warning79
Door keys28
Doors
electrical malfunction31
locking and unlocking29
manual operation31
DOT Quality Grades,
tires114
Draft-free ventilation92, 95
Drive belts17
Driving notes109
DSC (Dynamic Stability
Control)81
DSC Dynamic Stability
Control19, 81
Dynamic Brake Control
(DBC)82
Dynamic Stability Control
(DSC)19, 81
E
Easy access to the rear51
Electric power seats,
adjustment49
Electric power windows38
Electrical malfunction
doors31
fuel filler door22
luggage compartment
lid33
Electrical malfunction,
closing only
fully-automatic convertible
top44
Elements of operation14
Emergency release of
luggage compartment lid
from luggage
compartment's interior34
Energy Control74
Engine and differential108
Engine compartment
essentials119
Engine coolant, refer to
coolant123 Engine data144
Engine oil
consumption121
disposal122
fluid capacity147
quality122
specifications122
viscosity122
Engine oil level121
check121
indicator19
Engine oil pressure
indicator17
Engine speed144
Engine, starting64
Engine, switching off65
Enlarging luggage
compartment35
Entering the rear51
Exterior mirrors55
F
Failure messages76
Filling capacities147
Fittings, tow starting and
towing141
Flashlight96 Flat Tire
Monitor85, 115, 138
Flat tires113, 135, 138
Floor panel, luggage
compartment35
Fog lamps88
Follow me home lamps87
Front fog lamps88
Front reading lamps89
Fuel consumption78
Fuel consumption
display75
Fuel filler door22
electrical malfunction22
manual operation22
Fuel gauge75
Fuel reserve indicator75
Fuel specifications23
Fuel tank capacity147
Fuel tank gauge75
Fuel-injection system144
Fully-automatic convertible
top42
electrical malfunction,
closing only44
manual closing44
Fuses139