2002 BMW 325Ci CONVERTIBLE ECU
[x] Cancel search: ECUPage 39 of 159

39n
OverviewControlsMaintenanceRepairsDataIndex
Manual convertible topThe fabric top offers the perfect protec-
tion against weather and one person
can open and close it easily and simply.
So that you will get the most out of
enjoying your convertible, here are a
few tips: it is advisable to close the
convertible top when the vehicle is
being parked. The closed convertible
top not only protects the passenger
compartment from unforeseeable
damage from the weather, it also
provides a certain degree of theft
protection.
In addition, keep valuables only in the
locked luggage compartment, even
with the convertible top closed.
Never mount a roof-mounted luggage
rack on the convertible top.
Closing the electric power
windows: to help ensure that the
windows seal securely, you should
either close the rear windows first or
close all four windows at the same
time.<
To open the convertible top
Never attempt to open or close
the convertible top unless the
vehicle is completely stationary. To
prevent vehicle damage the top
compartment's lock will not disengage
unless the luggage compartment lid is
closed.<
1. Flip the locking handle out (refer to
illustration), and turn it as far as the
end stop will allow
2. Raise the convertible top a little bit
(release the tension)
3. To unlock, press the button with igni-
tion key in position 1. The top
compartment lid's lock disengages
and the lid itself rises a small
distance. The side windows will
lower slightly
If the indicator lamp lights up
when you press the button, this
indicates that the top compartment's
floor panel has been raised, preventing
the lock from disengaging, refer to
page 35. You should respond by folding
the top compartment panel back to its
original position and then reclosing the
luggage compartment lid.<
Page 59 of 159
59n
OverviewControlsMaintenanceRepairsDataIndex
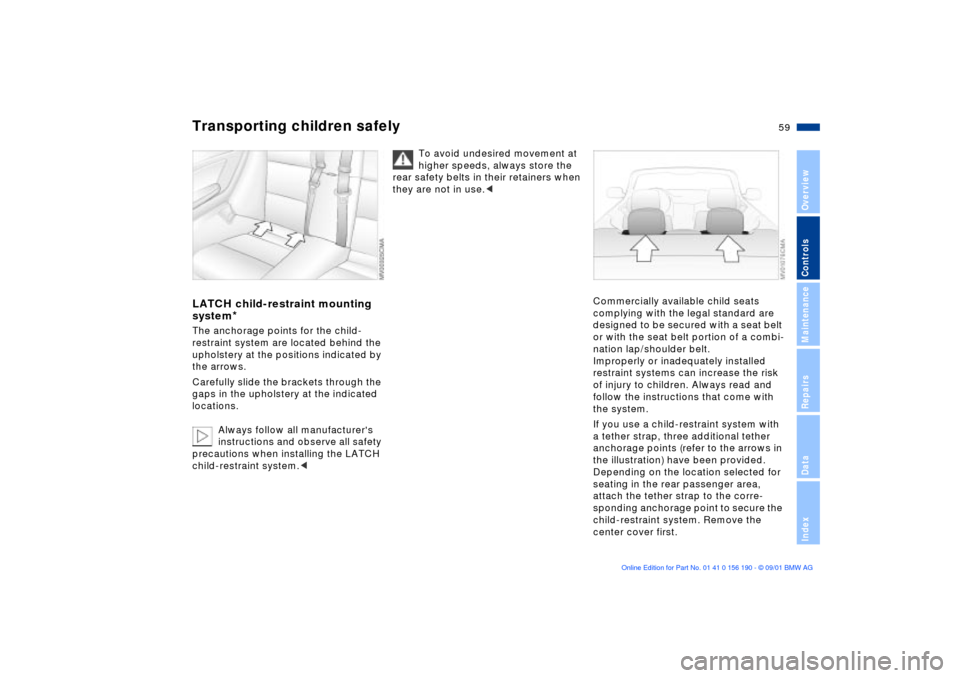
Transporting children safelyLATCH child-restraint mounting
system
*
The anchorage points for the child-
restraint system are located behind the
upholstery at the positions indicated by
the arrows.
Carefully slide the brackets through the
gaps in the upholstery at the indicated
locations.
Always follow all manufacturer's
instructions and observe all safety
precautions when installing the LATCH
child-restraint system.<
To avoid undesired movement at
higher speeds, always store the
rear safety belts in their retainers when
they are not in use.<
Commercially available child seats
complying with the legal standard are
designed to be secured with a seat belt
or with the seat belt portion of a combi-
nation lap/shoulder belt.
Improperly or inadequately installed
restraint systems can increase the risk
of injury to children. Always read and
follow the instructions that come with
the system.
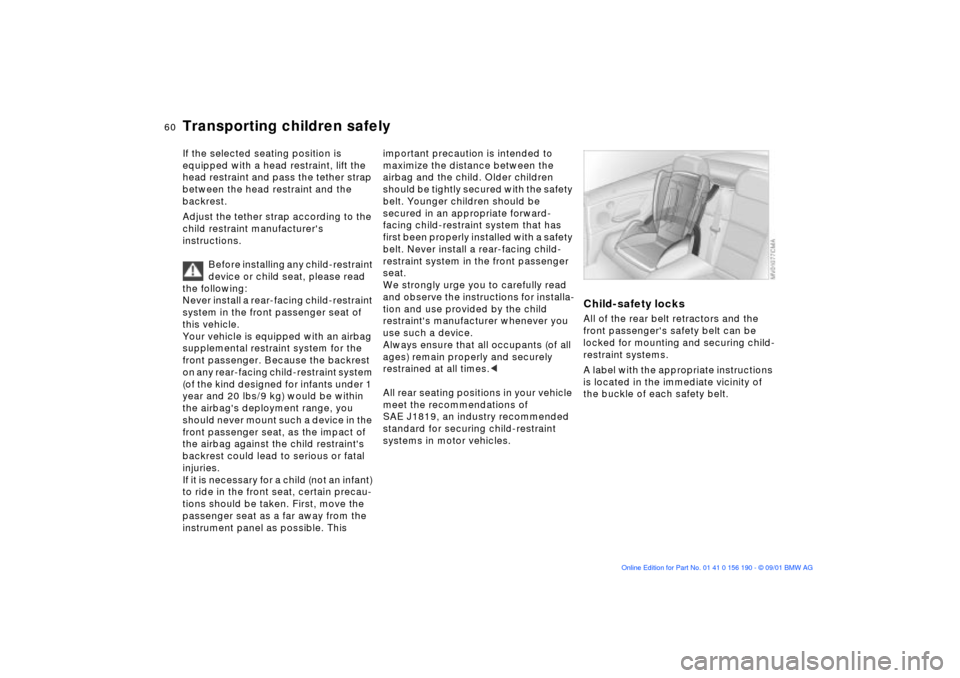
If you use a child-restraint system with
a tether strap, three additional tether
anchorage points (refer to the arrows in
the illustration) have been provided.
Depending on the location selected for
seating in the rear passenger area,
attach the tether strap to the corre-
sponding anchorage point to secure the
child-restraint system. Remove the
center cover first.
Page 60 of 159
60n
Transporting children safelyIf the selected seating position is
equipped with a head restraint, lift the
head restraint and pass the tether strap
between the head restraint and the
backrest.
Adjust the tether strap according to the
child restraint manufacturer's
instructions.
Before installing any child-restraint
device or child seat, please read
the following:
Never install a rear-facing child-restraint
system in the front passenger seat of
this vehicle.
Your vehicle is equipped with an airbag
supplemental restraint system for the
front passenger. Because the backrest
on any rear-facing child-restraint system
(of the kind designed for infants under 1
year and 20 lbs/9 kg) would be within
the airbag's deployment range, you
should never mount such a device in the
front passenger seat, as the impact of
the airbag against the child restraint's
backrest could lead to serious or fatal
injuries.
If it is necessary for a child (not an infant)
to ride in the front seat, certain precau-
tions should be taken. First, move the
passenger seat as a far away from the
instrument panel as possible. This
important precaution is intended to
maximize the distance between the
airbag and the child. Older children
should be tightly secured with the safety
belt. Younger children should be
secured in an appropriate forward-
facing child-restraint system that has
first been properly installed with a safety
belt. Never install a rear-facing child-
restraint system in the front passenger
seat.
We strongly urge you to carefully read
and observe the instructions for installa-
tion and use provided by the child
restraint's manufacturer whenever you
use such a device.
Always ensure that all occupants (of all
ages) remain properly and securely
restrained at all times.<
All rear seating positions in your vehicle
meet the recommendations of
SAE J1819, an industry recommended
standard for securing child-restraint
systems in motor vehicles.
Child-safety locksAll of the rear belt retractors and the
front passenger's safety belt can be
locked for mounting and securing child-
restraint systems.
A label with the appropriate instructions
is located in the immediate vicinity of
the buckle of each safety belt.
Page 67 of 159
67n
OverviewControlsMaintenanceRepairsDataIndex
Automatic transmission with Steptronic
*
You can drive as with a normal auto-
matic transmission. In addition, you can
also shift manually.
When you move the selector lever from
the "D" position to the left into the M/S
range, the performance-oriented shift
programs of the automatic transmission
are engaged. Steptronic enters the
manual selection mode and executes
the desired shift whenever you tap the
selector lever in the direction indicated
by "+" or "Ð." When you wish to use the
automatic transmission mode again,
move the selector lever to the right into
the "D" position.
Selector lever positions
P R N D M/S + Ð
Starting the engineThe engine can only be started in
selector lever positions P ("Park") or N
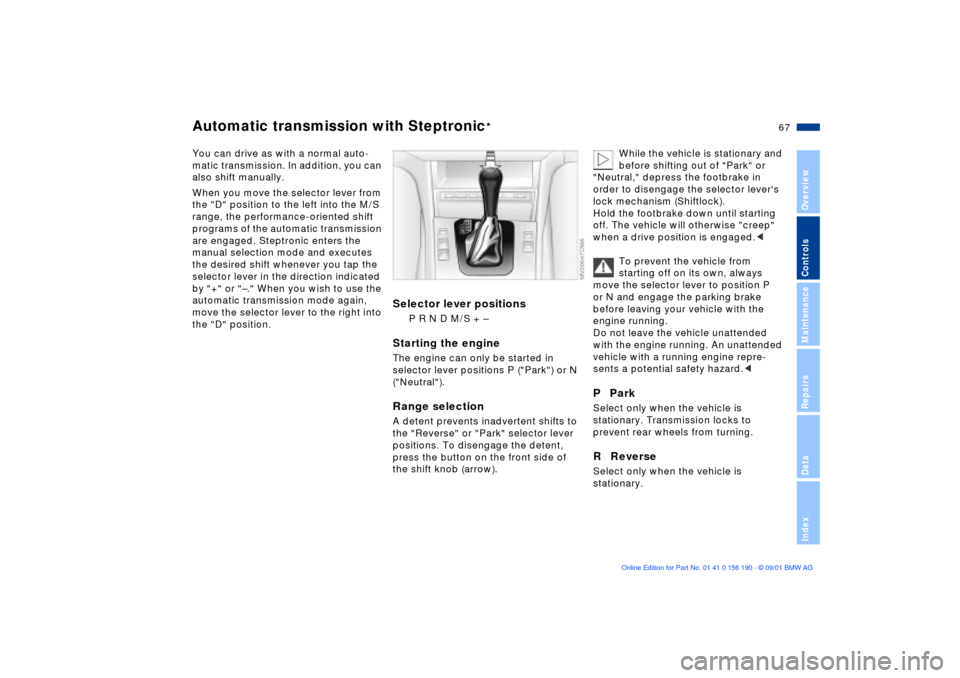
("Neutral").Range selectionA detent prevents inadvertent shifts to
the "Reverse" or "Park" selector lever
positions. To disengage the detent,
press the button on the front side of
the shift knob (arrow).
While the vehicle is stationary and
before shifting out of "Park" or
"Neutral," depress the footbrake in
order to disengage the selector lever's
lock mechanism (Shiftlock).
Hold the footbrake down until starting
off. The vehicle will otherwise "creep"
when a drive position is engaged.<
To prevent the vehicle from
starting off on its own, always
move the selector lever to position P
or N and engage the parking brake
before leaving your vehicle with the
engine running.
Do not leave the vehicle unattended
with the engine running. An unattended
vehicle with a running engine repre-
sents a potential safety hazard.<
P ParkSelect only when the vehicle is
stationary. Transmission locks to
prevent rear wheels from turning.R ReverseSelect only when the vehicle is
stationary.
Page 68 of 159
68n
Automatic transmission with Steptronic
*
N NeutralSelect only when stopping for an
extended period.D Drive (automatic shift program)This position is designed for driving
under all normal operating conditions.
All forward gears are available.Kickdown modeIn the kickdown mode, you achieve
maximum acceleration and in
position D top speed.
Depress the accelerator pedal past the
increased resistance point at the full-
throttle position.
M/S Manual mode and
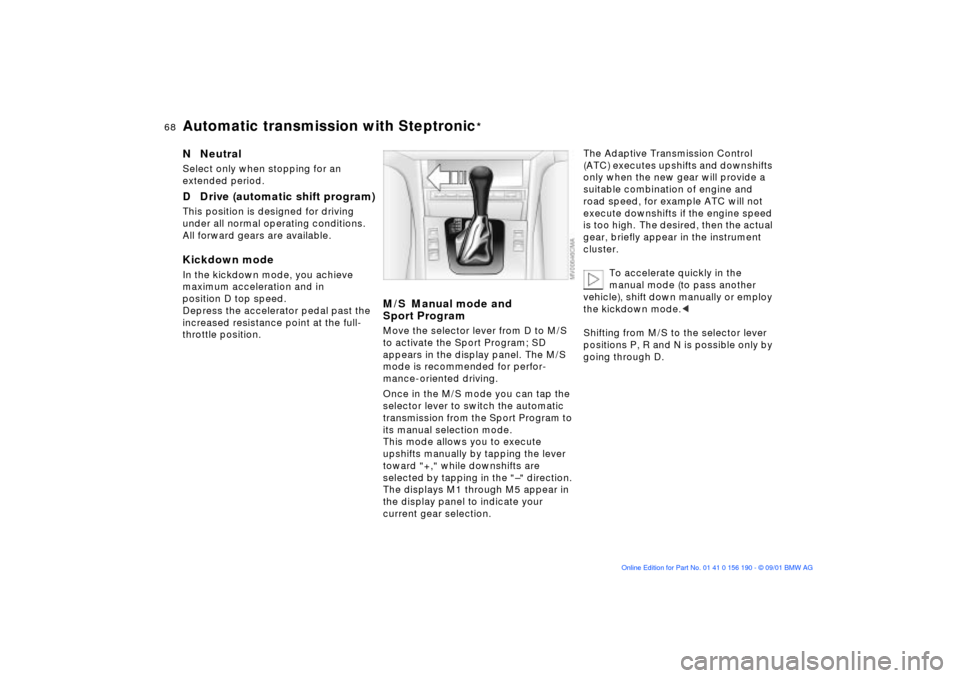
Sport ProgramMove the selector lever from D to M/S
to activate the Sport Program; SD
appears in the display panel. The M/S
mode is recommended for perfor-
mance-oriented driving.
Once in the M/S mode you can tap the
selector lever to switch the automatic
transmission from the Sport Program to
its manual selection mode.
This mode allows you to execute
upshifts manually by tapping the lever
toward "+," while downshifts are
selected by tapping in the "Ð" direction.
The displays M1 through M5 appear in
the display panel to indicate your
current gear selection.
The Adaptive Transmission Control
(ATC) executes upshifts and downshifts
only when the new gear will provide a
suitable combination of engine and
road speed, for example ATC will not
execute downshifts if the engine speed
is too high. The desired, then the actual
gear, briefly appear in the instrument
cluster.
To accelerate quickly in the
manual mode (to pass another
vehicle), shift down manually or employ
the kickdown mode.<
Shifting from M/S to the selector lever
positions P, R and N is possible only by
going through D.
Page 102 of 159
102n
Ski bag
*
The ski bag allows the safe and clean
transport of up to 4 pairs of standard
skis or up to two snowboards.
The length of the ski bag and the addi-
tional space provided in the luggage
compartment make it possible to carry
skis up to 6.8 ft (2.1 m) long. Because
of the tapered shape of the bag, the ski
bag can only accommodate two pairs
of skis up to 6.8 ft (2.1 m) long.
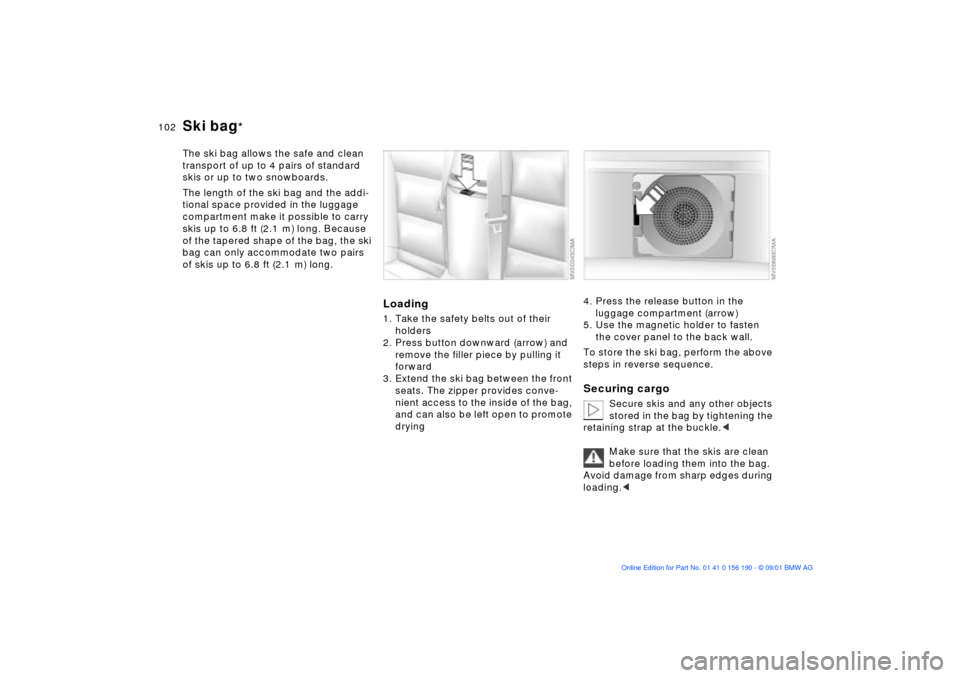
Loading1. Take the safety belts out of their
holders
2. Press button downward (arrow) and
remove the filler piece by pulling it
forward
3. Extend the ski bag between the front
seats. The zipper provides conve-
nient access to the inside of the bag,
and can also be left open to promote
drying
4. Press the release button in the
luggage compartment (arrow)
5. Use the magnetic holder to fasten
the cover panel to the back wall.
To store the ski bag, perform the above
steps in reverse sequence.Securing cargo
Secure skis and any other objects
stored in the bag by tightening the
retaining strap at the buckle.<
Make sure that the skis are clean
before loading them into the bag.
Avoid damage from sharp edges during
loading.<
Page 103 of 159

103n
OverviewControlsMaintenanceRepairsDataIndex
Ski bag Cargo loading
When reattaching the cover, guide
both bars into the guide and press
the cover back into place. Secure the
safety belts in their holders again.<
Stowing cargo If you are transporting cargo in your
BMW:
>Load heavy cargo as far forward as
possible Ð directly behind the
luggage compartment partition Ð and
as low as possible
>Cover sharp edges and corners.
With the convertible top closed,
you can increase the space in the
luggage compartment, refer to page 35.
We recommend that you always fold
the convertible top compartment panel
down as soon as you have removed
your cargo from the luggage compart-
ment. This way, you can be sure that
you can always operate your convert-
ible top at any time.
At the same time, when the top is
raised you should fold the convertible
top compartment panel back up before
stowing large objects in the luggage
compartment; this precaution will help
reduce the likelihood of damage to
either the convertible top compartment
or your luggage.<
Page 104 of 159
104n
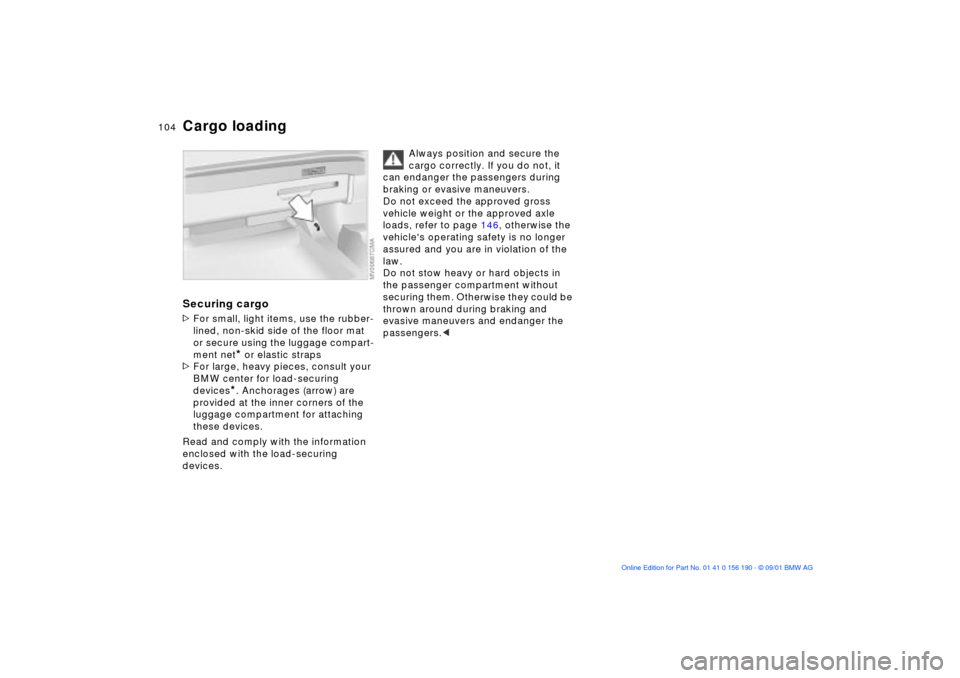
Cargo loadingSecuring cargo >For small, light items, use the rubber-
lined, non-skid side of the floor mat
or secure using the luggage compart-
ment net
* or elastic straps
>For large, heavy pieces, consult your
BMW center for load-securing
devices*. Anchorages (arrow) are
provided at the inner corners of the
luggage compartment for attaching
these devices.
Read and comply with the information
enclosed with the load-securing
devices.
Always position and secure the
cargo correctly. If you do not, it
can endanger the passengers during
braking or evasive maneuvers.
Do not exceed the approved gross
vehicle weight or the approved axle
loads, refer to page 146, otherwise the
vehicle's operating safety is no longer
assured and you are in violation of the
law.
Do not stow heavy or hard objects in
the passenger compartment without
securing them. Otherwise they could be
thrown around during braking and
evasive maneuvers and endanger the
passengers.<