Page 75 of 100

PERIODIC MAINTENANCE AND MINOR REPAIR
6-32
6
EAU03420
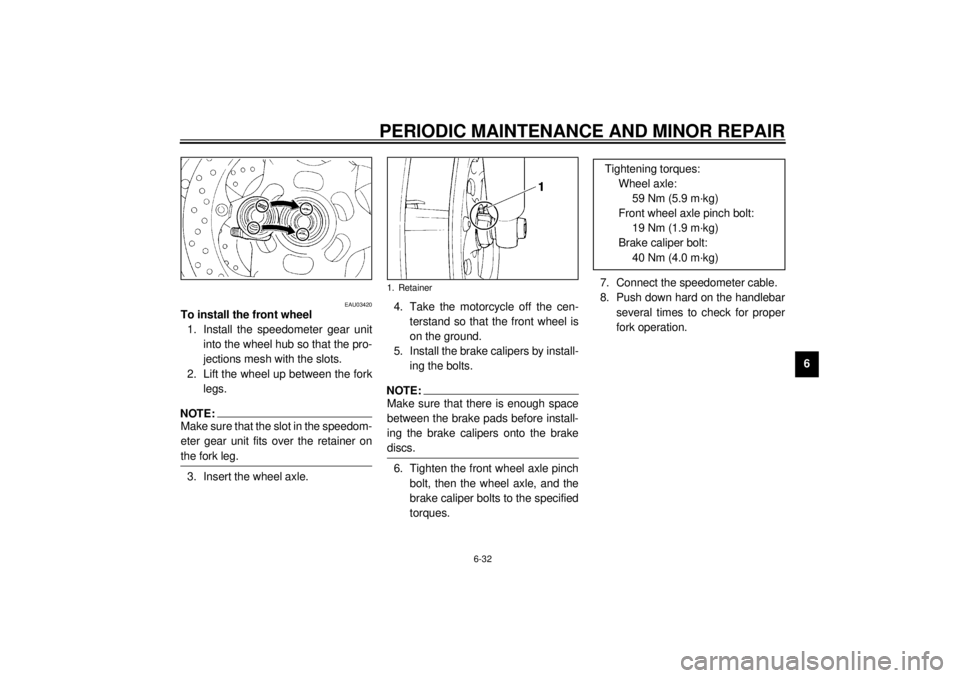
To install the front wheel
1. Install the speedometer gear unit
into the wheel hub so that the pro-
jections mesh with the slots.
2. Lift the wheel up between the fork
legs.NOTE:@ Make sure that the slot in the speedom-
eter gear unit fits over the retainer on
the fork leg. @3. Insert the wheel axle.4. Take the motorcycle off the cen-
terstand so that the front wheel is
on the ground.
5. Install the brake calipers by install-
ing the bolts.
NOTE:@ Make sure that there is enough space
between the brake pads before install-
ing the brake calipers onto the brake
discs. @6. Tighten the front wheel axle pinch
bolt, then the wheel axle, and the
brake caliper bolts to the specified
torques.7. Connect the speedometer cable.
8. Push down hard on the handlebar
several times to check for proper
fork operation.1. Retainer
Tightening torques:
Wheel axle:
59 Nm (5.9 m·kg)
Front wheel axle pinch bolt:
19 Nm (1.9 m·kg)
Brake caliper bolt:
40 Nm (4.0 m·kg)
E_4km.book Page 32 Thursday, September 7, 2000 9:32 AM
Page 76 of 100
PERIODIC MAINTENANCE AND MINOR REPAIR
6-33
6
EAU03410
Rear wheel To remove the rear wheel
EW000122
WARNING
@ l
It is advisable to have a Yamaha
dealer service the wheel.
l
Securely support the motor-
cycle so that there is no danger
of it falling over.
@
1. Loosen the rear wheel axle pinch
bolt, and then remove the axle nut.
2. Place the motorcycle on the
centerstand.3. Remove the brake caliper bolts
and the axle nut.
4. Disconnect the brake torque rod
from the brake caliper bracket by
removing the cotter pin, the nut,
and the bolt.
5. While supporting the brake cali-
per, pull the wheel axle out.
6. Pull the wheel to the right to sepa-
rate it from the final gear case, and
then remove it.
1. Wheel axle pinch bolt
1. Axle nut
1. Nut
2. Brake torque rod
3. Cotter pin
4. Bolt (´ 2)
E_4km.book Page 33 Thursday, September 7, 2000 9:32 AM
Page 77 of 100

PERIODIC MAINTENANCE AND MINOR REPAIR
6-34
6
ECA00062
CAUTION:@ Do not push the brake pedal after
the wheel has been removed togeth-
er with the brake disc, otherwise the
brake pads will be forced shut. @
EAU03411
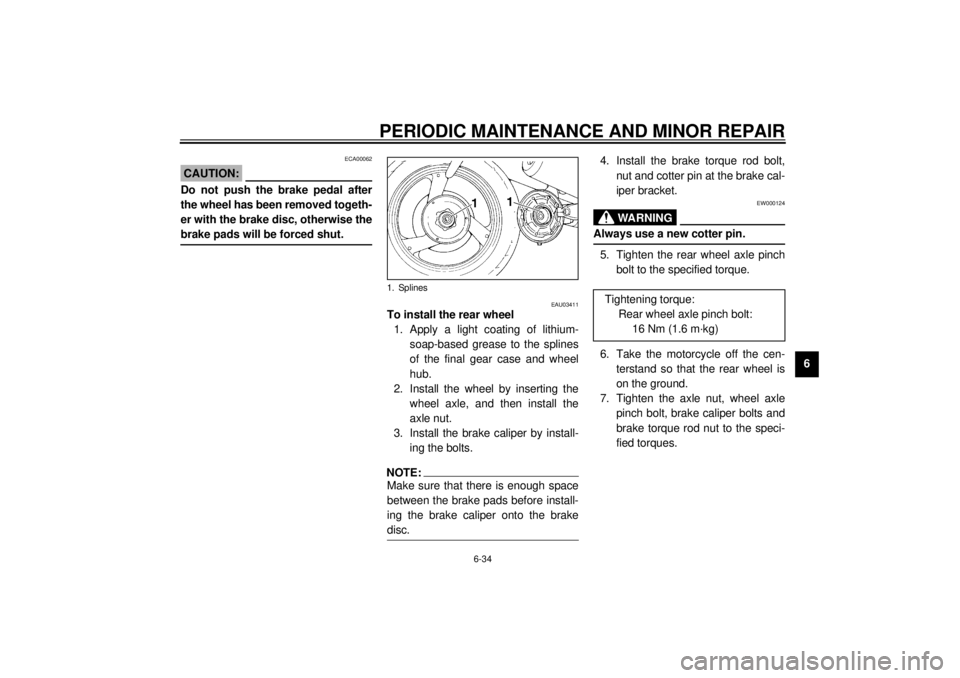
To install the rear wheel
1. Apply a light coating of lithium-
soap-based grease to the splines
of the final gear case and wheel
hub.
2. Install the wheel by inserting the
wheel axle, and then install the
axle nut.
3. Install the brake caliper by install-
ing the bolts.NOTE:@ Make sure that there is enough space
between the brake pads before install-
ing the brake caliper onto the brake
disc. @
4. Install the brake torque rod bolt,
nut and cotter pin at the brake cal-
iper bracket.
EW000124
WARNING
@ Always use a new cotter pin. @5. Tighten the rear wheel axle pinch
bolt to the specified torque.
6. Take the motorcycle off the cen-
terstand so that the rear wheel is
on the ground.
7. Tighten the axle nut, wheel axle
pinch bolt, brake caliper bolts and
brake torque rod nut to the speci-
fied torques.
1. Splines
Tightening torque:
Rear wheel axle pinch bolt:
16 Nm (1.6 m·kg)
E_4km.book Page 34 Thursday, September 7, 2000 9:32 AM