Page 164 of 240
’01MY CELICA U (L/O 0008)
1592001 CELICA (20766U)
�Stop the vehicle on a level firm
ground, firmly set the parking brake
and put the transmission in “P”
(automatic) or reverse (manual).
Block the wheel diagonally opposite
to the one being changed if neces-
sary.
�Make sure to set the jack properly
in the jack point. Raising the ve-
hicle with jack improperly posi-
tioned will damage the vehicle or
may allow the vehicle to fall off the
jack and cause personal injury.
�Never get under the vehicle when
the vehicle is supported by the jack
alone.
�Use the jack only for lifting your
vehicle during wheel changing.
�Do not raise the vehicle with some-
one in the vehicle.
�When raising the vehicle, do not
put an object on or under the jack.
�Raise the vehicle only high enough
to remove and change the tire.
NOTICE
Do not continue driving with a de-
flated tire. Driving even a short dis-
tance can damage a tire and wheel
beyond repair.
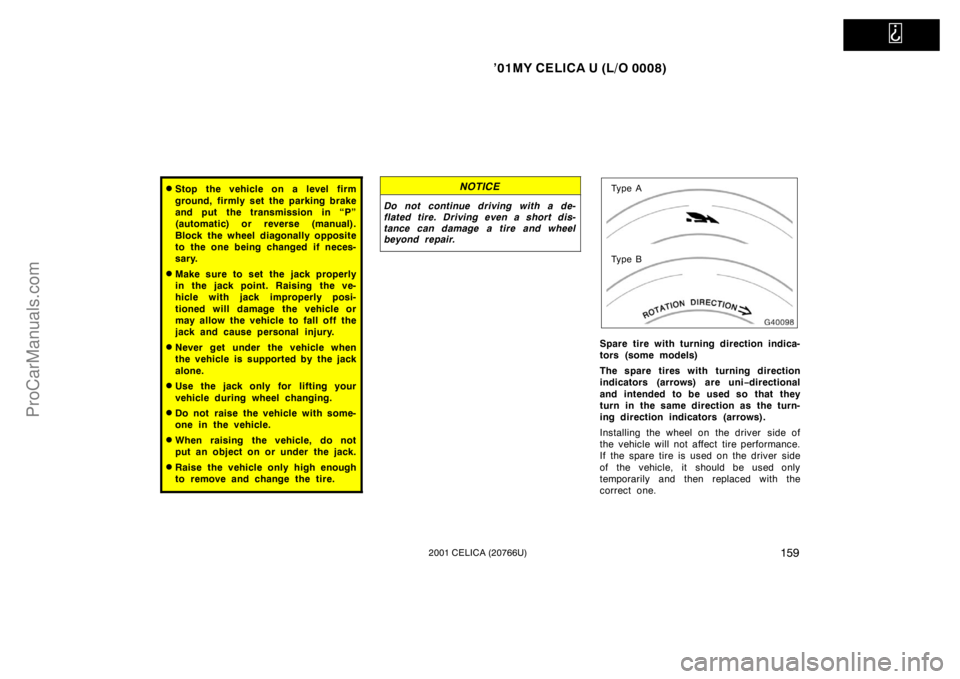
Ty p e A
Ty p e B
Spare tire with turning direction indica-
tors (some models)
The spare tires with turning direction
indicators (arrows) are uni−directional
and intended to be used so that they
turn in the same direction as the turn-
ing direction indicators (arrows).
Installing the wheel on the driver side of
the vehicle will not affect tire performance.
If the spare tire is used on the driver side
of the vehicle, it should be used only
temporarily and then replaced with the
correct one.
ProCarManuals.com
Page 167 of 240
’01MY CELICA U (L/O 0008)
1622001 CELICA (20766U)
2. Twist the jack head clockwise and pullout the jack.To store the jack, put the jack base on
the fitting place. Turn the joint until the
jack upper side fits securely with the pro-
trusion of the carrier.
This prevents the jack from flying forward
during a collision or sudden braking.
CAUTION
When storing the jack, be careful not
to injure your hands with the edge of
the trim.
To remove the spare tire:
1. Remove the spare tire cover.
2. Loosen the bolt and remove it.
Then take the spare tire out of the ve-
hicle.
When storing the spare tire, put it in place
with the inner side of the wheel facing up.
Then secure the tire by repeating the
above removal steps in reverse order to
prevent it from flying forward during a
collision or sudden braking.
ProCarManuals.com
Page 168 of 240
’01MY CELICA U (L/O 0008)
1632001 CELICA (20766U)
—Blocking the wheel
2. Block the wheel diagonally oppositethe flat tire to keep the vehicle from
rolling when it is j acked up.
When blocking the wheel, place a wheel
block from the front for the front wheels
or from the rear for the rear wheels.
—Removing wheel ornament
Steel wheels
Aluminum wheels
3. Remove the wheel ornament.
Pry off the wheel ornament, using the
beveled end of the wheel nut wrench as
shown.
CAUTION
Do not try to pull off the ornament by
hand. Take due care in handling the
ornament to avoid unexpected person-
al injury.
ProCarManuals.com
Page 169 of 240
’01MY CELICA U (L/O 0008)
1642001 CELICA (20766U)
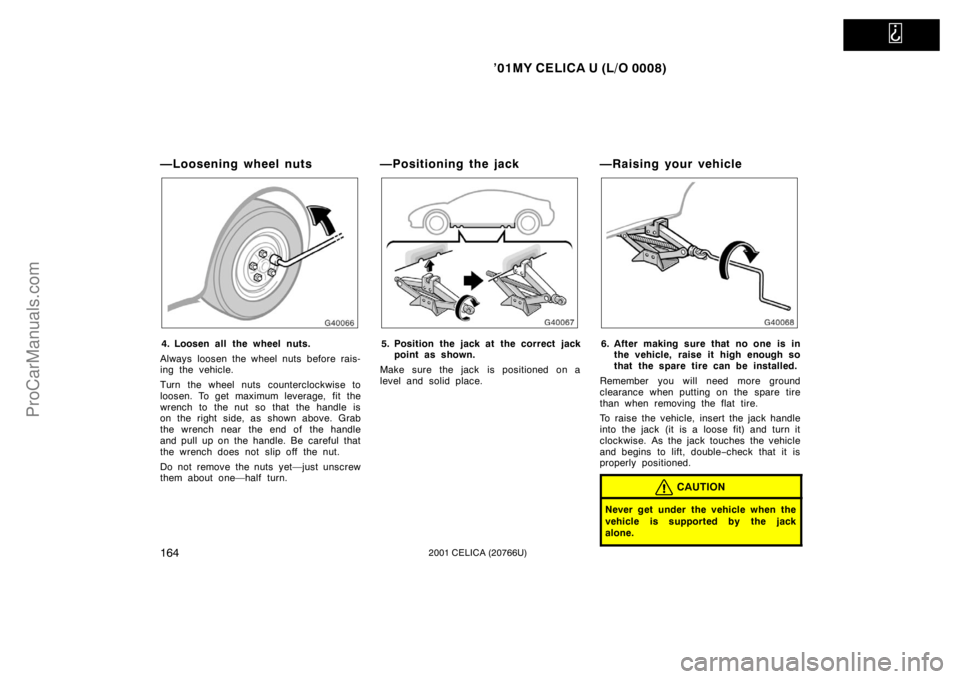
—Loosening wheel nuts
4. Loosen all the wheel nuts.
Always loosen the wheel nuts before rais-
ing the vehicle.
Turn the wheel nuts counterclockwise to
loosen. To get maximum leverage, fit the
wrench to the nut so that the handle is
on the right side, as shown above. Grab
the wrench near the end of the handle
and pull up on the handle. Be careful that
the wrench does not slip off the nut.
Do not remove the nuts yet—just unscrew
them about one—half turn.
—Positioning the jack
5. Position the jack at the correct jack point as shown.
Make sure the jack is positioned on a
level and solid place.
—Raising your vehicle
6. After making sure that no one is in the vehicle, raise it high enough so
that the spare tire can be installed.
Remember you will need more ground
clearance when putting on the spare tire
than when removing the flat tire.
To raise the vehicle, insert the jack handle
into the jack (it is a loose fit) and turn it
clockwise. As the jack touches the vehicle
and begins to lift, double −check that it is
properly positioned.
CAUTION
Never get under the vehicle when the
vehicle is supported by the jack
alone.
ProCarManuals.com
Page 171 of 240
’01MY CELICA U (L/O 0008)
1662001 CELICA (20766U)
—Lowering your vehicle
9. Lower the vehicle completely andtighten the wheel nuts.
Turn the jack handle counterclockwise to
lower the vehicle.
Use only the wheel nut wrench and turn
it clockwise to tighten the nuts. Do not
use other tools or any additional leverage
other than your hands, such as a hammer,
pipe or your foot. Make sure the wrench
is securely engaged over the nut.
Tighten each nut a little at a time in the
order shown. Repeat the process until all
the nuts are tight.
CAUTION
When lowering the vehicle, make sure
all portions of your body and all oth-
er persons around will not be injured
as the vehicle is lowered to the
ground.
—Reinstalling wheel ornament
Steel wheels
Aluminum wheels
ProCarManuals.com
Page 173 of 240
’01MY CELICA U (L/O 0008)
1682001 CELICA (20766U)
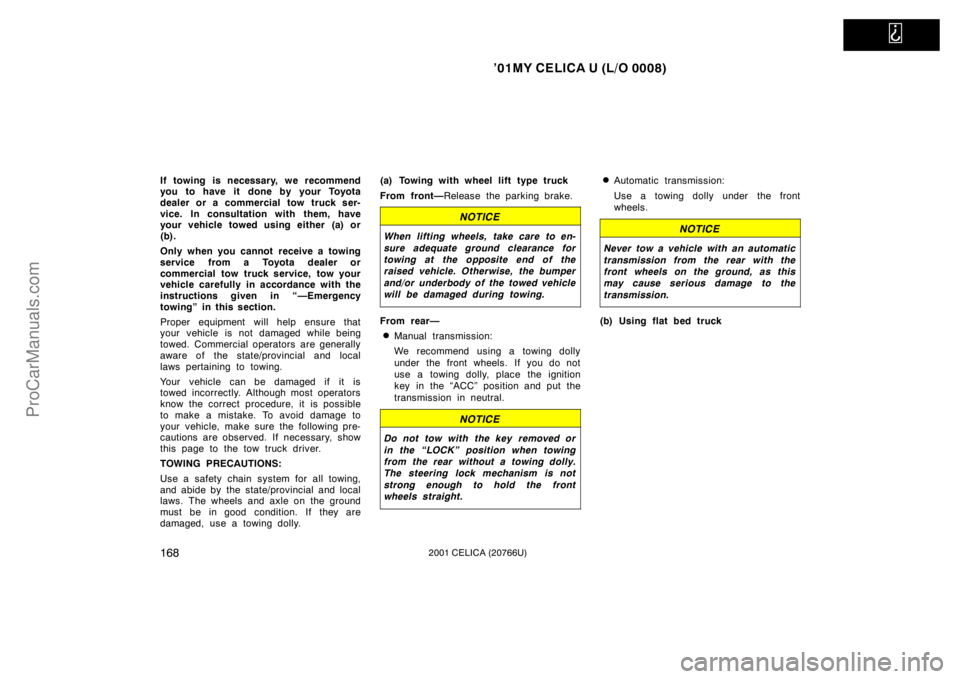
If towing is necessary, we recommend
you to have it done by your Toyota
dealer or a commercial tow truck ser-
vice. In consultation with them, have
your vehicle towed using either (a) or
(b).
Only when you cannot receive a towing
service from a Toyota dealer or
commercial tow truck service, tow your
vehicle carefully in accordance with the
instructions given in “—Emergency
towing” in this section.
Proper equipment will help ensure that
your vehicle is not damaged while being
towed. Commercial operators are generally
aware of the state/provincial and local
laws pertaining to towing.
Your vehicle can be damaged if it is
towed incorrectly. Although most operators
know the correct procedure, it is possible
to make a mistake. To avoid damage to
your vehicle, make sure the following pre-
cautions are observed. If necessary, show
this page to the tow truck driver.
TOWING PRECAUTIONS:
Use a safety chain system for all towing,
and abide by the state/provincial and local
laws. The wheels and axle on the ground
must be in good condition. If they are
damaged, use a towing dolly.(a) Towing with wheel lift type truck
From front—
Release the parking brake.
NOTICE
When lifting wheels, take care to en-
sure adequate ground clearance for
towing at the opposite end of the
raised vehicle. Otherwise, the bumper
and/or underbody of the towed vehicle
will be damaged during towing.
From rear—
�Manual transmission:
We recommend using a towing dolly
under the front wheels. If you do not
use a towing dolly, place the ignition
key in the “ACC” position and put the
transmission in neutral.
NOTICE
Do not tow with the key removed or
in the “LOCK” position when towing
from the rear without a towing dolly.
The steering lock mechanism is not
strong enough to hold the front
wheels straight.
�Automatic transmission:
Use a towing dolly under the front
wheels.
NOTICE
Never tow a vehicle with an automatic
transmission from the rear with the
front wheels on the ground, as this
may cause serious damage to the
transmission.
(b) Using flat bed truck
ProCarManuals.com
Page 175 of 240
’01MY CELICA U (L/O 0008)
1702001 CELICA (20766U)
CAUTION
Use extreme caution when towing ve-
hicles. Avoid sudden starts or erratic
driving maneuvers which would place
excessive stress on the emergency
towing eyelets and towing cable or
chain. The eyelets and towing cable
or chain may break and cause serious
injury or damage.
NOTICE
Use only a cable or chain specifically
intended for use in towing vehicles.
Securely fasten the cable or chain to
the towing eyelets provided.
Before towing, release the parking brake
and put the transmission in neutral (manu-
al) or “N” (automatic). The key must be
in “ACC” (engine off) or “ON” (engine run-
ning).
CAUTION
If the engine is not running, the pow-
er assist for the brakes and steering
will not work so steering and braking
will be much harder than usual.
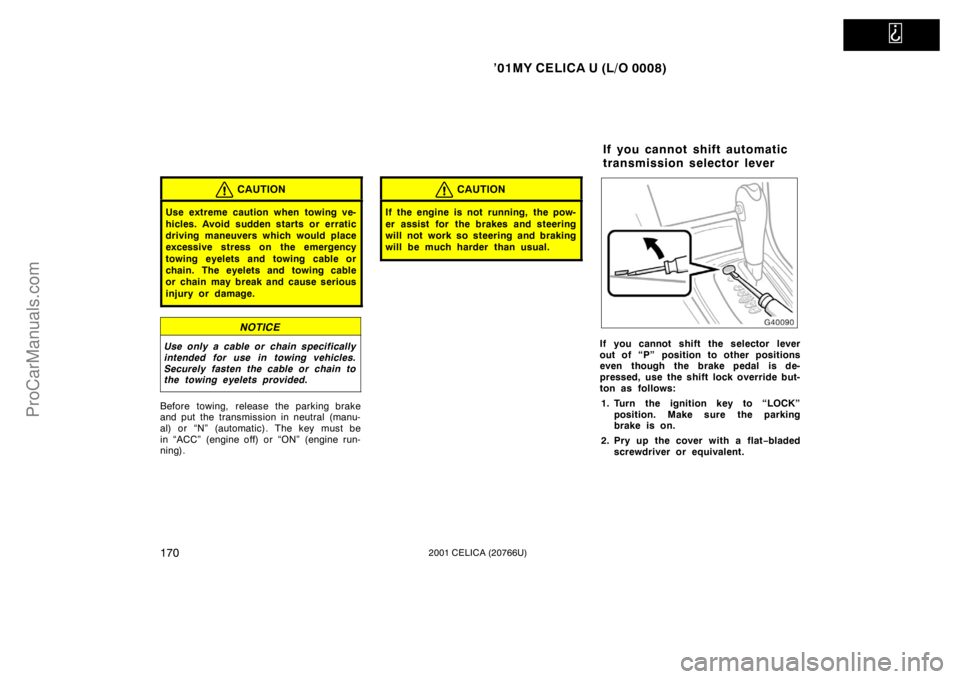
If you cannot shift the selector lever
out of “P” position to other positions
even though the brake pedal is de-
pressed, use the shift lock override but-
ton as follows:1. Turn the ignition key to “LOCK” position. Make sure the parking
brake is on.
2. Pry up the cover with a flat −bladed
screwdriver or equivalent.
If you cannot shift automatic
transmission selector lever
ProCarManuals.com
Page 176 of 240
’01MY CELICA U (L/O 0008)
1712001 CELICA (20766U)
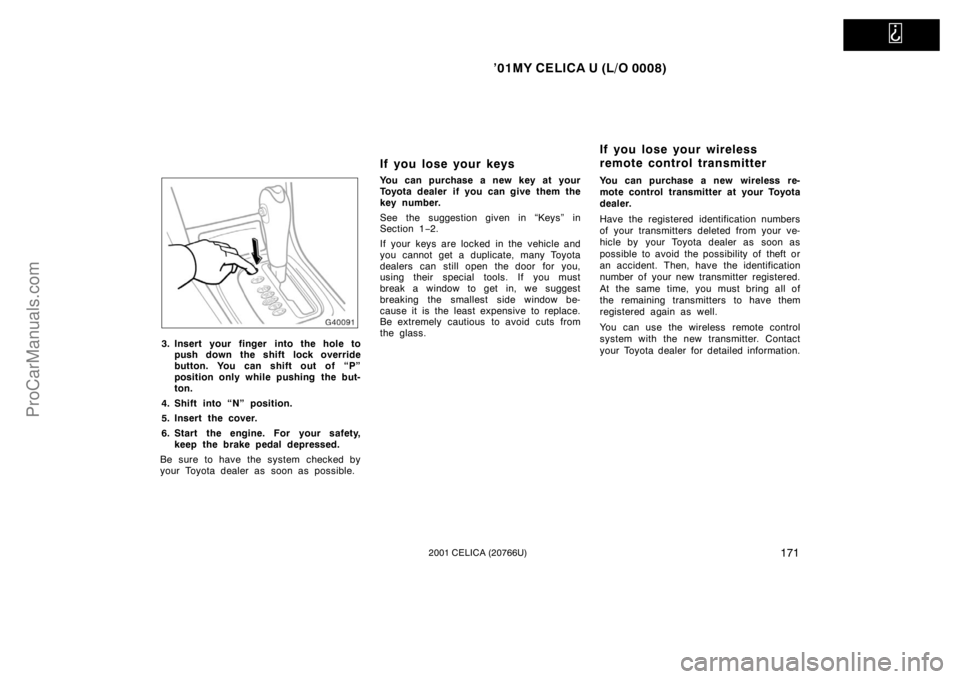
3. Insert your finger into the hole topush down the shift lock override
button. You can shift out of “P”
position only while pushing the but-
ton.
4. Shift into “N” position.
5. Insert the cover.
6. Start the engine. For your safety, keep the brake pedal depressed.
Be sure to have the system checked by
your Toyota dealer as soon as possible.
If you lose your keys
You can purchase a new key at your
Toyota dealer if you can give them the
key number.
See the suggestion given in “Keys” in
Section 1 −2.
If your keys are locked in the vehicle and
you cannot get a duplicate, many Toyota
dealers can still open the door for you,
using their special tools. If you must
break a window to get in, we suggest
breaking the smallest side window be-
cause it is the least expensive to replace.
Be extremely cautious to avoid cuts from
the glass. You can purchase a new wireless re-
mote control transmitter at your Toyota
dealer.
Have the registered identification numbers
of your transmitters deleted from your ve-
hicle by your Toyota dealer as soon as
possible to avoid the possibility of theft or
an accident. Then, have the identification
number of your new transmitter registered.
At the same time, you must bring all of
the remaining transmitters to have them
registered again as well.
You can use the wireless remote control
system with the new transmitter. Contact
your Toyota dealer for detailed information.
If you lose your wireless
remote control transmitter
ProCarManuals.com