Page 45 of 240
’01MY CELICA U (L/O 0008)
412001 CELICA (20766U)
NOTICE
Do not perform any of the following
changes without consulting your
Toyota dealer. Such changes can in-
terfere with proper operation of the
SRS front airbag system in some
cases.
�Installation of electronic devices
such as a mobile two −way radio,
cassette tape player or compact
disc player
� Modification of the suspension sys-
tem
� Modification of the front end struc-
ture
� Attachment of a grille guard (bull
bar, kangaroo bar, etc.), snowplow,
winches or any other equipment to
the front end
� Repairs made on or near the front
fenders, front end structure, con-
sole, steering column, steering
wheel or dashboard near the front
passenger airbag
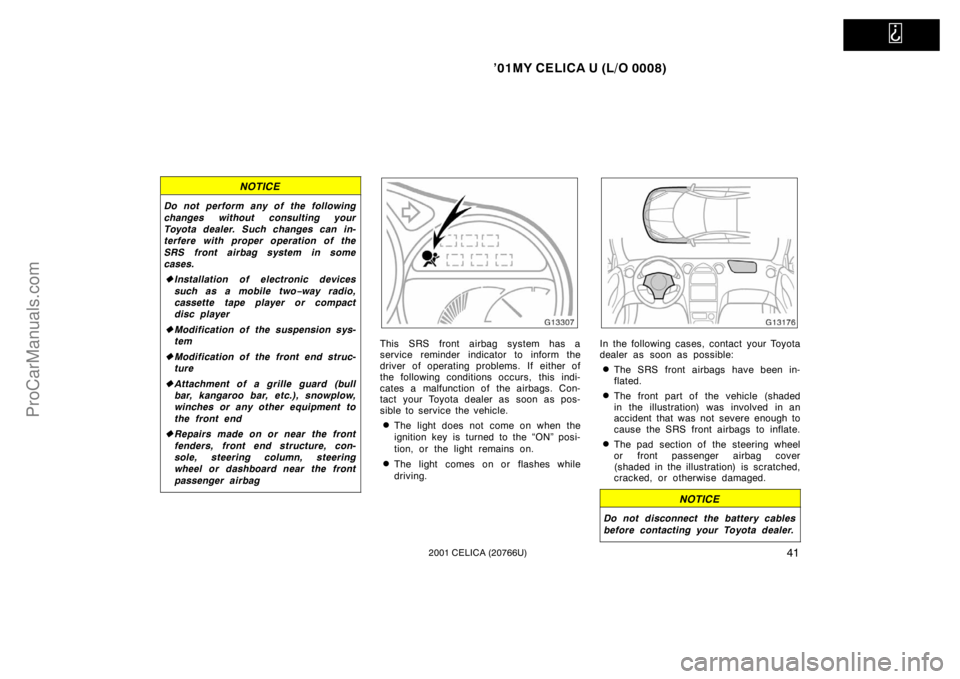
This SRS front airbag system has a
service reminder indicator to inform the
driver of operating problems. If either of
the following conditions occurs, this indi-
cates a malfunction of the airbags. Con-
tact your Toyota dealer as soon as pos-
sible to service the vehicle.
�The light does not come on when the
ignition key is turned to the “ON” posi-
tion, or the light remains on.
�The light comes on or flashes while
driving.
In the following cases, contact your Toyota
dealer as soon as possible:
�The SRS front airbags have been in-
flated.
�The front part of the vehicle (shaded
in the illustration) was involved in an
accident that was not severe enough to
cause the SRS front airbags to inflate.
�The pad section of the steering wheel
or front passenger airbag cover
(shaded in the illustration) is scratched,
cracked, or otherwise damaged.
NOTICE
Do not disconnect the battery cables
before contacting your Toyota dealer.
ProCarManuals.com
Page 46 of 240

’01MY CELICA U (L/O 0008)
422001 CELICA (20766U)
SRS side airbags
The SRS (Supplemental Restraint Sys-
tem) side airbags are designed to pro-
vide further protection for the driver
and front passenger in addition to the
primary safety protection provided by
the seat belts.
In response to a severe side impact, the
SRS side airbags work together with the
seat belts to help reduce injury by inflat-
ing. The SRS side airbags help to reduce
injuries mainly to the driver’s or front pas-
senger ’s chest. The SRS side airbag on
the passenger seat is activated even with
no passenger in the front seat.
Be sure to wear your seat belt properly.Your vehicle is equipped with a crash
sensing and diagnostic module, which will
record the use of the seat belt restraint
system by the driver when the SRS side
airbags are inflated.
CAUTION
SRS side airbags inflate with consid-
erable force. To avoid potential death
or serious injury when they inflate,
the driver and front passenger must:
�Wear their seat belts properly.
�Remain properly seated with their
back upright and against the seat at
all times.This indicator comes on when the igni-
tion key is turned to the “ON” position.
It goes off after about 6 seconds. This
means the SRS side airbags are operat-
ing properly.
This warning light system monitors the
airbag sensor assembly, front airbag sen-
sors, side airbag sensors, door side air-
bag sensors, front seat belt pretensioner
assemblies, inflators, warning light, inter-
connecting wiring and power sources. (For
details, see “Service reminder indicators
and warning buzzers” in Section 1
−5.)
ProCarManuals.com
Page 50 of 240
’01MY CELICA U (L/O 0008)
462001 CELICA (20766U)
NOTICE
Do not perform any of the following
changes without consulting your
Toyota dealer. Such changes can
interfere with proper operation of the
SRS side airbag system in some
cases.
�Installation of electronic devices
such as a mobile two −way radio,
cassette tape player or compact
disc player
� Modification of the suspension sys-
tem
� Modification of the side structure of
the passenger compartment
� Repairs made on or near the con-
sole or front seat
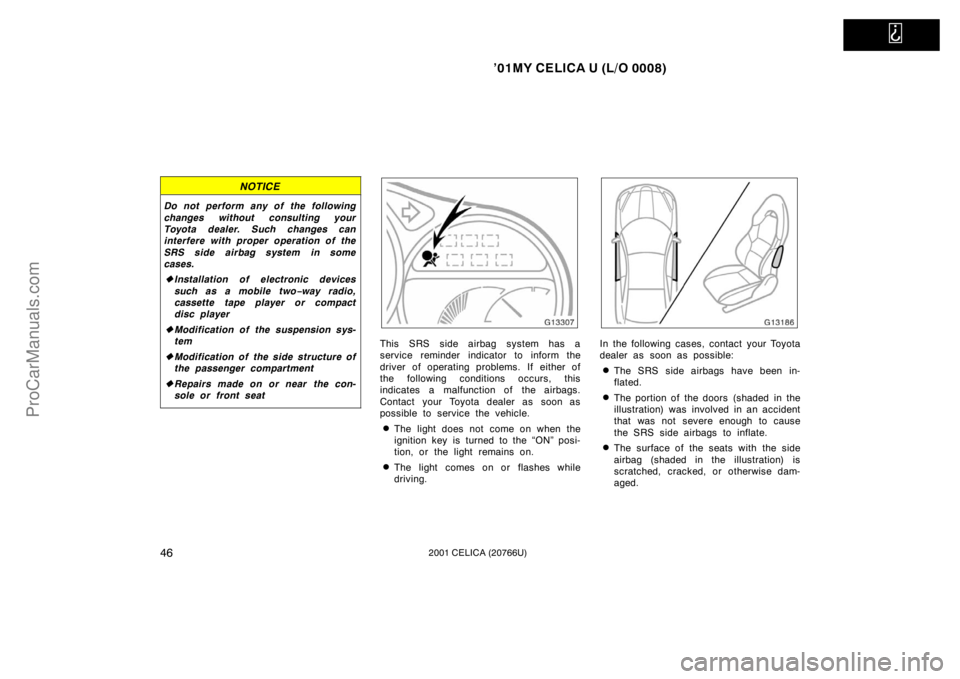
This SRS side airbag system has a
service reminder indicator to inform the
driver of operating problems. If either of
the following conditions occurs, this
indicates a malfunction of the airbags.
Contact your Toyota dealer as soon as
possible to service the vehicle.
�The light does not come on when the
ignition key is turned to the “ON” posi-
tion, or the light remains on.
�The light comes on or flashes while
driving.
In the following cases, contact your Toyota
dealer as soon as possible:
�The SRS side airbags have been in-
flated.
�The portion of the doors (shaded in the
illustration) was involved in an accident
that was not severe enough to cause
the SRS side airbags to inflate.
�The surface of the seats with the side
airbag (shaded in the illustration) is
scratched, cracked, or otherwise dam-
aged.
ProCarManuals.com
Page 70 of 240
’01MY CELICA U (L/O 0008)
662001 CELICA (20766U)
Headlights and turn signals
Ty p e A
Ty p e B
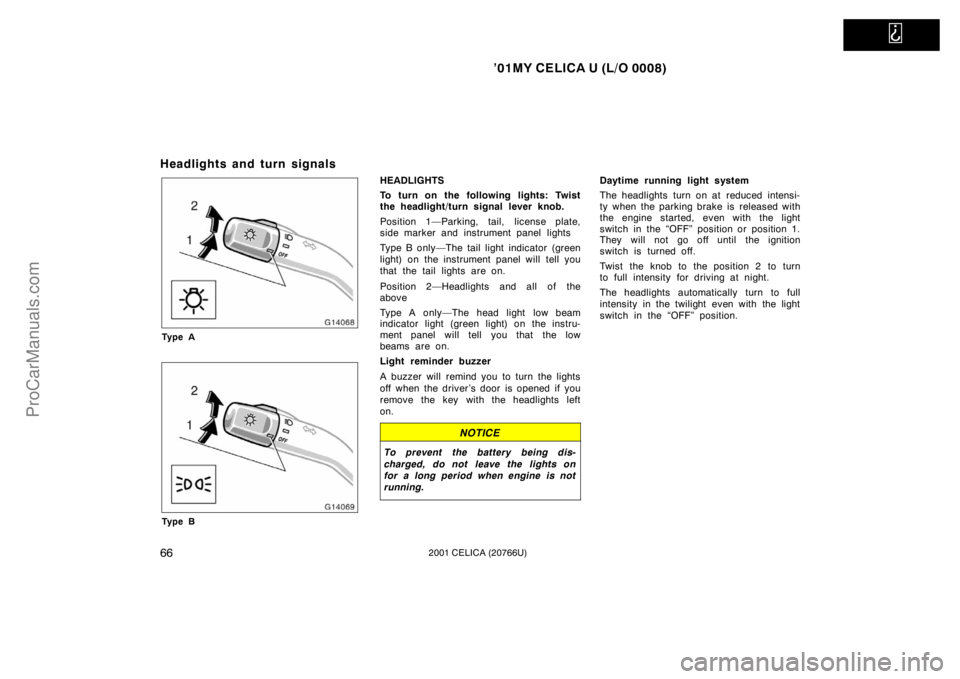
HEADLIGHTS
To turn on the following lights: Twist
the headlight/turn signal lever knob.
Position 1—Parking, tail, license plate,
side marker and instrument panel lights
Type B only—The tail light indicator (green
light) on the instrument panel will tell you
that the tail lights are on.
Position 2—Headlights and all of the
above
Type A only—The head light low beam
indicator light (green light) on the instru-
ment panel will tell you that the low
beams are on.
Light reminder buzzer
A buzzer will remind you to turn the lights
off when the driver ’s door is opened if you
remove the key with the headlights left
on.
NOTICE
To prevent the battery being dis-
charged, do not leave the lights on
for a long period when engine is not
running.
Daytime running light system
The headlights turn on at reduced intensi-
ty when the parking brake is released with
the engine started, even with the light
switch in the “OFF” position or position 1.
They will not go off until the ignition
switch is turned off.
Twist the knob to the position 2 to turn
to full intensity for driving at night.
The headlights automatically turn to full
intensity in the twilight even with the light
switch in the “OFF” position.
ProCarManuals.com
Page 71 of 240
’01MY CELICA U (L/O 0008)
672001 CELICA (20766U)
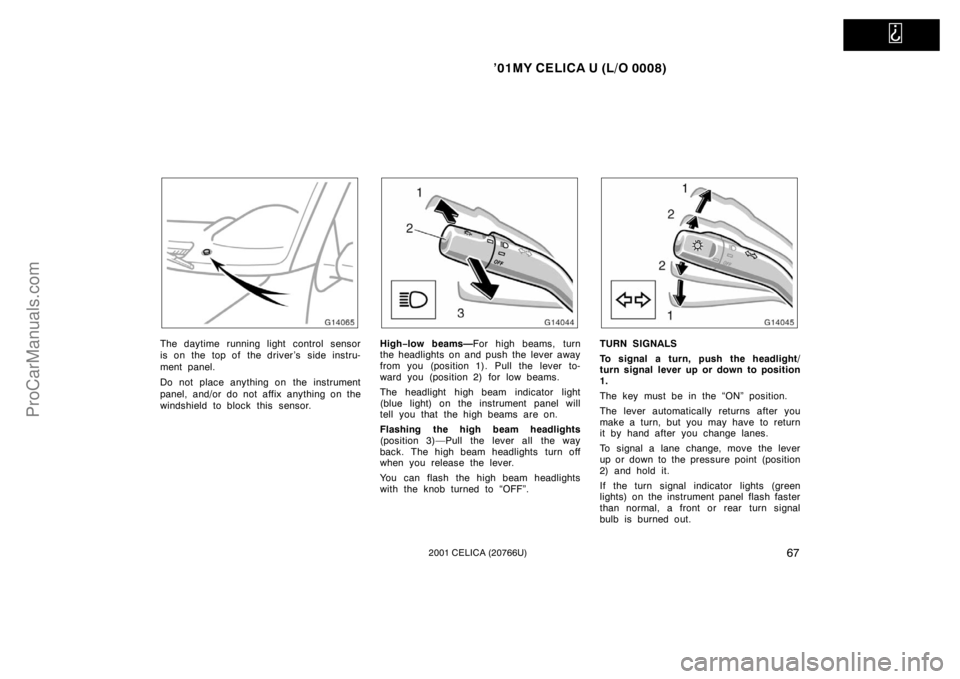
The daytime running light control sensor
is on the top of the driver’s side instru-
ment panel.
Do not place anything on the instrument
panel, and/or do not affix anything on the
windshield to block this sensor.High−low beams— For high beams, turn
the headlights on and push the lever away
from you (position 1). Pull the lever to-
ward you (position 2) for low beams.
The headlight high beam indicator light
(blue light) on the instrument panel will
tell you that the high beams are on.
Flashing the high beam headlights
(position 3)—Pull the lever all the way
back. The high beam headlights turn off
when you release the lever.
You can flash the high beam headlights
with the knob turned to “OFF”.TURN SIGNALS
To signal a turn, push the headlight/
turn signal lever up or down to position
1.
The key must be in the “ON” position.
The lever automatically returns after you
make a turn, but you may have to return
it by hand after you change lanes.
To signal a lane change, move the lever
up or down to the pressure point (position
2) and hold it.
If the turn signal indicator lights (green
lights) on the instrument panel flash faster
than normal, a front or rear turn signal
bulb is burned out.
ProCarManuals.com
Page 76 of 240
’01MY CELICA U (L/O 0008)
722001 CELICA (20766U)
NOTICE
Do not operate the rear wiper if the
rear window is dry. It may scratch the
glass.
Rear window defogger
To defog or defrost the rear window,
push the switch.
The key must be in the “ON” position.
The thin heater wires on the inside of the
rear window will quickly clear the surface.
An indicator light will illuminate to indicate
the defogger is operating.
Push the switch once again to turn the
defogger off.
The system will automatically shut off af-
ter the defogger has operated about 15
minutes.Make sure you turn the defogger off when
the window is clear. Leaving the defogger
on for a long time could cause the battery
to discharge, especially during stop
−and−
go driving. The defogger is not designed
for drying rain water or for melting snow.
NOTICE
When cleaning the inside of the rear
window, be careful not to scratch or
damage the heater wires or connec-
tors.
ProCarManuals.com
Page 77 of 240
’01MY CELICA U (L/O 0008)
732001 CELICA (20766U)
OPERATION OF INSTRUMENTS AND
CONTROLS
Gauges, Meters and Service reminder indicators
Fuel gauge74
. . . . . . . . . . . . . . . . . . . . . . . . . . . . . . . . . . . . \
. . . . . . . . . . . . .
Engine coolant temperature gauge ge74
. . . . . . . . . . . . . . . . . . . . . . . . . .
Tachometer 75
. . . . . . . . . . . . . . . . . . . . . . . . . . . . . . . . . . . . \
. . . . . . . . . . . . .
Odometer and two trip meters 76
. . . . . . . . . . . . . . . . . . . . . . . . . . . . . . . . .
Service reminder indicators and warning buzzers rs76
. . . . . . . . . . . . . .
SECTION 1− 5
ProCarManuals.com
Page 78 of 240
’01MY CELICA U (L/O 0008)
742001 CELICA (20766U)
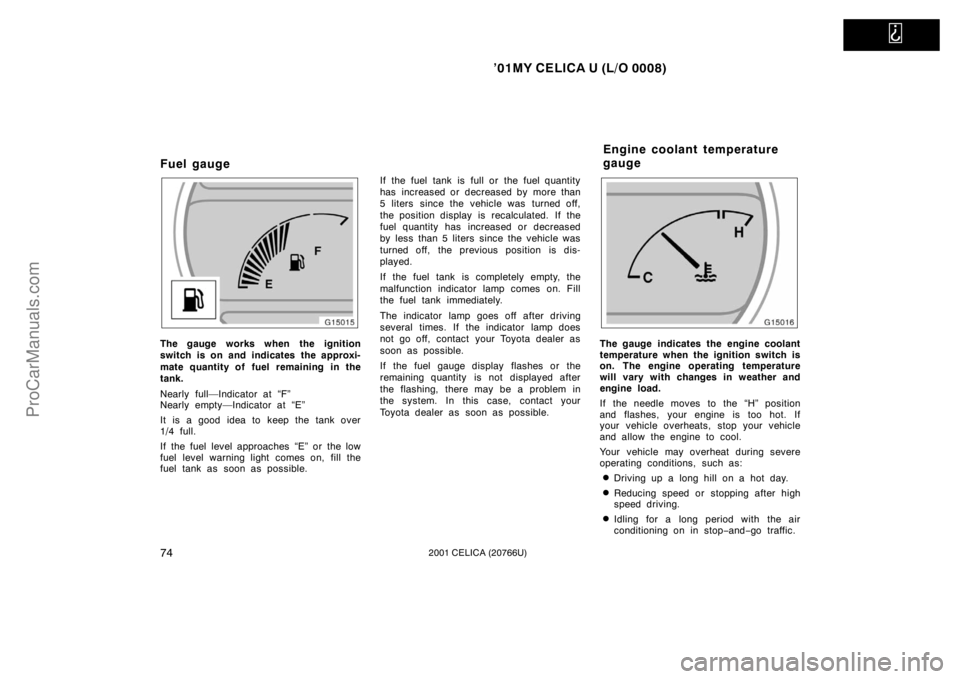
Fuel gauge
The gauge works when the ignition
switch is on and indicates the approxi-
mate quantity of fuel remaining in the
tank.
Nearly full—Indicator at “F”
Nearly empty—Indicator at “E”
It is a good idea to keep the tank over
1/4 full.
If the fuel level approaches “E” or the low
fuel level warning light comes on, fill the
fuel tank as soon as possible.If the fuel tank is full or the fuel quantity
has increased or decreased by more than
5 liters since the vehicle was turned off,
the position display is recalculated. If the
fuel quantity has increased or decreased
by less than 5 liters since the vehicle was
turned off, the previous position is dis-
played.
If the fuel tank is completely empty, the
malfunction indicator lamp comes on. Fill
the fuel tank immediately.
The indicator lamp goes off after driving
several times. If the indicator lamp does
not go off, contact your Toyota dealer as
soon as possible.
If the fuel gauge display flashes or the
remaining quantity is not displayed after
the flashing, there may be a problem in
the system. In this case, contact your
Toyota dealer as soon as possible.The gauge indicates the engine coolant
temperature when the ignition switch is
on. The engine operating temperature
will vary with changes in weather and
engine load.
If the needle moves to the “H” position
and flashes, your engine is too hot. If
your vehicle overheats, stop your vehicle
and allow the engine to cool.
Your vehicle may overheat during severe
operating conditions, such as:
�Driving up a long hill on a hot day.
�Reducing speed or stopping after high
speed driving.
�Idling for a long period with the air
conditioning on in stop
−and− go traffic.
Engine coolant temperature
gauge
ProCarManuals.com