Page 6 of 341
Table of Contents (cont'd)
Maintenance Schedule Service and Appearance Care
Section
7
Section
6
Scheduled Maintenance
Owner Checks and Services
Periodic Maintenance InspectionsRecommended Fluids and Lubricants
Maintenance Records
Fuel
Checking Fluids and Lubricants
GM Oil Life System™
Engine Air Cleaner/Filter
Brakes
Bulb ReplacementWindshield Wiper Blade Replacement
Tires and Wheels
Appearance Care
Electrical System/Fuses and Circuit Breakers
Capacities and Specifications
Normal Maintenance Replacement Parts
iv
Page 11 of 341

ix
For example,
these symbols
are used on an
original battery:
CAUTION
POSSIBLE
INJURY
PROTECT
EYES BY
SHIELDING
CAUSTIC
BATTERY
ACID COULD
CAUSE
BURNS
AVOID
SPARKS OR
FLAMES
SPARK OR
FLAME
COULD
EXPLODE
BATTERY
These symbols
are important for
you and your
passengers
whenever your
vehicle is driven:
CHILD
RESTRAINT
TOP STRAP
ANCHOR
DOOR LOCK
UNLOCK
FASTEN
SEAT
BELTS
POWER
WINDOW
AIR BAG
These symbols
have to do with
your lamps:
MASTER
LIGHTING
SWITCH
TURN
SIGNALS
PARKING
LAMPS
HAZARD
WARNING
FLASHER
DAYTIME
RUNNING
LAMPS
FOG LAMPS
These symbols
are on some of
your controls:
WINDSHIELD
WIPER
WINDSHIELD
WASHER
WINDSHIELD
DEFROSTER
REAR
WINDOW
DEFOGGER
VENTILATING
FAN
These symbols
are used on
warning and
indicator lights:
ENGINE
COOLANT
TEMP
BATTERY
CHARGING
SYSTEM
BRAKE
COOLANT
ENGINE OIL
PRESSURE
ANTI-LOCK
BRAKES
Here are some
other symbols
you may see:
FUSE
LIGHTER
HORN
FUEL
Vehicle Symbols
These are some of the symbols you may find on your vehicle. Also see ªWarning Lights and Gagesº in the Index.
Page 96 of 341
2-26
THIRD (3): This position is also used for normal
driving, however, it offers more power and lower fuel
economy than AUTOMATIC OVERDRIVE (D).
Here are some times you might choose THIRD (3)
instead of AUTOMATIC OVERDRIVE (D):
�When driving on hilly, winding roads.
�When towing a trailer, so there is less shifting
between gears.
�When going down a steep hill.SECOND (2): This position gives you more power but
lower fuel economy. You can use SECOND (2) on hills.
It can help control your speed as you go down steep
mountain roads, but then you would also want to use
your brakes off and on.
NOTICE:
Don't drive in SECOND (2) for more than
25 miles (41 km), or at speeds over 55 mph
(88 km/h), or you can damage your transaxle.
Use AUTOMATIC OVERDRIVE (D) or
THIRD (3) as much as possible. Don't shift into
SECOND (2) unless you are going slower than
65 mph (105 km/h) or you can damage
your engine.
Page 97 of 341
2-27
FIRST (1): This position gives you even more power
(but lower fuel economy) than SECOND (2). You can
use it on very steep hills, or in deep snow or mud.
If the selector lever is put in FIRST (1), the transaxle
won't shift into first gear until the vehicle is going
slowly enough.
NOTICE:
If your front wheels can't turn, don't try to drive.
This might happen if you were stuck in very deep
sand or mud or were up against a solid object.
You can damage your transaxle.
Also, if you stop when going uphill, don't hold
your vehicle there with only the accelerator
pedal. This could overheat and damage the
transaxle. Use your brakes or shift into PARK (P)
to hold your vehicle in position on a hill.
Manual Transaxle Operation
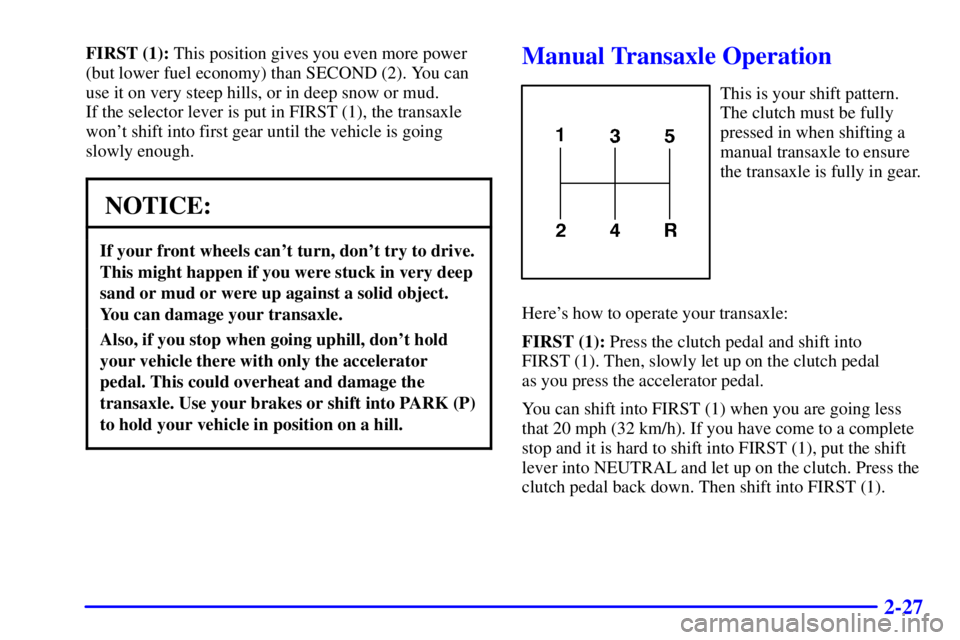
This is your shift pattern.
The clutch must be fully
pressed in when shifting a
manual transaxle to ensure
the transaxle is fully in gear.
Here's how to operate your transaxle:
FIRST (1): Press the clutch pedal and shift into
FIRST (1). Then, slowly let up on the clutch pedal
as you press the accelerator pedal.
You can shift into FIRST (1) when you are going less
that 20 mph (32 km/h). If you have come to a complete
stop and it is hard to shift into FIRST (1), put the shift
lever into NEUTRAL and let up on the clutch. Press the
clutch pedal back down. Then shift into FIRST (1).
Page 98 of 341
2-28
SECOND (2): Press the clutch pedal as you let up on
the accelerator pedal and shift into SECOND (2). Then,
slowly let up on the clutch pedal as you press the
accelerator pedal.
THIRD (3), FOURTH (4) and FIFTH (5): Shift into
THIRD (3), FOURTH (4) and FIFTH (5) the same way
you do for SECOND (2). Slowly let up on the clutch
pedal as you press the accelerator pedal.
To stop, let up on the accelerator pedal and press
the brake pedal. Just before the vehicle stops, press
the clutch pedal and the brake pedal, and shift
to NEUTRAL.
NEUTRAL: Use this position when you start or idle
your engine.REVERSE (R): To back up, press down the clutch
pedal and lift up on the ring on the shift lever to shift
into REVERSE (R). Let up on the clutch pedal slowly
while pressing the accelerator pedal.
NOTICE:
Shift into REVERSE (R) only after your
vehicle is stopped. Shifting into REVERSE (R)
while your vehicle is moving could damage
your transaxle.
Also, use REVERSE (R), along with the parking brakes,
for parking your vehicle.
Once the shift lever is in REVERSE (R) the ignition can
be turned to OFF and the key removed.
Page 100 of 341
2-30
To release the parking brake, hold the regular brake
pedal down. Pull the parking brake handle up until you
can press the release button. Hold the release button in
as you move the brake handle all the way down.
NOTICE:
Driving with the parking brake on can cause
your rear brakes to overheat. You may have to
replace them, and you could also damage other
parts of your vehicle.
If you are towing a trailer and are parking on a hill, see
ªTowing a Trailerº in the Index. That section shows
what to do first to keep the trailer from moving.
Shifting Into PARK (P)
(Automatic Transaxle Only)
CAUTION:
It can be dangerous to get out of your vehicle if
the shift lever is not fully in PARK (P) with the
parking brake firmly set. Your vehicle can roll. If
you have left the engine running, the vehicle can
move suddenly. You or others could be injured.
To be sure your vehicle won't move, even when
you're on fairly level ground, use the steps that
follow. If you're pulling a trailer, see ªTowing a
Trailerº in the Index.
1. Hold the brake pedal down with your right foot and
set the parking brake.
2. Move the shift lever into PARK (P) like this:
Page 110 of 341
2-40
The cruise control will turn off if any of the
following occur:
�The brakes are applied,
�the clutch pedal is applied (manual transaxle),
�the parking brake is applied, or
�the brake system warning light is on.
CAUTION:
�Cruise control can be dangerous where you
can't drive safely at a steady speed. So,
don't use your cruise control on winding
roads or in heavy traffic.
�Cruise control can be dangerous on
slippery roads. On such roads, fast changes
in tire traction can cause needless wheel
spinning, and you could lose control. Don't
use cruise control on slippery roads.
If your vehicle is in cruise control when the enhanced
traction control system begins to limit wheel spin, the
cruise control will automatically disengage.See ªEnhanced Traction Systemº in the Index. When
road conditions allow you to safely use it again, you
may turn the cruise control back on.
Setting Cruise Control
CAUTION:
If you leave your cruise control switch on when
you're not using cruise, you might hit a button
and go into cruise when you don't want to. You
could be startled and even lose control. Keep the
cruise control switch off until you want to use
cruise control.
1. Press the cruise control ON OFF button. The
indicator on the button will turn on.
2. Get up to the speed you want.
3. Press the SET COAST button and release it. The
CRUISE light on the instrument panel will come on.
4. Take your foot off the accelerator pedal.
Page 130 of 341
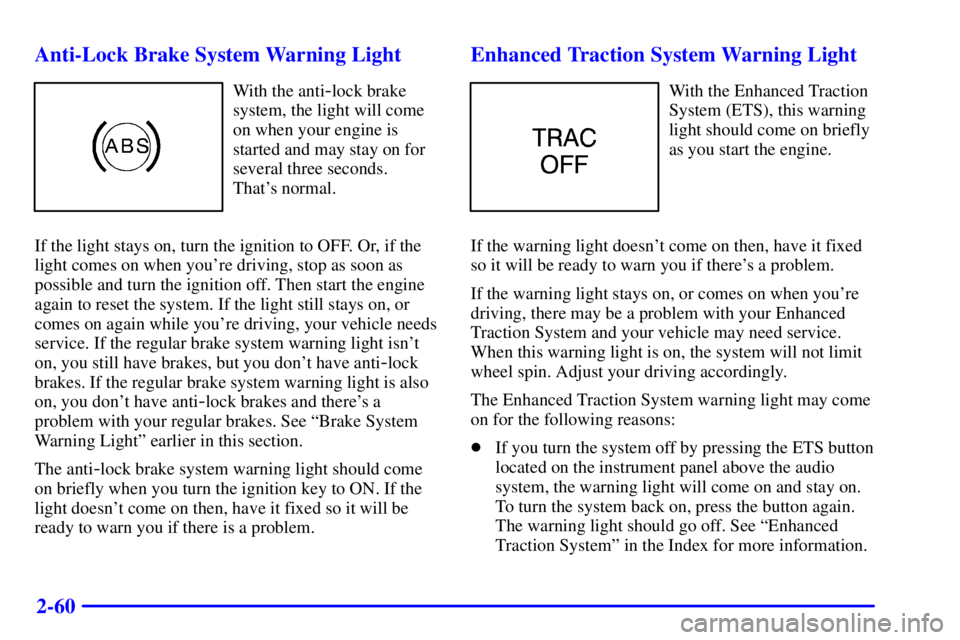
2-60 Anti-Lock Brake System Warning Light
With the anti-lock brake
system, the light will come
on when your engine is
started and may stay on for
several three seconds.
That's normal.
If the light stays on, turn the ignition to OFF. Or, if the
light comes on when you're driving, stop as soon as
possible and turn the ignition off. Then start the engine
again to reset the system. If the light still stays on, or
comes on again while you're driving, your vehicle needs
service. If the regular brake system warning light isn't
on, you still have brakes, but you don't have anti
-lock
brakes. If the regular brake system warning light is also
on, you don't have anti
-lock brakes and there's a
problem with your regular brakes. See ªBrake System
Warning Lightº earlier in this section.
The anti
-lock brake system warning light should come
on briefly when you turn the ignition key to ON. If the
light doesn't come on then, have it fixed so it will be
ready to warn you if there is a problem.
Enhanced Traction System Warning Light
With the Enhanced Traction
System (ETS), this warning
light should come on briefly
as you start the engine.
If the warning light doesn't come on then, have it fixed
so it will be ready to warn you if there's a problem.
If the warning light stays on, or comes on when you're
driving, there may be a problem with your Enhanced
Traction System and your vehicle may need service.
When this warning light is on, the system will not limit
wheel spin. Adjust your driving accordingly.
The Enhanced Traction System warning light may come
on for the following reasons:
�If you turn the system off by pressing the ETS button
located on the instrument panel above the audio
system, the warning light will come on and stay on.
To turn the system back on, press the button again.
The warning light should go off. See ªEnhanced
Traction Systemº in the Index for more information.