Page 113 of 413

2-46
Fog Lamps
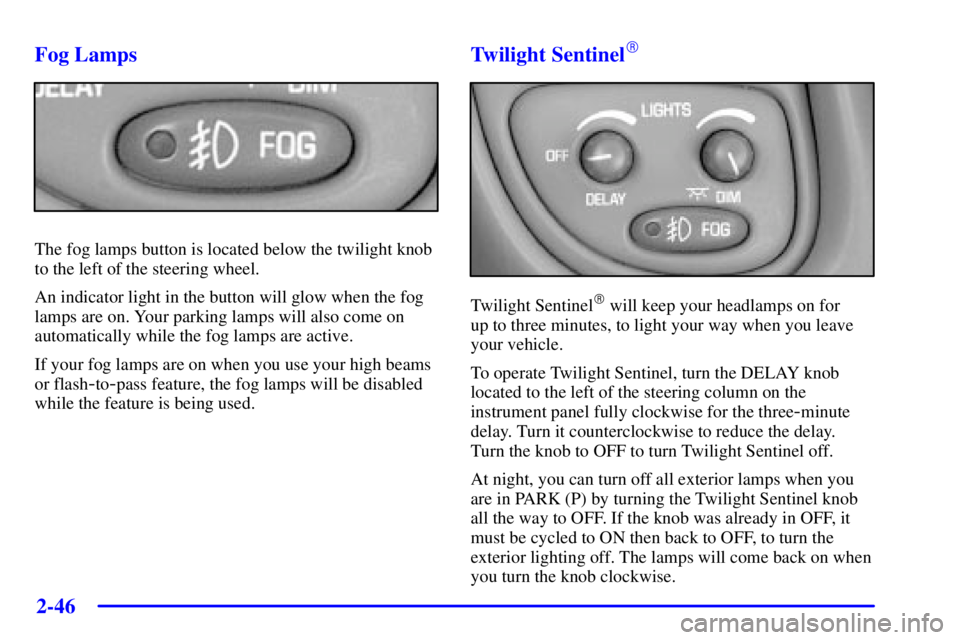
The fog lamps button is located below the twilight knob
to the left of the steering wheel.
An indicator light in the button will glow when the fog
lamps are on. Your parking lamps will also come on
automatically while the fog lamps are active.
If your fog lamps are on when you use your high beams
or flash
-to-pass feature, the fog lamps will be disabled
while the feature is being used.
Twilight Sentinel�
Twilight Sentinel� will keep your headlamps on for
up to three minutes, to light your way when you leave
your vehicle.
To operate Twilight Sentinel, turn the DELAY knob
located to the left of the steering column on the
instrument panel fully clockwise for the three
-minute
delay. Turn it counterclockwise to reduce the delay.
Turn the knob to OFF to turn Twilight Sentinel off.
At night, you can turn off all exterior lamps when you
are in PARK (P) by turning the Twilight Sentinel knob
all the way to OFF. If the knob was already in OFF, it
must be cycled to ON then back to OFF, to turn the
exterior lighting off. The lamps will come back on when
you turn the knob clockwise.
Page 125 of 413

2-58
OnStar� System (If Equipped)
OnStar is a vehicle communications system that
offers a variety of services and provides a hands
-free
communication link between you and the OnStar Center.
A service subscription agreement and fee are required in
order to receive OnStar service. Services are available
24 hours a day, 7 days a week. For more information,
call 1
-888-ONSTAR-7 (1-888-667-8277).
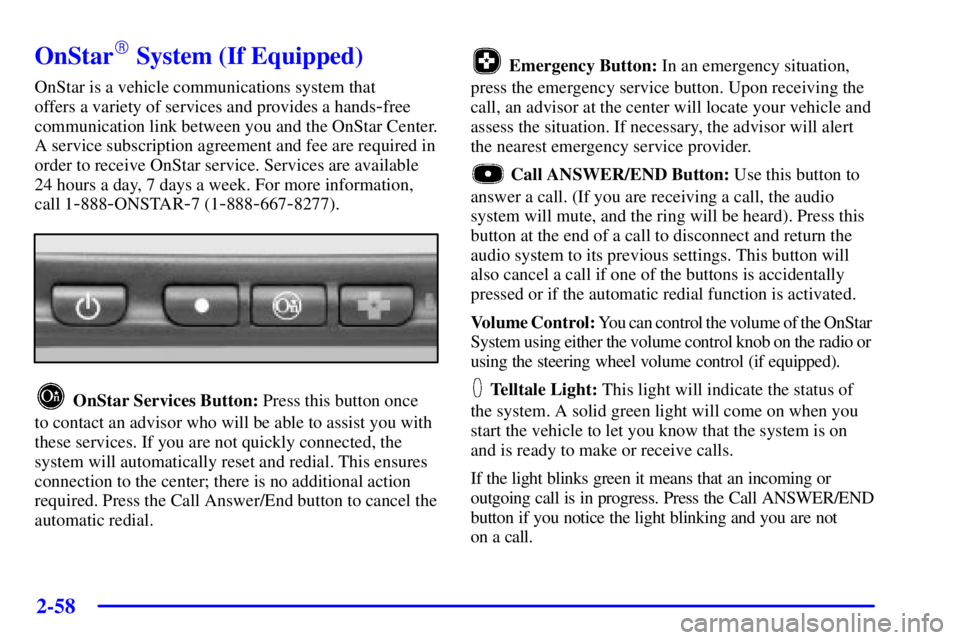
OnStar Services Button: Press this button once
to contact an advisor who will be able to assist you with
these services. If you are not quickly connected, the
system will automatically reset and redial. This ensures
connection to the center; there is no additional action
required. Press the Call Answer/End button to cancel the
automatic redial.
Emergency Button: In an emergency situation,
press the emergency service button. Upon receiving the
call, an advisor at the center will locate your vehicle and
assess the situation. If necessary, the advisor will alert
the nearest emergency service provider.
Call ANSWER/END Button: Use this button to
answer a call. (If you are receiving a call, the audio
system will mute, and the ring will be heard). Press this
button at the end of a call to disconnect and return the
audio system to its previous settings. This button will
also cancel a call if one of the buttons is accidentally
pressed or if the automatic redial function is activated.
Volume Control: You can control the volume of the OnStar
System using either the volume control knob on the radio or
using the steering wheel volume control (if equipped).
Telltale Light: This light will indicate the status of
the system. A solid green light will come on when you
start the vehicle to let you know that the system is on
and is ready to make or receive calls.
If the light blinks green it means that an incoming or
outgoing call is in progress. Press the Call ANSWER/END
button if you notice the light blinking and you are not
on a call.
Page 134 of 413
2-67
The main components of your instrument panel are the following:
A. Air Outlets
B. Turn Signal/Multifunction Lever
C. Audio System Steering Wheel Controls
D. Windshield Wiper Lever
E. Steering Column Shift Lever
F. Driver Information Center (DIC) Controls
(If Equipped)G. Audio System
H. Hazard Warning Flashers Control
I. Twilight Sentinel
� and Fog Lamp Controls
J. Ignition Switch
K. Comfort Control System
L. Glove Box
Page 144 of 413

2-77 Traction Control System Warning
Light (Option)
This warning light should
come on briefly when the
engine is started.
If the warning light doesn't come on then, have it fixed
so it will be ready to warn you if there's a problem. If it
stays on, or comes on when you're driving, there may be
a problem with your traction control system and your
vehicle may need service. When this warning light is on,
the system will not limit wheel spin. Adjust your
driving accordingly.The traction control system warning light may come on
for the following reasons:
�If you turn the system off by pressing the TRACTION
CONTROL button located on the center console, the
warning light will come on and stay on. To turn the
system back on, press the button again. The warning
light should go off. See ªTraction Control Systemº in
the Index for more information.
�If there's a brake system problem that is specifically
related to traction control, the traction control system
will turn off and the warning light will come on. If
your brakes begin to overheat, the traction control
system will turn off and the warning light will come
on until your brakes cool down.
�If the traction control system is affected by an
engine
-related problem, the system will turn off and
the warning light will come on.
If the traction control system warning light comes on
and stays on for an extended period of time when the
system is turned on, your vehicle needs service.
Page 145 of 413

2-78
Low Traction Active (LOW TRAC) Light
Your LOW TRAC
(Low Traction Active) light
may come on for one of the
following reasons:
�An advanced computer
-controlled system called
Stabilitrak� (if equipped) has come on to help your
vehicle continue to go in the direction in which
you're steering. This stability enhancement system
activates when the computer senses that your vehicle
is just starting to spin, as it might if you hit a patch
of ice or other slippery spot on the road. When the
system is on, you may hear a noise or feel a vibration
in the brake pedal. This is normal.
In these situations when the LOW TRAC light is on
and the system is engaged, you should continue to
steer in the direction you want to go. The system is
designed to help you in bad weather or other difficult
driving situations by making the most of whatever
road conditions will permit.�The optional Traction Control System is active
and is limiting wheel spin. You may feel the system
working, but this is normal. Slippery road conditions
may exist, so adjust your driving accordingly.
If the LOW TRAC light comes on, slippery road
conditions may exist, so you should consider slowing
down and adjusting your driving accordingly.
Engine Coolant Temperature Gage
United States Canada
This gage shows the engine coolant temperature.
Page 174 of 413

3-
3-1
Section 3 Comfort Controls and Audio Systems
In this section, you'll find out how to operate the comfort control and audio systems offered with your vehicle.
Be sure to read about the particular systems supplied with your vehicle.
3
-2 Comfort Controls
3
-8 Air Conditioning
3
-9 Heating
3
-9 Defogging and Defrosting
3
-10 Rear Window Defogger
3
-10 Ventilation System
3
-12 Audio Systems
3
-12 Setting the Clock for Systems with
Radio Data System
3
-13 AM-FM Stereo with Cassette Tape Player
with Programmable Equalization and Radio
Data System (RDS) (If Equipped)
3
-20 AM-FM Stereo with Compact Disc Player
with Programmable Equalization and Radio
Data System (RDS) (If Equipped)3
-27 AM-FM Stereo with Cassette Tape
and Compact Disc Player with
Programmable Equalization and
Radio Data System (RDS) (If Equipped)
3
-36 Trunk-Mounted CD Changer (Option)
3
-40 Theft-Deterrent Feature RDS Radios
3
-40 Audio Steering Wheel Controls (If Equipped)
3
-41 Understanding Radio Reception
3
-42 Tips About Your Audio System
3
-42 Care of Your Cassette Tape Player
3
-43 Care of Your Compact Discs
3
-43 Care of Your Compact Disc Player
3
-44 Diversity Antenna System
3
-44 Chime Level Adjustment
Page 213 of 413

3-40
TRACK SCAN: Press and hold one of the SEEK
arrows for two seconds until TRACK SCAN appears on
the display and you hear a beep. You will hear the first
few seconds of each track on the current disc. The sound
will mute while scanning. The SCAN icon will be lit
and the T will blink to indicate track scan mode.
Press SEEK again to stop TRACK SCAN.
DISC SCAN: Press and hold one of the SEEK arrows
for four seconds until DISC SCAN appears on the
display and you hear a double beep. You will hear the
first few seconds of track one on each disc. The sound
will mute while scanning. The SCAN icon will be lit
and the D will blink to indicate disc scan mode.
Press SEEK again to stop DISC SCAN.
Theft-Deterrent Feature RDS Radios
THEFTLOCK� is designed to discourage theft of your
radio. The feature works automatically by learning a
portion of the Vehicle Identification Number (VIN).
If the radio is moved to a different vehicle, it will not
operate and LOCKED will be displayed.
With THEFTLOCK activated, your radio will not
operate if stolen.
Audio Steering Wheel Controls
(If Equipped)
If your vehicle has this feature, you can control certain
radio functions using the buttons on your steering wheel.
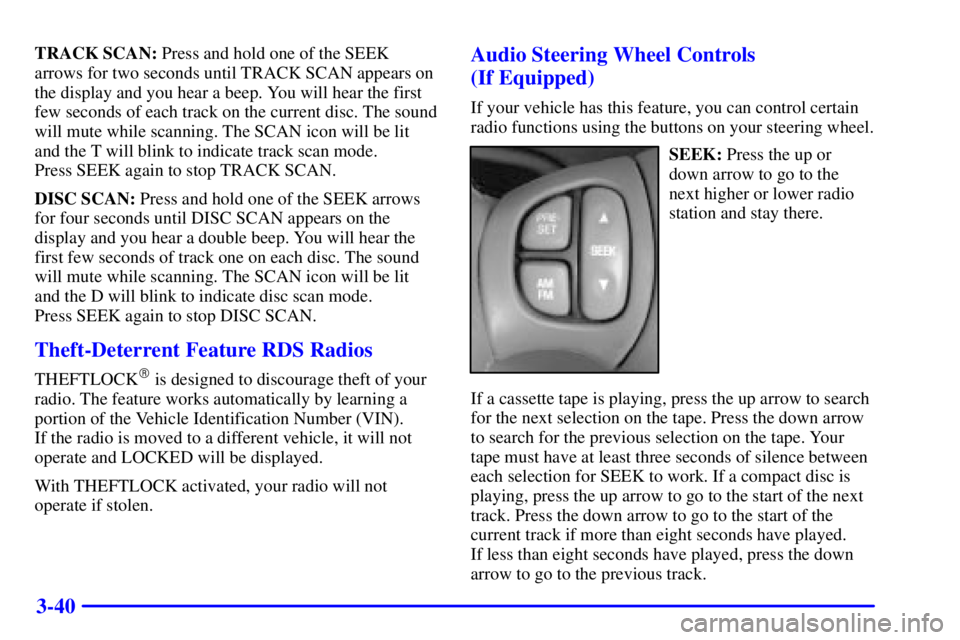
SEEK: Press the up or
down arrow to go to the
next higher or lower radio
station and stay there.
If a cassette tape is playing, press the up arrow to search
for the next selection on the tape. Press the down arrow
to search for the previous selection on the tape. Your
tape must have at least three seconds of silence between
each selection for SEEK to work. If a compact disc is
playing, press the up arrow to go to the start of the next
track. Press the down arrow to go to the start of the
current track if more than eight seconds have played.
If less than eight seconds have played, press the down
arrow to go to the previous track.
Page 225 of 413
4-8
Here's how anti-lock works. Let's say the road is wet.
You're driving safely. Suddenly an animal jumps out in
front of you.
You slam on the brakes and continue braking.
Here's what happens with ABS.
A computer senses that wheels are slowing down. If one
of the wheels is about to stop rolling, the computer will
separately work the brakes at each front wheel and at
both rear wheels.The anti
-lock system can change the brake pressure
faster than any driver could. The computer is
programmed to make the most of available tire and road
conditions. This can help you steer around the obstacle
while braking hard.
As you brake, your computer keeps receiving updates on
wheel speed and controls braking pressure accordingly.