Page 109 of 436

2-17
Entering Programming Mode
To program features, your vehicle must be in the
programming mode. Follow these steps:
1. The optional content theft
-deterrent system must
be disarmed. See ªContent Theft
-Deterrent Systemº
in this section.
2. Remove fuse 47 from the instrument panel fuse
block, located to the right of the glove box. See
ªFuses and Circuit Breakersº in the Index.
3. Close the driver's door.
4. Turn the ignition key towards you to ACCESSORY.
5. Count the number of chimes you hear. You will
hear two to four chimes depending on the features
your vehicle is equipped with. Refer to the chart
shown previously.
You can now program your choices.
To exit the programming mode, follow the steps
listed under ªExiting Programming Modeº later in
this section.
Delayed Illumination and Exit Lighting
With delayed illumination, the interior lamps will stay
on for about 25 seconds after all the doors and the
liftgate are closed.
With exit lighting, the interior lamps will come on and
stay on for about 25 seconds whenever you remove the
key from the ignition.
Programmable Modes
Mode 1: Both Features Off (The interior lamps will
turn on or off at the same instant that a door is opened
or closed.)
Mode 2: Delayed Illumination Only (The interior lamps
will stay on for about 25 seconds after all the doors and
liftgate are closed, or until you lock the doors.)
Mode 3: Exit Lighting Only (The interior lamps
will come on whenever you remove the key from the
ignition and stay on for about 25 seconds, or until
you lock the doors.)
Mode 4: Both Features On (This combines
Modes 2 and 3.)
Page 129 of 436
2-37
Parking at Night
Park in a lighted spot, close all windows and lock your
vehicle. Remember to keep your valuables out of sight.
Put them in a storage area, or take them with you.
Parking Lots
Even if you park in a lot where someone will be watching
your vehicle, it's still best to lock it up and take your key.
But what if you have to leave your key? What if you
have to leave something valuable in your vehicle?
�Put your valuables in a storage area, like your
glove box.
�If your vehicle has a remote keyless entry system,
take the transmitter with you.
�Lock all the doors except the driver's.
Content Theft-Deterrent (Option)
If your vehicle has this option, it has a theft-deterrent
alarm system.
A light located on top of your instrument panel (near the
center of the vehicle, next to the windshield) will flash
slowly to let you know that the system has been armed.
While armed, the doors will not unlock with the power
door lock switch.
Page 159 of 436

2-67
Interior Lamps
Instrument Panel Intensity Control
Turn the thumbwheel, located below the headlamps
control, clockwise to increase the brightness of the
instrument panel lights, and counterclockwise to
decrease the brightness. Turn the thumbwheel all the
way counterclockwise to turn them off.
Interior Lamps Control
Turn the thumbwheel all the way clockwise to turn on
the interior lamps, if the interior lamps override switch
is off. Turn the thumbwheel counterclockwise to turn
the lamps off.
Interior Lamps Override Switch
This switch is located
in the overhead
console switchbank.
Press the symbol on the bottom of the switch to
override control of the interior lamps and turn off power
to the courtesy lamps, reading lamps, visor vanity lamps
(if equipped) and glove box lamp. This feature allows
you to have the lamps off when any door is open.
Press the top of the interior lamps override switch to
turn power back on to the interior lamps. This will
allow the lamps to stay on when any door is open.
Page 164 of 436

2-72 Convex Outside Mirror
Your passenger's side mirror is convex. A convex
mirror's surface is curved so you can see more from
the driver's seat.
CAUTION:
A convex mirror can make things (like other
vehicles) look farther away than they really are.
If you cut too sharply into the right lane, you
could hit a vehicle on your right. Check your
inside mirror or glance over your shoulder
before changing lanes.
Heated Outside Mirrors
The outside rearview mirrors are heated when you
activate the rear window defogger. See ªRear Window
Defoggerº in the Index.
Storage Compartments
Your vehicle's large carrying capacity can store many
items. You can carry things as large as a 4� x 8� piece
of plywood. You can also use the floor pins that are used
to attach the seats, to secure larger loads.
Glove Box
Your vehicle has a glove box below the instrument
panel. To open the glove box, lift the latch release.
Use the key to lock or unlock the glove box.
The glove box door has a detent to prevent the door
from lowering too far. Open the glove box until the door
is partway open, then pull the door down if you need it
fully open. To close the glove box, the door must be
pushed up past the detent.
In the door of the glove box, you will find a tissue pack
holder and clip for a pen or pencil.
Page 167 of 436
2-75
5. Add one peg at a time until your garage door opener
operates with the compartment door closed when
you press the button.
Storage Bin
At the base of the center instrument panel console,
there is a storage bin. To open the bin, lift the latch
release and the door will fold down.
Inside the bin, you will find a tray that slides out.
Slide the tray all the way toward the rear of the vehicle
until the tray locks onto the plastic tabs at the end of the
guide rails. The tray can hold CDs or cassettes in the
center area. You can also store cassettes in the left and
right side area. The tray can be removed for cleaning
or when you want to replace the selection of CDs or
cassettes. Slide the tray back into the storage bin before
closing the bin door. The tray can also be placed in the
glove box for locked storage if desired.
Page 177 of 436
2-85
Accessory Inflator System (Option)
Your vehicle may have an air inflator. With it, you can
inflate things like air mattresses and basketballs, and
you can also use it to bring your tires up to the
proper pressure.
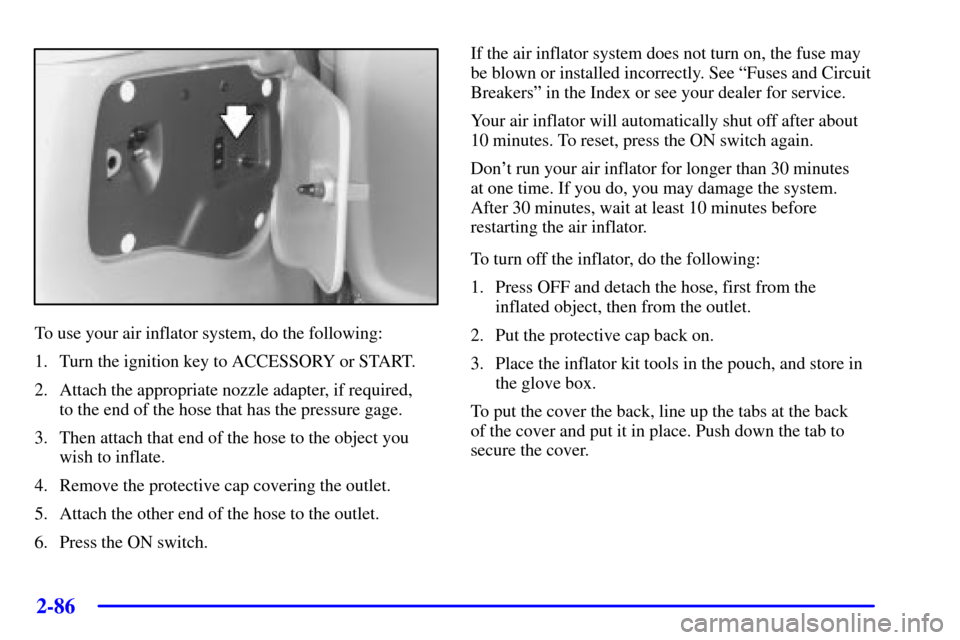
The air inflator is located in the rear compartment on
the driver's side. To remove the cover, pull the tab
on the cover and pull it off.
The air inflator kit is stored in the glove box. It includes
a 20
-foot (6 m) hose with an air pressure gage and
nozzle adapters.
CAUTION:
Inflating something too much can make it explode,
and you or others could be injured. Be sure to read
the inflator instructions, and inflate any object
only to its recommended pressure.
Page 178 of 436

2-86
To use your air inflator system, do the following:
1. Turn the ignition key to ACCESSORY or START.
2. Attach the appropriate nozzle adapter, if required,
to the end of the hose that has the pressure gage.
3. Then attach that end of the hose to the object you
wish to inflate.
4. Remove the protective cap covering the outlet.
5. Attach the other end of the hose to the outlet.
6. Press the ON switch.If the air inflator system does not turn on, the fuse may
be blown or installed incorrectly. See ªFuses and Circuit
Breakersº in the Index or see your dealer for service.
Your air inflator will automatically shut off after about
10 minutes. To reset, press the ON switch again.
Don't run your air inflator for longer than 30 minutes
at one time. If you do, you may damage the system.
After 30 minutes, wait at least 10 minutes before
restarting the air inflator.
To turn off the inflator, do the following:
1. Press OFF and detach the hose, first from the
inflated object, then from the outlet.
2. Put the protective cap back on.
3. Place the inflator kit tools in the pouch, and store in
the glove box.
To put the cover the back, line up the tabs at the back
of the cover and put it in place. Push down the tab to
secure the cover.
Page 187 of 436
2-95
The main components of the instrument panel are the following:
A. Side Vents
B. Front Vents
C. Turn Signal/Multifunction Lever
D. Hazard Warning Flasher Switch
E. Instrument Panel Cluster
F. Center Vents
G. Audio System
H. Side Vents
I. Exterior Lamp Control
J. Hood Release
K. Audio Steering Wheel Controls (Option)
L. HornM. Ignition Switch
N. Audio Steering Wheel Controls (Option)
O. Climate Controls
P. Rear Fan Controls (Option)
Q. Cupholder Tray
R. Accessory Power Outlet
S. Storage Bin
T. Instrument Panel Switchbank
U. Glove Box
V. Front Vents
W. Instrument Panel Fuse Block