2001 NISSAN SENTRA high beam
[x] Cancel search: high beamPage 52 of 240
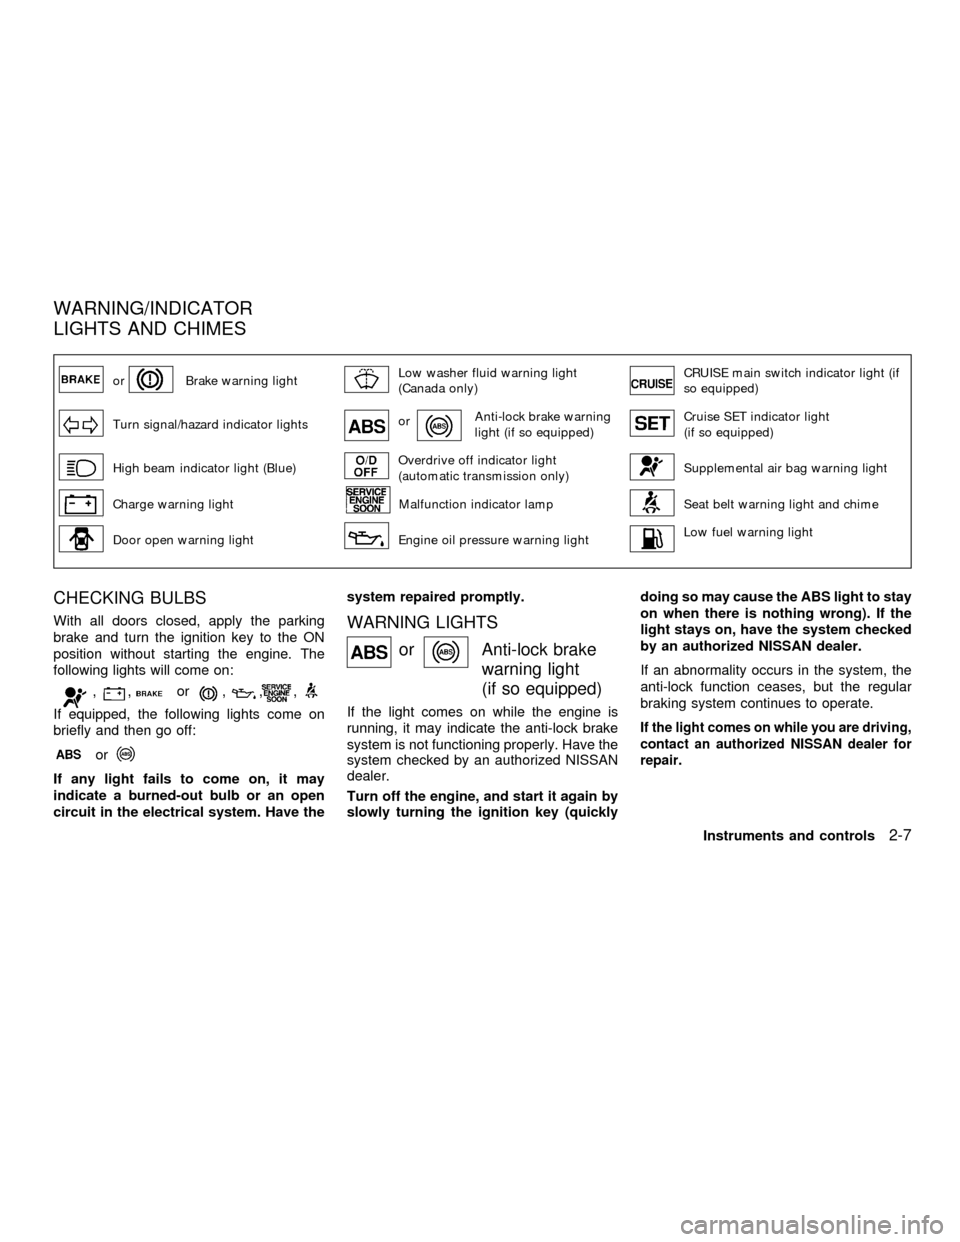
orBrake warning lightLow washer fluid warning light
(Canada only)CRUISE main switch indicator light (if
so equipped)
Turn signal/hazard indicator lightsorAnti-lock brake warning
light (if so equipped)Cruise SET indicator light
(if so equipped)
High beam indicator light (Blue)Overdrive off indicator light
(automatic transmission only)Supplemental air bag warning light
Charge warning lightMalfunction indicator lampSeat belt warning light and chime
Door open warning lightEngine oil pressure warning lightLow fuel warning light
CHECKING BULBS
With all doors closed, apply the parking
brake and turn the ignition key to the ON
position without starting the engine. The
following lights will come on:
,,or,,,
If equipped, the following lights come on
briefly and then go off:
or
If any light fails to come on, it may
indicate a burned-out bulb or an open
circuit in the electrical system. Have thesystem repaired promptly.
WARNING LIGHTS
orAnti-lock brake
warning light
(if so equipped)
If the light comes on while the engine is
running, it may indicate the anti-lock brake
system is not functioning properly. Have the
system checked by an authorized NISSAN
dealer.
Turn off the engine, and start it again by
slowly turning the ignition key (quicklydoing so may cause the ABS light to stay
on when there is nothing wrong). If the
light stays on, have the system checked
by an authorized NISSAN dealer.
If an abnormality occurs in the system, the
anti-lock function ceases, but the regular
braking system continues to operate.If the light comes on while you are driving,
contact an authorized NISSAN dealer for
repair.
WARNING/INDICATOR
LIGHTS AND CHIMES
Instruments and controls2-7
ZX
Page 55 of 240
functioning properly. Have the system
checked by your authorized NISSAN
dealer.
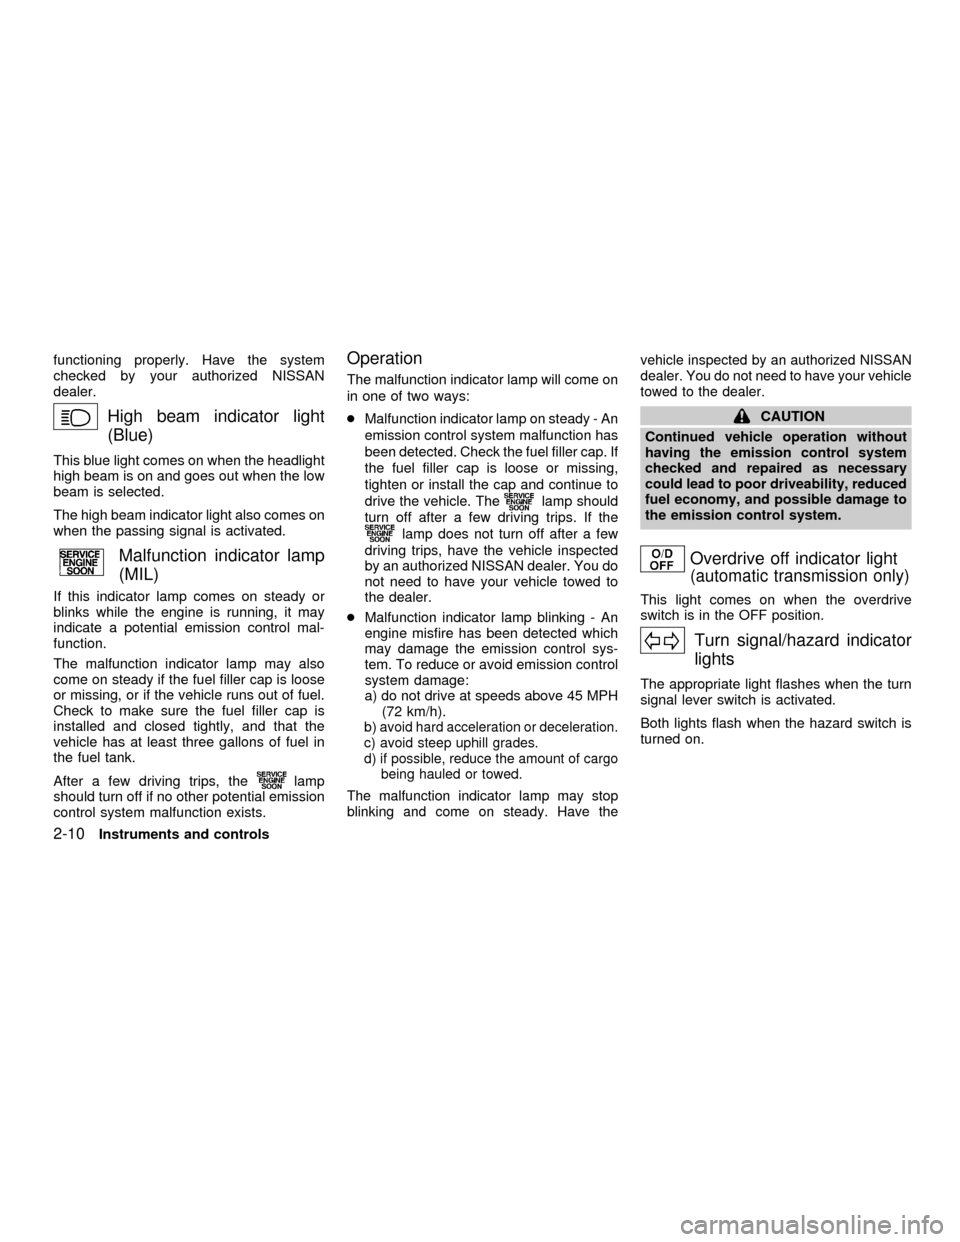
High beam indicator light
(Blue)
This blue light comes on when the headlight
high beam is on and goes out when the low
beam is selected.
The high beam indicator light also comes on
when the passing signal is activated.
Malfunction indicator lamp
(MIL)
If this indicator lamp comes on steady or
blinks while the engine is running, it may
indicate a potential emission control mal-
function.
The malfunction indicator lamp may also
come on steady if the fuel filler cap is loose
or missing, or if the vehicle runs out of fuel.
Check to make sure the fuel filler cap is
installed and closed tightly, and that the
vehicle has at least three gallons of fuel in
the fuel tank.
After a few driving trips, the
lamp
should turn off if no other potential emission
control system malfunction exists.
Operation
The malfunction indicator lamp will come on
in one of two ways:
cMalfunction indicator lamp on steady - An
emission control system malfunction has
been detected. Check the fuel filler cap. If
the fuel filler cap is loose or missing,
tighten or install the cap and continue to
drive the vehicle. The
lamp should
turn off after a few driving trips. If the
lamp does not turn off after a few
driving trips, have the vehicle inspected
by an authorized NISSAN dealer. You do
not need to have your vehicle towed to
the dealer.
cMalfunction indicator lamp blinking - An
engine misfire has been detected which
may damage the emission control sys-
tem. To reduce or avoid emission control
system damage:
a) do not drive at speeds above 45 MPH
(72 km/h).
b)
avoid hard acceleration or deceleration.
c) avoid steep uphill grades.
d) if possible, reduce the amount of cargo
being hauled or towed.
The malfunction indicator lamp may stop
blinking and come on steady. Have thevehicle inspected by an authorized NISSAN
dealer. You do not need to have your vehicle
towed to the dealer.
CAUTION
Continued vehicle operation without
having the emission control system
checked and repaired as necessary
could lead to poor driveability, reduced
fuel economy, and possible damage to
the emission control system.
Overdrive off indicator light
(automatic transmission only)
This light comes on when the overdrive
switch is in the OFF position.
Turn signal/hazard indicator
lights
The appropriate light flashes when the turn
signal lever switch is activated.
Both lights flash when the hazard switch is
turned on.
2-10Instruments and controls
ZX
Page 61 of 240
To defog the rear window glass, start the
engine and push the rear window defogger
switch on. (The indicator light on the switch
comes on.) Push the switch again to turn
the defogger off.
The rear window defogger switch automati-
cally turns off after approximately 15 min-
utes.
CAUTION
When cleaning the inner side of the
rear window, be careful not to scratch
or damage the rear window defogger.
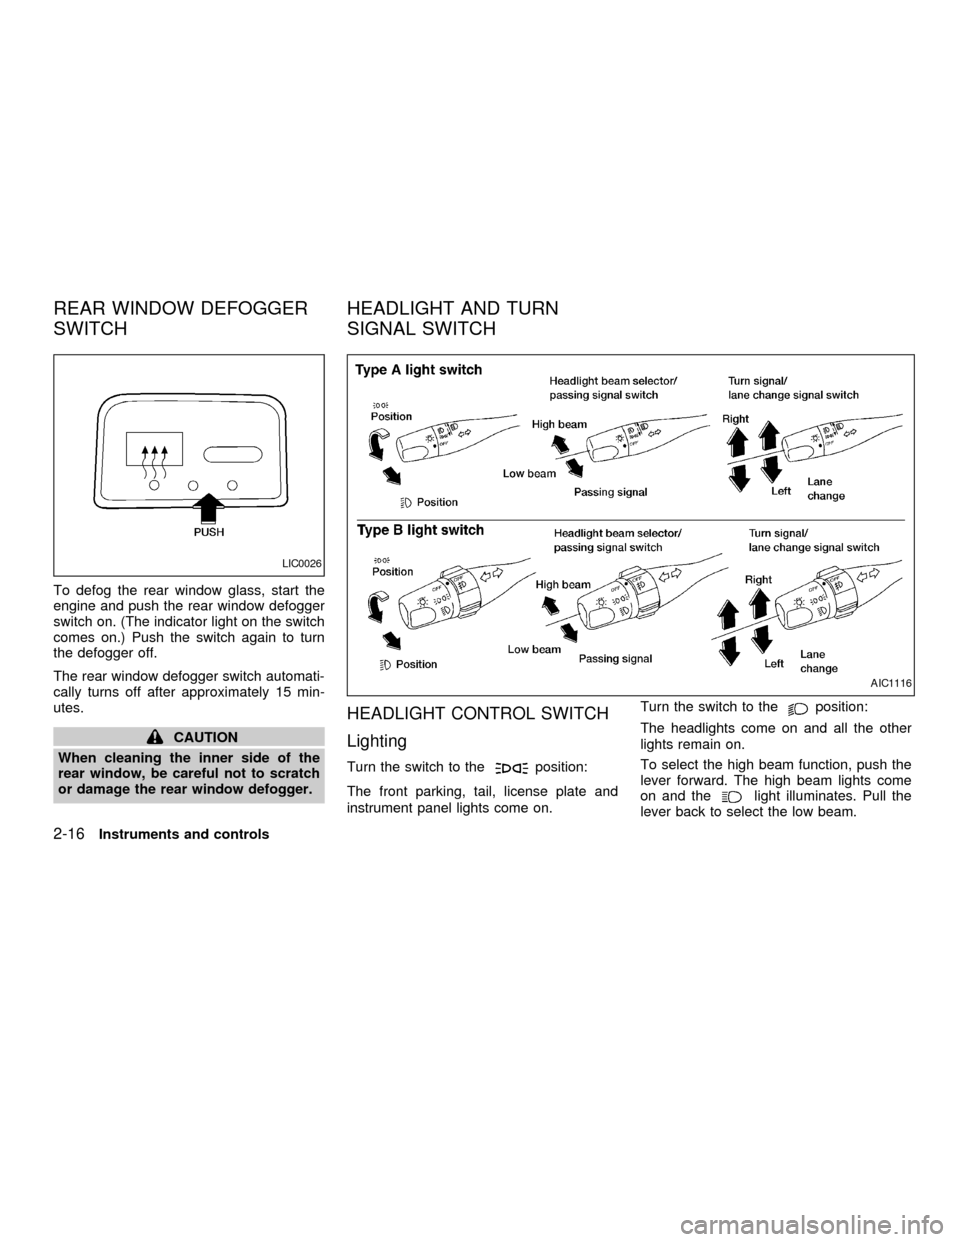
HEADLIGHT CONTROL SWITCH
Lighting
Turn the switch to theposition:
The front parking, tail, license plate and
instrument panel lights come on.Turn the switch to the
position:
The headlights come on and all the other
lights remain on.
To select the high beam function, push the
lever forward. The high beam lights come
on and the
light illuminates. Pull the
lever back to select the low beam.
LIC0026
AIC1116
REAR WINDOW DEFOGGER
SWITCHHEADLIGHT AND TURN
SIGNAL SWITCH
2-16Instruments and controls
ZX
Page 62 of 240
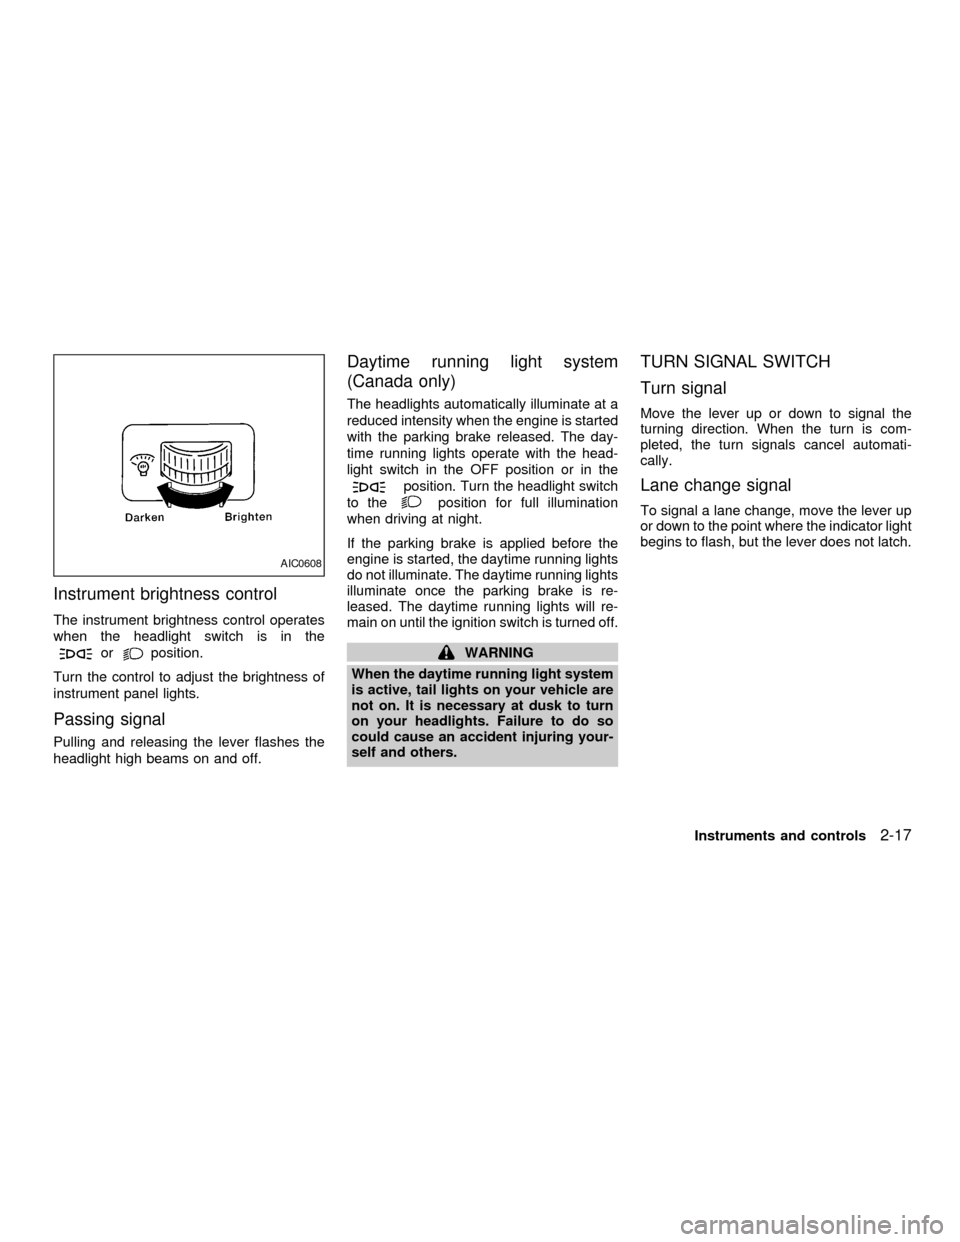
Instrument brightness control
The instrument brightness control operates
when the headlight switch is in the
orposition.
Turn the control to adjust the brightness of
instrument panel lights.
Passing signal
Pulling and releasing the lever flashes the
headlight high beams on and off.
Daytime running light system
(Canada only)
The headlights automatically illuminate at a
reduced intensity when the engine is started
with the parking brake released. The day-
time running lights operate with the head-
light switch in the OFF position or in the
position. Turn the headlight switch
to the
position for full illumination
when driving at night.
If the parking brake is applied before the
engine is started, the daytime running lights
do not illuminate. The daytime running lights
illuminate once the parking brake is re-
leased. The daytime running lights will re-
main on until the ignition switch is turned off.
WARNING
When the daytime running light system
is active, tail lights on your vehicle are
not on. It is necessary at dusk to turn
on your headlights. Failure to do so
could cause an accident injuring your-
self and others.
TURN SIGNAL SWITCH
Turn signal
Move the lever up or down to signal the
turning direction. When the turn is com-
pleted, the turn signals cancel automati-
cally.
Lane change signal
To signal a lane change, move the lever up
or down to the point where the indicator light
begins to flash, but the lever does not latch.
AIC0608
Instruments and controls2-17
ZX
Page 63 of 240
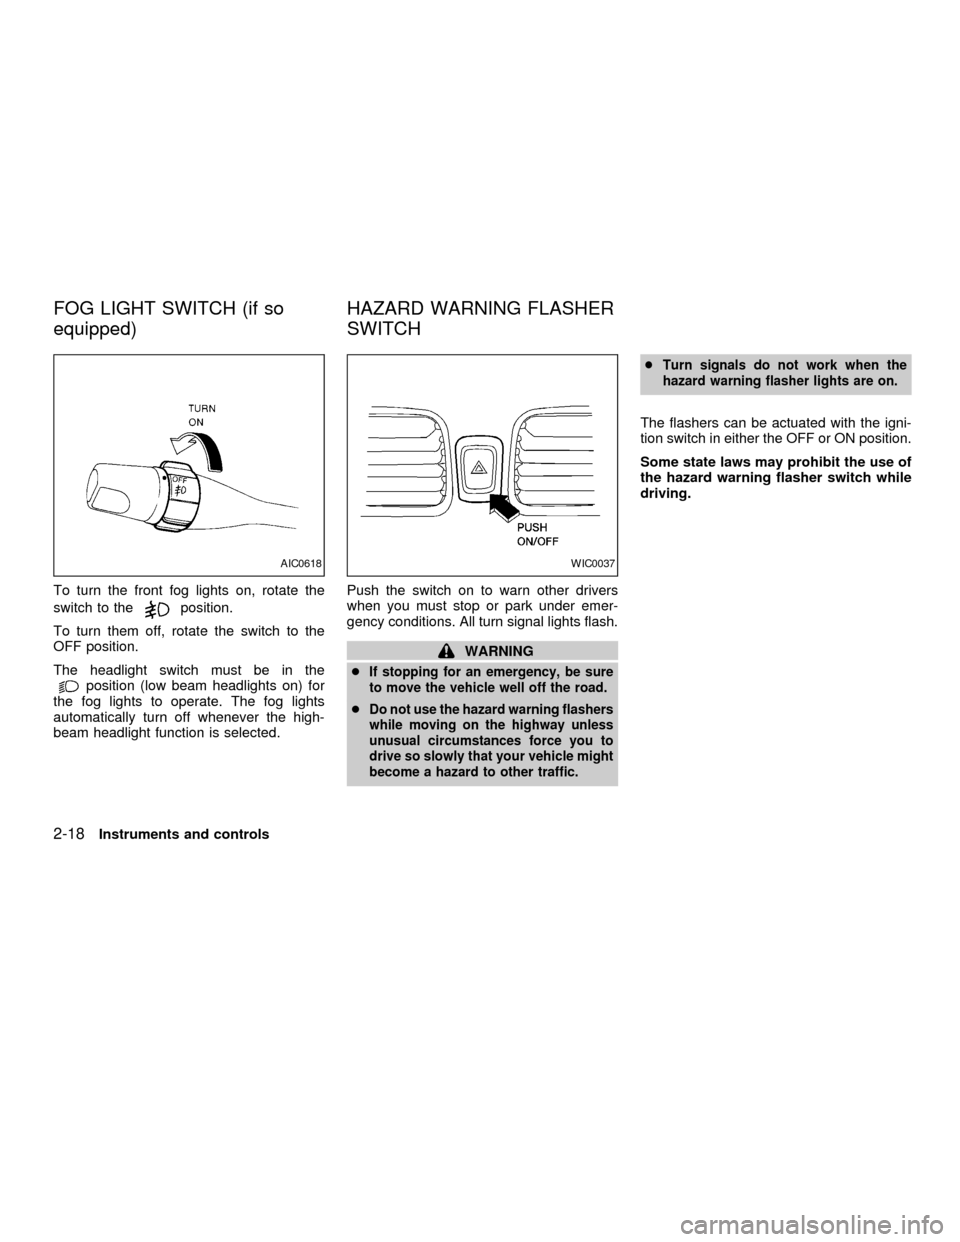
To turn the front fog lights on, rotate the
switch to the
position.
To turn them off, rotate the switch to the
OFF position.
The headlight switch must be in the
position (low beam headlights on) for
the fog lights to operate. The fog lights
automatically turn off whenever the high-
beam headlight function is selected.Push the switch on to warn other drivers
when you must stop or park under emer-
gency conditions. All turn signal lights flash.
WARNING
c
If stopping for an emergency, be sure
to move the vehicle well off the road.
cDo not use the hazard warning flashers
while moving on the highway unless
unusual circumstances force you to
drive so slowly that your vehicle might
become a hazard to other traffic.cTurn signals do not work when the
hazard warning flasher lights are on.
The flashers can be actuated with the igni-
tion switch in either the OFF or ON position.
Some state laws may prohibit the use of
the hazard warning flasher switch while
driving.
AIC0618WIC0037
FOG LIGHT SWITCH (if so
equipped)HAZARD WARNING FLASHER
SWITCH
2-18Instruments and controls
ZX
Page 186 of 240
HEADLIGHTS
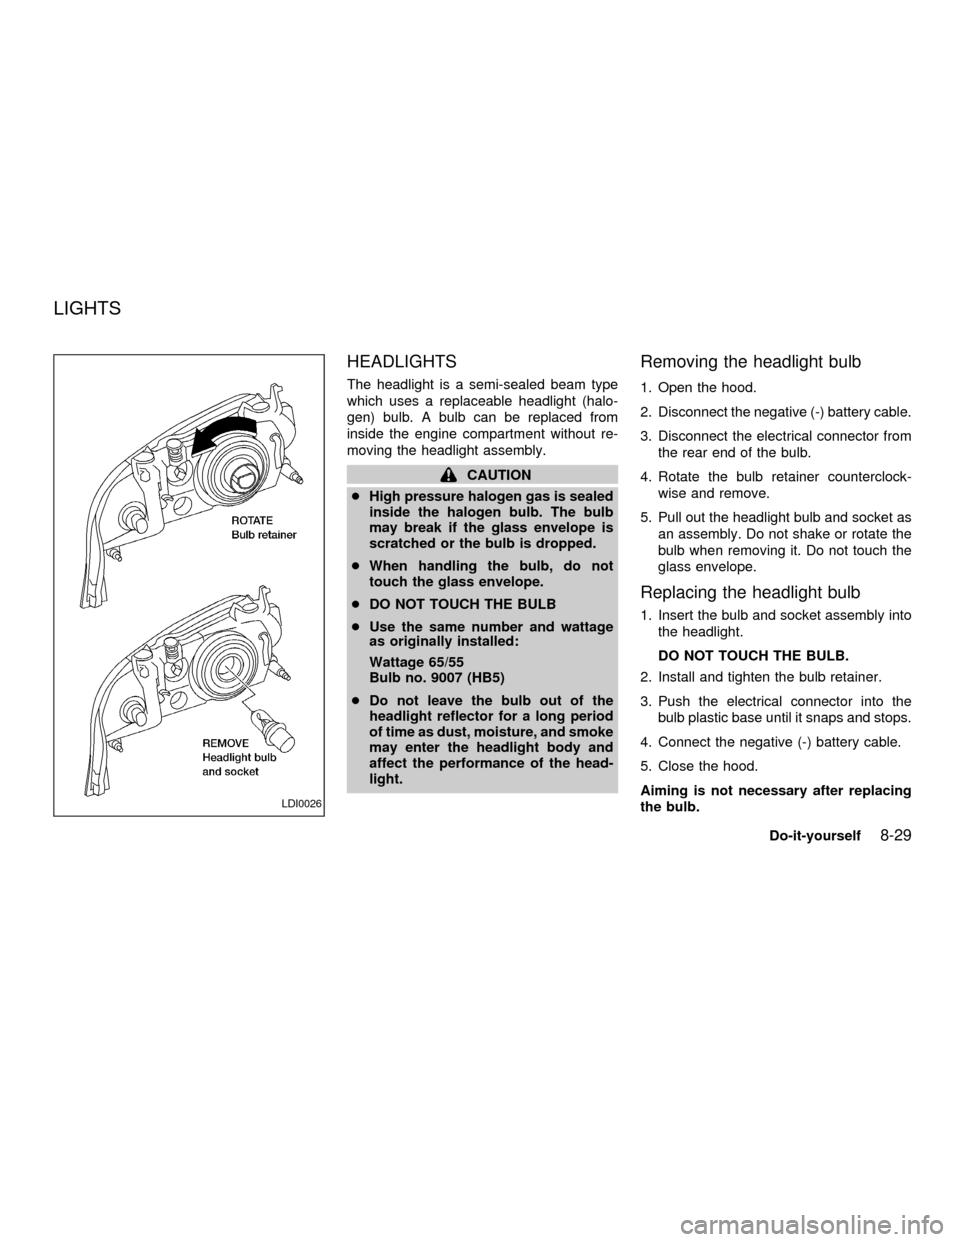
The headlight is a semi-sealed beam type
which uses a replaceable headlight (halo-
gen) bulb. A bulb can be replaced from
inside the engine compartment without re-
moving the headlight assembly.
CAUTION
cHigh pressure halogen gas is sealed
inside the halogen bulb. The bulb
may break if the glass envelope is
scratched or the bulb is dropped.
cWhen handling the bulb, do not
touch the glass envelope.
cDO NOT TOUCH THE BULB
cUse the same number and wattage
as originally installed:
Wattage 65/55
Bulb no. 9007 (HB5)
cDo not leave the bulb out of the
headlight reflector for a long period
of time as dust, moisture, and smoke
may enter the headlight body and
affect the performance of the head-
light.
Removing the headlight bulb
1. Open the hood.
2. Disconnect the negative (-) battery cable.
3. Disconnect the electrical connector from
the rear end of the bulb.
4. Rotate the bulb retainer counterclock-
wise and remove.
5. Pull out the headlight bulb and socket as
an assembly. Do not shake or rotate the
bulb when removing it. Do not touch the
glass envelope.
Replacing the headlight bulb
1. Insert the bulb and socket assembly into
the headlight.
DO NOT TOUCH THE BULB.
2. Install and tighten the bulb retainer.
3. Push the electrical connector into the
bulb plastic base until it snaps and stops.
4. Connect the negative (-) battery cable.
5. Close the hood.
Aiming is not necessary after replacing
the bulb.
LDI0026
LIGHTS
Do-it-yourself8-29
ZX