2001 NISSAN SENTRA Battery
[x] Cancel search: BatteryPage 64 of 240
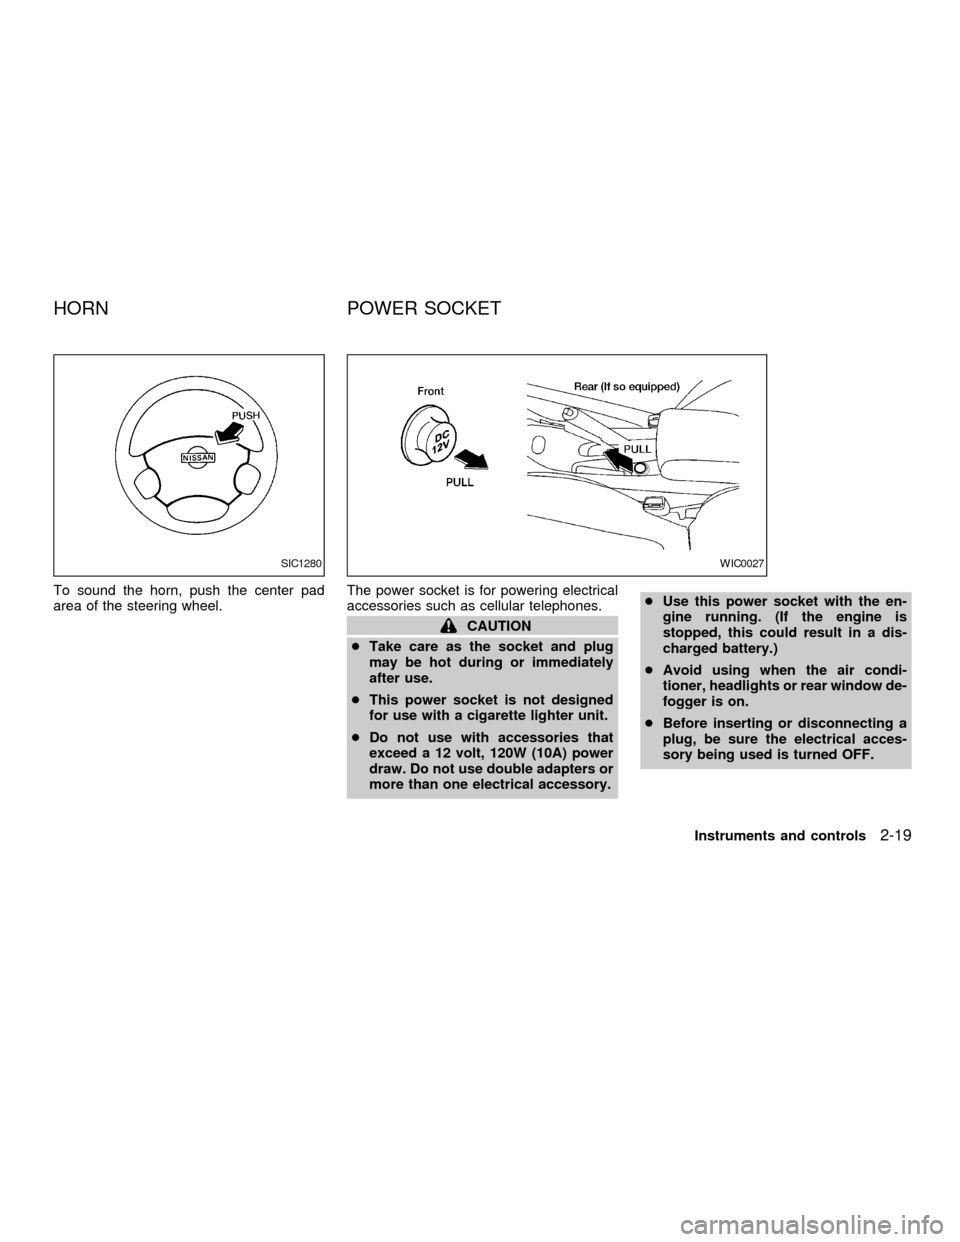
To sound the horn, push the center pad
area of the steering wheel.The power socket is for powering electrical
accessories such as cellular telephones.
CAUTION
cTake care as the socket and plug
may be hot during or immediately
after use.
cThis power socket is not designed
for use with a cigarette lighter unit.
cDo not use with accessories that
exceed a 12 volt, 120W (10A) power
draw. Do not use double adapters or
more than one electrical accessory.cUse this power socket with the en-
gine running. (If the engine is
stopped, this could result in a dis-
charged battery.)
cAvoid using when the air condi-
tioner, headlights or rear window de-
fogger is on.
cBefore inserting or disconnecting a
plug, be sure the electrical acces-
sory being used is turned OFF.
SIC1280WIC0027
HORN POWER SOCKET
Instruments and controls2-19
ZX
Page 71 of 240
The sunroof only operates with the ignition
key in the ON position.
NOTE:
If the battery is discharged or is discon-
nected, the sunroof may not operate cor-
rectly, and must be reset.
From any sunroof position (full open, par-
tially open, closed, partially vented and
vented), push and hold the button in the
forward position until the sunroof vents in
the full-up position. This resets the sunroof
motor memory and now the sunroof will
operate correctly.
Sliding the sunroof
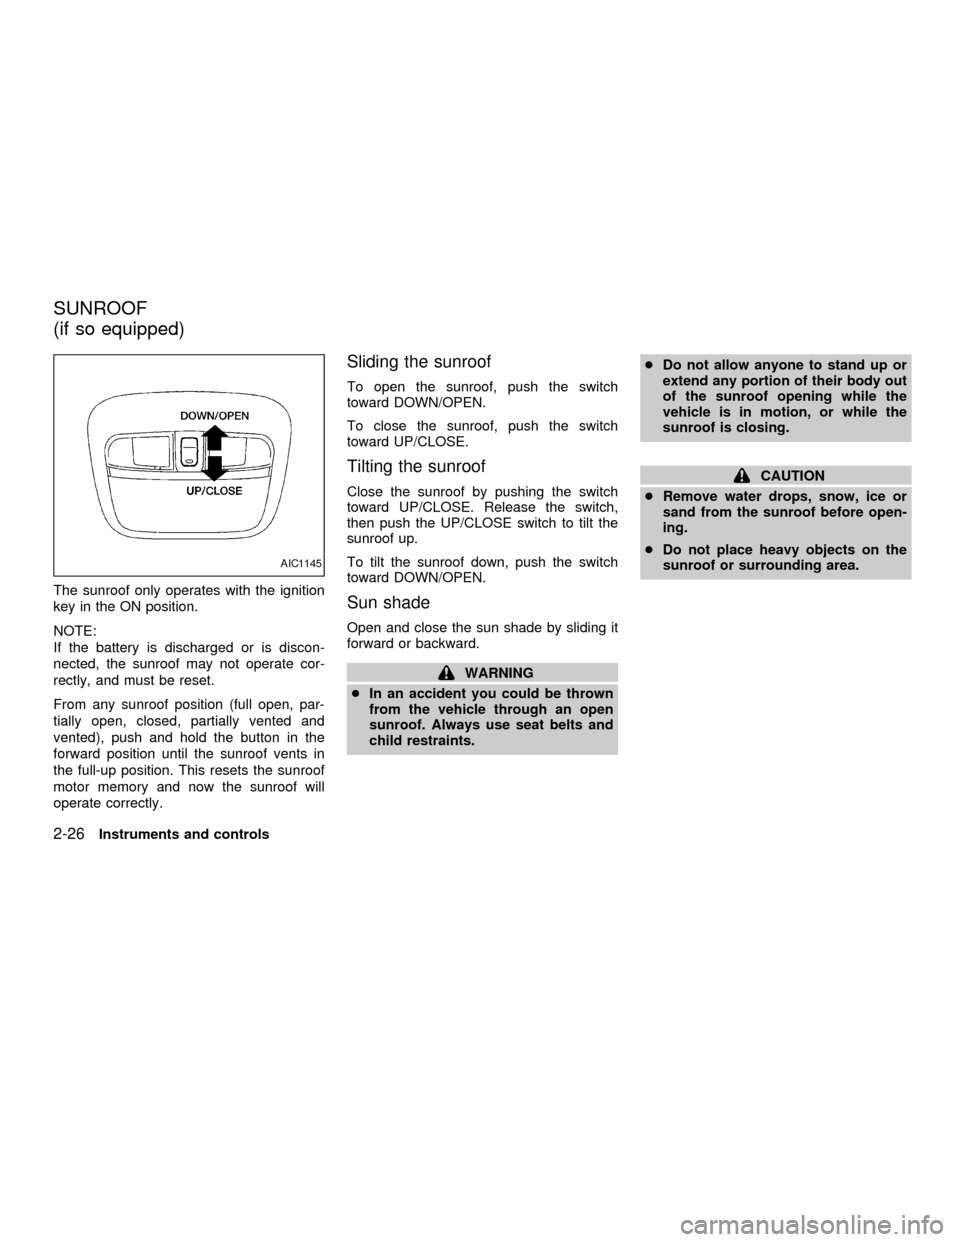
To open the sunroof, push the switch
toward DOWN/OPEN.
To close the sunroof, push the switch
toward UP/CLOSE.
Tilting the sunroof
Close the sunroof by pushing the switch
toward UP/CLOSE. Release the switch,
then push the UP/CLOSE switch to tilt the
sunroof up.
To tilt the sunroof down, push the switch
toward DOWN/OPEN.
Sun shade
Open and close the sun shade by sliding it
forward or backward.
WARNING
cIn an accident you could be thrown
from the vehicle through an open
sunroof. Always use seat belts and
child restraints.cDo not allow anyone to stand up or
extend any portion of their body out
of the sunroof opening while the
vehicle is in motion, or while the
sunroof is closing.
CAUTION
cRemove water drops, snow, ice or
sand from the sunroof before open-
ing.
cDo not place heavy objects on the
sunroof or surrounding area.
AIC1145
SUNROOF
(if so equipped)
2-26Instruments and controls
ZX
Page 72 of 240
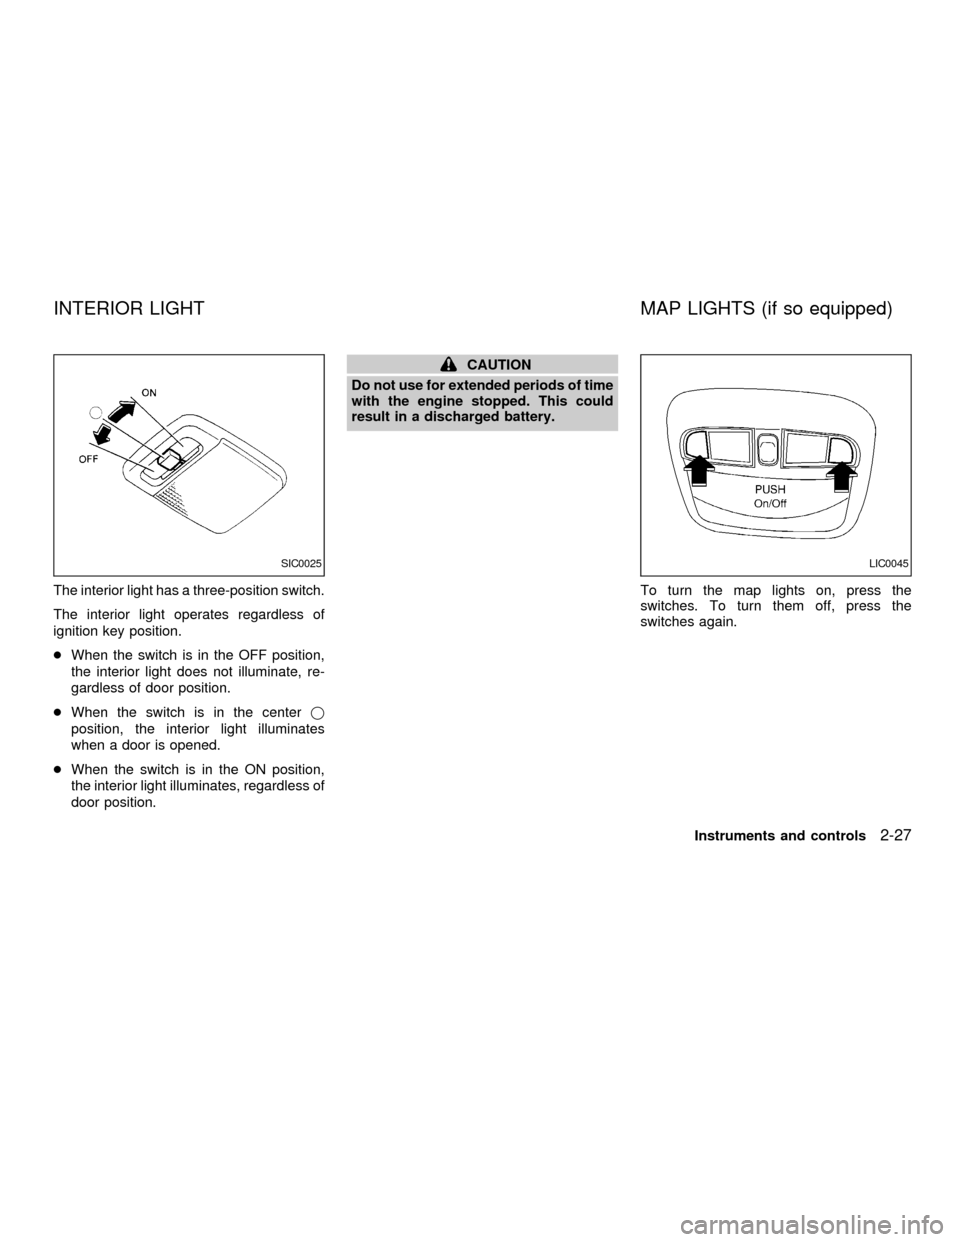
The interior light has a three-position switch.
The interior light operates regardless of
ignition key position.
cWhen the switch is in the OFF position,
the interior light does not illuminate, re-
gardless of door position.
cWhen the switch is in the centerj
position, the interior light illuminates
when a door is opened.
cWhen the switch is in the ON position,
the interior light illuminates, regardless of
door position.
CAUTION
Do not use for extended periods of time
with the engine stopped. This could
result in a discharged battery.
To turn the map lights on, press the
switches. To turn them off, press the
switches again.
SIC0025LIC0045
INTERIOR LIGHT MAP LIGHTS (if so equipped)
Instruments and controls2-27
ZX
Page 74 of 240

3 Pre-driving checks and adjustments
Keys .......................................................................3-2
Nissan vehicle immobilizer system
(NVIS) keys (if so equipped) .............................3-2
Doors ......................................................................3-3
Locking with key ................................................3-3
Locking with inside lock knob............................3-4
Locking with power door lock switch
(if so equipped)..................................................3-4
Child safety rear door lock ................................3-4
Multi-remote control system (if so equipped).........3-5
How to use multi-remote control system...........3-5
Battery replacement ..........................................3-8
Hood .......................................................................3-9
Trunk lid................................................................3-10Opener operation ............................................3-10
Key operation ..................................................3-11
Interior trunk lid release (if so equipped) ........3-12
Fuel filler lid ..........................................................3-13
Opener operation ............................................3-13
Fuel filler cap ...................................................3-13
Steering wheel .....................................................3-14
Tilt operation ....................................................3-14
Sun visors ...........................................................3-15
Vanity mirror ....................................................3-15
Mirrors ..................................................................3-15
Inside mirror.....................................................3-15
Outside mirror remote control .........................3-16
ZX
Page 81 of 240

BATTERY REPLACEMENT
Replace the battery in the multi-remote con-
troller as follows:
1. Open the lid using a coin.
2. Remove the battery.3. Install a new battery.
Recommended battery: Sanyo CR2025
or equivalent.
4.
Close the lid securely.
5. Press the LOCK button, then the UN-
LOCK button two or three times to checkthe multi-remote controller operation.
If the battery is removed for any reason
other than replacement, perform step five.
cAn improperly disposed battery can
hurt the environment. Always confirm
local regulations for battery disposal.
cThe multi-remote controller is water-
resistant; however, if it does get wet,
immediately wipe completely dry.
cThe operational range of the multi-
remote controller extends to approxi-
mately 49 ft (15 m) from the vehicle.
This range may vary with conditions.
FCC Notice:
Changes or modifications not expressly
approved by the manufacturer for com-
pliance could void the user's authority to
operate the equipment.
This device complies with Part 15 of the
FCC Rules and RSS-210 of Industry
Canada.
Operation is subject to the following two
conditions: (1) This device may not
cause harmful interference, and (2) this
device must accept any interference re-
ceived, including interference that may
cause undesired operation of the device.
WPD0023
3-8Pre-driving checks and adjustments
ZX
Page 102 of 240
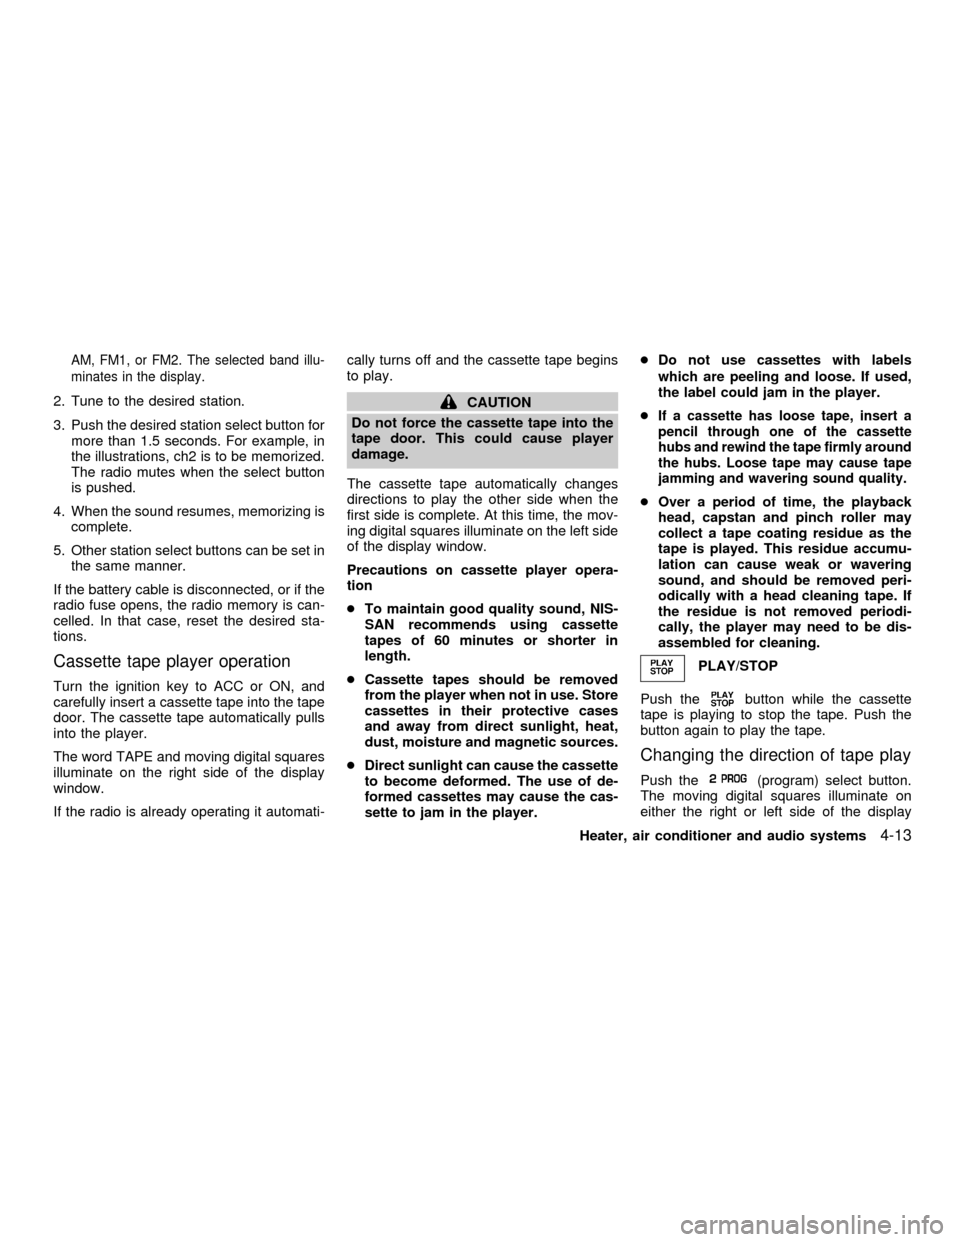
AM, FM1, or FM2. The selected band illu-
minates in the display.
2. Tune to the desired station.
3. Push the desired station select button for
more than 1.5 seconds. For example, in
the illustrations, ch2 is to be memorized.
The radio mutes when the select button
is pushed.
4. When the sound resumes, memorizing is
complete.
5. Other station select buttons can be set in
the same manner.
If the battery cable is disconnected, or if the
radio fuse opens, the radio memory is can-
celled. In that case, reset the desired sta-
tions.
Cassette tape player operation
Turn the ignition key to ACC or ON, and
carefully insert a cassette tape into the tape
door. The cassette tape automatically pulls
into the player.
The word TAPE and moving digital squares
illuminate on the right side of the display
window.
If the radio is already operating it automati-cally turns off and the cassette tape begins
to play.
CAUTION
Do not force the cassette tape into the
tape door. This could cause player
damage.
The cassette tape automatically changes
directions to play the other side when the
first side is complete. At this time, the mov-
ing digital squares illuminate on the left side
of the display window.
Precautions on cassette player opera-
tion
cTo maintain good quality sound, NIS-
SAN recommends using cassette
tapes of 60 minutes or shorter in
length.
cCassette tapes should be removed
from the player when not in use. Store
cassettes in their protective cases
and away from direct sunlight, heat,
dust, moisture and magnetic sources.
cDirect sunlight can cause the cassette
to become deformed. The use of de-
formed cassettes may cause the cas-
sette to jam in the player.cDo not use cassettes with labels
which are peeling and loose. If used,
the label could jam in the player.
cIf a cassette has loose tape, insert a
pencil through one of the cassette
hubs and rewind the tape firmly around
the hubs. Loose tape may cause tape
jamming and wavering sound quality.
cOver a period of time, the playback
head, capstan and pinch roller may
collect a tape coating residue as the
tape is played. This residue accumu-
lation can cause weak or wavering
sound, and should be removed peri-
odically with a head cleaning tape. If
the residue is not removed periodi-
cally, the player may need to be dis-
assembled for cleaning.
PLAY/STOP
Push the
button while the cassette
tape is playing to stop the tape. Push the
button again to play the tape.
Changing the direction of tape play
Push the(program) select button.
The moving digital squares illuminate on
either the right or left side of the display
Heater, air conditioner and audio systems
4-13
ZX
Page 107 of 240
1. Push to select AM, FM1, or FM2. The
selected band illuminates in the display.
2. Tune to the desired station.
3. Push the desired station select button for
more than 1.5 seconds. For example, in
the illustrations, ch2 is to be memorized.
The radio mutes when the select button
is pushed.
4. When the indicator illuminates in the
display and the sound resumes, memo-
rizing is complete.
5. Other station select buttons can be set in
the same manner.
If the battery cable is disconnected, or if the
radio fuse opens, the radio memory is can-
celled. In that case, reset the desired stations.
Compact disc (CD) player operation
Turn the ignition key to the ACC or ON
position, and carefully insert the compact
disc into the slot with the label side up. The
compact disc is automatically pulled into the
slot and starts to play.
If the radio is already operating, it automati-
cally turns off and the compact disc begins
to play.
CAUTION
Do not force the compact disc into the
slot. This could damage the player.
CD
When this button is pushed with the compact
disc loaded and the radio playing, the radio
turns off and the compact disc starts to play.
When this button is pushed while the com-
pact disc is playing, the compact disc stops
playing.
FF (Fast Forward),
REW (Rewind) buttons
When the
orbutton is pushed
while the compact disc is playing, the com-
pact disc plays at an increased speed while
fast forwarding or rewinding. When the but-
ton is released, the compact disc returns to
normal play speed.
APS (Automatic Pro-
gram Search) FF, APS
REW
When the
button is pushed while the
compact disc is playing, the selection fol-
lowing the present one starts to play from
the beginning. Push the
button severaltimes to skip several selections. Each time
the button is pushed, the CD advances one
selection. (When the last selection on the
compact disc is skipped, the first selection is
played.)
When thebutton is pushed, the selection
being played returns to the beginning. Push
the
button several times to skip back
several selections. Each time the button is
pushed, the CD moves back one selection.
Repeat/Random button
When the
button is pushed while the
compact disc is playing, the play pattern
changes as follows.
1: The current selection is repeated.
RANDOM: Selections are played at ran-
dom, not following the sequence on the
compact disc. The same program may be
repeated twice.
Normal(no symbol): All selections are
played in sequence.
When a new compact disc is inserted,
the play pattern automatically changes
to the ``Normal'' play pattern.
4-18Heater, air conditioner and audio systems
ZX
Page 114 of 240

5 Starting and driving
Precautions when starting and driving ...................5-2
Exhaust gas (carbon monoxide) .......................5-2
Three-way catalyst ............................................5-2
Avoiding collision and rollover ...........................5-3
Drinking alcohol/drugs and driving ....................5-3
Ignition switch .........................................................5-4
Automatic transmission .....................................5-4
Manual transmission..........................................5-5
Key positions .....................................................5-5
Nissan vehicle immobilizer system
(NVIS) (if so equipped)......................................5-6
Before starting the engine ......................................5-6
Starting the engine .................................................5-7
Driving the vehicle ..................................................5-7
Automatic transmission (if so equipped) ...........5-7
Manual transmission........................................5-11
Parking brake .......................................................5-13
Cruise control (if so equipped) .............................5-14
Precautions on cruise control ..........................5-14Cruise control operations ................................5-14
Break-in schedule ................................................5-16
Increasing fuel economy ......................................5-16
Parking/parking on hills ........................................5-17
Power steering .....................................................5-18
Brake system........................................................5-18
Braking precautions .........................................5-18
Anti-lock brake system (ABS)
(if so equipped)................................................5-19
Cold weather driving ............................................5-20
Freeing a frozen door lock ..............................5-20
Anti-freeze .......................................................5-20
Battery .............................................................5-20
Draining of coolant ..........................................5-20
Tire equipment.................................................5-21
Special winter equipment ................................5-21
Driving on snow or ice.....................................5-21
Engine block heater (if so equipped) ..............5-22
ZX