Page 61 of 240
To defog the rear window glass, start the
engine and push the rear window defogger
switch on. (The indicator light on the switch
comes on.) Push the switch again to turn
the defogger off.
The rear window defogger switch automati-
cally turns off after approximately 15 min-
utes.
CAUTION
When cleaning the inner side of the
rear window, be careful not to scratch
or damage the rear window defogger.
HEADLIGHT CONTROL SWITCH
Lighting
Turn the switch to theposition:
The front parking, tail, license plate and
instrument panel lights come on.Turn the switch to the
position:
The headlights come on and all the other
lights remain on.
To select the high beam function, push the
lever forward. The high beam lights come
on and the
light illuminates. Pull the
lever back to select the low beam.
LIC0026
AIC1116
REAR WINDOW DEFOGGER
SWITCHHEADLIGHT AND TURN
SIGNAL SWITCH
2-16Instruments and controls
ZX
Page 62 of 240

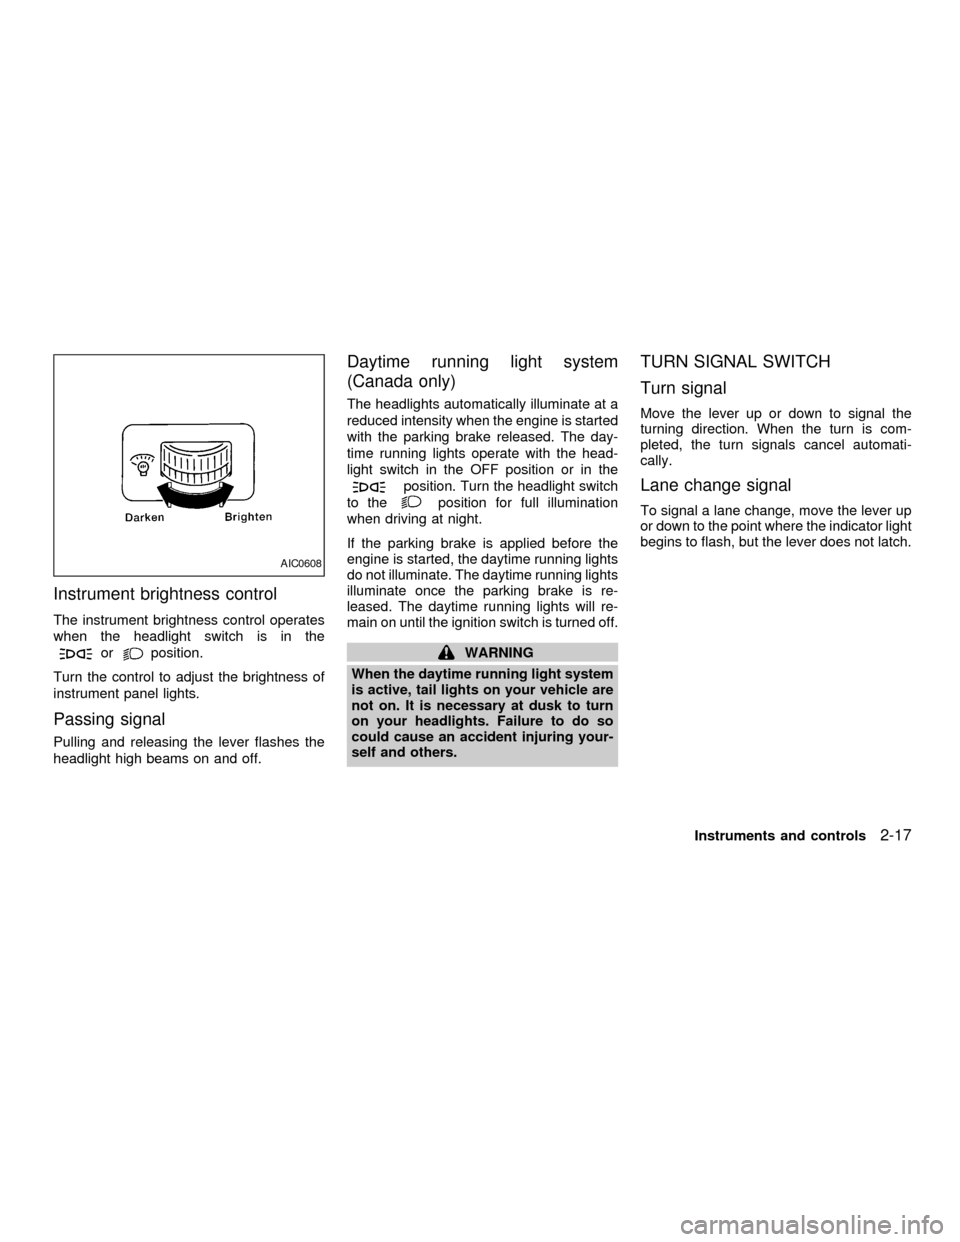
Instrument brightness control
The instrument brightness control operates
when the headlight switch is in the
orposition.
Turn the control to adjust the brightness of
instrument panel lights.
Passing signal
Pulling and releasing the lever flashes the
headlight high beams on and off.
Daytime running light system
(Canada only)
The headlights automatically illuminate at a
reduced intensity when the engine is started
with the parking brake released. The day-
time running lights operate with the head-
light switch in the OFF position or in the
position. Turn the headlight switch
to the
position for full illumination
when driving at night.
If the parking brake is applied before the
engine is started, the daytime running lights
do not illuminate. The daytime running lights
illuminate once the parking brake is re-
leased. The daytime running lights will re-
main on until the ignition switch is turned off.
WARNING
When the daytime running light system
is active, tail lights on your vehicle are
not on. It is necessary at dusk to turn
on your headlights. Failure to do so
could cause an accident injuring your-
self and others.
TURN SIGNAL SWITCH
Turn signal
Move the lever up or down to signal the
turning direction. When the turn is com-
pleted, the turn signals cancel automati-
cally.
Lane change signal
To signal a lane change, move the lever up
or down to the point where the indicator light
begins to flash, but the lever does not latch.
AIC0608
Instruments and controls2-17
ZX
Page 68 of 240
CONSOLE BOX (if so equipped)
WARNING
The center console box should not be
used while driving so full attention may
be given to vehicle operation.
Pull up on the lever to open the console box
lid. The console box can store cassette
tapes and compact discs. A business card
holder and a tissue holder are also con-
tained within the console box.
INSTRUMENT PANEL STORAGE
To open the storage tray, push and release.
The storage tray will automatically move to
the open position.
WARNING
cThe storage tray should not be used
while driving so full attention may be
given to vehicle operation.
cKeep the tray lid closed while driving
to help prevent contents from be-
coming projectiles causing injury in
an accident or during a sudden stop.
LIC0038
LIC0029
Instruments and controls2-23
ZX
Page 69 of 240

POWER WINDOWS
(if so equipped)
WARNING
cMake sure that all passengers have
their hands, etc. inside the vehicle
before closing the windows. Use the
window lock switch to prevent unex-
pected use of the power windows.
cDo not leave children unattended in-
side the vehicle. They could un-
knowingly activate switches or con-
trols and become trapped in a
window. Unattended children could
become involved in serious acci-
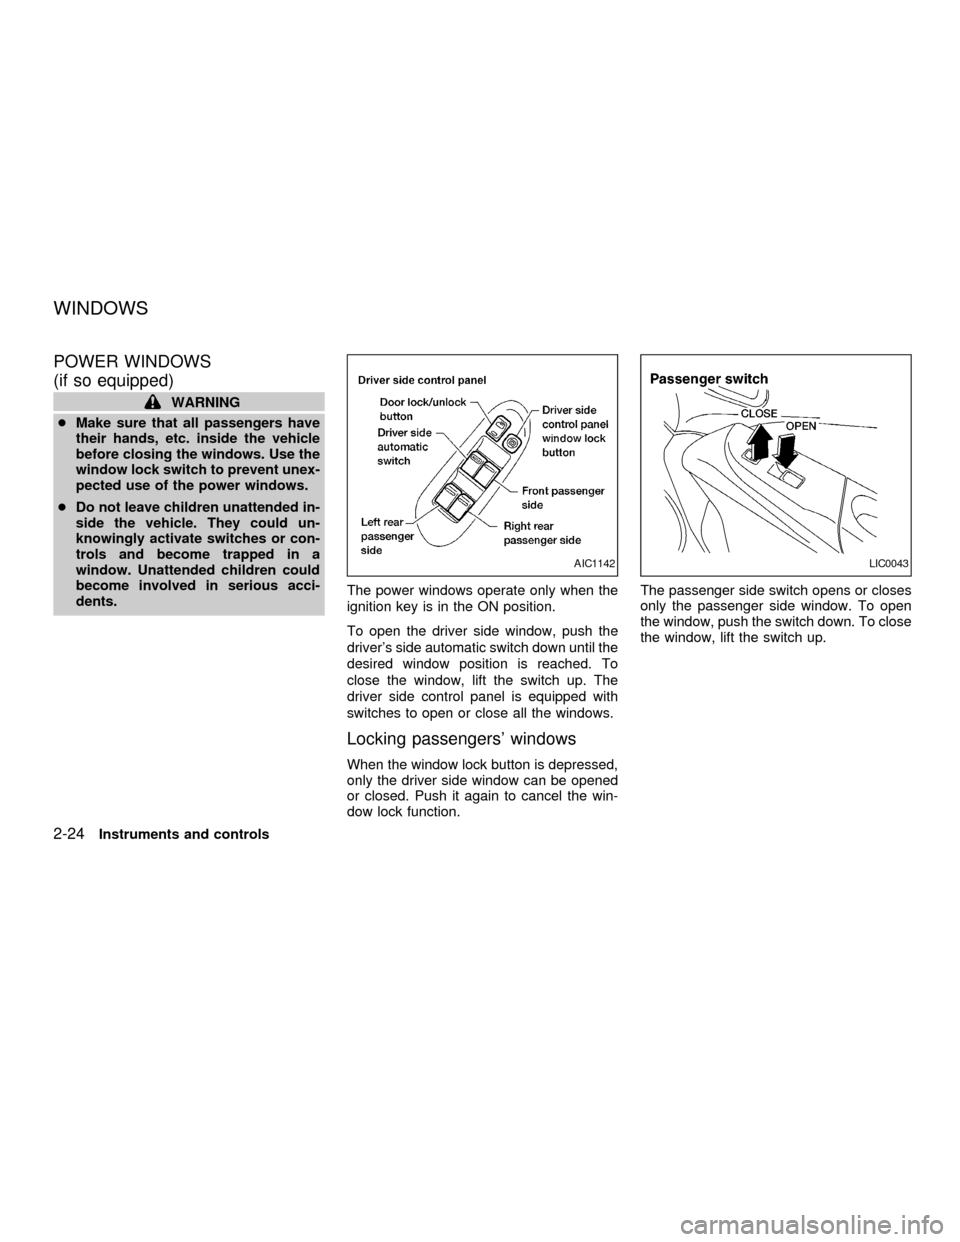
dents.The power windows operate only when the
ignition key is in the ON position.
To open the driver side window, push the
driver's side automatic switch down until the
desired window position is reached. To
close the window, lift the switch up. The
driver side control panel is equipped with
switches to open or close all the windows.
Locking passengers' windows
When the window lock button is depressed,
only the driver side window can be opened
or closed. Push it again to cancel the win-
dow lock function.The passenger side switch opens or closes
only the passenger side window. To open
the window, push the switch down. To close
the window, lift the switch up.
AIC1142LIC0043
WINDOWS
2-24Instruments and controls
ZX
Page 82 of 240
1. Pull the hood lock release handles1
located below the driver side instrument
panel. The hood will spring up slightly.
2. Push the lever to the left
s2at the front
of the hood with your fingertips and raise
the hood.
3. Insert the support rod into the slot
marked with the arrow on the underside
of the hood.
4. When closing the hood, return the sup-
port rod to its original position, lower the
hood to approximately 12 inches above
the latch and release it. This allows
proper engagement of the hood latch.
WARNING
cMake sure the hood is completely
closed and latched before driving.
Failure to do so could cause the
hood to fly open and result in an
accident.
cIf you see steam or smoke coming
from the engine compartment, to
avoid injury do not open the hood.
WPD0030WPD0020
HOOD
Pre-driving checks and adjustments3-9
ZX
Page 83 of 240
OPENER OPERATION
WARNING
cDo not drive with the trunk lid open.
This could allow dangerous exhaust
gases to be drawn into the vehicle.
See ``Exhaust gas'' in the ``Starting
and driving'' section of this manual.
cClosely supervise children when
they are around cars to prevent them
from playing and becoming locked
in the trunk where they could be
seriously injured. Keep the carlocked, with the trunk closed, when
not in use, and prevent children's
access to car keys.
Type A
The trunk lid opener lever is located on the
outside of the driver's seat. To open the
trunk lid, pull up the opener lever. To close,
push the trunk lid down securely.Type B
The trunk lid release is located on the
instrument panel. To open the trunk, push
the release in the direction indicated in the
illustration. To close the trunk lid, push it
down securely.
WPD0026
TRUNK LID
3-10Pre-driving checks and adjustments
ZX
Page 124 of 240

instrument panel comes on at this
time.
When cruising at a low speed or
climbing a gentle slope, you may feel
uncomfortable shift shocks as the
transmission shifts between third gear
and overdrive repeatedly. In this case,
depress the OVERDRIVE switch to
turn the OVERDRIVE off. The O/D
OFF indicator light in the instrument
panel comes on at this time.
When driving conditions change, depress
the overdrive switch to turn the OVER-
DRIVE on.
Remember not to drive at high speeds for
extended periods of time with the OVER-
DRIVE off. This reduces fuel economy.
MANUAL TRANSMISSION
WARNING
cDo not downshift abruptly on slip-
pery roads. This may cause a loss of
control.
cDo not over-rev the engine when
shifting to a lower gear. This may
cause a loss of control or engine
damage.
CAUTION
cDo not rest your foot on the clutch
pedal while driving. This may cause
clutch damage.
cStop your vehicle completely before
shifting into R (Reverse).
cWhen the vehicle is stopped with the
engine running (for example, at a
stop light), shift to N (Neutral) and
release the clutch pedal with the foot
brake applied.
Shifting
To change gears, or when upshifting or
downshifting, depress the clutch pedal fully,
shift into the appropriate gear, then release
the clutch slowly and smoothly.
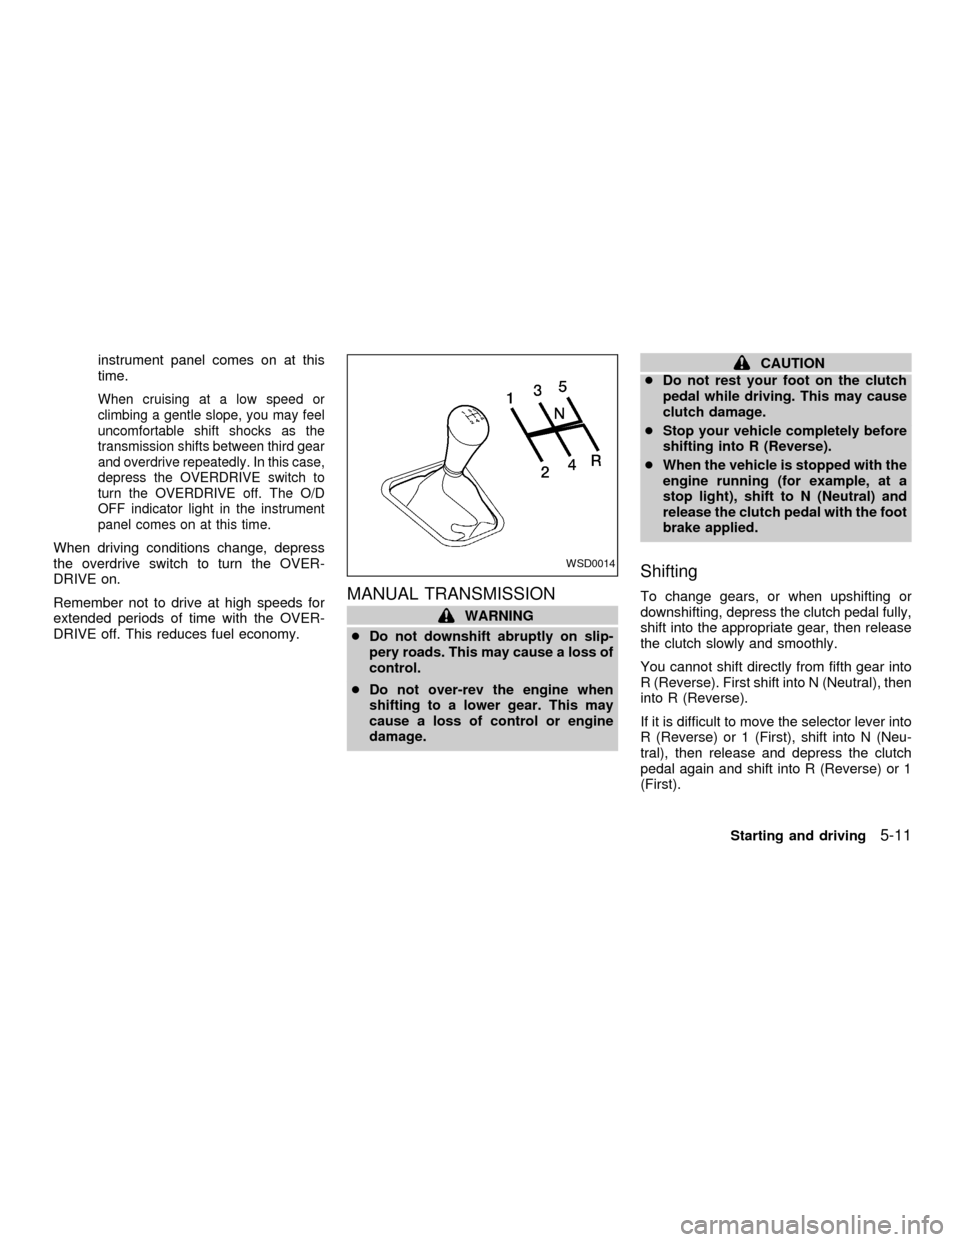
You cannot shift directly from fifth gear into
R (Reverse). First shift into N (Neutral), then
into R (Reverse).
If it is difficult to move the selector lever into
R (Reverse) or 1 (First), shift into N (Neu-
tral), then release and depress the clutch
pedal again and shift into R (Reverse) or 1
(First).
WSD0014
Starting and driving5-11
ZX
Page 127 of 240

PRECAUTIONS ON CRUISE
CONTROL
cIf the cruise control system malfunctions,
it cancels automatically. The SET light in
the instrument panel then blinks to warn
the driver.
cIf the SET light in the instrument panel
blinks, turn the CRUISE ONzOFF switch
off and have the system checked by your
NISSAN dealer.
cThe SET light in the instrument panel
may blink when the CRUISE ONzOFF
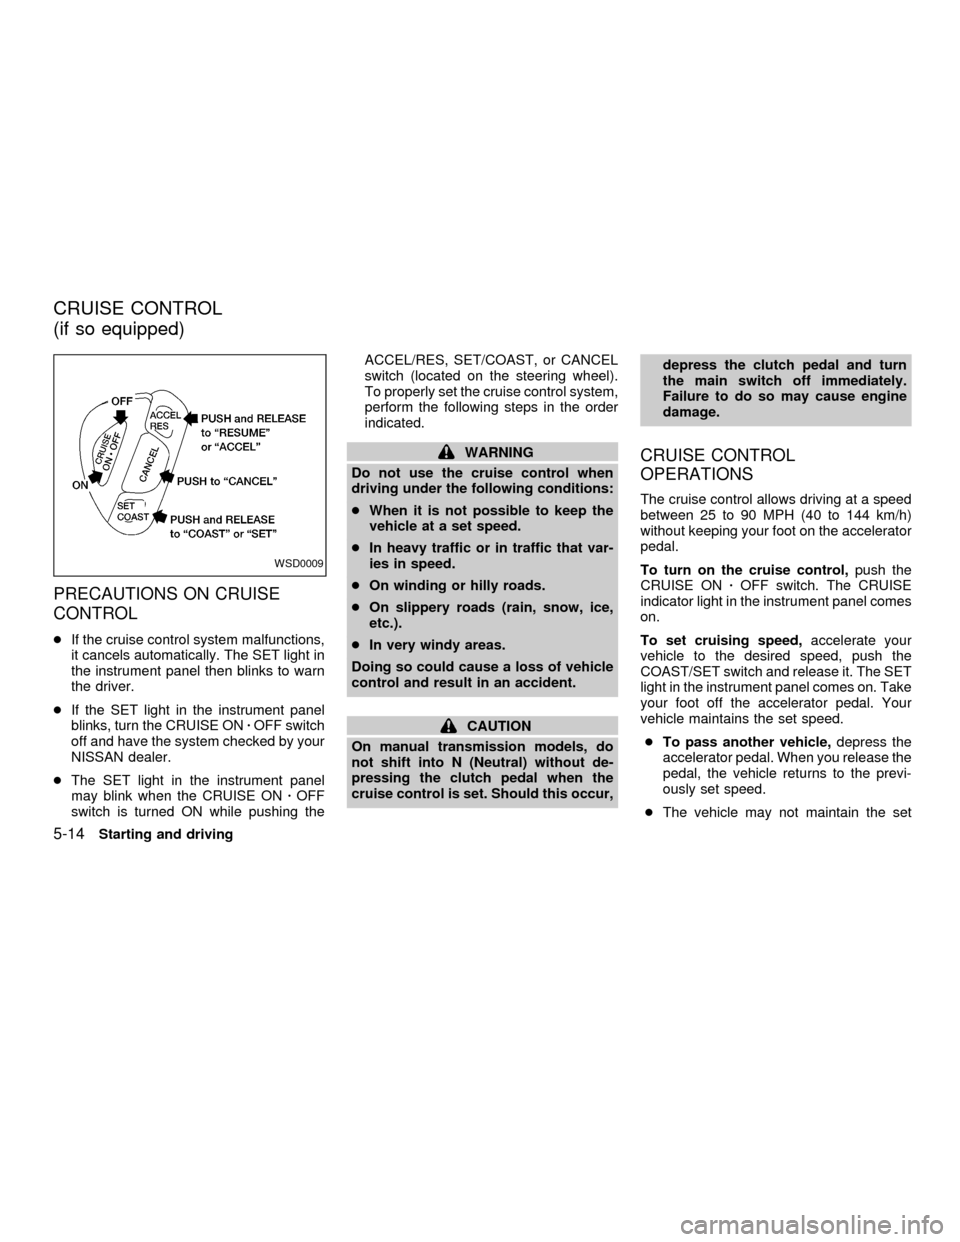
switch is turned ON while pushing theACCEL/RES, SET/COAST, or CANCEL
switch (located on the steering wheel).
To properly set the cruise control system,
perform the following steps in the order
indicated.
WARNING
Do not use the cruise control when
driving under the following conditions:
cWhen it is not possible to keep the
vehicle at a set speed.
cIn heavy traffic or in traffic that var-
ies in speed.
cOn winding or hilly roads.
cOn slippery roads (rain, snow, ice,
etc.).
cIn very windy areas.
Doing so could cause a loss of vehicle
control and result in an accident.
CAUTION
On manual transmission models, do
not shift into N (Neutral) without de-
pressing the clutch pedal when the
cruise control is set. Should this occur,depress the clutch pedal and turn
the main switch off immediately.
Failure to do so may cause engine
damage.
CRUISE CONTROL
OPERATIONS
The cruise control allows driving at a speed
between 25 to 90 MPH (40 to 144 km/h)
without keeping your foot on the accelerator
pedal.
To turn on the cruise control,push the
CRUISE ONzOFF switch. The CRUISE
indicator light in the instrument panel comes
on.
To set cruising speed,accelerate your
vehicle to the desired speed, push the
COAST/SET switch and release it. The SET
light in the instrument panel comes on. Take
your foot off the accelerator pedal. Your
vehicle maintains the set speed.
cTo pass another vehicle,depress the
accelerator pedal. When you release the
pedal, the vehicle returns to the previ-
ously set speed.
cThe vehicle may not maintain the set
WSD0009
CRUISE CONTROL
(if so equipped)
5-14Starting and driving
ZX