2001 NISSAN QUEST check engine light
[x] Cancel search: check engine lightPage 228 of 304

8 Do-it-yourself
Maintenance precautions .......................................8-2
Engine compartment check locations ....................8-3
Engine cooling system ...........................................8-4
Checking engine coolant level ..........................8-4
Changing engine coolant ..................................8-5
Engine oil ...............................................................8-5
Checking engine oil level ..................................8-5
Changing engine oil ..........................................8-6
Changing engine oil filter...................................8-7
Automatic transmission fluid ..................................8-8
Temperature conditions for checking ................8-8
Power steering fluid................................................8-9
Brake fluid ..............................................................8-9
Window washer fluid ............................................8-10
Battery ..................................................................8-10
Jump starting ...................................................8-11
Drive belts ............................................................8-12
Spark plugs ..........................................................8-12
Replacing spark plugs .....................................8-12
Air cleaner ............................................................8-13
Cabin air filter ..................................................8-14Windshield wiper blades ......................................8-17
Cleaning ..........................................................8-17
Replacing .........................................................8-17
Parking brake and brake pedal ............................8-19
Checking parking brake...................................8-19
Checking brake pedal .....................................8-19
Brake booster ..................................................8-20
Fuses ....................................................................8-20
Engine compartment .......................................8-20
Passenger compartment .................................8-21
Multi-remote controller battery replacement ........8-22
Lights ....................................................................8-23
Headlights ........................................................8-23
Fog lights .........................................................8-24
Exterior and interior lights ...............................8-25
Wheels and tires ..................................................8-29
Tire pressure ...................................................8-29
Types of tires ...................................................8-30
Tire chains .......................................................8-31
Changing tires and wheels ..............................8-31
ZX
Page 234 of 304
Drain plug tightening torque:
22 to 29 ft-lb
(29 to 39 Nzm)
Do not use excessive force.
7. Refill the engine with a recommended oil
through the oil filler opening then install
the oil filler cap securely.
See the ``Technical and consumer infor-
mation'' section for drain and refill capac-
ity.
The drain and refill capacity depends on the
oil temperature and drain time. Use these
specifications for reference only. Always
use the dipstick to determine when the
proper amount of oil is in the engine.
8. Start the engine. Check for leakage
around the drain plug. Correct as re-
quired.
9. Turn the engine off and wait several
minutes. Check the oil level with the
dipstick. Add engine oil if necessary.
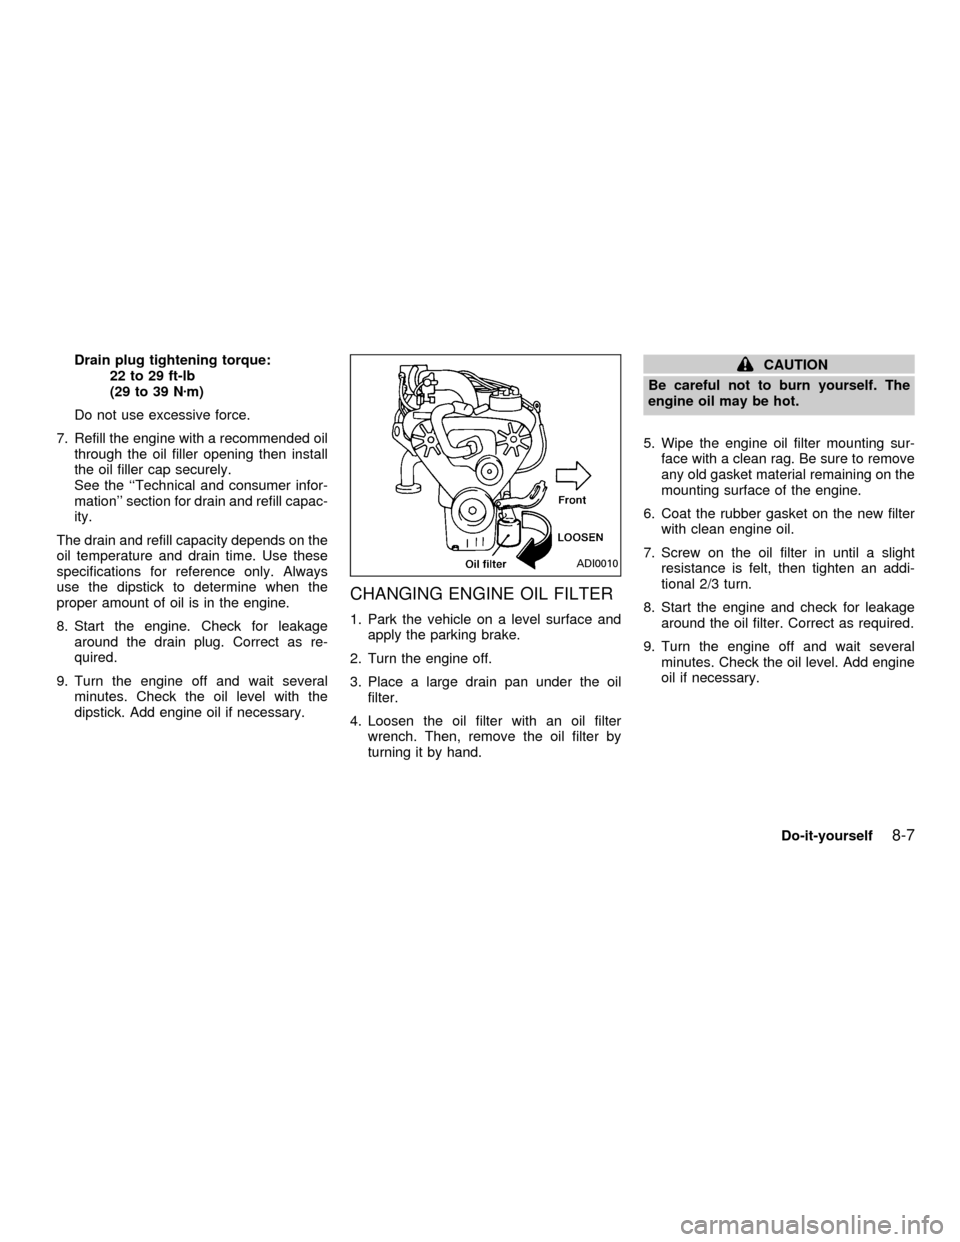
CHANGING ENGINE OIL FILTER
1. Park the vehicle on a level surface and
apply the parking brake.
2. Turn the engine off.
3. Place a large drain pan under the oil
filter.
4. Loosen the oil filter with an oil filter
wrench. Then, remove the oil filter by
turning it by hand.
CAUTION
Be careful not to burn yourself. The
engine oil may be hot.
5. Wipe the engine oil filter mounting sur-
face with a clean rag. Be sure to remove
any old gasket material remaining on the
mounting surface of the engine.
6. Coat the rubber gasket on the new filter
with clean engine oil.
7. Screw on the oil filter in until a slight
resistance is felt, then tighten an addi-
tional 2/3 turn.
8. Start the engine and check for leakage
around the oil filter. Correct as required.
9. Turn the engine off and wait several
minutes. Check the oil level. Add engine
oil if necessary.
ADI0010
Do-it-yourself8-7
ZX
Page 237 of 304
WARNING
Use only new fluid from a sealed con-
tainer. Old, inferior, or contaminated
fluid may damage the brake system.
The use of improper fluids can damage
the brake system and affect the vehi-
cle's stopping ability.
CAUTION
Do not spill the fluid on painted sur-
faces. This will damage the paint. If
fluid is spilled, wash with water.
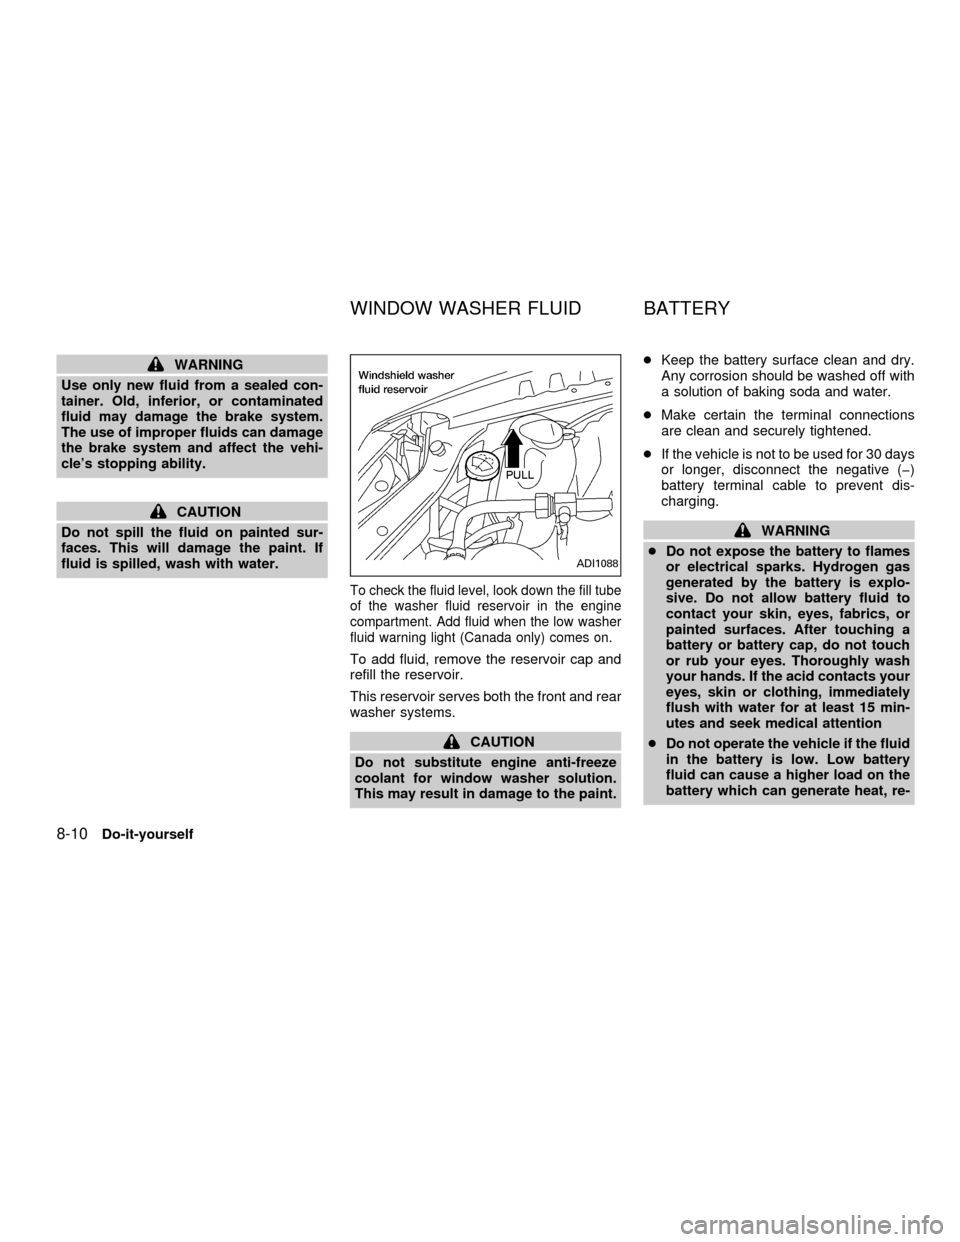
To check the fluid level, look down the fill tube
of the washer fluid reservoir in the engine
compartment. Add fluid when the low washer
fluid warning light (Canada only) comes on.
To add fluid, remove the reservoir cap and
refill the reservoir.
This reservoir serves both the front and rear
washer systems.
CAUTION
Do not substitute engine anti-freeze
coolant for window washer solution.
This may result in damage to the paint.cKeep the battery surface clean and dry.
Any corrosion should be washed off with
a solution of baking soda and water.
cMake certain the terminal connections
are clean and securely tightened.
cIf the vehicle is not to be used for 30 days
or longer, disconnect the negative (þ)
battery terminal cable to prevent dis-
charging.
WARNING
cDo not expose the battery to flames
or electrical sparks. Hydrogen gas
generated by the battery is explo-
sive. Do not allow battery fluid to
contact your skin, eyes, fabrics, or
painted surfaces. After touching a
battery or battery cap, do not touch
or rub your eyes. Thoroughly wash
your hands. If the acid contacts your
eyes, skin or clothing, immediately
flush with water for at least 15 min-
utes and seek medical attention
cDo not operate the vehicle if the fluid
in the battery is low. Low battery
fluid can cause a higher load on the
battery which can generate heat, re-
ADI1088
WINDOW WASHER FLUID BATTERY
8-10Do-it-yourself
ZX
Page 246 of 304
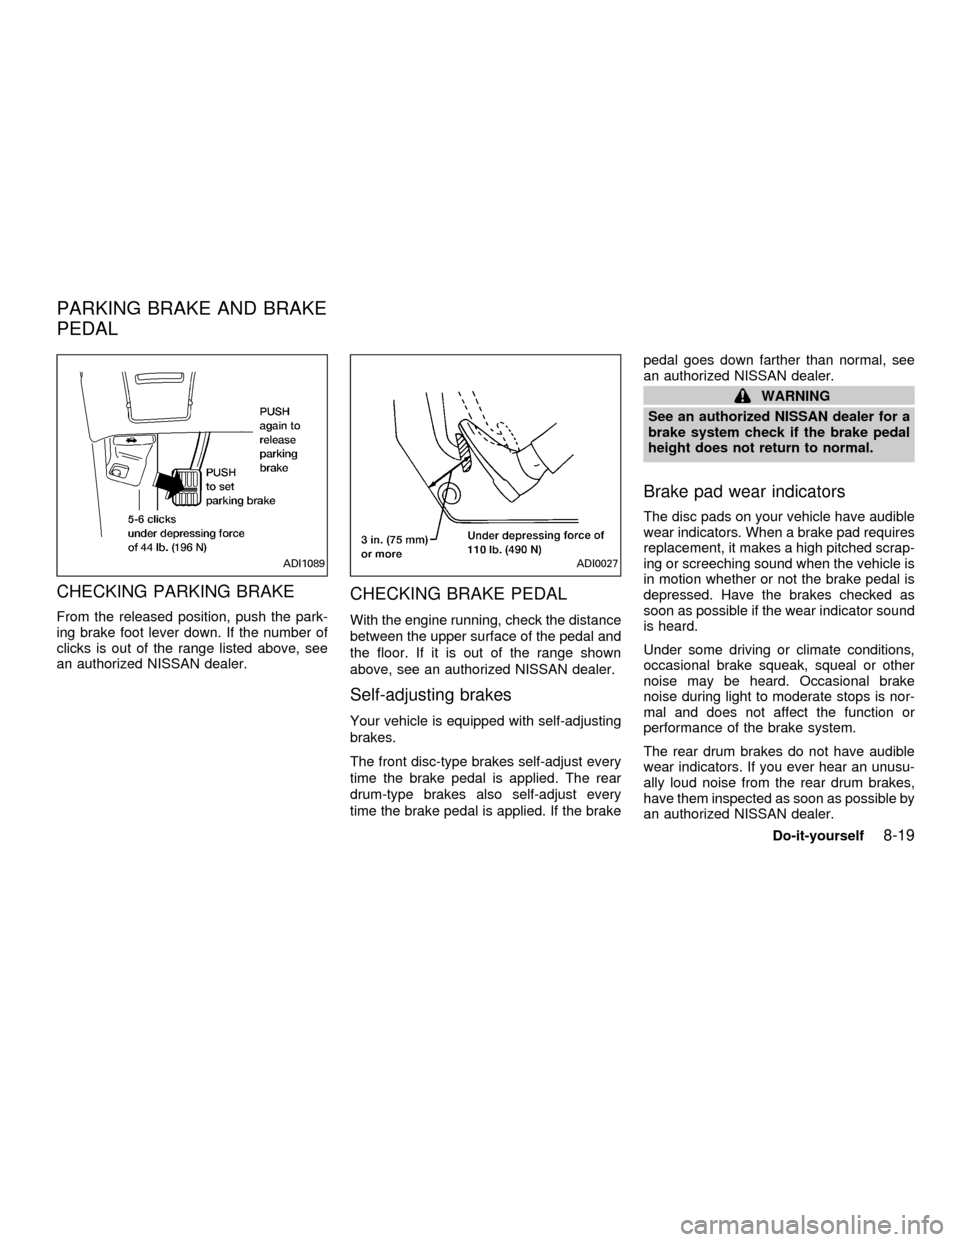
CHECKING PARKING BRAKE
From the released position, push the park-
ing brake foot lever down. If the number of
clicks is out of the range listed above, see
an authorized NISSAN dealer.
CHECKING BRAKE PEDAL
With the engine running, check the distance
between the upper surface of the pedal and
the floor. If it is out of the range shown
above, see an authorized NISSAN dealer.
Self-adjusting brakes
Your vehicle is equipped with self-adjusting
brakes.
The front disc-type brakes self-adjust every
time the brake pedal is applied. The rear
drum-type brakes also self-adjust every
time the brake pedal is applied. If the brakepedal goes down farther than normal, see
an authorized NISSAN dealer.
WARNING
See an authorized NISSAN dealer for a
brake system check if the brake pedal
height does not return to normal.
Brake pad wear indicators
The disc pads on your vehicle have audible
wear indicators. When a brake pad requires
replacement, it makes a high pitched scrap-
ing or screeching sound when the vehicle is
in motion whether or not the brake pedal is
depressed. Have the brakes checked as
soon as possible if the wear indicator sound
is heard.
Under some driving or climate conditions,
occasional brake squeak, squeal or other
noise may be heard. Occasional brake
noise during light to moderate stops is nor-
mal and does not affect the function or
performance of the brake system.
The rear drum brakes do not have audible
wear indicators. If you ever hear an unusu-
ally loud noise from the rear drum brakes,
have them inspected as soon as possible by
an authorized NISSAN dealer.
ADI1089ADI0027
PARKING BRAKE AND BRAKE
PEDAL
Do-it-yourself8-19
ZX
Page 247 of 304
Proper brake inspection intervals should
be followed.For more information regard-
ing brake inspections, see the appropriate
maintenance schedule information in the
``Maintenance'' section of this manual.
BRAKE BOOSTER
Check the brake booster function as fol-
lows:
1. With the engine off, press and release
the brake pedal several times. When
brake pedal movement (distance of
travel) remains the same from one pedal
application to the next, continue on to the
next step.
2. While depressing the brake pedal, start
the engine. The pedal height should drop
a little.
3. With the brake pedal depressed, turn the
engine off. Keep the pedal depressed for
about 30 seconds; the pedal height
should not change.
4. Run the engine for one minute without
depressing the brake pedal, then turn it
off. Depress the brake pedal several
times. The pedal travel distance will de-
crease gradually with each depressionas the vacuum is released from the
booster.
If the brakes do not operate properly, see an
authorized NISSAN dealer.
ENGINE COMPARTMENT
CAUTION
Never use a fuse of a higher amperage
rating than that specified on the fuse
box cover. This could damage the elec-
trical system or cause a fire.
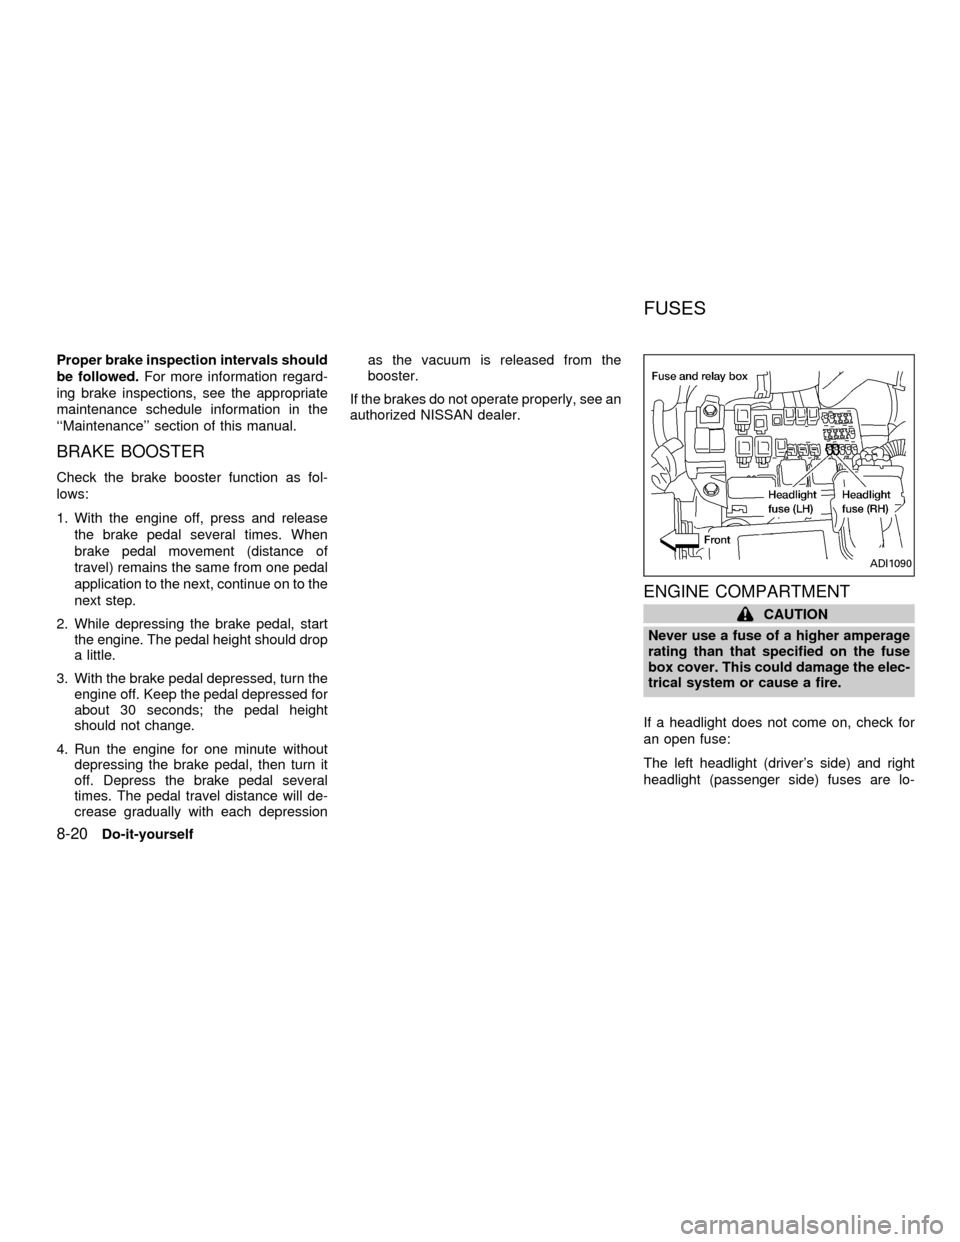
If a headlight does not come on, check for
an open fuse:
The left headlight (driver's side) and right
headlight (passenger side) fuses are lo-
ADI1090
FUSES
8-20Do-it-yourself
ZX
Page 248 of 304
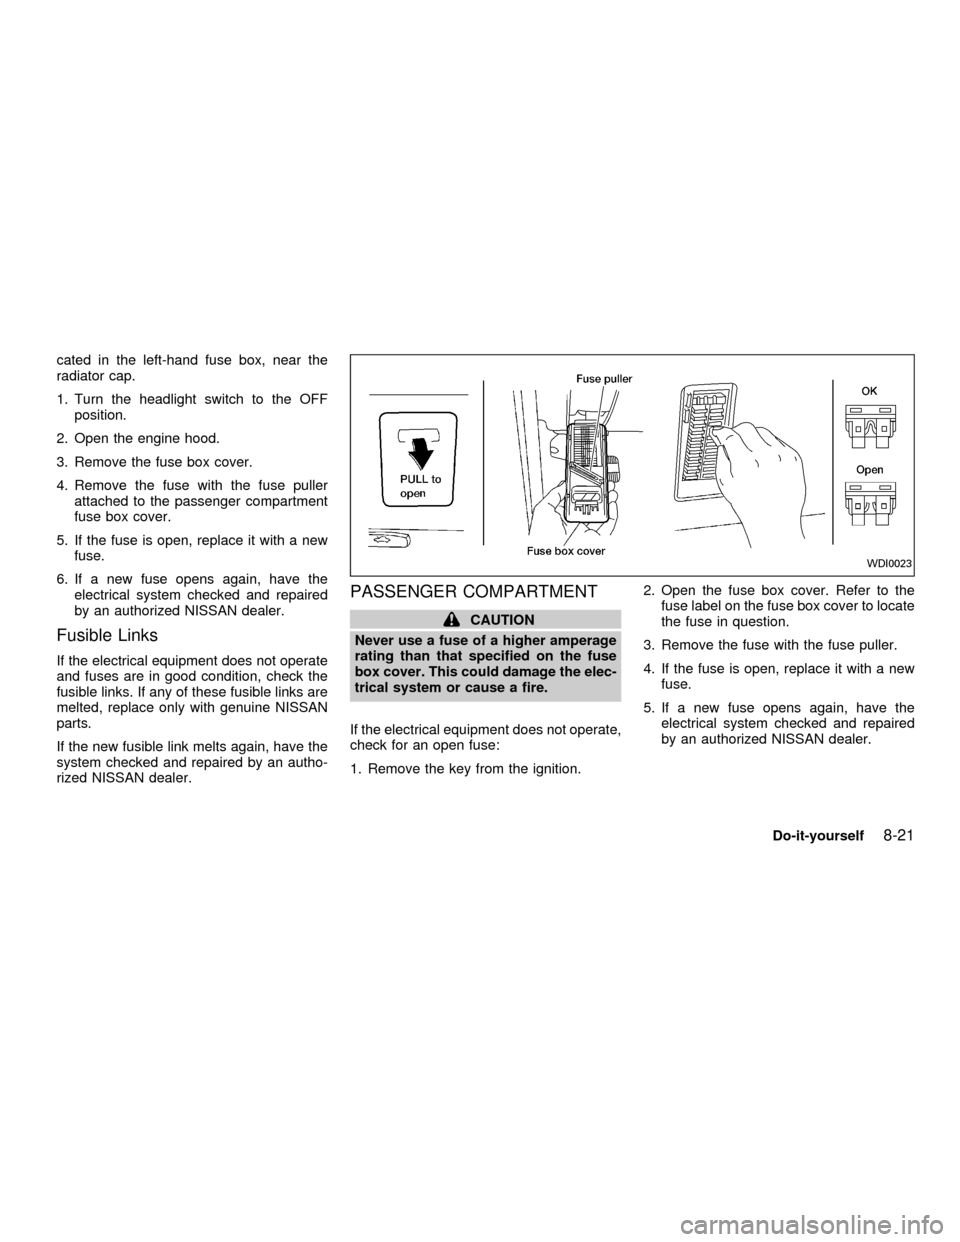
cated in the left-hand fuse box, near the
radiator cap.
1. Turn the headlight switch to the OFF
position.
2. Open the engine hood.
3. Remove the fuse box cover.
4. Remove the fuse with the fuse puller
attached to the passenger compartment
fuse box cover.
5. If the fuse is open, replace it with a new
fuse.
6. If a new fuse opens again, have the
electrical system checked and repaired
by an authorized NISSAN dealer.
Fusible Links
If the electrical equipment does not operate
and fuses are in good condition, check the
fusible links. If any of these fusible links are
melted, replace only with genuine NISSAN
parts.
If the new fusible link melts again, have the
system checked and repaired by an autho-
rized NISSAN dealer.
PASSENGER COMPARTMENT
CAUTION
Never use a fuse of a higher amperage
rating than that specified on the fuse
box cover. This could damage the elec-
trical system or cause a fire.
If the electrical equipment does not operate,
check for an open fuse:
1. Remove the key from the ignition.2. Open the fuse box cover. Refer to the
fuse label on the fuse box cover to locate
the fuse in question.
3. Remove the fuse with the fuse puller.
4. If the fuse is open, replace it with a new
fuse.
5. If a new fuse opens again, have the
electrical system checked and repaired
by an authorized NISSAN dealer.
WDI0023
Do-it-yourself8-21
ZX
Page 277 of 304

of the vehicle, for which NISSAN is not
responsible.
Incorrect ignition timing may result in spark
knock, after-run, and/or overheating, which
may cause excessive fuel consumption or
engine damage. If any of the above symp-
toms are encountered, have your vehicle
checked at an authorized NISSAN dealer or
other competent service facility.
However, now and then you may notice
light spark knock for a short time while
accelerating or driving up hills. This is
no cause for concern, because you get
the greatest fuel benefit when there is
light spark knock for a short time under
heavy engine load.
ENGINE OIL AND OIL FILTER
RECOMMENDATION
Selecting the correct oil
It is essential to choose engine oil with the
correct quality and viscosity to ensure sat-
isfactory engine life and performance. NIS-
SAN recommends the use of a low friction
oil (energy conserving oil) in order to im-
prove fuel economy and conserve energy.
Oils which do not have the specified quality
label should not be used as they could
cause engine damage.Only those engine oils with the American
Petroleum Institute (API) CERTIFICATION
MARK on the front of the container should
be used. This type of oil supersedes the
existing API SG, SH, or SJ and Energy
Conserving II categories.
If you cannot find engine oil with the API
CERTIFICATION MARK, use an API grade
SG/SH, Energy Conserving II or API grade
SJ, Energy Conserving oil. An oil with a
single designation SG or SH, or in combi-
nation with other categories (for example,
SG/CC or SG/CD) may also be used if one
ATI0507
10-4Technical and consumer information
ZX
Page 298 of 304
11 Index
A
Accident
Interia fuel shut-off switch .................... 6-11
After an accident........................................ 6-11
Air bag (See supplemental restraint
system) ...................................................... 1-31
Air bag warning light .................................. 1-37
Air cleaner housing filter ............................ 8-13
Air conditioner
Air conditioner operation ........................ 4-5
Air conditioner service .......................... 4-15
Air conditioner specification label ....... 10-12
Air conditioner system refrigerant and
lubrication recommendations ................ 10-6
Heater and air conditioner (automatic)
(if so equipped)..................................... 4-11
Heater and air conditioner (manual)....... 4-3
Rear seat air conditioner ...................... 4-14
Air filter
Cabin air filter ....................................... 8-14
Air flow charts .............................................. 4-7
Alarm system (See vehicle security
system) ...................................................... 2-11
Anti-lock brake system (ABS).................... 5-14
Anti-lock brake warning light ....................... 2-9
Armrests..................................................... 1-11Ashtray (See cigarette lighter and
ashtray) ...................................................... 2-22
Audio system
Compact disc (CD) player ........... 4-30, 4-32
FM-AM radio with cassette player ........ 4-19
FM-AM radio with cassette player and
compact disc (CD) player ..................... 4-25
Autolamp switch......................................... 2-17
Automatic
Automatic power window switch .......... 2-30
Automatic transmission fluid (ATF) ........ 8-8
Driving with automatic transmission ....... 5-6
Transmission selector lever lock
release .................................................... 5-7
B
Battery........................................................ 8-10
Battery replacement (See multi-remote
control system) ............................................ 3-8
Before starting the engine ........................... 5-5
Brake
Anti-lock brake system (ABS) .............. 5-14
Brake booster ....................................... 8-20
Brake fluid ..................................... 10-2, 8-9
Brake light (See stop light) ................... 8-25
Brake pedal .......................................... 8-19
Brake system ........................................ 5-14Brake warning light ................................. 2-8
Brake wear indicators ........................... 2-11
Parking brake check ............................. 8-19
Parking brake operation ......................... 5-9
Self-adjusting brakes ............................ 8-19
Break-in schedule ...................................... 5-11
Bulb check/instrument panel ....................... 2-7
Bulb replacement ....................................... 8-25
C
Cabin air filter ............................................ 8-14
Capacities and recommended fuel/
lubricants.................................................... 10-2
Car phone or CB radio .............................. 4-46
Cargo net ................................................... 2-26
Cargo (See vehicle loading
information) .............................................. 10-13
Check engine indicator light
(See malfunction indicator light) ................ 2-10
Child restraint with top tether strap ........... 1-68
Child restraints ........................................... 1-54
Child safety sliding door lock....................... 3-5
Cigarette lighter (accessory) and
ashtray ....................................................... 2-22
Cleaning exterior and interior ...................... 7-2
Clock................................................. 4-21, 4-27
Cold weather driving .................................. 5-16
ZX