Page 97 of 247
OPENER OPERATIONTo open the fuel filler lid, push the opener
switch. To lock, close the fuel filler lid securely.
FUEL FILLER CAPThe fuel filler cap is a ratcheting type. Tighten
the cap clockwise until ratcheting clicks are
heard.
Put the fuel filler cap on the cap holder while
refueling.
WARNING
IGasoline is extremely flammable and
highly explosive under certain condi-
tions. You could be burned or seri-ously injured if it is misused or mis-
handled. Always stop the engine and
do not smoke or allow open flames or
sparks near the vehicle when refuel-
ing.
IFuel may be under pressure. Turn the
cap one-half turn, and wait for any
hissing sound to stop to prevent fuel
from spraying out and possible per-
sonal injury. Then remove the cap.
IDo not attempt to top off the fuel tank
SPA0986
SPA0653
FUEL FILLER LID3-12
Pre-driving checks and adjustments
Z
00.1.17/A33-D/V5.0
X
Page 156 of 247

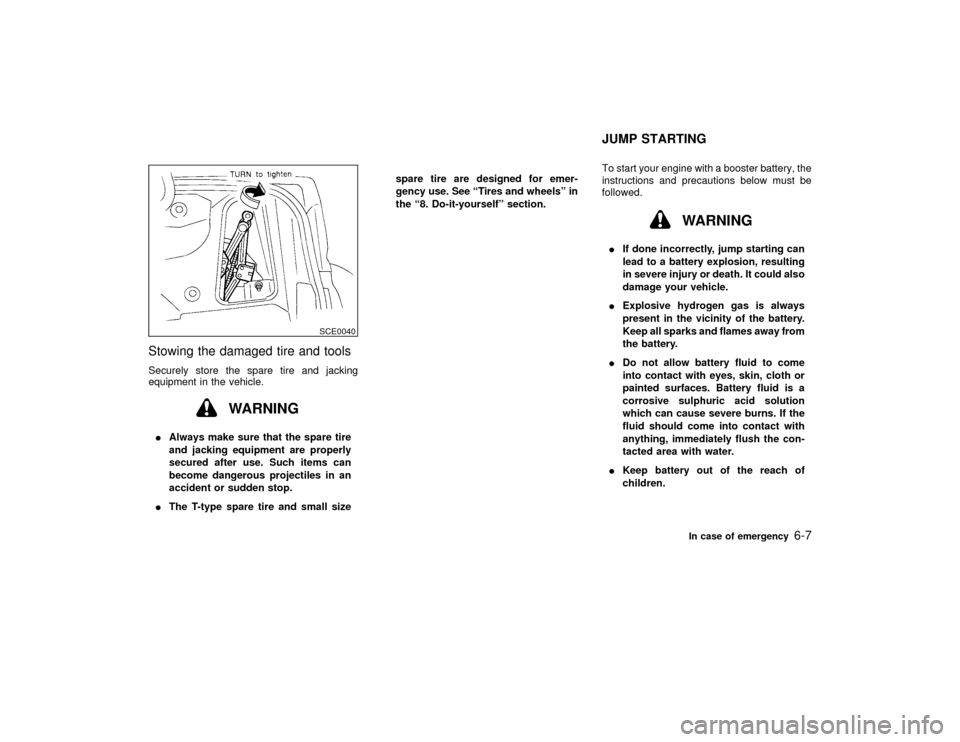
Stowing the damaged tire and toolsSecurely store the spare tire and jacking
equipment in the vehicle.
WARNING
IAlways make sure that the spare tire
and jacking equipment are properly
secured after use. Such items can
become dangerous projectiles in an
accident or sudden stop.
IThe T-type spare tire and small sizespare tire are designed for emer-
gency use. See ªTires and wheelsº in
the ª8. Do-it-yourselfº section.To start your engine with a booster battery, the
instructions and precautions below must be
followed.
WARNING
IIf done incorrectly, jump starting can
lead to a battery explosion, resulting
in severe injury or death. It could also
damage your vehicle.
IExplosive hydrogen gas is always
present in the vicinity of the battery.
Keep all sparks and flames away from
the battery.
IDo not allow battery fluid to come
into contact with eyes, skin, cloth or
painted surfaces. Battery fluid is a
corrosive sulphuric acid solution
which can cause severe burns. If the
fluid should come into contact with
anything, immediately flush the con-
tacted area with water.
IKeep battery out of the reach of
children.
SCE0040
JUMP STARTING
In case of emergency
6-7
Z
00.1.17/A33-D/V5.0
X
Page 182 of 247

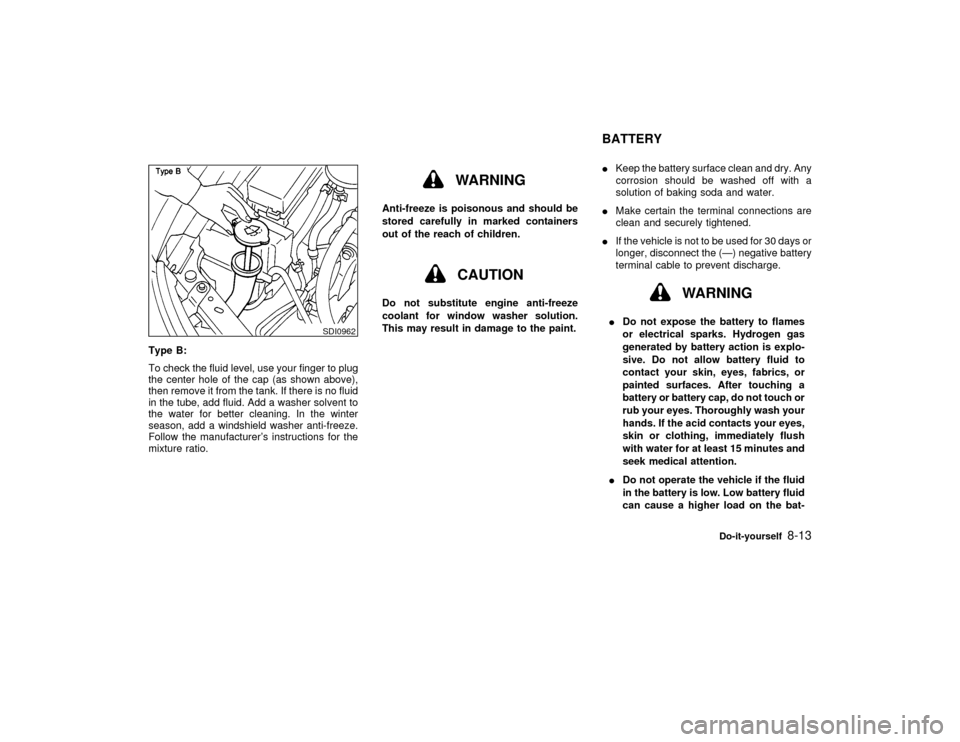
Type B:
To check the fluid level, use your finger to plug
the center hole of the cap (as shown above),
then remove it from the tank. If there is no fluid
in the tube, add fluid. Add a washer solvent to
the water for better cleaning. In the winter
season, add a windshield washer anti-freeze.
Follow the manufacturer's instructions for the
mixture ratio.
WARNING
Anti-freeze is poisonous and should be
stored carefully in marked containers
out of the reach of children.
CAUTION
Do not substitute engine anti-freeze
coolant for window washer solution.
This may result in damage to the paint.IKeep the battery surface clean and dry. Any
corrosion should be washed off with a
solution of baking soda and water.
IMake certain the terminal connections are
clean and securely tightened.
IIf the vehicle is not to be used for 30 days or
longer, disconnect the (Ð) negative battery
terminal cable to prevent discharge.
WARNING
IDo not expose the battery to flames
or electrical sparks. Hydrogen gas
generated by battery action is explo-
sive. Do not allow battery fluid to
contact your skin, eyes, fabrics, or
painted surfaces. After touching a
battery or battery cap, do not touch or
rub your eyes. Thoroughly wash your
hands. If the acid contacts your eyes,
skin or clothing, immediately flush
with water for at least 15 minutes and
seek medical attention.
IDo not operate the vehicle if the fluid
in the battery is low. Low battery fluid
can cause a higher load on the bat-
SDI0962
BATTERY
Do-it-yourself
8-13
Z
00.1.17/A33-D/V5.0
X
Page 193 of 247
HEADLIGHTSThe headlight is a semi-sealed beam type
which uses a replaceable headlight (halogen)
bulb. A bulb can be replaced from inside the
engine compartment without removing the
headlight assembly.
CAUTION
High pressure halogen gas is sealed
inside the halogen bulb. The bulb may
break if the glass envelope is scratched
or the bulb is dropped.
When handling the bulb, do not touch
the glass envelope.
Replacing the headlight bulb1. Disconnect the battery negative cable.
2. Disconnect the electrical connector from
the rear end of the bulb.
3. Pull off the rubber cap.
4. Push and turn the retaining pin to loosen it.
5. Remove the headlight bulb. Do not shake
or rotate the bulb when removing it.
6. Install the new bulb in the reverse order of
removal.
Aiming is not necessary after replacing the
bulb. When aiming adjustment is neces-
sary, contact your NISSAN dealer.
SDI0967
8-24
Do-it-yourself
Z
00.1.17/A33-D/V5.0
X
Page 217 of 247

The following are approximate capacities. The actual refill capacities may be a little different. When refilling, follow the procedure
instructed in the ª8. Do-it-yourselfº section to determine the proper refill capacity.
Capacity (Approximate)
Recommended
specifications US
measureImp
measureLiter
Fuel 18-1/2 gal 15-3/8 gal 70 Unleaded gasoline with an octane rating of at least 91 AKI (RON 96)*1
Engine oil*6
Drain and refill
With oil filter change 4-1/4 qt 3-1/2 qt 4.0IAPI Certification Mark*2, *3
IAPI grade SG/SH, Energy ConservingI&IIorAPIgrade SJ, Energy
Conserving*2, *3
IILSAC grade GF-I & GF-II*2, *3 Without oil filter change 3-7/8 qt 3-1/4 qt 3.7
Cooling system
With reservoir 8-1/8 qt 6-3/4 qt 7.7
Genuine NISSAN anti-freeze coolant or equivalent
Reservoir 3/4 qt 5/8 qt 0.7
Manual transmission gear oil Ð Ð Ð API GL-4, Viscosity SAE 75W-90 only
Automatic transmission fluid
Refill to the proper oil level according to the instructions
in the ª8. Do-it-yourselfº section.Nissan Matic ªDº (Continental U.S. and Alaska) or Canada NISSAN Auto-
matic Transmission Fluid*4
Power steering fluidGenuine Nissan PSFII or equivalent*8
Brake and clutch fluidGenuine Nissan Brake Fluid*5 or equivalent DOT 3 (US FMVSS No. 116)
Multi-purpose grease Ð Ð Ð NLGI No. 2 (Lithium soap base)
Air conditioning system refrigerant Ð Ð Ð HFC-134a (R-134a)*7
Air conditioning system lubricants Ð Ð ÐNissan A/C System Oil
Type S or exact equivalent
*1: For additional information, see later in this paragraph for fuel recommendation.
*2: For additional information, see later in this paragraph for engine oil and oil filter recommendation.
*3: For additional information, see later in this paragraph for recommended SAE viscosity number.
*4: Dexron
TMIII/Mercon
TM
or equivalent may also be used. Outside the continental United States and Alaska contact a NISSAN dealer for more information regarding
suitable fluids, including recommended brand(s) of Dexron
TMIII/Mercon
TM
automatic transmission fluid.
*5: Available in mainland US through your NISSAN dealer.
*6: For additional information, see ªEngine oilº in the ª8. Do-it-yourselfº section for changing engine oil.
*7: For additional information, see ªVehicle identificationº in this section for air conditioner specification label.
*8: Genuine Nissan PSFII, Canada Nissan Automatic Transmission fluid, Dexron
TMIII/Mercon
TM
or equivalent ATF may also be used.
CAPACITIES AND
RECOMMENDED
FUEL/LUBRICANTS10-2
Technical and consumer information
Z
00.1.17/A33-D/V5.0
X
Page 222 of 247
Contact your NISSAN dealer when servicing
your air conditioning system.
ENGINE
Model VQ30DE
Type Gasoline, 4-cycle
Cylinder arrangement 6-cylinder, V-slanted at 60É
Bore x Stroke in (mm) 3.66 x 2.886 (93.0 x 73.3)
Displacement cu in (cm
3) 182.33 (2,988)
Firing order 1-2-3-4-5-6*
Idle speed rpm
See the emission control label on
the underside of the hood. Ignition timing (B.T.D.C.) degree/rpm
CO percentage at idle speed [No air] %
Spark plugStandard PFR5G-11
Service option PFR4G-11, PFR6G-11
Spark plug gap (Normal) in (mm) 0.043 (1.1)
Camshaft operation Timing chain
Alternator belt size
Width x Length in (mm) 0.8409 x 43.11 (21.36 x 1,095)
TI1009-A
SPECIFICATIONS
Technical and consumer information
10-7
Z
00.1.17/A33-D/V5.0
X