2001 NISSAN FRONTIER light
[x] Cancel search: lightPage 119 of 290

RPT (Repeat)
When the
repeat button is pushed
while the compact disc is playing, the play
pattern changes as follows.
1:The current selection is repeated.
MIX:Selections are played at random, not
following the sequence on the compact
disc. The same program may be repeated
twice.
Normal(no symbol): All selections are
played repeatedly in sequence.
When a new compact disc is inserted,
the play pattern automatically changes
to the(Normal(play pattern.
CD EJECT
When the
button is pushed with a com-
pact disc loaded, the compact disc ejects.
When the
button is pushed while the
compact disc is playing, the compact disc
ejects and the system turns off.
If the compact disc ejects and is not
removed within 10 seconds, it is pulled
back into the slot.DISC indicator light
CD IN appears on the display when a CD is
loaded with the system ON
CD care and cleaning:
cHandle a CD by its edges. Never touch
the surface of the disc. Do not bend the
disc.
cAlways place the discs in the storage
case when they are not being used.
cTo clean a disc, wipe the surface from
the center to the outer edge using a
clean, soft cloth. Do not wipe the disc
using a circular motion.
Do not use a conventional record cleaner
or alcohol intended for industrial use.
cA new disc may be rough on the inner
LHA0049
Heater, air conditioner and audio systems4-15
ZX
Page 120 of 290
and outer edges. Remove the rough
edges by rubbing the inner and outer
edges with the side of a pen or pencil as
illustrated.
CAUTION
cOnly use high quality 12 cm (4.7
inches) round discs that have the
``Compact Disc Digital Audio'' logo
on the disc or packaging.
cDuring cold weather or rainy days,
the player may malfunction due to
the humidity. If this occurs, remove
the CD and dehumidify or ventilate
the player completely.
cThe player may skip while driving on
rough roads.
cThe CD player sometimes cannot
function when the passenger com-
partment temperature is extremely
high. Decrease the temperature be-
fore use.
cDo not expose the CD to direct sun-
light.
cDo not touch the playing surface of
the disc.cDo not use the following CD's as
they may cause the CD player to
malfunction:
c8 cm (3.1 in) discs with an adapter
cRecordable compact discs (CD-R)
cRewritable compact discs (CD-
RW)
cCD's that are not round
cCD's with a paper label
cCD's that are warped, scratched
or have abnormal edges
4-16Heater, air conditioner and audio systems
ZX
Page 124 of 290
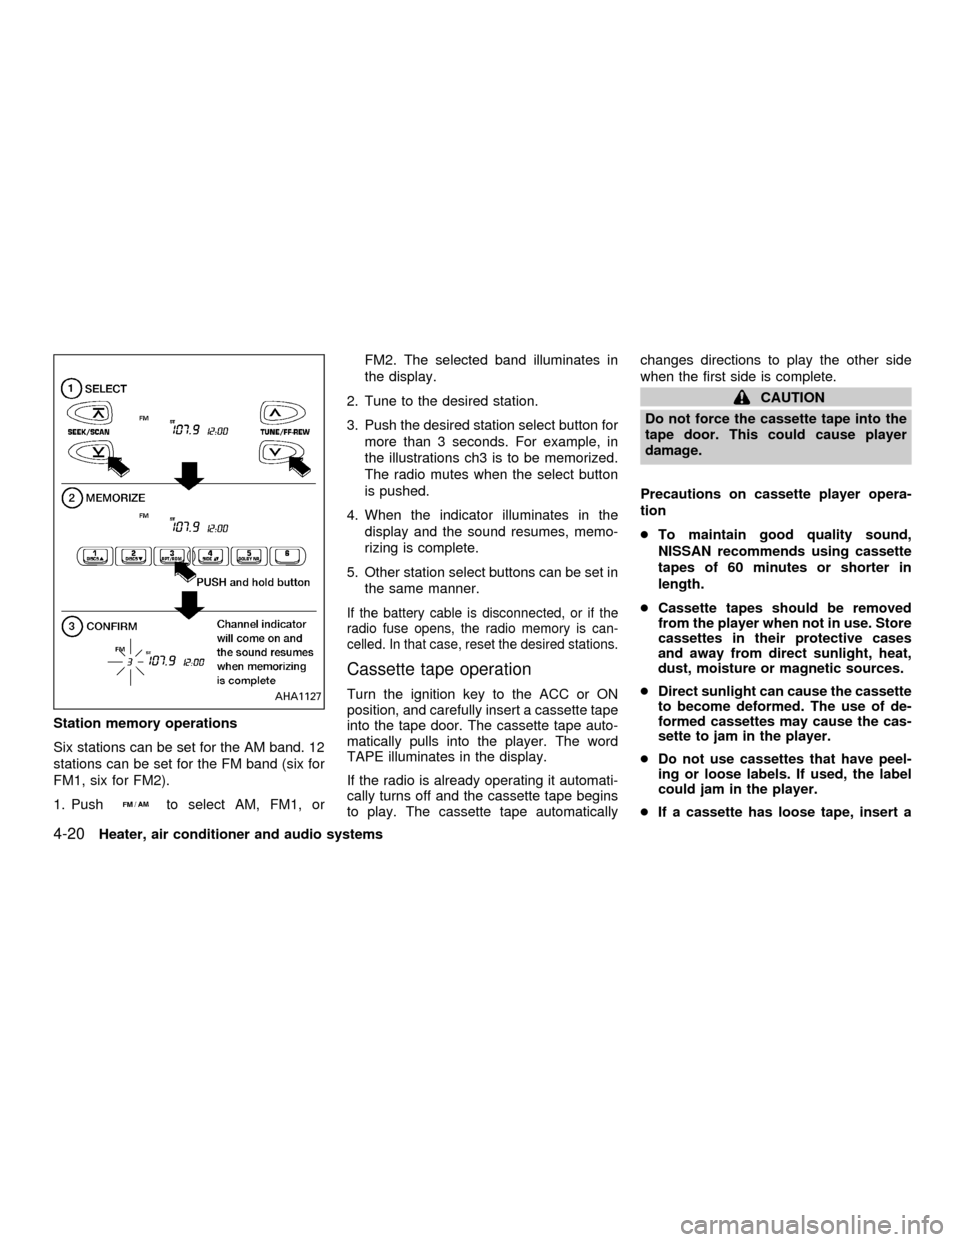
Station memory operations
Six stations can be set for the AM band. 12
stations can be set for the FM band (six for
FM1, six for FM2).
1. Push
to select AM, FM1, orFM2. The selected band illuminates in
the display.
2. Tune to the desired station.
3. Push the desired station select button for
more than 3 seconds. For example, in
the illustrations ch3 is to be memorized.
The radio mutes when the select button
is pushed.
4. When the indicator illuminates in the
display and the sound resumes, memo-
rizing is complete.
5. Other station select buttons can be set in
the same manner.
If the battery cable is disconnected, or if the
radio fuse opens, the radio memory is can-
celled. In that case, reset the desired stations.
Cassette tape operation
Turn the ignition key to the ACC or ON
position, and carefully insert a cassette tape
into the tape door. The cassette tape auto-
matically pulls into the player. The word
TAPE illuminates in the display.
If the radio is already operating it automati-
cally turns off and the cassette tape begins
to play. The cassette tape automaticallychanges directions to play the other side
when the first side is complete.
CAUTION
Do not force the cassette tape into the
tape door. This could cause player
damage.
Precautions on cassette player opera-
tion
cTo maintain good quality sound,
NISSAN recommends using cassette
tapes of 60 minutes or shorter in
length.
cCassette tapes should be removed
from the player when not in use. Store
cassettes in their protective cases
and away from direct sunlight, heat,
dust, moisture or magnetic sources.
cDirect sunlight can cause the cassette
to become deformed. The use of de-
formed cassettes may cause the cas-
sette to jam in the player.
cDo not use cassettes that have peel-
ing or loose labels. If used, the label
could jam in the player.
cIf a cassette has loose tape, insert a
AHA1127
4-20Heater, air conditioner and audio systems
ZX
Page 127 of 290
the play pattern automatically changes
to ALL.
CD eject
When the
button is pushed with a com-
pact disc loaded, the compact disc ejects.
When the
button is pushed while the
compact disc is playing, the compact disc
ejects and the system turns off.
If the compact disc ejects and is not
removed within 10 seconds, it is pulled
back into the slot.
DISC indicator light
This light comes on when a compact disc is
loaded into the player.
CD care and cleaning:
cHandle a CD by its edges. Never touch
the surface of the disc. Do not bend the
disc.
cAlways place the discs in the storage
case when they are not in use.
cTo clean a disc, wipe the surface from
the center to the outer edge using a
clean, soft cloth. Do not wipe the disc
using a circular motion.
Do not use a conventional record cleaner
or alcohol intended for industrial use.
cA new disc may be rough on the innerand outer edges. Remove the rough
edges by rubbing the inner and outer
edges with the side of a pen or pencil as
illustrated.
CAUTION
cOnly use high quality 12 cm (4.7
inches) round discs that have the
``Compact Disc Digital Audio'' logo
on the disc or packaging.
cDuring cold weather or rainy days,
the player may malfunction due to
the humidity. If this occurs, remove
the CD and dehumidify or ventilate
the player completely.
cThe player may skip while driving on
rough roads.
cThe CD player sometimes cannot
function when the compartment tem-
perature is extremely high. Decrease
the temperature before use.
cDo not expose the CD to direct sun-
light.
cDo not touch the playing surface of
the disc.
LHA0049
Heater, air conditioner and audio systems4-23
ZX
Page 141 of 290
Ejectºfor 2 seconds. The display then
changes toªEjecting Discº.
3. When a disc is removed, the indicator
and disc icon will be turned off, and then
the next disc will emerge, and so on.
4. The display will be turned off after all
discs are ejected and removed.
If a disc is not removed within 15 seconds,
or if the EJECT button is pressed again
during the Eject sequence, the entire disc
Eject sequence will be canceled.
CD care and cleaning:
cHandle a CD by its edges. Never touch
the surface of the disc. Do not bend the
disc.
cAlways place the discs in the storage
case when they are not being used.
cTo clean a disc, wipe the surface from
the center to the outer edge using a
clean, soft cloth. Do not wipe the disc
using a circular motion.
Do not use a conventional record cleaner
or alcohol intended for industrial use.cA new disc may be rough on the inner
and outer edges. Remove the rough
edges by rubbing the inner and outer
edges with the side of a pen or pencil as
illustrated.
CAUTION
cOnly use high quality 12 cm (4.7
inches) round discs that have the
``Compact Disc Digital Audio'' logo
on the disc or packaging.
cDuring cold weather or rainy days,
the player may malfunction due to
the humidity. If this occurs, remove
the CD and dehumidify or ventilate
the player completely.
cThe player may skip while driving on
rough roads.
cThe CD player sometimes cannot
function when the passenger com-
partment temperature is extremely
high. Decrease the temperature be-
fore use.
cDo not expose the CD to direct sun-
light.
cDo not touch the playing surface of
the disc.
LHA0049
Heater, air conditioner and audio systems4-37
ZX
Page 149 of 290
(manual transmission vehicles), us-
ing only the brake, as this could
cause loss of control.
cHeavy braking going down a hill
could cause your brakes to overheat
and fade, resulting in loss of control
and an accident. Apply brakes lightly
and use a low gear to control your
speed.
cUnsecured cargo can be thrown
around when driving over rough ter-
rain. Properly secure all cargo so it
will not be thrown forward and cause
injury to you or your passengers.
cTo avoid raising the center of gravity
excessively, do not exceed the rated
capacity of the roof rack (if so
equipped) and evenly distribute the
load. Secure heavy loads in the
cargo area as far forward and as low
as possible. Do not equip the vehicle
with tires larger than specified in this
manual. This could cause your ve-
hicle to roll over.
cDo not grip the inside or spokes of
the steering wheel when driving off-
road. The steering wheel could movesuddenly and injure your hands. In-
stead drive with your fingers and
thumbs on the outside of the rim.
cBefore operating the vehicle, ensure
that the driver and all passengers
have their seat belts fastened.
cAlways drive with the floor mats in
place as the floor may become hot.
cLower your speed when encounter-
ing strong crosswinds. With a higher
center of gravity, your NISSAN is
more affected by strong side winds.
Slower speeds ensure better vehicle
control.
cDo not drive beyond the perfor-
mance of the tires, even with 4WD
engaged.
cAccelerating quickly, sharp steering
maneuvers or sudden braking may
cause loss of control.
cIf at all possible, avoid sharp turning
maneuvers, particularly at high
speeds. Your NISSAN four-wheel
drive vehicle has a higher center of
gravity than a two-wheel drive veh-icle. The vehicle is not designed for
cornering at the same speeds as
conventional two-wheel drive ve-
hicles. Failure to operate this vehicle
correctly could result in loss of con-
trol and/or a roll over accident.
cAlways use tires of the same type,
size, brand, construction (bias, bias-
belted, or radial), and tread pattern
on all four wheels. Install tire chains
on the rear wheels when driving on
slippery roads and drive carefully.
cBe sure to check the brakes immedi-
ately after driving in mud or water.
See(Brake system(later in this sec-
tion for(Wet brakes(.
cAvoid parking your vehicle on steep
hills. If you get out of the vehicle and
it rolls forward, backward or side-
ways, you could be injured.
cWhenever you drive off-road
through sand, mud or water as deep
as the wheel hub, more frequent-
maintenance may be required. See
(Periodic maintenance(in the(Main-
tenance(section of this manual.
Starting and driving
5-5
ZX
Page 150 of 290
AUTOMATIC TRANSMISSION
On automatic transmission models, the ig-
nition lock is designed so the key cannot be
turned to LOCK and removed until the shift
selector lever is moved to the P (Park)
position.
When removing the key from the ignition,
make sure the shift selector lever is in the P
(Park) position.
If the key cannot be turned to the LOCK
position, proceed as follows to remove the key:
1) Move the shift selector lever into the P
(Park) position.2) Turn the ignition key slightly in the ON
direction.
3) Turn the key toward the LOCK position.
4) Remove the key.
The shift lever is designed so it cannot be
moved out of P (Park) and into any of the
other gear positions if the ignition key is
turned to OFF or if the key is removed from
the switch.
The shift lever can be moved if the igni-
tion switch is in the ACC position. This
allows the vehicle to be moved if the
battery is discharged. The shift lever can
also be moved if the ignition switch is in
the ON position and the foot brake pedal
is depressed.
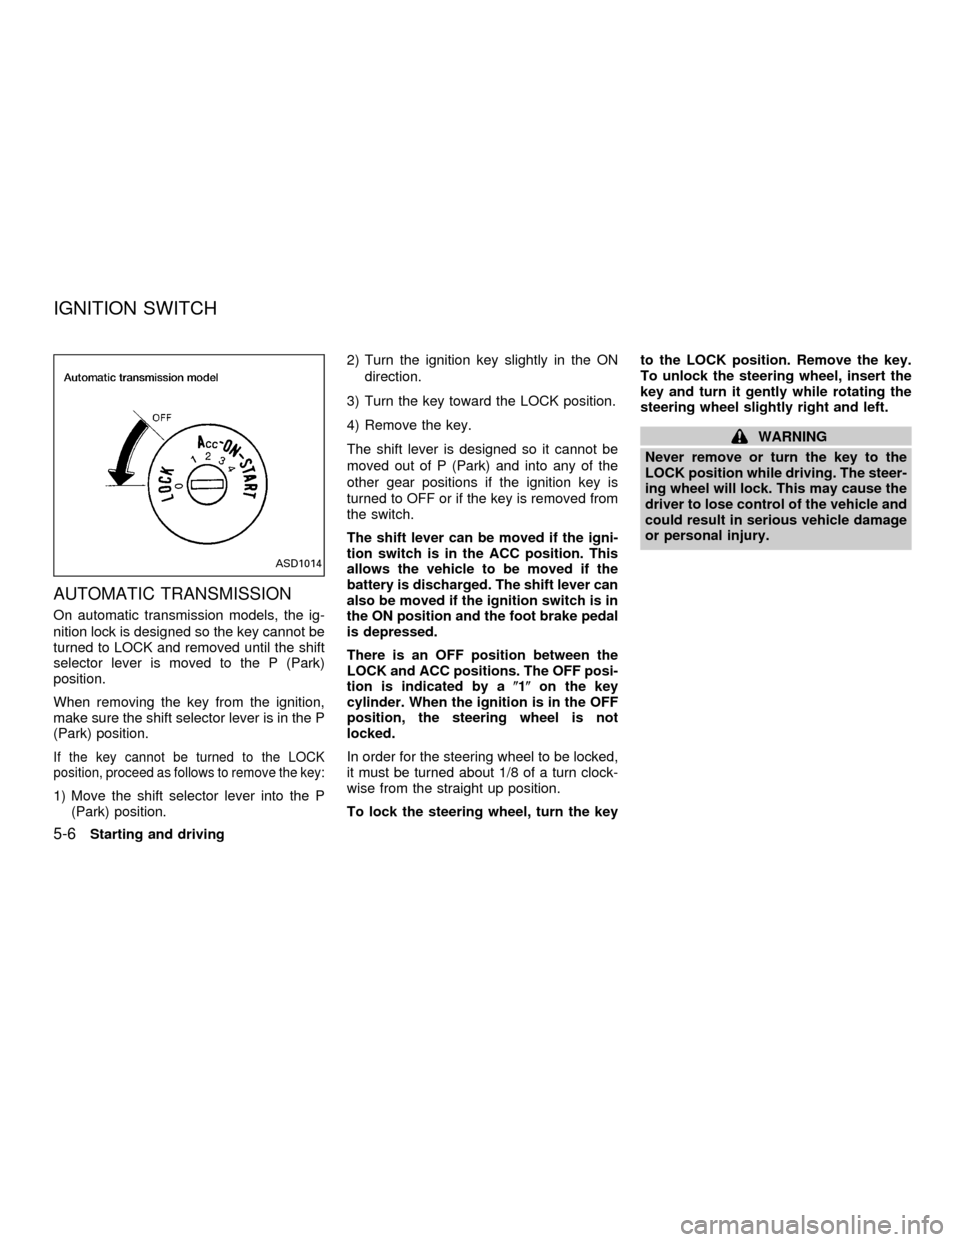
There is an OFF position between the
LOCK and ACC positions. The OFF posi-
tion is indicated by a(1(on the key
cylinder. When the ignition is in the OFF
position, the steering wheel is not
locked.
In order for the steering wheel to be locked,
it must be turned about 1/8 of a turn clock-
wise from the straight up position.
To lock the steering wheel, turn the keyto the LOCK position. Remove the key.
To unlock the steering wheel, insert the
key and turn it gently while rotating the
steering wheel slightly right and left.
WARNING
Never remove or turn the key to the
LOCK position while driving. The steer-
ing wheel will lock. This may cause the
driver to lose control of the vehicle and
could result in serious vehicle damage
or personal injury.
ASD1014
IGNITION SWITCH
5-6Starting and driving
ZX
Page 151 of 290
MANUAL TRANSMISSION
The ignition switch includes an anti-theft
steering lock device.
The key can only be removed when the
ignition switch is in the LOCK position.
On manual transmission models, to turn the
ignition key to LOCK from ACC or ON, turn
the key to OFF, push the key in, then turn
the key to LOCK.
In order for the steering wheel to be locked,
it must be turned about 1/8 of a turn clock-
wise from the straight up position.To lock the steering wheel, turn the key
to the LOCK position. Remove the key.
To unlock the steering wheel, insert the
key and turn it gently while rotating the
steering wheel slightly right and left.
WARNING
Never remove or turn the key to the
LOCK position while driving. The steer-
ing wheel will lock. This may cause the
driver to lose control of the vehicle and
could result in serious vehicle damage
or personal injury.
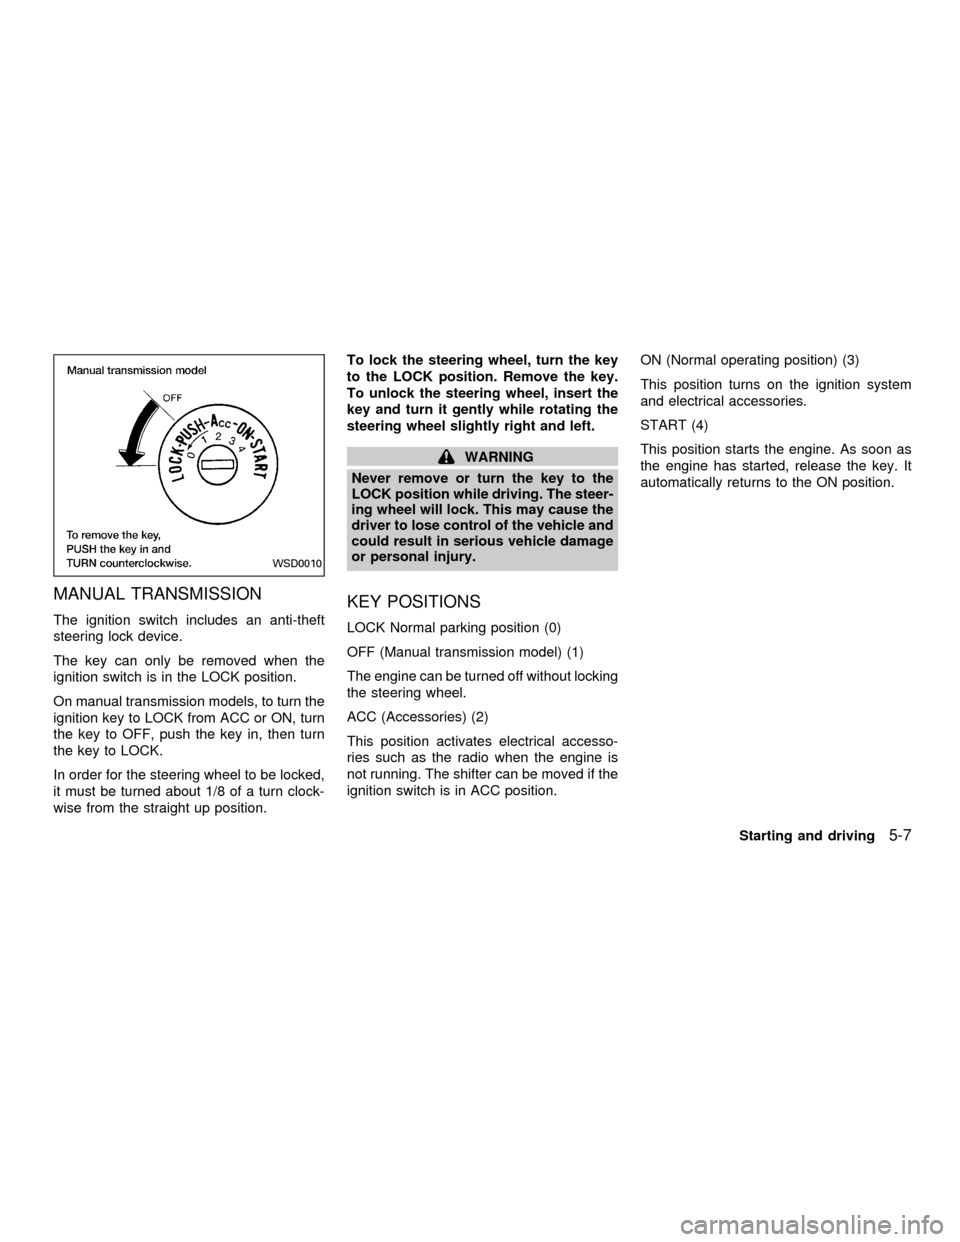
KEY POSITIONS
LOCK Normal parking position (0)
OFF (Manual transmission model) (1)
The engine can be turned off without locking
the steering wheel.
ACC (Accessories) (2)
This position activates electrical accesso-
ries such as the radio when the engine is
not running. The shifter can be moved if the
ignition switch is in ACC position.ON (Normal operating position) (3)
This position turns on the ignition system
and electrical accessories.
START (4)
This position starts the engine. As soon as
the engine has started, release the key. It
automatically returns to the ON position.
WSD0010
Starting and driving5-7
ZX