2001 NISSAN ALTIMA height
[x] Cancel search: heightPage 11 of 258

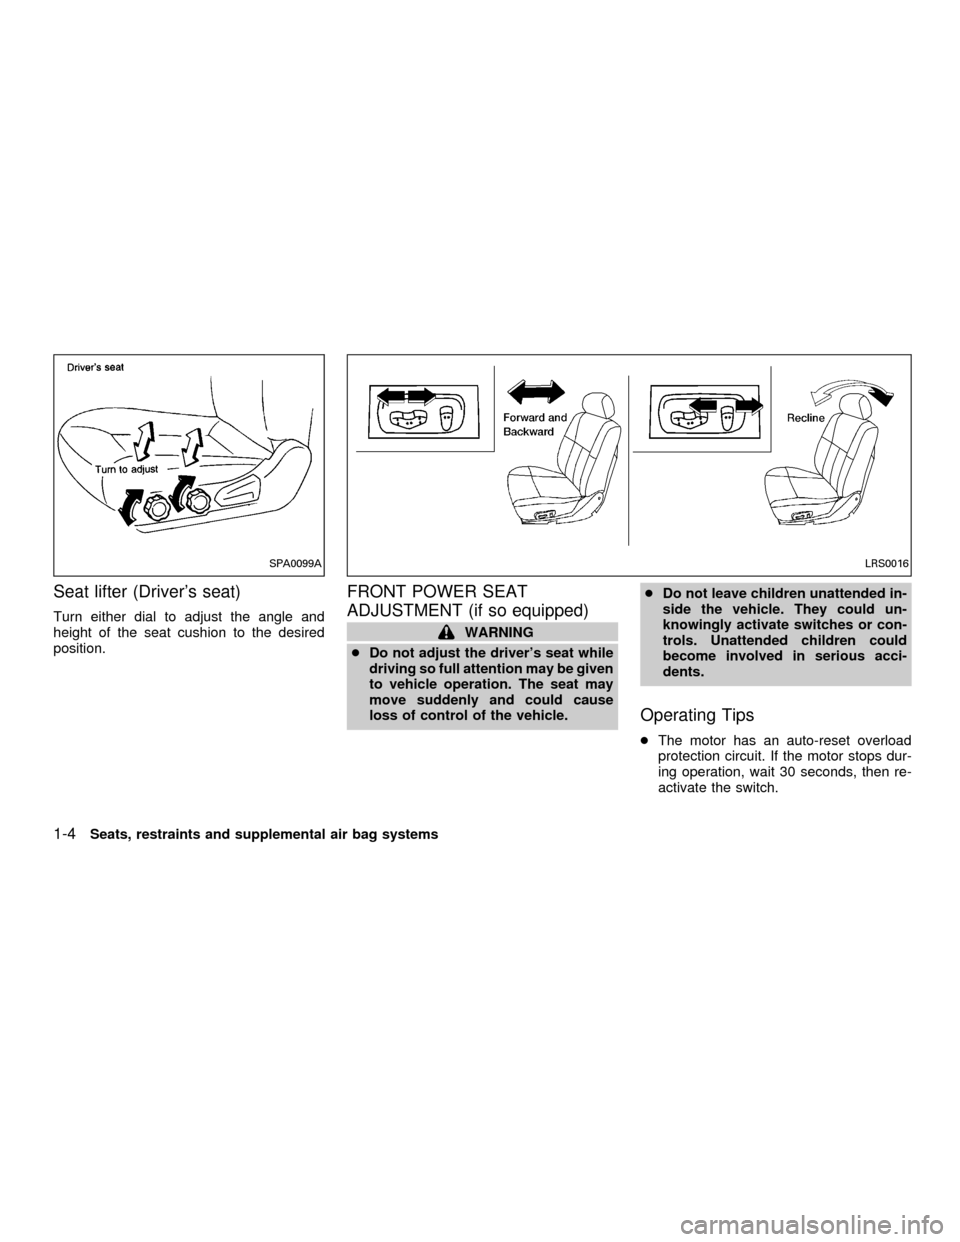
Seat lifter (Driver's seat)
Turn either dial to adjust the angle and
height of the seat cushion to the desired
position.
FRONT POWER SEAT
ADJUSTMENT (if so equipped)
WARNING
cDo not adjust the driver's seat while
driving so full attention may be given
to vehicle operation. The seat may
move suddenly and could cause
loss of control of the vehicle.cDo not leave children unattended in-
side the vehicle. They could un-
knowingly activate switches or con-
trols. Unattended children could
become involved in serious acci-
dents.
Operating Tips
cThe motor has an auto-reset overload
protection circuit. If the motor stops dur-
ing operation, wait 30 seconds, then re-
activate the switch.
SPA0099ALRS0016
1-4Seats, restraints and supplemental air bag systems
ZX
Page 12 of 258

cDo not operate the power seat switch for
a long period of time when the engine is
off. This will discharge the battery.
Forward and backward
Moving the switch forward or backward will
slide the seat forward or backward to the
desired position.
Reclining
Move the recline switch backward until the
desired angle is obtained. To bring the
seatback forward again, move the switch
forward and move your body forward. The
seatback will move forward.
Seat lifter (if so equipped for driver's
seat)
Push the front or rear end of the switch up or
down to adjust the angle and height of the
seat cushion.
Lumbar support (if so equipped for
driver's seat)
The lumbar support feature provides lower
back support to the driver. Move the lever
up or down to adjust the seat lumbar area.
LRS0017ARS1035
Seats, restraints and supplemental air bag systems1-5
ZX
Page 33 of 258

Checking seat belt operation
Seat belt retractors are designed to lock
seat belt movement using two separate
methods:
1) When the seat belt is pulled quickly from
the retractor.
2) When the vehicle slows down rapidly.
To increase your confidence in the seat
belts, check their operation as follows.
cGrasp the shoulder belt and pull quickly
forward. The retractor should lock and
restrict further belt movement.
If the retractor does not lock during this
check or if you have any questions about
belt operation, see an authorized NISSAN
dealer.
Center of rear seat
Selecting correct set of seat belts:
The center seat belt buckle is identified by
the CENTER mark. The center seat belt
tongue can be fastenedonlyinto the center
seat belt buckle.
Shoulder belt height adjustment
(For front seats)
The shoulder belt anchor height should be
adjusted to the position best for you. (See
``Precautions on seat belt usage'' earlier in
this section.) To adjust, pull out the adjust-
ment button and move the shoulder belt
anchor to the desired position, so the belt
passes over the center of the shoulder. The
belt should be away from your face and
neck, but not falling off of your shoulder.
Release the adjustment button to lock the
shoulder belt anchor into position.
WRS0081WRS0006
1-26Seats, restraints and supplemental air bag systems
ZX
Page 34 of 258

WARNING
cAfter adjustment, release the adjust-
ment button and try to move the
shoulder belt anchor up and down to
make sure it is securely fixed in
position.
cThe shoulder belt anchor height
should be adjusted to the position
best for you. Failure to do so may
reduce the effectiveness of the en-
tire restraint system and increase
the chance or severity of injury in an
accident.SEAT BELT EXTENDERS
If, because of body size or driving position,
it is not possible to properly fit the lap-
shoulder belt and fasten it, an extender is
available which is compatible with the in-
stalled seat belts. The extender adds ap-
proximately 8 inches (200 mm) of length
and may be used for either the driver or front
passenger seating position. See your NIS-
SAN dealer for assistance if an extender is
required.
WARNING
cOnly NISSAN seat belt extenders,
made by the same company which
made the original equipment seat
belts, should be used with NISSAN
seat belts.
cPersons who can use the standard
seat belt should not use an extender.
Such unnecessary use could result
in serious personal injury in the
event of an accident.
SEAT BELT MAINTENANCE
cTo clean the seat belt webbings,apply
a mild soap solution or any solution rec-
ommended for cleaning upholstery or
carpet. Then wipe with a cloth and allow
the seat belts to dry in the shade. Do not
allow the seat belts to retract until they
are completely dry.
cIf dirt builds up on the shoulder belt
guideof the seat belt anchors, the seat
belts may retract slowly. Wipe the shoul-
der belt guide with a clean, dry cloth.
cPeriodically check to see that the seat
belt and the metal components,such
as buckles, tongues, retractors, flexible
wires and anchors, work properly. If
loose parts, deterioration, cuts or other
damage on the webbing is found, the
entire seat belt assembly should be re-
placed.
Seats, restraints and supplemental air bag systems
1-27
ZX
Page 197 of 258

Self-adjusting brakes
Your vehicle is equipped with self-adjusting
brakes.
The front (and rear, if equipped) disc-type
brakes self-adjust every time the brake
pedal is applied. The rear drum-type brakes
also self-adjust every time the brake pedal
is applied.
If the brake pedal goes down farther than
normal, it may be due to a lack of adjust-
ment of the rear drum brakes. To adjust,
apply the parking brake several times.
WARNING
See an authorized NISSAN dealer for a
brake system check if the brake pedal
height does not return to normal.
Brake pad wear indicators
The disc brake pads on your vehicle have
audible wear indicators. When a brake pad
requires replacement, it makes a high
pitched scraping or screeching sound when
the vehicle is in motion whether or not the
brake pedal is depressed. Have the brakes
checked as soon as possible if the wearindicator sound is heard.
Under some driving or climate conditions,
occasional brake squeak, squeal or other
noise may be heard. Occasional brake
noise during light to moderate stops is nor-
mal and does not affect the function or
performance of the brake system.
The rear drum brakes (if so equipped) do
not have audible wear indicators. Should
you ever hear an unusually loud noise from
the rear drum brakes, have them inspected
as soon as possible by an authorized
NISSAN dealer.
Proper brake inspection intervals should
be followed.For more information regard-
ing brake inspections, see the appropriate
maintenance schedule information in the
``Maintenance'' section of this manual.
BRAKE BOOSTER
Check the brake booster function as fol-
lows:
1. With the engine off, press and release
the brake pedal several times. When
brake pedal movement (distance of
travel) remains the same from one pedalapplication to the next, continue on to the
next step.
2. While depressing the brake pedal, start
the engine. The pedal height should drop
a little.
3. With the brake pedal depressed, stop the
engine. Keep the pedal depressed for
about 30 seconds. The pedal height
should not change.
4. Run the engine for one minute without
depressing the brake pedal, then turn it
off. Depress the brake pedal several
times. The pedal travel distance will de-
crease gradually with each depression
as the vacuum is released from the
booster.
If the brakes do not operate properly, see an
authorized NISSAN dealer.
8-20Do-it-yourself
ZX
Page 202 of 258

3. Remove the three nuts and one bolt
mounting the headlamp assembly (see
above illustration).
4. Pull the headlamp assembly evenly away
from the front of the vehicle to access the
bulb sockets.5. Disconnect the harness connector from
the back side of the bulb socket (see
above illustration).
6. Turn the bulb retaining ring counter-
clockwise until it is free from the head-
lamp assembly and then remove it.
7. Remove the bulb by pulling it straight out
of the lamp assembly. Do not shake the
bulb when removing it.
8. Follow the instructions in reverse order to
install new bulb.
Headlamp mounting nuts and bolt
torque: 36 to 47 in-lb (4.1 to 5.3 Nzm)
Adjusting the headlight aim
Before performing aiming adjustment, make
sure of the following:
a. Use an aiming wall screen.
b. Keep all of the tires inflated to the correct
pressure.
c. Place the vehicle and screen on level
ground.
d. See that the vehicle is unloaded (except
for full levels of coolant, engine oil and
fuel, and that the spare tire, jack, and
tools are stored). Have the driver or an
equivalent weight placed in the driver's
seat.
Low beam
1. Open the hood. Turn headlamp low
beam on.
2. Adjust the vertical aim by turning the
adjusting screw.
cCover the opposite lamp and ensure the
fog lamps (if so equipped) are turned off.
cAdjust beam pattern until cutoff line is
positioned at the same height off ground
as bulb center (on H-line).
LDI0010LDI0011
Do-it-yourself8-25
ZX
Page 214 of 258

The wheel nuts must be kept tightened to
specifications at all times. It is recom-
mended that wheel nuts be tightened to
specification at each rotation interval.
WARNING
cAfter rotating the tires, check and
adjust the tire pressure.
cRetighten the wheel nuts when the
vehicle has been driven for 600 miles
(1,000 km) (also in cases of a flat tire,
etc.).
cDo not include the spare tire in the
tire rotation.
Tire wear and damage
WARNING
cTires should be periodically in-
spected for wear, cracking, bulging,
or objects caught in the tread. If
excessive wear, cracks, bulging, or
deep cuts are found, the tire(s)
should be replaced.
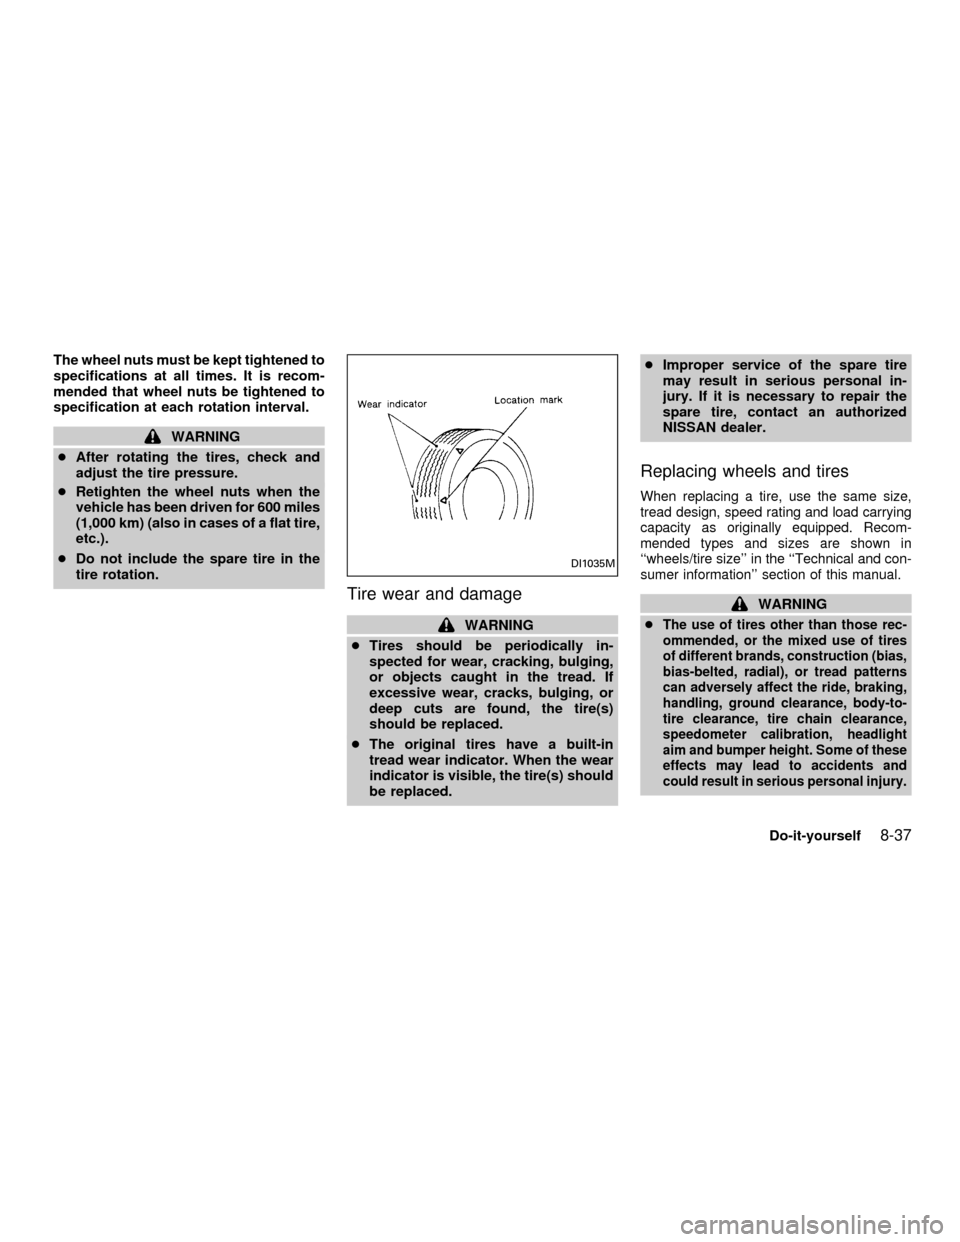
cThe original tires have a built-in
tread wear indicator. When the wear
indicator is visible, the tire(s) should
be replaced.cImproper service of the spare tire
may result in serious personal in-
jury. If it is necessary to repair the
spare tire, contact an authorized
NISSAN dealer.
Replacing wheels and tires
When replacing a tire, use the same size,
tread design, speed rating and load carrying
capacity as originally equipped. Recom-
mended types and sizes are shown in
``wheels/tire size'' in the ``Technical and con-
sumer information'' section of this manual.
WARNING
c
The use of tires other than those rec-
ommended, or the mixed use of tires
of different brands, construction (bias,
bias-belted, radial), or tread patterns
can adversely affect the ride, braking,
handling, ground clearance, body-to-
tire clearance, tire chain clearance,
speedometer calibration, headlight
aim and bumper height. Some of these
effects may lead to accidents and
could result in serious personal injury.
DI1035M
Do-it-yourself8-37
ZX
Page 238 of 258

WHEELS AND TIRES
Conventional T type (Spare)
Road wheel
Steel XE, GXE 15 x 6JJ 15 x 4T
Aluminum
SE, GLE, GXE
(1)16 x 6JJ 15 x 4T
Offset in (mm) 1.77 (45) 1.57 (40)
Tire size XE, GXE P195/65R15T
GXE P205/60R15T
GXE, GLE P205/55R16T T125/70D15
SE P205/55R16H
(1) if so equipped
DIMENSIONS AND WEIGHTS
Overall length in (mm) 185.7 (4,717)
Overall width in (mm) 69.1 (1,754)
Overall height in (mm) 55.9 (1,420)
Front tread in (mm) 59.3 (1,505)
Rear tread in (mm) 58.9 (1,495)
Wheelbase in (mm) 103.1 (2,620)
Gross vehicle weight rating lb (kg)
See the ``F.M.V.S.S.
certification label'' on
the driver side, center
door pillar. Gross axle weight rating
Front lb (kg)
Rear lb (kg)
Technical and consumer information10-9
ZX