2001 NISSAN ALTIMA battery
[x] Cancel search: batteryPage 12 of 258

cDo not operate the power seat switch for
a long period of time when the engine is
off. This will discharge the battery.
Forward and backward
Moving the switch forward or backward will
slide the seat forward or backward to the
desired position.
Reclining
Move the recline switch backward until the
desired angle is obtained. To bring the
seatback forward again, move the switch
forward and move your body forward. The
seatback will move forward.
Seat lifter (if so equipped for driver's
seat)
Push the front or rear end of the switch up or
down to adjust the angle and height of the
seat cushion.
Lumbar support (if so equipped for
driver's seat)
The lumbar support feature provides lower
back support to the driver. Move the lever
up or down to adjust the seat lumbar area.
LRS0017ARS1035
Seats, restraints and supplemental air bag systems1-5
ZX
Page 65 of 258

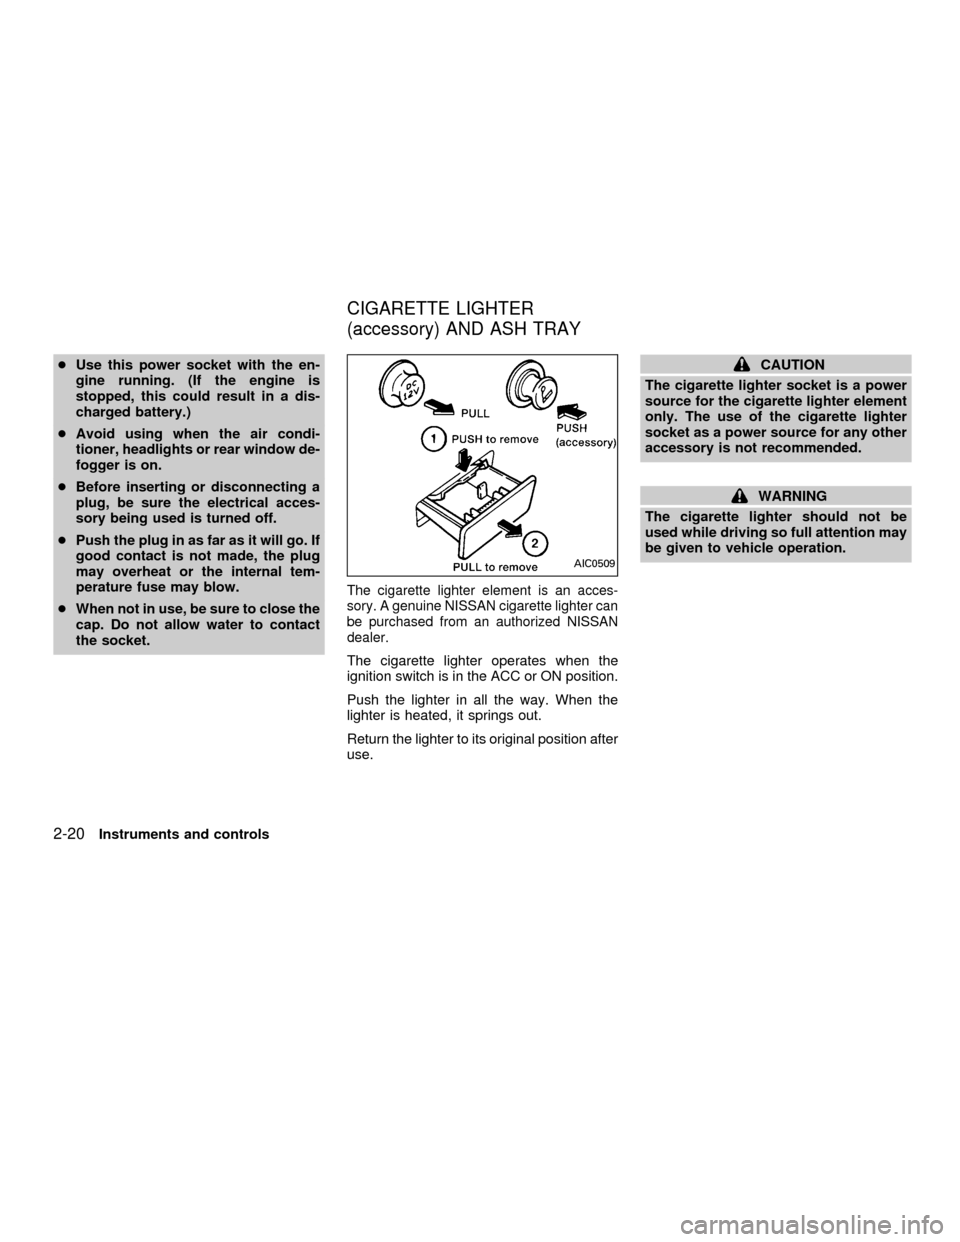
cUse this power socket with the en-
gine running. (If the engine is
stopped, this could result in a dis-
charged battery.)
cAvoid using when the air condi-
tioner, headlights or rear window de-
fogger is on.
cBefore inserting or disconnecting a
plug, be sure the electrical acces-
sory being used is turned off.
cPush the plug in as far as it will go. If
good contact is not made, the plug
may overheat or the internal tem-
perature fuse may blow.
cWhen not in use, be sure to close the
cap. Do not allow water to contact
the socket.
The cigarette lighter element is an acces-
sory. A genuine NISSAN cigarette lighter can
be purchased from an authorized NISSAN
dealer.
The cigarette lighter operates when the
ignition switch is in the ACC or ON position.
Push the lighter in all the way. When the
lighter is heated, it springs out.
Return the lighter to its original position after
use.
CAUTION
The cigarette lighter socket is a power
source for the cigarette lighter element
only. The use of the cigarette lighter
socket as a power source for any other
accessory is not recommended.
WARNING
The cigarette lighter should not be
used while driving so full attention may
be given to vehicle operation.
AIC0509
CIGARETTE LIGHTER
(accessory) AND ASH TRAY
2-20Instruments and controls
ZX
Page 73 of 258

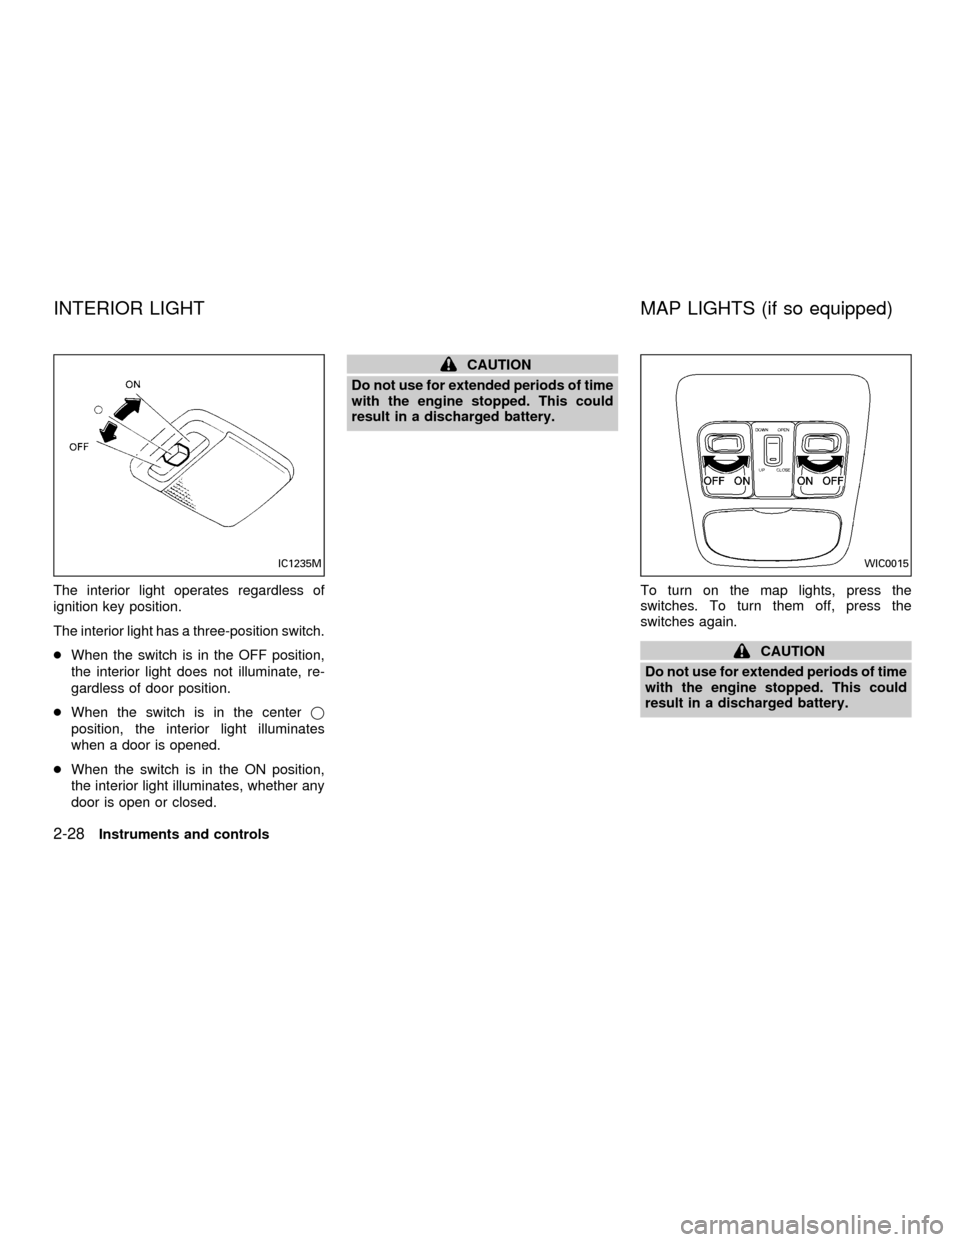
The interior light operates regardless of
ignition key position.
The interior light has a three-position switch.
cWhen the switch is in the OFF position,
the interior light does not illuminate, re-
gardless of door position.
cWhen the switch is in the centerj
position, the interior light illuminates
when a door is opened.
cWhen the switch is in the ON position,
the interior light illuminates, whether any
door is open or closed.
CAUTION
Do not use for extended periods of time
with the engine stopped. This could
result in a discharged battery.
To turn on the map lights, press the
switches. To turn them off, press the
switches again.
CAUTION
Do not use for extended periods of time
with the engine stopped. This could
result in a discharged battery.
IC1235MWIC0015
INTERIOR LIGHT MAP LIGHTS (if so equipped)
2-28Instruments and controls
ZX
Page 74 of 258

The light illuminates when the trunk lid is
opened. When the trunk lid is closed, the
light goes off.The Integrated HomeLinkTUniversal Trans-
ceiver provides a convenient way to consoli-
date the functions of up to three individual
hand-held transmitters into one built-in de-
vice.
Integrated HomeLinkTUniversal Trans-
ceiver:
cWill operate most Radio Frequency (RF)
devices such as garage doors, gates,
home and office lighting, entry door locks
and security systems.
cIs powered by your vehicle's battery. No
separate batteries are required. If the
vehicle's battery is discharged or is dis-
connected, HomeLinkTwill retain all pro-
gramming.Once the Integrated HomeLinkTUniver-
sal Transceiver is programmed, retain
the original transmitter for future pro-
gramming procedures (i.e., new vehicle
purchases). Upon sale of the vehicle, the
programmed Integrated HomeLinkTUni-
versal Transceiver buttons should be
erased for security purposes. For addi-
tional information refer to ``Program-
ming the Integrated HomeLinkTUniver-
sal Transceiver'' later in this section.
TRUNK LIGHT INTEGRATED HOMELINKT
UNIVERSAL TRANSCEIVER (if
so equipped)
Instruments and controls2-29
ZX
Page 76 of 258

PROGRAMMING HomeLinkTFOR
CANADIAN CUSTOMERS
Prior to 1992, D.O.C. regulations required
hand-held transmitters to stop transmitting
after 2 seconds. To program your hand-held
transmitter to HomeLinkT, continue to press
and hold the HomeLinkTbutton (note step 2
through 4 under ``Programming HomeLinkT'')
while you press and re-press (``cycle'') your
hand-held transmitters every 2 seconds until
the indicator light flashes rapidly (indicating
successful programming).
NOTE:
If programming a garage door opener,
etc., it is advised to unplug the device
during the ``cycling'' process to prevent
possible damage to the garage door
opener components.
OPERATING THE INTEGRATED
HomeLinkTUNIVERSAL TRANS-
CEIVER
The Integrated HomeLinkTUniversal Trans-
ceiver (once programmed) may now be
used to activate the garage door, etc. To
operate, simply press the appropriate pro-
grammed Integrated HomeLinkTUniversalTransceiver button. The red indicator light
will illuminate while the signal is being trans-
mitted.
PROGRAMMING TROUBLE-
DIAGNOSIS
If the HomeLinkTdoes not quickly learn the
hand-held transmitter information:
creplace the hand-held transmitter batter-
ies with new batteries.
cposition the hand-help transmitter with its
battery area facing away from the
HomeLinkTsurface.
cpress and hold both the HomeLinkTand
hand-held transmitter buttons without in-
terruption.
cposition the hand-held transmitter 2 to 5
inches (50 to 127 mm) away from the
HomeLinkTsurface. Hold the transmitter
in that position for up to 15 seconds. If
HomeLinkTis not programmed within
that time, try holding the transmitter in
another position - keeping the indicator
light in view at all times.
If you continue to have programming diffi-
culties, please contact the NISSAN Con-
sumer Affairs Department. The phone num-bers are located in the Foreword of this
owner's manual.
CLEARING THE PROGRAMMED
INFORMATION
Individual buttons cannot be cleared, how-
ever to clear all programming, press and
hold the two outside buttons and release
when the indicator light begins to flash
(approximately 20 seconds)
ROLLING CODE PROGRAMMING
Rolling code garage door openers (or other
rolling code devices) which are ``code pro-
tected'' and manufactured after 1996, may
be determined by the following:
A. Reference the garage door opener Own-
er's Manual for verification.
B. The hand-held transmitter appears to
program the Integrated HomeLinkTUni-
versal Transceiver but does not activate
the garage door.
C. Press and hold the trained HomeLinkT
button. If the garage door opener has the
rolling code feature, the HomeLinkTindi-
cator light will flash rapidly, then remains
on after 2 seconds.
Instruments and controls
2-31
ZX
Page 80 of 258

3 Pre-driving checks and adjustments
Keys .......................................................................3-2
Nissan vehicle immobilizer system
(NVIS) keys .......................................................3-2
Doors ......................................................................3-2
Locking with key ................................................3-3
Locking with inside lock knob............................3-3
Locking with power door lock switch.................3-4
Child safety rear door lock ................................3-5
Multi-remote control system (if so equipped).........3-5
How to use multi-remote control system...........3-5
Battery replacement ..........................................3-8
Hood .......................................................................3-9
Trunk lid................................................................3-10
Opener operation ............................................3-10Key operation ..................................................3-10
Interior trunk lid release (if so equipped) ........3-11
Fuel filler lid ..........................................................3-12
Opener operation ............................................3-12
Fuel filler cap ...................................................3-12
Steering wheel .....................................................3-14
Tilt operation ....................................................3-14
Sunvisors ..............................................................3-14
Vanity mirrors ..................................................3-14
Mirrors ..................................................................3-15
Inside mirror.....................................................3-15
Outside mirror remote control .........................3-15
ZX
Page 87 of 258

BATTERY REPLACEMENT
Replace the battery in the multi-remote con-
troller as follows:
1. Open the lid using a coin.
2. Replace the battery with a new one.Recommended battery: Sanyo CR2025
or equivalent.
3. Close the lid securely.
4. Press the
button, then thebut-
ton two or three times to check themulti-remote controller operation.
Each time the
button is pressed, the
hazard lights flash once.
If the battery is removed for any reason
other than replacement, perform step 4.
cAn improperly disposed battery can
hurt the environment. Always confirm
local regulations for battery disposal.
cThe multi-remote controller is water-
resistant; however, if it does get wet,
immediately wipe completely dry.
cThe operational range of the multi-
remote controller extends to approxi-
mately 33 ft (10 m) from the vehicle.
This range may vary with conditions.
FCC Notice:
Changes or modifications not expressly
approved by the manufacturer for com-
pliance could void the user's authority to
operate the equipment.
This device complies with part 15 of the
FCC Rules and RSS-210 of Industry
Canada.
Operation is subject to the following two
conditions: (1) This device may not
APD1026
3-8Pre-driving checks and adjustments
ZX
Page 109 of 258

SCAN tuning
Push the SEEK/SCAN tuning button
or
for more than 1.5 seconds. SCAN ap-
pears in the display window. SCAN tuning
begins from high to low frequencies or low
to high frequencies, depending on which
button is pressed. SCAN tuning stops at
each broadcasting station for five seconds.
Pushing the button again during this five
second period stops SCAN tuning and the
radio remains tuned to that station.
Station memory operations
Six stations can be set for the AM band. 12
stations can be set for the FM band (six for
FM1, six for FM2).
1. Push band select button (FM/AM) to se-
lect AM, FM1, or FM2. The selected band
illuminates in the display.
2. Tune to the desired station.
3. Push the desired station select button for
more than 1.5 seconds. The radio mutes
when the select button is pushed.
4. When the indicator illuminates in the
display and the sound resumes, memo-
rizing is complete.5. Other station select buttons can be set in
the same manner.If the battery cable is disconnected, or if the
radio fuse opens, the radio memory is can-
celled. In that case, reset the desired stations.
COMPACT DISC (CD) player op-
eration
Turn the ignition key to the ACC or ON
position, and carefully insert the compact
disc into the slot with the label side up. The
compact disc is automatically pulled into the
slot and starts to play.
If the radio is already operating, it automati-
cally turns off and the compact disc begins
to play.
CAUTION
Do not force the compact disc into the
slot. This could damage the player.
CD button
When this button is pushed with the compact
disc loaded and the radio playing, the radio
turns off and the compact disc starts to play.
When power/volume control knob is pushedwhile the compact disc is playing, the com-
pact disc stops playing.
FF (Fast forward), REW
(Rewind)
When the
orbutton is pushed
while the compact disc is playing, the com-
pact disc plays at an increased speed while
fast forwarding or rewinding. When the but-
ton is released, the compact disc returns to
normal play speed.
APS (Automatic Program
Search) FF, APS REW
When thebutton is pushed while the
compact disc is playing, the selection fol-
lowing the present one starts to play from
the beginning. Push or hold the
but-
ton several times to skip several selections.
Each time the button is pushed, the CD
advances one selection. (When the last
selection on the compact disc is skipped,
the first selection is played.)
When thebutton is pushed, the selec-
tion being played returns to the beginning.
Push or hold the
button several
times to skip back several selections. Each
4-14Heater, air conditioner and audio systems
ZX