Page 68 of 280
RDS select program type
²Press the RDS control until FIND
program type is displayed.
²Use the SEL control to select the
program type. With the feature
on, use the SEEK or AUTOSET
or SCAN control to find the
desired program type from the
following selections:
²Classic
²Country
²Info
²Jazz/R&B
²Religious
²Rock
²Soft
²To p 4 0
RDS show
²With the RDS menu enabled,
press the RDS control until
SHOW is displayed.
AUTO
RDS
SEL
AUTO
RDS
Controls and features
68
Page 69 of 280

²Use the SEL control to select
TYPE, NAME, TEXT or NONE.
When your radio is turned to a
RDS station, RDS station TYPE,
station NAME, or TEXT message
will be displayed along with the
frequency. Press SEL in order to
scroll through the text messages.
Mute mode
Press the control to mute the
playing media. Press the control
again to return to the playing media.
Rear seat controls (if equipped)
The Personal Audio System, a
feature of the optional Premium
AM/FM Stereo/Cassette/Single CD
and the MACHtAudio System with
AM/FM Stereo/Cassette/Single CD,
allows front and middle seat
passengers to listen to different
media sources (radio, cassette or
CD) simultaneously. However, the
front and middle-seat passengers
cannot listen to two different radio
stations at the same time.
To turn on the rear seat controls,
press the memory preset controls 3
and 5 at the same time. The
will
appear in the display.
Pressing 3 and 5 at the same time
again will turn the rear seat controls
off.
SEL
EJ
MUTE
- VOLUME +
MODE
SEEK MEMORY
REW1FF2SIDE 1-23
4COMP5SHUFFLE6
Controls and features
69
Page 77 of 280

²Terrain.Hills, mountains and tall buildings between your vehicle's
antenna and the radio station signal can cause FM reception problems.
Static can be caused on AM stations by power lines, electric fences,
traffic lights and thunderstorms. Moving away from an interfering
structure (out of its ªshadowº) returns your reception to normal.
²Station overload.Weak signals are sometimes captured by stronger
signals when you pass a broadcast tower. A stronger signal may
temporarily overtake a weaker signal and play while the weak station
frequency is displayed.
The audio system automatically switches to single channel reception if it
will improve the reception of a station normally received in stereo.
Audio system warranties and service
Refer to the ªWarranty Guideº for audio system warranty information.
If service is necessary, see your dealer or a qualified technician.
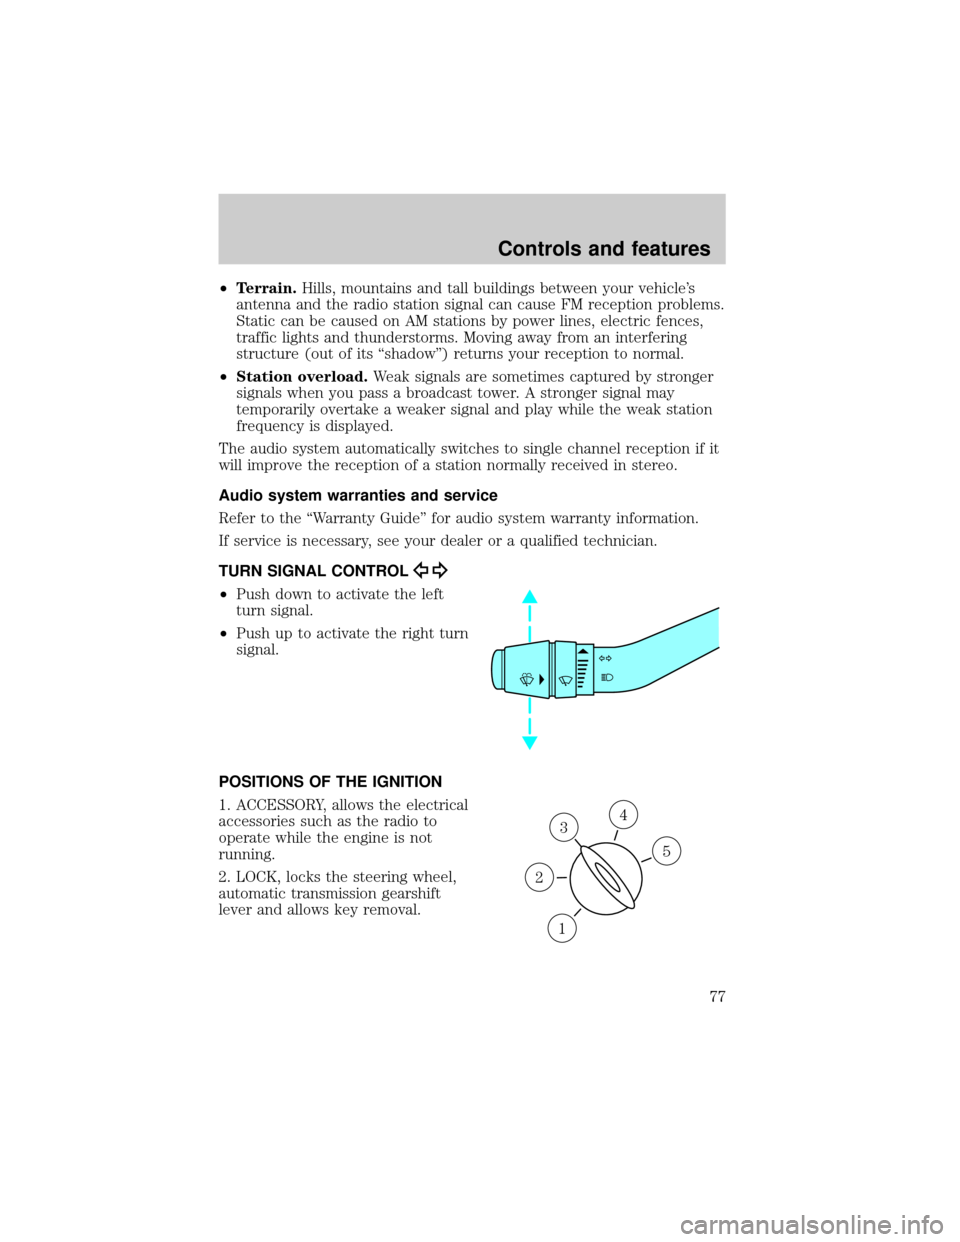
TURN SIGNAL CONTROL
²Push down to activate the left
turn signal.
²Push up to activate the right turn
signal.
POSITIONS OF THE IGNITION
1. ACCESSORY, allows the electrical
accessories such as the radio to
operate while the engine is not
running.
2. LOCK, locks the steering wheel,
automatic transmission gearshift
lever and allows key removal.
3
1
2
5
4
Controls and features
77
Page 87 of 280

Do not let children play with the moon roof. They may seriously
hurt themselves.
Electronic compass/temperature display (if equipped)
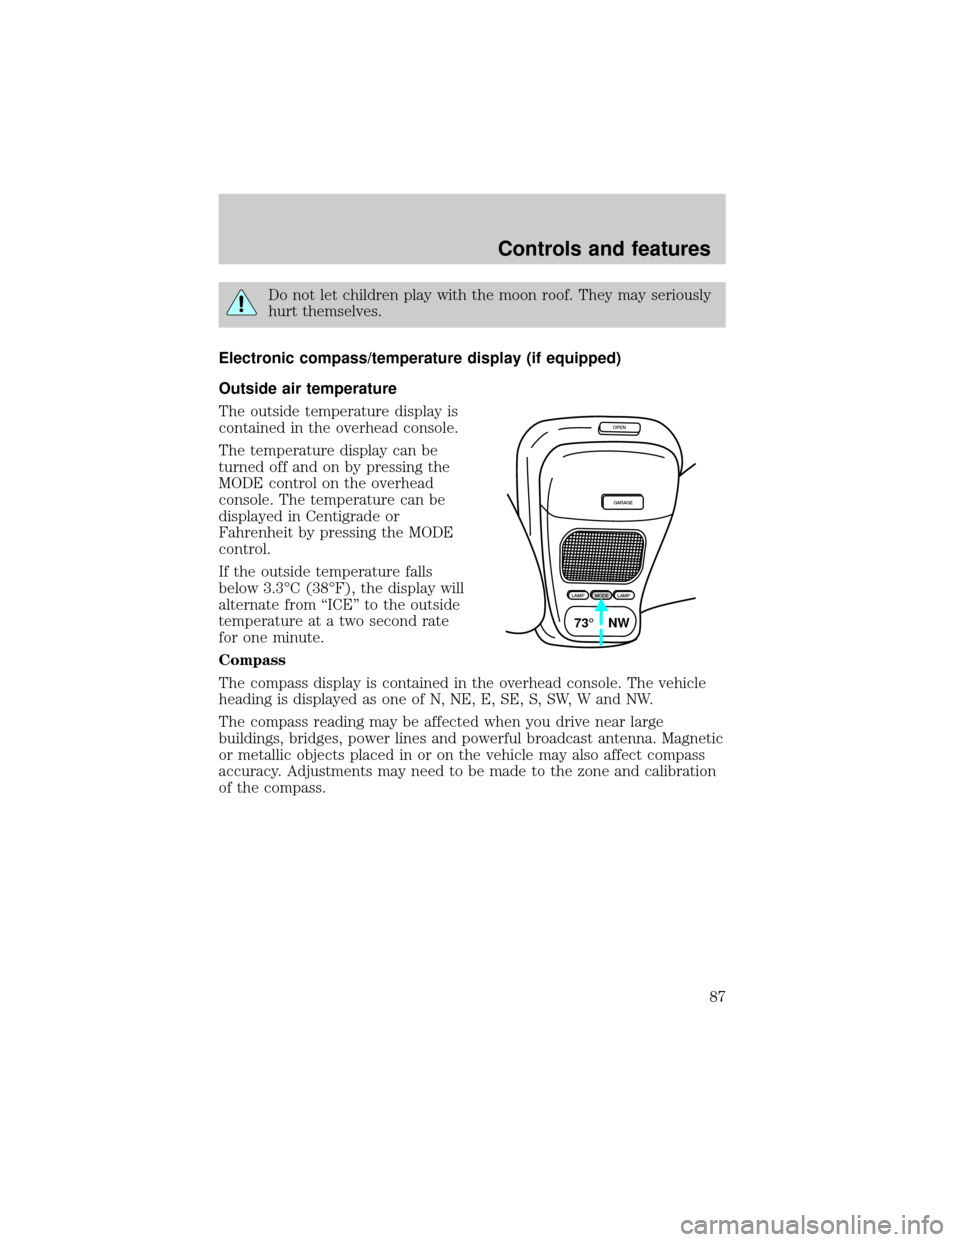
Outside air temperature
The outside temperature display is
contained in the overhead console.
The temperature display can be
turned off and on by pressing the
MODE control on the overhead
console. The temperature can be
displayed in Centigrade or
Fahrenheit by pressing the MODE
control.
If the outside temperature falls
below 3.3ÉC (38ÉF), the display will
alternate from ªICEº to the outside
temperature at a two second rate
for one minute.
Compass
The compass display is contained in the overhead console. The vehicle
heading is displayed as one of N, NE, E, SE, S, SW, W and NW.
The compass reading may be affected when you drive near large
buildings, bridges, power lines and powerful broadcast antenna. Magnetic
or metallic objects placed in or on the vehicle may also affect compass
accuracy. Adjustments may need to be made to the zone and calibration
of the compass.
OPEN
GARAGE
LAMPMODELAMP
73¡ NW
Controls and features
87
Page 88 of 280
Compass zone adjustment
1. Determine which magnetic zone
you are in by referring to the zone
map.
2. Turn ignition to the ON position.
3. Press and hold the MODE control
until VAR appears in the display,
then release. The display should
show the current zone number.
4. Press the MODE control until the
desired zone number appears. The
display will flash and then return to
normal operation. The zone is now
updated.
1
2
3
4
5
6
7891011121314 15
LAMPMODELAMP
9 VAR
Controls and features
88
Page 89 of 280

Compass calibration adjustment
Perform this adjustment in an open
area free from steel structures and
high voltage lines:
²Press and hold the MODE control
until CAL appears in the display
(approximately eight seconds)
and release.
²Drive the vehicle slowly (less
than 5 km/h [3 mph]) in circles
until CAL indicator turns off in
about 2±3 complete circles.
HOMELINKTUNIVERSAL TRANSCEIVER WITH TRAVELNOTET
(IF EQUIPPED)
The HomeLinktUniversal Transceiver, located on the driver's visor,
provides a convenient way to replace up to three hand-held transmitters
with a single built-in device. This feature will learn the radio frequency
codes of most current transmitters to operate garage doors, entry gates,
security systems, entry door locks, and home or office lighting.
When programming your HomeLinktUniversal Transceiver, to a
garage door or gate be sure that people and objects are out of
the way to prevent potential harm or damage.
Do not use the HomeLinktUniversal Transceiver with any garage door
opener that lacks safety stop and reverse features as required by U.S.
federal safety standards (this includes any garage door opener model
manufactured before April 1, 1982). A garage door which cannot detect
an object, signaling the door to stop and reverse, does not meet current
U.S. federal safety standards. For more information on this matter, call
toll-free: 1±800±355±3515 or on the Internet atHomeLink.jci.com.
LAMPMODELAMP
CAL
Controls and features
89
Page 155 of 280

N (Neutral)
With the gearshift in N (Neutral),
the vehicle can be started and is
free to roll. Hold the brake pedal
down while in this gear.
(Overdrive)
The normal driving position for the
best fuel economy. Transmission
operates in gears one through four.
(Overdrive) can be deactivated
by pressing the transmission control
switch on the gearshift lever.
The transmission control indicator
light (TCIL) will illuminate on the
instrument cluster.
Drive± Not shown on the display. Activate by pressing the transmission
control switch on the end of the gearshift lever with the gearshift in
the
position. The O/D OFF indicator will illuminate on the instrument
cluster. Transmission operates in gears one through three.
(Drive)
provides more engine braking than
(Overdrive) and is useful when:
²driving with a heavy load.
²towing a trailer up or down steep hills.
²additional engine braking is desired. If towing a trailer, refer to
Driving while you towin theTrailer Towingchapter.
To return to
(Overdrive) mode, press the transmission control
switch. The O/D OFF indicator will no longer be illuminated.
Each time the vehicle is started, the transmission will automatically
return to normal overdrive mode.
Every time the vehicle is shut off and restarted, you must press the
transmission control switch to cancel overdrive operation if driving in
overdrive is not desired.
O/D
ON/OFF
O/ D
OFF
Driving
155
Page 158 of 280

(Overdrive) can be deactivated
by pressing the transmission control
switch on the end of the gearshift
lever.
The transmission control indicator
light (TCIL) will illuminate on the
instrument cluster.
Drive± Not shown on the display. Activate by pressing the transmission
control switch on the end of the gearshift lever with the gearshift in
the
(Overdrive) position. The TCIL will illuminate on the instrument
cluster. Transmission operates in gears one through four. Drive (O/D
OFF) provides more engine braking than
(Overdrive) and is useful
whenever driving conditions (i.e., city traffic, hilly terrain, etc.) cause the
transmission to excessively shift between
(Overdrive) and other
gears. Deactivate
(Overdrive) when:
²driving with a heavy load.
²towing a trailer up or down steep hills.
²additional engine braking is desired. If towing a trailer, refer to
Driving while you towin theTrailer Towingchapter.
To return to
(Overdrive) mode, press the transmission control
switch. The TCIL will no longer be illuminated.
Each time the vehicle is started, the transmission will automatically
return to normal
(Overdrive) mode.
2 (Second)
Use 2 (Second) to start-up on
slippery roads or to provide additional
engine braking on downgrades.
1 (First)
Use 1 (First) to provide maximum
engine braking on steep downgrades.
Upshifts can be made by shifting to 2
(Second) or to
(Overdrive).
Selecting 1 (Low) at higher speeds causes the transmission to shift to a
lower gear and will shift to 1 (First) after the vehicle decelerates to the
proper vehicle speed.
O/D
ON/OFF
O/ D
OFF
Driving
158