Page 89 of 273
86 Climate control
Te ch n ica l
data Instruments
and controlsOperationDrivingInstrument
cluster displayPractical hints Car care Index
Basic setting – heater
Select temperature for each side of the passenger
compartment.
Select air volume with control Q switch, set at least
to position 2 to prevent windows from fogging up.
Set air distribution control switch to position shown
above.
Turn defroster outlets for side windows to the detent
position.
Open center air outlets as desired.Basic setting – air conditioner
Select temperature for each side of the passenger
compartment.
Select air volume with control Q switch, at least to
position 1 to start the air conditioner.
Set air distribution control switch to position a.
Open center air outlets i.
Open left and right side air outlets i.
Page 90 of 273
87 Climate control
Te ch n ica l
data Instruments
and controlsOperationDrivingInstrument
cluster displayPractical hints Car care Index Special settings (use only for short duration)
Defrosting
Set temperature selectors and switches for air volume
and air distribution to position P.
Close center air outlets.
Close left and right side air outlets.
Turn defroster outlets for side windows to the detent
position.Defogging windows
Windows fogged up on inside.
Switch off economy mode S. Indicator lamp goes out.
Switch off air recirculation O. Indicator lamp goes
out.
Set air distribution control switch to position c.
Increase air volume with control switch.
Close center and right side air outlets i.
Turn defroster outlets for side windows to the detent
position.
Page 91 of 273

88 Climate control
Te ch n ica l
data Instruments
and controlsOperationDrivingInstrument
cluster displayPractical hints Car care Index
Windshield fogged up on outside.
Switch on windshield wipers.
Set air distribution control switch to position d
ora.
Economy
The function of this setting corresponds to the air
conditioning mode. However, because the air
conditioning compressor will not engage (fuel savings),
it is not possible to air condition in this setting.
Press S button to activate.
Press S button once again to return to previous
setting.
Climate control - OFF
To switch the climate control off, set air volume control
switch to position 0.
The fresh air supply to the vehicle interior is shut off.
While driving, use this setting only temporarily,
otherwise the windshield could fog up.Rear window defroster
Turn key in steering lock to position 2.
To select, press F button.
To cancel, press F button again.
Note:
Heavy accumulation of snow and ice should be removed
before activating the defroster.
T h e re a r w in d ow d e f r o ste r u s e s a l a rg e a m ou n t of p ow e r.
To keep the battery drain to a minimum, turn off the
defroster as soon as the window is clear.
The defroster is automatically turned off after a
maximum of 12 minutes of operation.
If several power consumers are turned on
simultaneously, or the battery is only partially charged,
it is possible that the defroster will automatically turn
itself off. When this happens, the indicator lamp inside
the switch starts blinking.
As soon as the battery has sufficient voltage, the
defroster automatically turns itself back on.
Page 112 of 273

109 Interior equipment
Te ch n ica l
data Instruments
and controlsOperationDrivingInstrument
cluster displayPractical hints Car care Index Power w indows
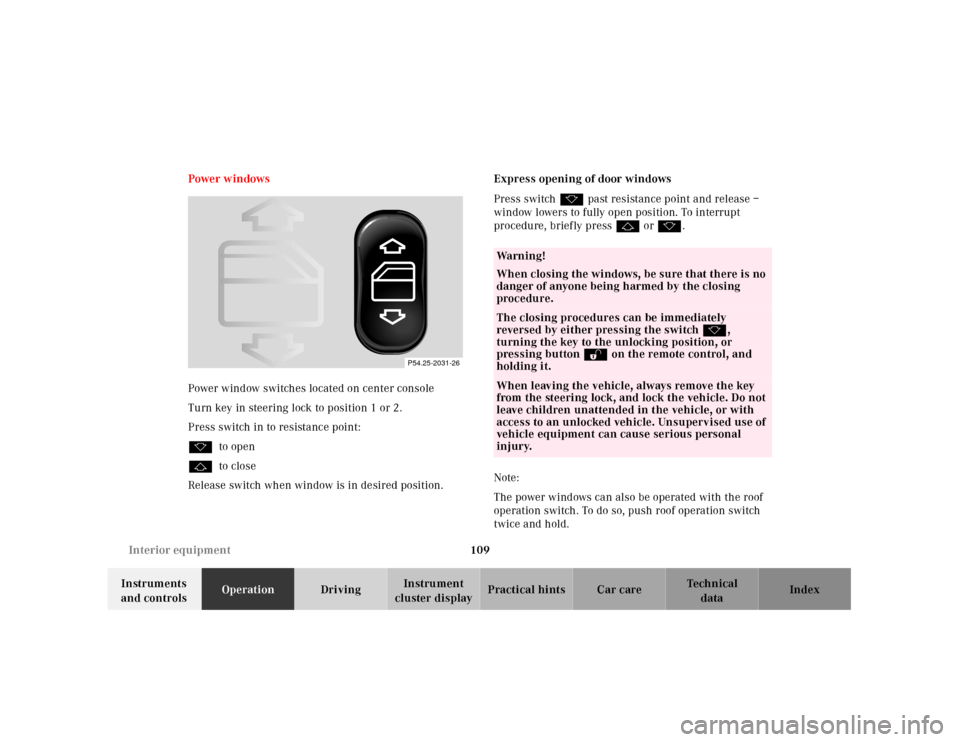
Power window switches located on center console
Turn key in steering lock to position 1 or 2.
Press switch in to resistance point:
kto open
jto close
Release switch when window is in desired position.Express opening of door windows
Press switch k past resistance point and release –
window lowers to fully open position. To interrupt
procedure, briefly press j or k.
Note:
The power windows can also be operated with the roof
operation switch. To do so, push roof operation switch
twice and hold.
P54.25-2031-26
Wa r n i n g !
When closing the windows, be sure that there is no
danger of anyone being harmed by the closing
procedure.The closing procedures can be immediately
reversed by either pressing the switch k,
turning the key to the unlocking position, or
pressing button Πon the remote control, and
holding it.When leaving the vehicle, always remove the key
from the steering lock, and lock the vehicle. Do not
leave children unattended in the vehicle, or with
access to an unlocked vehicle. Unsupervised use of
vehicle equipment can cause serious personal
injury.
Page 124 of 273
121 Retractable hardtop
Te ch n ica l
data Instruments
and controlsOperationDrivingInstrument
cluster displayPractical hints Car care Index Important!
Do not manually move corner flaps of rear shelf. Doing
so will result in damage to the roof folding mechanism
that is not covered by the Mercedes-Benz Limited
War ra nt y.
Prior to cleaning the rear window, see page 237.Lowering Hardtop
1.Engage parking brake.
2.Turn key in steering lock to position 2.
P65.10-2102-26
1
P77.39-2030-26
Page 125 of 273

122 Retractable hardtop
Te ch n ica l
data Instruments
and controlsOperationDrivingInstrument
cluster displayPractical hints Car care Index
3.Slide hardtop switch back (1) and hold:
•The indicator lamp in the hardtop switch lights
up.
Note:
If indicator lamp blinks slowly, a malfunction
has occurred in the system.
If indicator lamp blinks rapidly, the trunk lid
and / or the luggage cover may be open, and need
to be closed.
•The door windows lower.
•The trunk lid opens rearward.
•The hardtop lowers into its storage
compartment, simultaneously the shelf behind
roll bars opens, and rear quarter windows lower.
•The shelf behind the roll bars closes.
•The trunk lid closes.
•The indicator lamp in the hardtop switch goes
out – the opening procedure is completed.If the hardtop switch is held or is released and slid back
again within approximately 30 seconds, the door
windows will close.
However, the door windows can also be closed / opened
later on. Slide hardtop switch twice forward / backward
and hold.
The rear quarter windows cannot be raised with the
hardtop lowered.
Notes:
For safety reasons, the hardtop cannot be lowered while
driving.
Lowering a wet hardtop can result in water reaching the
vehicle interior. The hardtop should be dry when
lowering it into the storage compartment.
Wa r n i n g !
To prevent possible accidents, drive the vehicle
only with the hardtop either completely closed and
locked, or fully lowered into its storage
compartment.
Page 126 of 273
123 Retractable hardtop
Te ch n ica l
data Instruments
and controlsOperationDrivingInstrument
cluster displayPractical hints Car care Index Raising Hardtop
1.E n ga g e p a r k i n g b ra ke .
2.Turn key in steering lock to position 2.3.Slide hardtop switch forward (2) and hold:
•The indicator lamp in the hardtop switch lights
up.
Note:
If indicator lamp blinks slowly, a malfunction
has occurred in the system.
If indicator lamp blinks rapidly, the trunk lid
and / or the luggage cover may be open, and need
to be closed.
•The door windows lower.
•The trunk lid opens rearward.
•The hardtop is raised from its storage
compartment, simultaneously the shelf behind
roll bars opens and rear quarter windows close.
•The shelf behind the roll bars closes.
•The trunk lid closes, and the hardtop locks.
•The indicator lamp in the hardtop switch goes
out - the closing procedure is completed.
2
P77.39-2031-26
Page 127 of 273

124 Retractable hardtop
Te ch n ica l
data Instruments
and controlsOperationDrivingInstrument
cluster displayPractical hints Car care Index
If the hardtop switch is held or is released and slid
forward again within approximately 30 seconds, the
door windows will close.
However, the door windows can also be closed / opened
later on. Slide hardtop switch twice forward / backward
and hold.For safety reasons, the hardtop cannot be raised while
driving. However, if the hardtop is not completely locked
after raising it, you can then lock it while driving by
pushing the hardtop switch forward.
If t he ind ica tor lamp in th e h ardtop switch bl inks slowly
while activating the switch,
•the battery voltage may be insufficient – start
engine and let run while activating switch,
•the system may be overloaded (for example after
lowering or raising the hardtop approximately
5 consecutive times) - after approximately
10 minutes the hardtop switch may be activated
again.
I f t h e i nd ic a tor l a mp c on t in u e s to b l in k , l oc k t h e h a rd top
manually, see page 226.
Have the system checked at your authorized
Mercedes-Benz Center as soon as possible.
Wa r n i n g !
The hardtop is not fully closed and locked:
• if the indicator lamp in the hardtop switch
does not go out (key in steering lock
position 2),
• if the indicator lamp blinks, and a warning
sounds for 10 seconds when starting to drive.Stop the vehicle and before continuing to drive,
close and lock the hardtop:
The key should be in steering lock position 2.
Slide the hardtop switch forward.To prevent possible accidents, drive the vehicle
only with the hardtop either completely closed and
locked, or fully lowered into its storage
compartment.