Page 267 of 317
264 Exterior lamps
Te ch n ica l
data Instruments
and controlsOperation DrivingInstrument
cluster displayPractical hintsCar care Index
Parking, standing, side marker and turn signal lamp
115 6 N A ( 3 2 / 4 c p b u l b )
Open hood.
Twist bulb socket (4) counterclockwise and pull out.
Push bulb into socket, turn counterclockwise and
remove.
Insert new bulb in socket, push in and twist clockwise.
Reinstall bulb socket.Bulbs for auxiliary fog lamp (optional)
H3 U (55 W)
Open hood.
Remove cover (9). Unhook clamping ring and remove
bulb. Pull off electrical connector.
Insert new bulb in socket (seating properly in cutouts of
bulb socket), and mount clamping ring. Reinstall and
push electrical connector on securely.
Reinstall cover (9).
Page 271 of 317

268 Exterior lamps
Te ch n ica l
data Instruments
and controlsOperation DrivingInstrument
cluster displayPractical hintsCar care Index
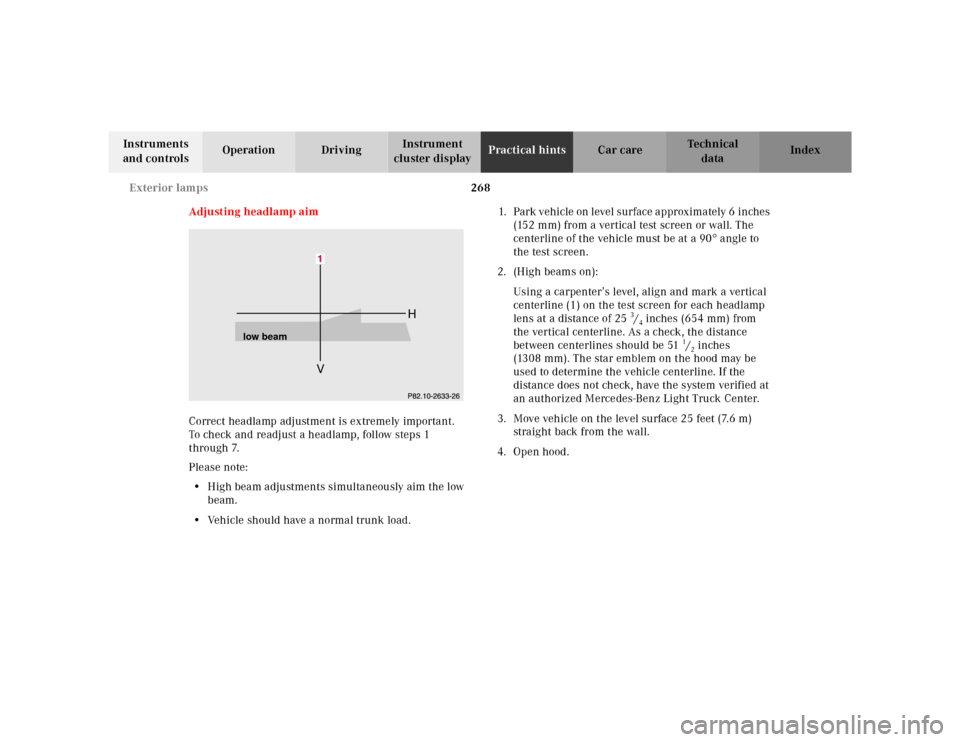
Adjusting headlamp aim
Correct headlamp adjustment is extremely important.
To check and readjust a headlamp, follow steps 1
through 7.
Please note:
•High beam adjustments simultaneously aim the low
beam.
•Vehicle should have a normal trunk load.1. Park vehicle on level surface approximately 6 inches
(152 mm) from a vertical test screen or wall. The
centerline of the vehicle must be at a 90° angle to
the test screen.
2. (High beams on):
Using a carpenter’s level, align and mark a vertical
centerline (1) on the test screen for each headlamp
lens at a distance of 25
3/4inches (654 mm) from
the vertical centerline. As a check, the distance
between centerlines should be 51
1/2inches
(1308 mm). The star emblem on the hood may be
used to determine the vehicle centerline. If the
distance does not check, have the system verified at
an authorized Mercedes-Benz Light Truck Center.
3. Move vehicle on the level surface 25 feet (7.6 m)
straight back from the wall.
4. Open hood.
VH
low beam
Page 278 of 317

275 Replacing wiper blades
Te ch n ica l
data Instruments
and controlsOperation DrivingInstrument
cluster displayPractical hintsCar care Index Replacing wiper blades
For safety reasons, remove key from steering lock before
replacing the wiper blade, otherwise the motor can
suddenly turn on and cause injury.
Notes:
Do not open engine hood with wiper arm folded forward.
Do not allow the wiper arm to contact the windshield
glass without a wiper blade inserted. The glass may be
scratched or broken.
Make certain that the wiper blade is properly installed.
An improperly installed wiper blade may cause
windshield damage.
The wiper with air spoiler should be mounted on the
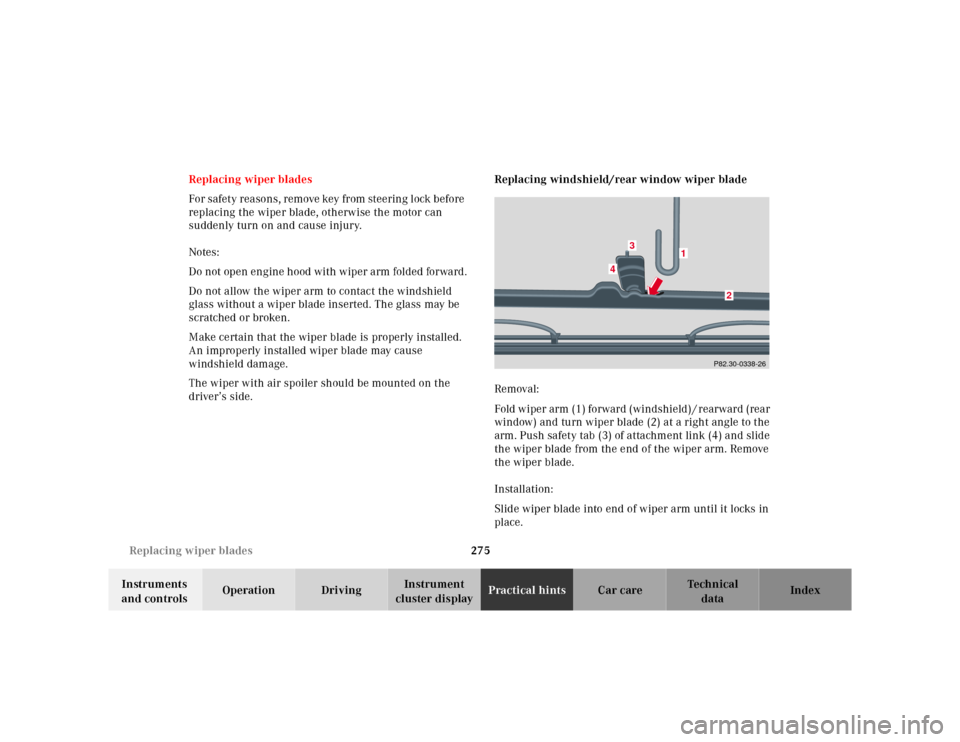
driver’s side.Replacing windshield/rear window wiper blade
Removal:
Fold wiper arm (1) forward (windshield) / rearward (rear
window) and turn wiper blade (2) at a right angle to the
arm. Push safety tab (3) of attachment link (4) and slide
the wiper blade from the end of the wiper arm. Remove
the wiper blade.
Installation:
Slide wiper blade into end of wiper arm until it locks in
place.
P82.30-0338-26
1
2
3
4