Page 93 of 341

90 Instrument cluster
Technical
data Instruments
and controlsOperationDrivingInstrument
cluster displayPractical hints Car care Index
Coolant temperature gauge (3)
During severe operating conditions and stop-and-go city
traf f ic, th e coola nt tempera ture may rise close to th e red
marking.
The engine should not be operated with the coolant
temperature in the red zone. Doing so may cause
serious engine damage which is not covered by the
Mercedes-Benz Limited Warranty.Outside temperature indicator (5)
The temperature sensor is located in the front bumper
area. Due to its location, the sensor can be affected by
road or engine heat during idling or slow driving. This
means that the accuracy of the displayed temperature
can only be verified by comparison to a thermometer
placed next to the sensor, not by comparison to external
displays (e.g. bank signs etc.).
Adaption to ambient temperature takes place in steps
and depends on the prevailing driving conditions
(stop-and-go or moderate, constant driving) and amount
of temperature change.
Wa r n i n g !
• Driving when your engine is badly overheated
can cause some fluids which may have leaked
into the engine compartment to catch fire. You
could be seriously burned.• Steam from an overheated engine can cause
serious burns and can occur just by opening
the engine hood. Stay away from the engine if
you see or hear steam coming from it.Turn off the engine, get out of the vehicle and do
not stand near the vehicle until it cools down.
Wa r n i n g !
The outside temperature indicator is not designed
to serve as an Ice-Warning Device and is therefore
unsuitable for that purpose. Indicated
temperatures just above the freezing point do not
guarantee that the road surface is free of ice.
Page 228 of 341
225 Parking system
Technical
data Instruments
and controlsOperationDrivingInstrument
cluster displayPractical hints Car care Index Sensors
1Sensors located in bumper
(front bumper shown)A total of 10 sensors (1) monitor the vehicle’s front and
rear areas. Six sensors are located in the front bumper,
four sensors in the rear bumper.
For proper operation of the Parktronic always keep the
sensors clean, especially at times of snow and ice.
See page 303 for instructions on cleaning the sensors in
the bumpers.
P88.20-2049-261
1
1
Page 230 of 341
227 Parking system
Technical
data Instruments
and controlsOperationDrivingInstrument
cluster displayPractical hints Car care Index Monitoring reach of sensors
Front bumper:
Rear bumper:The first yellow segment lights up at these distances.
Additional segments light up as the vehicle comes
closer to the obstacle.
Minimum distance between vehicle and obstacle at
which the system stops indicating: Center approx. 40 in (100 cm)
Corner approx. 24 in (60 cm)
Center approx. 48 in (120 cm)
Corner approx. 32 in (80 cm)
P54.65-2297-26
Front corners approx. 6 in (15 cm)
Front center and rear approx. 8 in (20 cm)
P54.65-2298-26
Page 231 of 341

228 Parking system
Technical
data Instruments
and controlsOperationDrivingInstrument
cluster displayPractical hints Car care Index
The obstacle may not be recognized if outside the
shaded sensor field, and no longer be indicated when
approaching it any closer (warning indicators go out).
Parktronic malfunction
All red segments of the warning indicators light up, and
a warning sounds for 3 seconds, if Parktronic does not
function properly.
A dirty sensor could be the reason. See page 303 for
instructions on cleaning the sensors in the bumpers.
After cleaning the sensors, turn electronic key in
steering lock to position 2. If the defect continues to be
displayed, have the system checked at your authorized
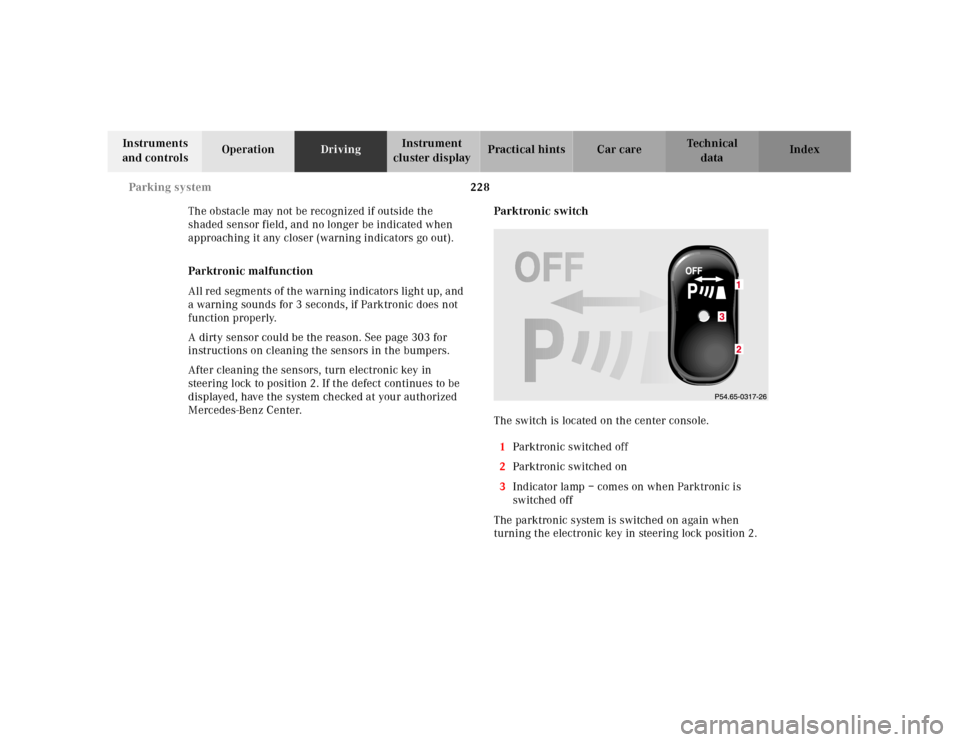
Mercedes-Benz Center.Parktronic switch
The switch is located on the center console.
1Parktronic switched off
2Parktronic switched on
3Indicator lamp – comes on when Parktronic is
switched off
The parktronic system is switched on again when
turning the electronic key in steering lock position 2.3
Page 285 of 341

282 Towing the vehicle
Technical
data Instruments
and controlsOperation DrivingInstrument
cluster displayPractical hintsCar care Index
Tow in g th e vehic le
Important!
When towing the vehicle, please, note the following:
With the automatic central locking activated and the
electronic key in steering lock position 2, the vehicle
d oors l ock if th e l ef t front w heel as well as t he righ t rear
wheel are turning at vehicle speeds of approximately
9 mph (15 km / h) or more.
To prevent the vehicle door locks from locking,
deactivate the automatic central locking.
The rear towing eye is located at the right, below the
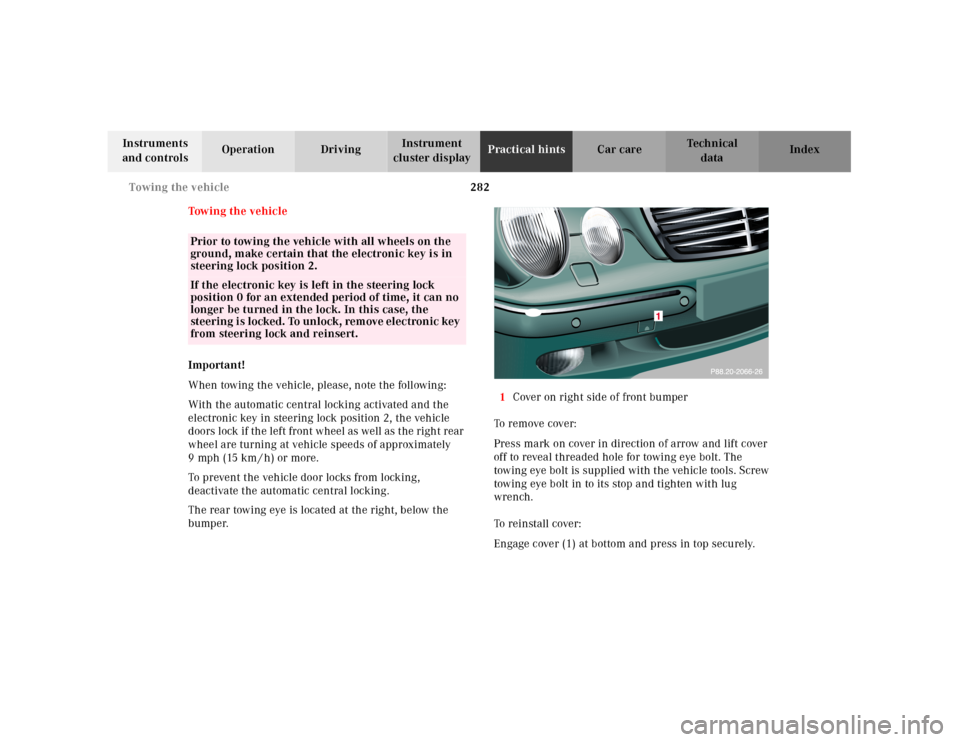
bumper.1Cover on right side of front bumper
To remove cover:
Press mark on cover in direction of arrow and lift cover
off to reveal threaded hole for towing eye bolt. The
towing eye bolt is supplied with the vehicle tools. Screw
towing eye bolt in to its stop and tighten with lug
wrench.
To reinstall cover:
Engage cover (1) at bottom and press in top securely.
Prior to towing the vehicle with all wheels on the
ground, make certain that the electronic key is in
steering lock position 2.If the electronic key is left in the steering lock
position 0 for an extended period of time, it can no
longer be turned in the lock. In this case, the
steering i s locked. To unlock, rem ove elec tronic key
from steering lock and reinsert.
Page 293 of 341
290 Exterior lamps
Technical
data Instruments
and controlsOperation DrivingInstrument
cluster displayPractical hintsCar care Index
Side marker lamp, front
Side marker lamp, front (5 W / 4 cp bulb)
From inside wheel house (arrow) reach behind side
marker lamp and press tab. Remove lamp from bumper
and take out bulb.High mounted stop lamp,
Additional turn signals on the exterior mirror
The high mounted stop lamp (3rd brake lamp), and the
additional turn signals on the exterior mirrors are
equipped with LED’s.
Have the system checked at an authorized
Mercedes-Benz Center if a malfunction occurs.