2001 MERCEDES-BENZ E320 ECU
[x] Cancel search: ECUPage 258 of 341

255 Fuses
Technical
data Instruments
and controlsOperation DrivingInstrument
cluster displayPractical hintsCar care Index Fuses
Before replacing a blown fuse, determine the cause of
the short circuit.
Spare fuses are supplied inside the main fuse box.
Observe amperage and color of fuse.
A special fuse puller is supplied with the vehicle tools.
A l ways u s e a n ew f u s e f o r r e pl a c e m e nt . N eve r a t te mp t to
repair or bridge a blown fuse.
A fuse chart can be found inside the corresponding fuse
box cover.
1Main fuses box in engine compartment
To gain access to the main fuse box (1), release
clamp (arrow), lift the fuse box cover up and remove it.
To close the main fuse box, engage right end of cover
and secure with clamp.
P54.15-2068-26
1
Page 267 of 341
264 Spare wheel
Technical
data Instruments
and controlsOperation DrivingInstrument
cluster displayPractical hintsCar care Index
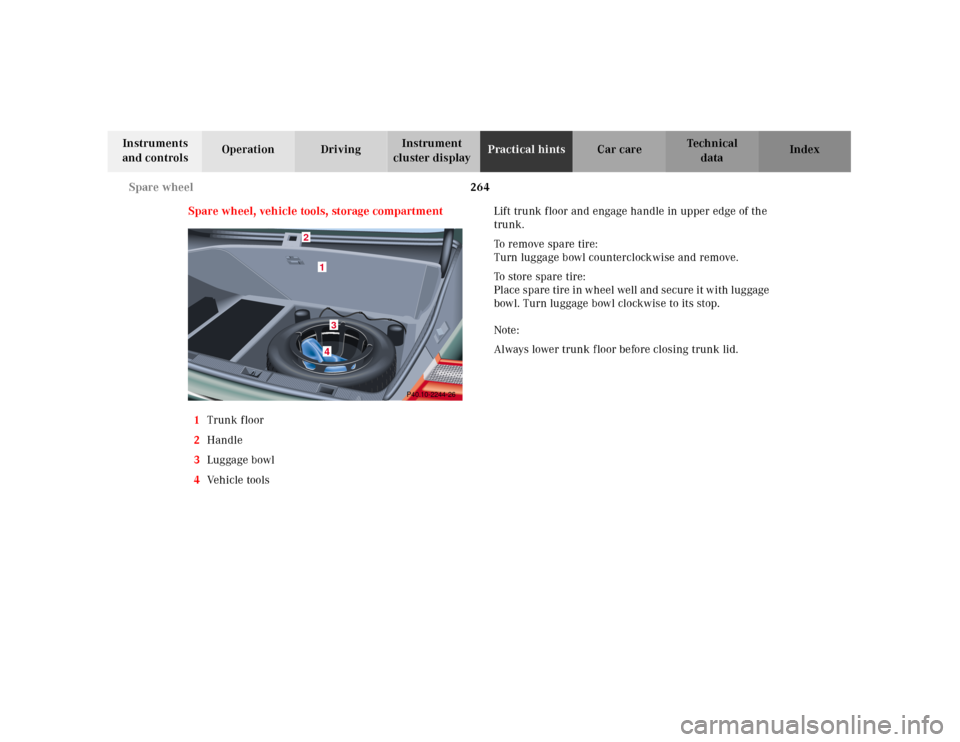
Spare wheel, vehicle tools, storage compartment
1Trunk floor
2Handle
3Luggage bowl
4Ve h i c l e t o o l sLift trunk floor and engage handle in upper edge of the
trunk.
To remove spare tire:
Turn luggage bowl counterclockwise and remove.
To store spare tire:
Place spare tire in wheel well and secure it with luggage
bowl. Turn luggage bowl clockwise to its stop.
Note:
Always lower trunk f loor before closing trunk lid.
P40.10-2244-26
1
2
34
Page 281 of 341
278 Battery
Technical
data Instruments
and controlsOperation DrivingInstrument
cluster displayPractical hintsCar care Index
must not leak acid when upside down for at least 15
minutes. Your authorized Mercedes-Benz Center can
provide such a special battery.
The service life of the battery is dependent on its
condition of charge. The battery should always be kept
sufficiently charged, in order to last an optimum length
of time.
Therefore, we strongly recommend that you have the
battery charge checked frequently, and corrected if
necessary, especially if you use the vehicle less than
approximately 200 miles (300 km) per month,
mostly for short distance trips, or if it is not used for
long periods of time.
Only charge a battery with a battery charger after the
battery has been disconnected from the vehicle’s
electrical circuit.
Always disconnect the battery negative lead first and
connect last.
When removing and connecting the battery, always
make sure that all electrical consumers are off and the
electronic key is in steering lock position 0. The battery,
its filler caps, the vent tube and the opposite plug must
always be securely installed when the vehicle in operation. During removal and installation always
protect the disconnected battery positive (+) terminal
with the cover attached to the battery.
While the engine is running the battery terminal clamps
must not be loosened or detached, otherwise the
generator and other electronic components would be
damaged.
Note:
After reconnecting the battery also resynchronize the
front seat head restraints, the express feature of the
power windows, and the electronic stability program
(ESP), see pages 48, 156 and 221.
Battery recycling
Batteries contain material that can harm the
environment with improper disposal.
Large 12 Volt storage batteries contain lead.
Recycling of batteries is the preferred method of
disposal.
Many states require sellers of batteries to accept old
batteries for recycling.
Page 285 of 341
282 Towing the vehicle
Technical
data Instruments
and controlsOperation DrivingInstrument
cluster displayPractical hintsCar care Index
Tow in g th e vehic le
Important!
When towing the vehicle, please, note the following:
With the automatic central locking activated and the
electronic key in steering lock position 2, the vehicle
d oors l ock if th e l ef t front w heel as well as t he righ t rear
wheel are turning at vehicle speeds of approximately
9 mph (15 km / h) or more.
To prevent the vehicle door locks from locking,
deactivate the automatic central locking.
The rear towing eye is located at the right, below the
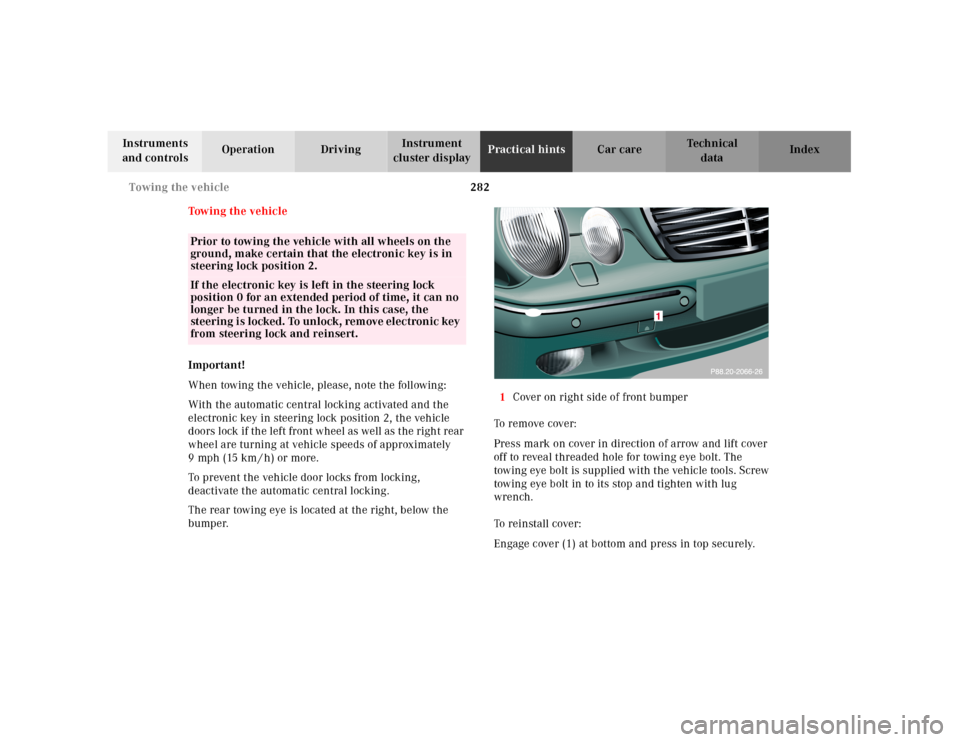
bumper.1Cover on right side of front bumper
To remove cover:
Press mark on cover in direction of arrow and lift cover
off to reveal threaded hole for towing eye bolt. The
towing eye bolt is supplied with the vehicle tools. Screw
towing eye bolt in to its stop and tighten with lug
wrench.
To reinstall cover:
Engage cover (1) at bottom and press in top securely.
Prior to towing the vehicle with all wheels on the
ground, make certain that the electronic key is in
steering lock position 2.If the electronic key is left in the steering lock
position 0 for an extended period of time, it can no
longer be turned in the lock. In this case, the
steering i s locked. To unlock, rem ove elec tronic key
from steering lock and reinsert.
Page 290 of 341
287 Exterior lamps
Technical
data Instruments
and controlsOperation DrivingInstrument
cluster displayPractical hintsCar care Index Bulbs for high and low beam
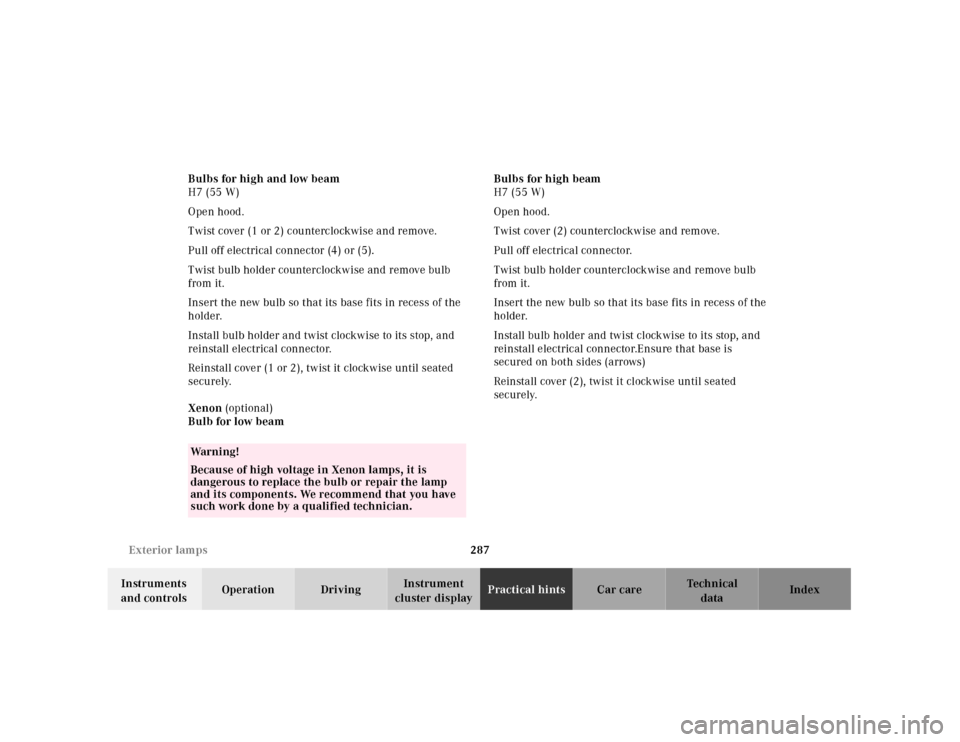
H7 (55 W)
Open hood.
Twist cover (1 or 2) counterclockwise and remove.
Pull off electrical connector (4) or (5).
Twist bulb holder counterclockwise and remove bulb
from it.
Insert the new bulb so that its base fits in recess of the
holder.
Install bulb holder and twist clockwise to its stop, and
reinstall electrical connector.
Reinstall cover (1 or 2), twist it clockwise until seated
securely.
Xenon (optional)
Bulb for low beamBulbs for high beam
H7 (55 W)
Open hood.
Twist cover (2) counterclockwise and remove.
Pull off electrical connector.
Twist bulb holder counterclockwise and remove bulb
from it.
Insert the new bulb so that its base fits in recess of the
holder.
Install bulb holder and twist clockwise to its stop, and
reinstall electrical connector.Ensure that base is
secured on both sides (arrows)
Reinstall cover (2), twist it clockwise until seated
securely.
Wa r n i n g !
Because of high voltage in Xenon lamps, it is
dangerous to replace the bulb or repair the lamp
and its components. We recommend that you have
such work done by a qualified technician.
Page 297 of 341
294 Rear seat cushion
Technical
data Instruments
and controlsOperation DrivingInstrument
cluster displayPractical hintsCar care Index
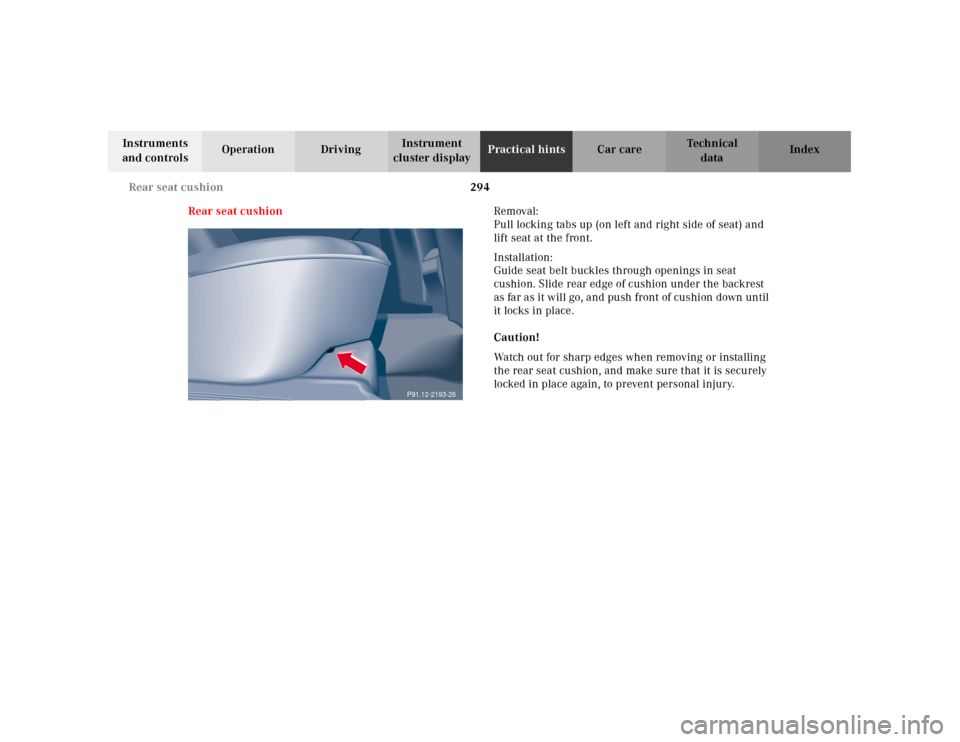
Rear seat cushionRemoval:
Pull locking tabs up (on left and right side of seat) and
lift seat at the front.
Installation:
Guide seat belt buckles through openings in seat
cushion. Slide rear edge of cushion under the backrest
as far as it will go, and push front of cushion down until
it locks in place.
Caution!
Watch out for sharp edges when removing or installing
the rear seat cushion, and make sure that it is securely
locked in place again, to prevent personal injury.
P91.12-2193-26
Page 336 of 341

333 Index
Technical
data Instruments
and controlsOperation DrivingInstrument
cluster displayPractical hints Car careIndex
NNavigation system - Multifunction display ................ 105
Night security illumination ......................................... 120OOn-board diagnostic system .........................................234
Operator’s manual ............................................................. 8
Outside temperature indicator ...................................... 90
Overhead control panel ................................................... 21PPanic button ...................................................................... 34
Parcel net in front passenger footwell ....................... 169
Parking ............................................................................205
Parking assist (Parktronic) ..........................................224
Malfunction ...............................................................228
Parktronic switch ......................................................228
Sensors .......................................................................225
Warning indicators ...................................................226
Parking brake ............................. 202, 204, 205, 221, 235
PA R K I N G BR A K E -
malfunction and warning messages ......................244Power assistance ........................................................... 204
Power seats front ..............................................................46
Power windows ............................................................... 154
Blocking of rear door window operation ............... 155
Opening and closing ...................................................33
Synchronizing power windows ............................... 156
Problems with your vehicle ............................................ 14
Product information .......................................................... 7
RRadio transmitters ......................................................... 176
Rain sensor ..................................................................... 123
Rear seat cushion .......................................................... 294
Rear view mirrors ............................................................82
Antiglare night position .............................................82
Exterior ......................................................................... 83
Inside ............................................................................82
Parking position ..........................................................85
Storing mirror positions in memory ........................84
Rear window defroster .................................................. 130
Rear window sunshade ................................................. 160
Remote control .................................................................29
Battery replacement .................................................291