Page 96 of 341

93 Multifunction steering wheel, multifunction display
Technical
data Instruments
and controlsOperationDrivingInstrument
cluster displayPractical hints Car care Index Depending on your vehicle’s equipment, you may use
the buttons on the multifunction steering wheel to call
up, control and set the following systems in the
multifunction display:
1Trip odometer and main odometer, see page 96
Vehicle speed, see page 96
Flexible service system (FSS), see page 114
Engine oil level indicator, see page 117
2Audio systems, see page 97
Radio, see page 97
CD player (optional), see page 98
Cassette player, see page 99
3Navigation system (if so equipped), see page 105
4Malfunction message memory, see page 108
5Individual settings, see page 110
6Trip computer, see page 106
After start
After reset
Fuel tank content
7Telephone (if so equipped), see page 100Press the è or ÿ button repeatedly until the
required system is displayed.
Pressing the è button advances the display to the
next system.
Pressing the ÿ button returns the display to the
previous system.
You may call up additional displays within some of these
categories by pressing the j or k button.
Wa r n i n g !
A driver’s attention to the road must always be his /
her primary focus when driving. For your safety and the safety of others, selecting
features through the multifunction steering wheel
should only be done by the driver when traffic and
road conditions permit it to be done safely.
Programming individual settings in the system can
only be made while the vehicle is at standstill.
Page 114 of 341

111 Multifunction steering wheel, multifunction display
Technical
data Instruments
and controlsOperationDrivingInstrument
cluster displayPractical hints Car care Index 1Preliminary display of the individual settings
2“SET TIME – HOURS”
(Only vehicles without COMAND)
3“SET TIME – MINUTES”
(Only vehicles without COMAND)
4“12 / 24 O’CLOCK”, the unit set is displayed in the
instrument cluster
(Only vehicles without COMAND)
5“TEMP. INDICATOR” – the unit set is displayed in
the outside temperature display in the instrument
cluster and in the automatic air conditioner display
6“DISPLAY VALUES IN” – the unit set is displayed in
the trip and main odometer.
7“TEXT” — sets the language used in the
multifunction display8“STATION SEARCH USING” — radio adjustment
“FREQUENCY” – use the j or k button to
select a frequency
“MEMORY” – use the j or k button to select
a stored station (preset memory)
9See page 113 for instructions on returning the
setting menus to the factory settings
10Selection marker – indicates the setting selected
Notes:
These settings may only be performed with the vehicle
at standstill and with the key in steering lock position 1
or 2.
The figure depicts the factory setting for the Federal
Republic of Germany.
Page 122 of 341

119 Exterior lamp switch
Technical
data Instruments
and controlsOperationDrivingInstrument
cluster displayPractical hints Car care Index Exterior lamp switch
DOff
CParking lamps (also side marker lamps, taillamps,
licence plate lamps, instrument panel lamps)
Canada only: When the engine is running, the low
beam is additionally switched on.BParking lamps plus low beam or high beam
headlamps (combination switch pushed forward).
ˆStanding lamps, right (turn left one stop)
‚Standing lamps, left (turn left two stops)
‡Front fog lamps (pull out one stop) with parking
lamps and / or low beam headlamps on. Green
indicator in lamp switch comes on.
†Rear fog lamp (pull out to second detent) in
addition to the front fog lamps. Yellow indicator in
lamp switch comes on.
Standing lamps
When the vehicle is parked on the street the standing
lamps (right or left side parking lamps) can be turned
on, making the vehicle more visible to passing vehicles.
The standing lamps cannot be operated with the
electronic key in steering lock position 2.
Page 123 of 341

120 Exterior lamp switch
Technical
data Instruments
and controlsOperationDrivingInstrument
cluster displayPractical hints Car care Index
Note:
With the electronic key removed and the driver’s door
open, a warning sounds and the message “SWITCH OFF
LIGHTS!” in the multifunction indicator appears if the
vehicle’s exterior lamps (except standing lamps) are not
switched off.
Fog lamps will operate with the parking lamps and / or
the low beam headlamps on. Fog lamps should only be
used in conjunction with low beam headlamps. Consult
your State or Province Motor Vehicle Regulations
regarding allowable lamp operation.
Fog lamps are automatically switched off when the
exterior lamp switch is turned to position D.Daytime running lamps
(Canada only)
When the engine is running and the selector lever is in
a driving position, the low beam headlamps (includes
parking lamps, side marker lamps, taillamps and
license plate lamps) are automatically switched on.
When shifting from a driving position to position “N”
or “P”, the low beam switches off (2 seconds delay).
For nighttime driving the exterior lamp switch should
be turned to position B to permit activation of the
high beam headlamps.
Night security illumination
When exiting the vehicle after driving with the exterior
lamps on, they switch on again for added illumination
for approximately 30 seconds after closing the last door.
The lamp-on time period can be changed at your
Mercedes-Benz Center.
Page 138 of 341

135 Audio system
Technical
data Instruments
and controlsOperationDrivingInstrument
cluster displayPractical hints Car care Index Operation – audio and telephone
These instructions are intended to help you become
acquainted with your Mercedes- Benz car radio. They
contain useful tips and a detailed description of the user
functions.
The right to correct errors and make technical amendments is
reserved.
Operating safety1 Optional equipment
Dolby and the double-D symbol
Ù
are trademarks of Dolby
laboratories Licensing Corporation. The Dolby noise reduction
system is manufactured under licence from Dolby Laboratories
Licensing Corporation.
Wa r n i n g !
In order to avoid distraction which could lead to an
accident, system settings should be entered with
the vehicle at standstill and systems should be
operated by the driver only when traffic conditions
permit. Always pay full attention to traffic
conditions first before operating system controls
while driving. Bear in mind that at a speed of just 30 mph
(approximately 50 km / h), your vehicle is covering
a distance of approximately 50 feet (approximately
14 m ) e v e r y s e c o n d .
Wa r n i n g !
Any alternations made to electronic components
can cause malfunctionsThe radio, cassette deck, CD changer
1 and
telephone
1 are interconnected. Therefore, when
one of the components is defective or has not been
removed / replaced properly this may impair the
function of other components.
These malfunctions might seriously impair the
operating safety of your vehicle.We recommend that you have any service work or
alternations on electronic components done in an
authorized Mercedes-Benz Center.
Page 146 of 341

143 Audio system
Technical
data Instruments
and controlsOperationDrivingInstrument
cluster displayPractical hints Car care Index Cassette mode
Note:
Vehicles equipped with the COMAND system do not
come with a factory installed cassette mechanism.
A standard 1/8” stereo phono plug for auxiliary audio
input (located in glove box) is provided for connection of
a portable battery operated cassette player or any other
portable device which uses a headphone output. Please
refer to the COMAND operating manual for information
concerning the activation of the audio input.Playing cassettes
Press the “TAPE” button. When the eject (EJ) key is
pressed, the display folds down and the cassette slot
becomes visible. Push the cassette into the slot until it
engages. The cassette will be pulled in automatically.
Notes:
Do not press directly on the radio display face.
Return the display panel to its normal position by
folding it back up and pressing gently on the display
frame to lock in place.
When playing mono recorded tapes (e.g. books) through
a stereo system the sound from one track might bleed to
the other track, despite setting the balance to the full
left or full right speakers.
Page 160 of 341

157 Interior equipment
Technical
data Instruments
and controlsOperationDrivingInstrument
cluster displayPractical hints Car care Index Release the switch when the roof has reached the
required position.
The switch is illuminated when the exterior lamps are
switched on (except standing lamps).
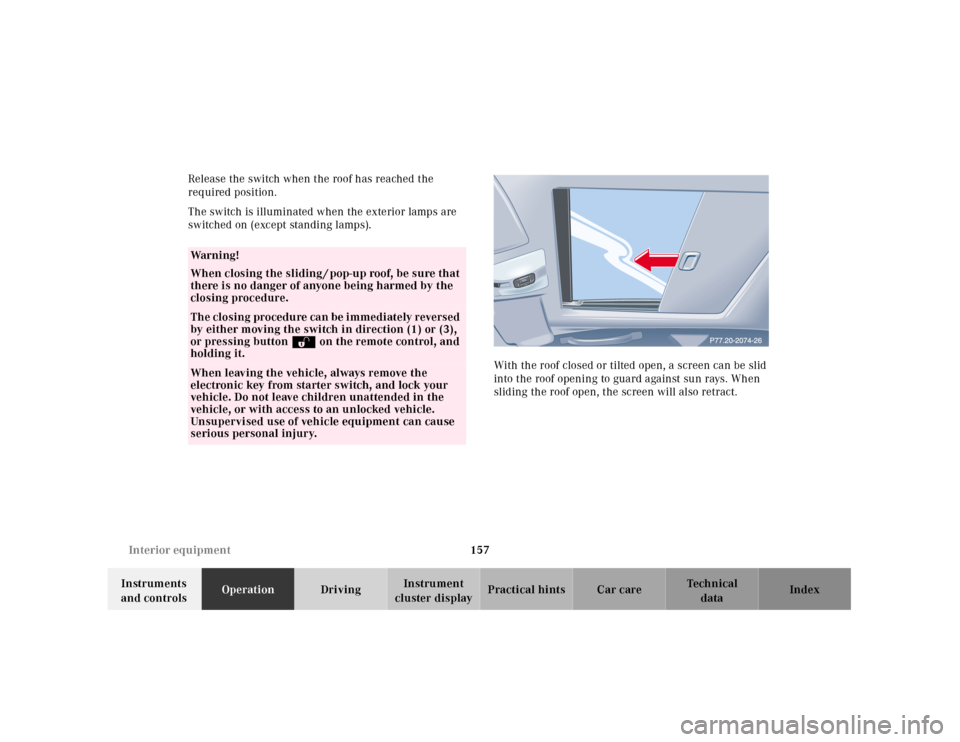
With the roof closed or tilted open, a screen can be slid
into the roof opening to guard against sun rays. When
sliding the roof open, the screen will also retract.
Wa r n i n g !
When closing the sliding / pop-up roof, be sure that
there is no danger of anyone being harmed by the
closing procedure.The closing procedure can be immediately reversed
by either moving the switch in direction (1) or (3),
or pressing button Πon the remote control, and
holding it.When leaving the vehicle, always remove the
electronic key from starter switch, and lock your
vehicle. Do not leave children unattended in the
vehicle, or with access to an unlocked vehicle.
Unsupervised use of vehicle equipment can cause
serious personal injury.
Page 169 of 341
166 Interior equipment
Technical
data Instruments
and controlsOperationDrivingInstrument
cluster displayPractical hints Car care Index
Ashtrays
Center console, front
By touching the bottom of the cover lightly, the ashtray
opens automatically.
Prior to removing the ashtray insert, move the gear
selector lever to position “N”.To remove ashtray:
Push sliding knob (1) toward the right to eject the
insert.
To install ashtray:
Install insert into ashtray frame and push down to
engage.
Wa r n i n g !
Remove front ashtray only with vehicle standing
still. With the gear selector lever in position “N”,
turn off the engine and set the parking brake.
Otherwise the vehicle might move as a result of
unintended contact with the gear selector lever.