Page 119 of 341
116 Headlamp cleaning system
Te ch n ica l
data Instruments
and controlsOperationDrivingInstrument
cluster displayPractical hints Car care Index
Headlamp cleaning system (optional)The switch is located in the center console.
The headlamp washer can be activated with the
electronic key in steering lock position 2.
Briefly press symbol side of switch.
P82.15-2007-26
Page 121 of 341

118 Combination switch
Te ch n ica l
data Instruments
and controlsOperationDrivingInstrument
cluster displayPractical hints Car care Index
6Control for windshield wiper/washer system:
Push brief ly for single wipe without adding washer
fluid (use only when windshield is wet).
Push past detent and hold to activate wiper and
washer.
Notes:
The windshield washer reservoir, hoses and nozzles are
automatically heated.
See page 259 for refilling windshield washer / headlamp
cleaning system.7Windshield wiper
0Wiper off
I Intermittent wiping
(optional rain sensor: One initial wipe, pauses
between wipes are automatically controlled by a
rain sensor monitoring the wetness of the
windshield.)
Notes:
With switch in this position, one wipe occurs
when turning the electronic main key in steering
lock from position 0.
Optional rain sensor:
Do not leave in inte rmittent se tting w hen vehicle
is taken to an automatic car wash or during
windshield cleaning. Wiper will operate in
presence of water spray at windshield, and wiper
may be damaged as a result.
II Normal wiper speed
III Fast wiper speed
P54.25-2033-26
6
7
Page 122 of 341
119 Hazard warning flasher
Te ch n ica l
data Instruments
and controlsOperationDrivingInstrument
cluster displayPractical hints Car care Index Windshield wiper smears
If the windshield wiper smears the windshield, even
during rain, activate the washer system as often as
necessary. The fluid in the washer reservoir should be
mixed in the correct ratio, see page 259.
Blocked windshield wiper
If the windshield wiper becomes blocked (for example,
due to snow), switch off the wiper.
For safety reasons before removing ice or snow, remove
electronic key from steering lock. Remove blockage.
Activate combination switch again (electronic key in
steering lock position 1).Hazard warning flasher switch
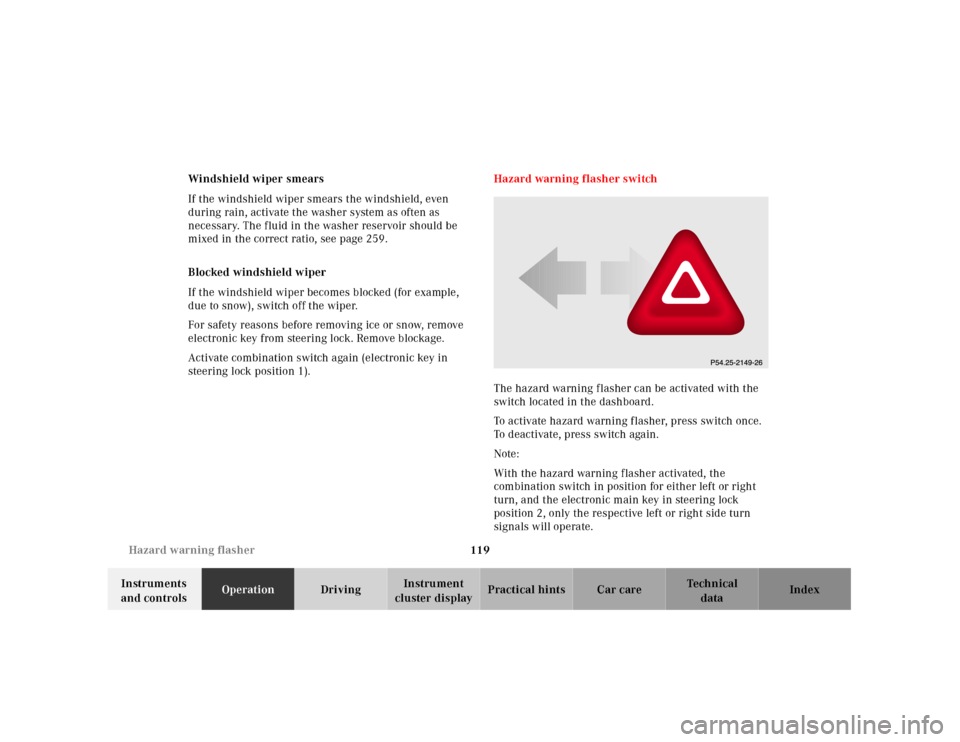
The hazard warning f lasher can be activated with the
switch located in the dashboard.
To activate hazard warning flasher, press switch once.
To deactivate, press switch again.
Note:
With the hazard warning flasher activated, the
combination switch in position for either left or right
turn, and the electronic main key in steering lock
position 2, only the respective left or right side turn
signals will operate.
Page 127 of 341

124 Automatic climate control
Te ch n ica l
data Instruments
and controlsOperationDrivingInstrument
cluster displayPractical hints Car care Index
Rear window defroster
Turn electronic key in steering lock to position 2.
To select, press F button.
To cancel, press F button again.
Notes:
H eavy accu mul ation of snow and ic e shoul d be removed
before activating the defroster.
The rear window defroster consumes a large amount of
electrical power. To keep the battery drain to a
minimum, turn off the defroster as soon as the window
is clear.
The defroster is automatically turned off after a
maximum of 12 minutes of operation.
If several power consumers are turned on
simultaneously, or the battery is only partially charged,
it is possible that the defroster will automatically turn
itself off. When this happens, the indicator lamp inside
the switch starts blinking.
As soon as the battery has sufficient voltage, the
defroster automatically turns itself back on.Air distribution
TPress b button for each side repeatedly until the
requested symbol is displayed.
Press U button to return to automatic mode.
Air volume
Press – or + side of rocker switch ï until the
requested blower speed is attained. A choice of 7 blower
speeds is available.
To switch the automatic climate control off, press – side
of rocker switch ï until symbol OFF is displayed.IThe fresh air supply to the vehicle interior is shut off.
While driving, use this setting only temporarily,
otherwise the windshield could fog up.
To switch the automatic climate control on again, press
U, P or +side of ï.
Page 128 of 341
125 Automatic climate control
Te ch n ica l
data Instruments
and controlsOperationDrivingInstrument
cluster displayPractical hints Car care Index Air recirculation
This mode can be selected to temporarily reduce the
entry of annoying odors or dust into the vehicle’s
interior.
Outside air is not supplied to the vehicle’s interior.
To select, press O button.
To cancel, press O button again.
The system will automatically switch from recirculated
air to fresh air
•after approx. 5 minutes at outside temperatures
below approx. 40°F (5°C),
•after approx. 30 minutes at outside temperatures
above approx. 40°F (5°C),
•after approx. 5 minutes, if button S is pressed.
If the windows should fog up from the inside, switch
from recirculated air back to fresh air.
At high outside temperatures, the system automatically
engages the recirculated air mode thereby increasing
the cooling capacity performance, switching to partially
fresh air within 30 minutes.Residual engine heat utilization
With the engine switched off, it is possible to continue
heating the interior for a short while.
Air volume and distribution are controlled
automatically.
To select:
Turn electronic key in steering lock to position 1 or 0 or
remove key.
Press T button
This function selection will not activate if the battery
charge level is insufficient.
To c a n c e l :
Press T button.
The system will automatically shut off
•if you turn electronic key in steering lock to
position 2,
•after approx. 30 minutes,
•if the battery voltage drops.
Page 133 of 341
130 Audio system
Te ch n ica l
data Instruments
and controlsOperationDrivingInstrument
cluster displayPractical hints Car care Index
Entering the code number
Switch on the radio. “CODE” will appear on the display.
Using the buttons on the alpha-numeric keypad, enter
the five digit code. Confirm by pressing the “OK” key.
If an incorrect code has been entered and confirmed,
“CODE” will reappear on the display. The correct code
must be entered once again.
If an incorrect code is entered
three times, “WAIT” will
appear on the display and the
radio will be locked out for
about 10 minutes.
Note:
Th e lock out time w il l only cou nt d own if th e ra dio is le ft
switched on.Button and soft key operation
In these instructions, the alpha-numeric keypad (right
side of radio face) and the function buttons (left side of
the radio face) are referred to as “buttons” and the four
keys under the display are referred to as “soft keys”.
Note:
Do not press directly on the radio display face.
Page 134 of 341

131 Audio system
Te ch n ica l
data Instruments
and controlsOperationDrivingInstrument
cluster displayPractical hints Car care Index Operation
Switching on and off
Press the control knob .
Th e ra dio is switch ed of f wh en the ignition key is tu rned
to position 0 or removed from the ignition. The radio is
switched on again when the ignition key is turned to
position 1 or 2.
Note:
The radio can also be switched on even if the ignition
key is not inserted, but will switch itself off
automatically after one hour to conserve vehicle battery
power.
Adjusting the volume
Turn the control knob - turning the knob clockwise will
increase the volume, counterclockwise will decrease the
volume.Audio functions
The AUD key is used to select the BASS, TREBLE and
BALANCE functions. Settings for bass and treble are
stored separately for the cassette and CD modes. Tone
level settings are identified by the vertical bars. The
center (flat) setting is shown by one longer bar in the
center of the display.
Bass
Press the AUD key repeatedly
until “BASS” appears in the
display.
Treble
Press the AUD key repeatedly
until “TREBLE” appears in th e
display.
Press the “+” key to increase
or the “-” key to decrease the level.
Page 138 of 341

135 Audio system
Te ch n ica l
data Instruments
and controlsOperationDrivingInstrument
cluster displayPractical hints Car care Index Cassette mode
Note:
Vehicles equipped with the COMAND system do not
come with a factory installed cassette mechanism.
A standard 1/8” stereo phono plug for auxiliary audio
input (located in glove box) is provided for connection of
a portable battery operated cassette player or any other
portable device which uses a headphone output. Please
refer to the COMAND operating manual for information
concerning the activation of the audio input.
Playing cassettes
Press the “TAPE” button. When the eject (EJ) key is
pressed, the display folds down and the cassette slot
becomes visible. Push the cassette into the slot until it
engages. The cassette will be pulled in automatically.Note:
Do not press directly on the radio display face.
Return the display panel to its normal position by
folding it back up and pressing gently on the display
frame to lock in place.
When playing mono recorded tapes (e.g. books) through
a stereo system the sound from one track might bleed to
the other track, despite setting the balance to the full
left or full right speakers.
Important!
If the display is in the down position for more than
20 seconds, 2 successive beeps will be heard. This will
continue at 5 second intervals until the display is
returned to its normal position.
