2001 MERCEDES-BENZ CL500 check engine
[x] Cancel search: check enginePage 6 of 424

3 ContentsCoat hooks ...................................... 192
Cup holder ...................................... 193
Ashtrays .......................................... 196
Lighter ............................................. 198
Parcel net in trunk ........................ 199
Cargo tie-down hooks ....................200
Parcel net in front
passenger footwell ....................200
Telephone, general ........................ 201
Garage door opener .......................202
Infrared reflecting windshield ....206
DrivingControl and operation of radio
transmitters ...............................208
The first 1 000 miles
(1 500 km) .................................209
Maintenance ...................................209
Tele Aid ........................................... 210
Catalytic converter ........................220
Emission control ............................221
Starter switch .................................222
Starter switch – KEYLESS-GO ......224Starting and turning off
the engine .................................. 227
Automatic transmission ............... 229
Parking brake ................................ 238
Driving instructions ...................... 239
Drive sensibly – save fuel ........ 239
Drinking and driving ................ 239
Pedals .......................................... 240
Power assistance ........................ 240
Brakes .......................................... 240
Driving off ................................... 241
Parking ........................................ 242
Tires ............................................. 243
Snow chains ............................... 245
Winter driving instructions ..... 246
Deep water .................................. 248
Passenger compartment ........... 248
Traveling abroad ........................ 249
Cruise control ................................ 250
Distronic (DTR) .............................. 253
Brake assist system
(BAS) .......................................... 268
Antilock brake system
(ABS) .......................................... 269Electronic stability program
(ESP) ........................................... 271
Active body control (ABC) ............275
Level control system ...................... 276
Parking assist (Parktronic) ..........279
What you should know
at the gas station .......................284
Check regularly
and before a long trip ...............287
Instrument cluster displayMalfunction and indicator
lamps in the
instrument cluster ....................290
On-board diagnostic system .....290
Check engine malfunction
indicator lamp .............................290
Brake warning lamp ..................292
Supplemental restraint
system (SRS)
indicator lamp .............................293
Fuel reserve warning .................293
ABS malfunction
indicator lamp .............................294
Page 7 of 424

4 Contents
Electronic stability program
(ESP) — warning lamp ...............295
Distronic (DTR) —
warning lamp ..............................295
Seat belt nonusage
warning lamp ..............................296
Malfunction and indicator
lamp in the center console ......296
AIRBAG OFF indicator lamp .....296
Malfunction and
warning messages in the
multifunction display ...............297
DISPLAY DEFECTIVE
(engine control unit) ..................298
DISPLAY DEFECTIVE
(several systems) ........................298
BATTERY /ALTERNATOR ..........299
ENTRANCE POSITION ..............300
BRAKE ASSIST ...........................300
BRAKE LINING WEAR .............. 301
BRAKE FLUID ............................. 301
PARKING BRAKE .......................302
TRUNK OPEN .............................302ELEC. STABIL. PROG.
(Electronic stability
program) ..................................... 303
COOLANT (coolant level) ......... 304
COOLANT
(coolant temperature) ............... 305
LIGHTING SYSTEM ................... 306
LIGHT SENSOR .......................... 308
SEAT BELT SYSTEM .................. 308
TELEPHONE – FUNCTION ....... 309
CRUISE CONTROL ..................... 309
ACTIVE BO DY CO NTROL
(ABC) ............................................ 310
TIRE PRESSURE .........................312
ENGINE OIL LEVEL .................... 314
SEAT BACKREST ......................... 315
KEY ...............................................316
DOOR ............................................ 316
HOOD ............................................ 317
TELE AID ......................................317
ENGINE OIL LEVEL .................... 318
WASHER FLUID ..........................319
LIGHT SENSOR .......................... 320
DISTRONIC (DTR) ...................... 321
Practical hintsFirst aid kit .....................................324
Fuses ................................................325
Shelf below rear window ..............327
Hood .................................................328
Checking engine oil level ............. 331
Automatic transmission
fluid level ...................................332
Active b od y control
(ABC) fluid level ........................332
Coolant level ...................................333
Adding coolant ...........................333
Windshield and headlamp
washer system ...........................334
Windshield and headlamp
washer fluid mixing ratio .........334
Spare wheel, vehicle tools,
storage compartment ................335
Jack ...................................................336
Wheels .............................................337
Tire Replacement .......................337
Rotating wheels ..........................338
Spare wheel ....................................338
Page 34 of 424
31 Central locking system
Te ch n ica l
data Instruments
and controlsOperationDrivingInstrument
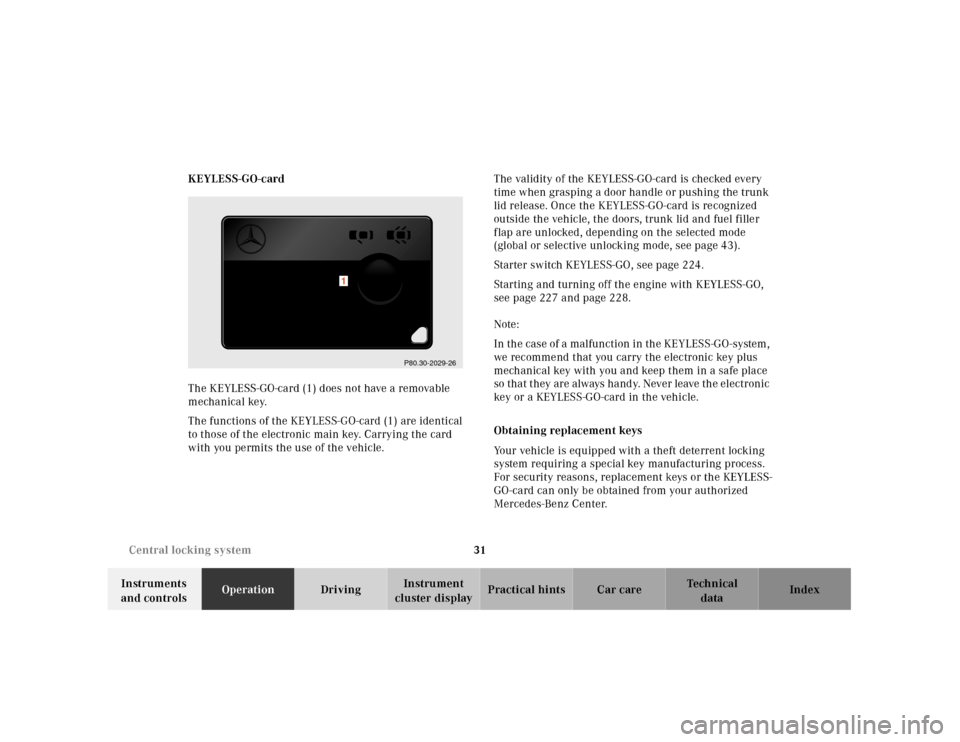
cluster displayPractical hints Car care Index KEYLESS-GO-card
The KEYLESS-GO-card (1) does not have a removable
mechanical key.
The functions of the KEYLESS-GO-card (1) are identical
to those of the electronic main key. Carrying the card
with you permits the use of the vehicle.The validity of the KEYLESS-GO-card is checked every
time when grasping a door handle or pushing the trunk
lid release. Once the KEYLESS-GO-card is recognized
outside the vehicle, the doors, trunk lid and fuel filler
flap are unlocked, depending on the selected mode
(global or selective unlocking mode, see page 43).
Starter switch KEYLESS-GO, see page 224.
Starting and turning off the engine with KEYLESS-GO,
see page 227 and page 228.
Note:
In th e case of a mal function in th e KEYLESS-G O -system ,
we recommend that you carry the electronic key plus
mechanical key with you and keep them in a safe place
so tha t t hey are always ha nd y. Never leave th e el ectronic
key or a KEYLESS-GO-card in the vehicle.
Obtaining replacement keys
Your vehicle is equipped with a theft deterrent locking
system requiring a special key manufacturing process.
For security reasons, replacement keys or the KEYLESS-
GO-card can only be obtained from your authorized
Mercedes-Benz Center.
P80.30-2029-26
1
Page 36 of 424

33 Central locking system
Te ch n ica l
data Instruments
and controlsOperationDrivingInstrument
cluster displayPractical hints Car care Index General notes on the central locking system
If the electronic key is inserted in the starter switch, the
vehicle cannot be locked or unlocked with the remote
control.
If the vehicle cannot be locked or unlocked:
•Aim transmitter eye at a receiver on either door
handle. Check the batteries of the electronic main
key, see page 363, or synchronize the remote
control, see page 365.
•Vehicles with KEYLESS-GO only:
A KEYLESS-GO-card must be recognized by the
system as being outside the vehicle to enable the
vehicle to be locked or unlocked (maximum distance
between card and doors or trunk is approx. 3 ft. (1
m). Check the location of the KEYLESS-GO-card, see
page 38. Check the batteries of the KEYLESS-GO-
card, see page 366. The trunk lid will open
automatically if a KEYLESS-GO card is detected in
the trunk, see page 38.Note:
If neither the remote control nor KEYLESS-GO system
functions, use the mechanical key to unlock or lock the
vehicle. To start engine, insert the electronic key in the
starter switch. There could be a slight delay until the
electronic key can be turned in the starter switch.
Important!
When unlocking the driver’s door with the mechanical
key, the exterior lamps will flash and the alarm will
sound.
To cancel the alarm, insert the electronic key in the
starter switch, or press buttonŒ or‹ on the
electronic main key; or with the optional KEYLESS-GO-
system, when carrying a KEYLESS-GO-card, by grasping
a door handle or pressing the start-/stop button on the
gear selector lever.
Page 154 of 424
151 Tire inflation pressure monitor
Te ch n ica l
data Instruments
and controlsOperationDrivingInstrument
cluster displayPractical hints Car care Index Notes:
Following a tire inflation pressure reactivation process
the real tire inflation pressures are displayed only after
a few minutes travel time.
Possible differences between readings of a tire pressure
gau ge of a n air h ose, e.g. gas sta tion equ ipment, and th e
vehicle’s multifunction display can occur. The vehicle’s
multifunction display of the tire inflation pressure
monitor is a more precise reading.Activation of tire inflation pressure monitor
Activation of tire inflation pressure monitor is
necessary if tire inf lation pressure is being changed,
wheels or tires are replaced, or new wheels are installed
on the vehicle.
Tire inf lation pressure should be checked and corrected
according to the label affixed inside the fuel filler flap.
For a detailed description, refer to page 345.
Turn electronic key in starter switch to position 2 (the
engine must not be running).
Notes:
When checking the tire inf lation pressure of the road
wheels, also check the spare tire.
The tire inflation pressure of the spare wheel, mounted
or not mounted, is not monitored by the tire inflation
pressure monitor.
See page 335 for location of the spare wheel, and
page 345 for tire inflation pressure.
Page 157 of 424
154 Engine oil level indicator
Te ch n ica l
data Instruments
and controlsOperationDrivingInstrument
cluster displayPractical hints Car care Index
Engine oil level indicator
To check the engine oil level, park vehicle on level
ground, with engine at normal operational temperature.
Check oil level approximately 5 minutes after stopping
the engine, allowing for the oil to return to the oil pan.
The message “PERF. SERV. ON TIME” (perform service
[engine oil level check] on time) will be displayed if the
required waiting period has not been observed after
stopping the engine:
•with engine at operational temperature approx.
5minutes.•with engine not at operational temperature up to
approx. 30 minutes.
The engine oil level check can be repeated after a short
time.
Turn the electronic key in starter switch to position 2.
To call up the trip odometer and main odometer, press
buttonè orÿ on the multifunction steering
wheel until the display appears. See page 124.
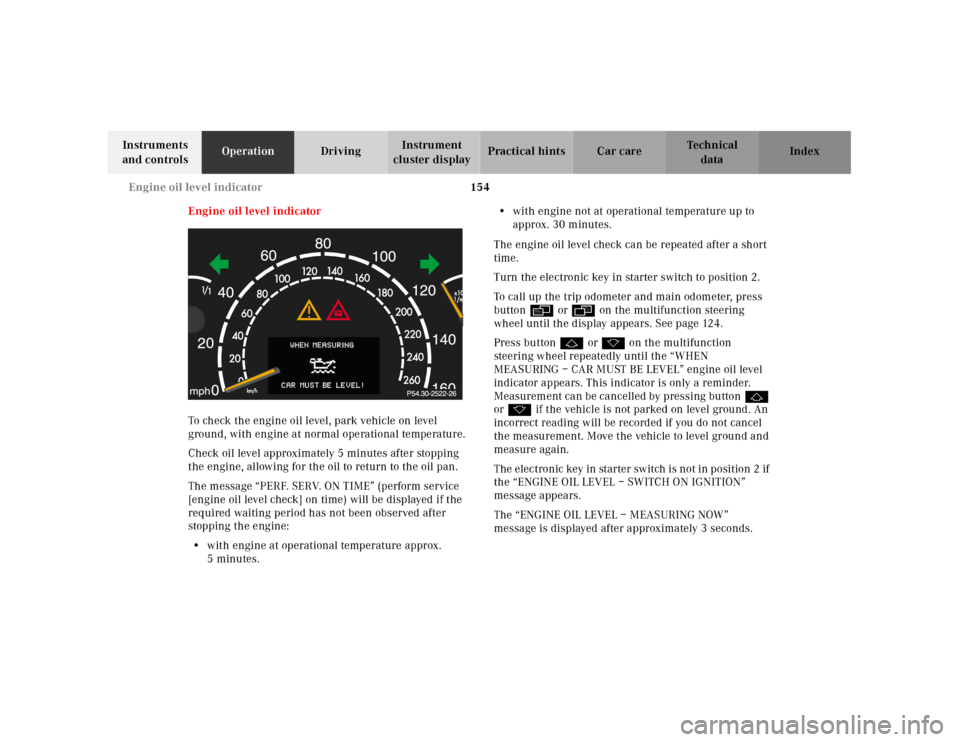
Press buttonj ork on the multifunction
steering wheel repeatedly until the “WHEN
MEASURING – CAR MUST BE LEVEL” engine oil level
indicator appears. This indicator is only a reminder.
Measurement can be cancelled by pressing buttonj
ork if the vehicle is not parked on level ground. An
incorrect reading will be recorded if you do not cancel
the measurement. Move the vehicle to level ground and
measure again.
The elec tronic key in starter sw itch is not in position 2 if
the “ENGINE OIL LEVEL – SWITCH ON IGNITION”
message appears.
The “ENGINE OIL LEVEL – MEASURING NOW”
message is displayed after approximately 3 seconds.
Page 158 of 424
155 Engine oil level indicator
Te ch n ica l
data Instruments
and controlsOperationDrivingInstrument
cluster displayPractical hints Car care Index One of the following messages will subsequently appear
on the indicator:
“ENGINE OIL LEVEL – O.K.”
No oil needs to be added.
“ENGINE OIL LEVEL – ADD 1.0 QUART”
(Canada: 1.0 L)
“ENGINE OIL LEVEL – ADD 1.5 QUART”
(Canada: 1.5 L)
“ENGINE OIL LEVEL – ADD 2.0 QUART”
(Canada: 2.0 L)
See “Checking engine oil level”, on page 331 for
instructions on adding engine oil.
“ENGINE OIL LEVEL – REDUCE OIL LEVEL”
Do not overfill the engine.
Excessive oil must be siphoned or drained off. It could
cause damage to the engine and catalytic converter not
covered by the Mercedes-Benz Limited Warranty.
The “MEASURING NOT POSSIBLE” message will be
displayed if a proper oil level check cannot be
performed. The engine oil level check can be repeated
after a short while.CL 500 and CL 55 AMG only:
Perform the engine oil level check with the dipstick, if it
cannot be completed via the multifunction display.
See “Checking engine oil level”, page 331.
In this case we recommend that you have the system
checked at a Mercedes-Benz Center.
Notes:
See malfunction and warning messages on page 297
and page 314 if an engine oil level indicator appears on
the multifunction display when the engine is running.
The engine oil level cannot be checked while the engine
is running. The “ENGINE OIL LEVEL – NOT WHEN
ENGINE ON” message will appear.
Engine oil consumption
Engine oil consumption checks should only be made
after the break-in period. During the break-in period,
higher oil consumption may be noticed and is normal.
Frequent driving at high engine speeds results in
increased consumption.
Page 170 of 424
167 Automatic climate control
Te ch n ica l
data Instruments
and controlsOperationDrivingInstrument
cluster displayPractical hints Car care Index Automatic climate control
The system is always at operational readiness, except
when manually switched off.
The automatic climate control only operates with the
engine running.
The temperature selector should be left at the desired
temperature setting. The temperature selected is
reached as quickly as possible.
Th e system w il l not hea t or c ool a ny q uicker by setting a
higher or lower temperature.
The desired interior temperature and air distribution
can be selected separately for the left and right side of
the passenger compartment.
The automatic climate control removes considerable
moisture from the air during operation in the cooling
mode. It is normal for water to drip on the ground
through ducts in the underbody.
The air conditioning will not engage (no cooling) if the
economy modeS is selected, see page 173. Notes:
Do not obstruc t th e air f low by pl acing objec ts on th e a ir
flow-through exhaust slots below the rear window.
Also keep the air intake grill in front of the windshield
free of snow and debris.
The storage compartment between the front seats can be
ventilated. See page 175 for notes on ventilating the
storage space under the armrest in the center console.
The air conditioner switches itself off for its own
protection if refrigerant is lost. No cooling will then take
pl a c e . E c o no my m od eS c a n n ot b e s w i tch e d o f f . H ave
the air conditioner checked by a Mercedes-Benz Center
should this happen.
Dust filter
Nearly all dust particles and pollen are filtered out
before outside air enters the passenger compartment
through the air distribution system.