Page 103 of 424
100 Restraint systems
Te ch n ica l
data Instruments
and controlsOperationDrivingInstrument
cluster displayPractical hints Car care Index
Safety guidelines for the seat belt, emergency
tensioning retractor and airbag
Wa r n i n g !
• Damaged seat belts or belts that were highly
stressed in an accident must be replaced and
their anchoring points must also be checked.
Use only belts installed or supplied by an
authorized Mercedes-Benz Center.• Airbags and “ETR’s” are designed to function
on a one-time-only basis. An airbag or
emergency tensioning retractor (ETR) that was
activated must be replaced.• No modifications of any kind may be made to
any components or wiring of the “SRS”. This
includes changing or removing any component
or part of the “SRS”, the installation of
additional trim material, badges etc. over the
steering wheel hub, front passenger airbag
cover, door trim panels, or door frame trims,
and installation of additional electrical/
electronic equipment on or near “SRS”
components and wiring. Keep area between
airbags and occupants free from objects (e.g.
packages, purses, umbrellas, etc.).
• Do not pass belts over sharp edges.• Do not make any modification that could
change the effectiveness of the belts.• Do not use handles or coat hooks above doors
and rear windows for placing such items as
coat hangers etc..• An airbag system component within the
steering wheel gets hot after the airbag has
inflated. Do not touch.• Improper work on the system, including
incorrect installation and removal, can lead to
possible injury through an unintended
activation of the “SRS”.• In addition, through improper work there is a
risk of rendering the “SRS” inoperative or
causing unintended airbag deployment. Work
on the “SRS” must therefore only be performed
by an authorized Mercedes-Benz Center.
Page 119 of 424
116 Instrument cluster
Te ch n ica l
data Instruments
and controlsOperationDrivingInstrument
cluster displayPractical hints Car care Index
•Turning the electronic key in starter switch to
position 1 or 2.
•Switching on the exterior lamps.
1 The instrument cluster is activated for approx. 30 seconds.Instrument cluster illumination
The instrument cluster illumination is dimmed or
brightened automatically to suit daylight lighting
conditions.
The instrument cluster illumination will also be
adjusted when the vehicle’s exterior lamps are
switched on.Display illumination, changing basic settings for driving
at dusk or in darkness:
Press adjusting knob (1) – the knob will pop out.
Rotate adjusting knob (1) clockwise – instrument lamp
intensity increases.
Rotate adjusting knob (1) counterclockwise –
instrument lamp intensity decreases.
Push knob back into panel.
Note:
It is not possible to select a basic brightness setting in
daylight – the intensity is adjusted automatically.
Page 159 of 424
156 Exterior lamp switch
Te ch n ica l
data Instruments
and controlsOperationDrivingInstrument
cluster displayPractical hints Car care Index
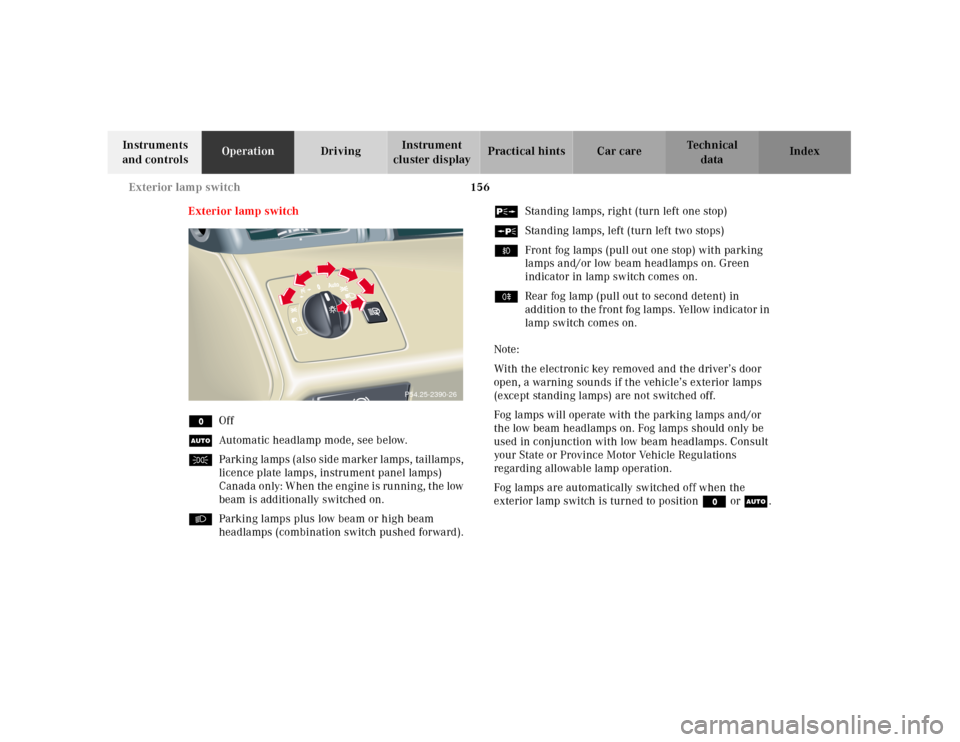
Exterior lamp switch
MOff
UAutomatic headlamp mode, see below.
CParking lamps (also side marker lamps, taillamps,
licence plate lamps, instrument panel lamps)
Canad a only: W hen the engine is ru nning, t he low
beam is additionally switched on.
BParking lamps plus low beam or high beam
headlamps (combination switch pushed forward).ˆStanding lamps, right (turn left one stop)
‚Standing lamps, left (turn left two stops)
‡Front fog lamps (pull out one stop) with parking
lamps and/or low beam headlamps on. Green
indicator in lamp switch comes on.
†Rear fog lamp (pull out to second detent) in
addition to the front fog lamps. Yellow indicator in
lamp switch comes on.
Note:
With the electronic key removed and the driver’s door
open, a warning sounds if the vehicle’s exterior lamps
(except standing lamps) are not switched off.
Fog lamps will operate with the parking lamps and/or
the low beam headlamps on. Fog lamps should only be
used in conjunction with low beam headlamps. Consult
your State or Province Motor Vehicle Regulations
regarding allowable lamp operation.
Fog lamps are automatically switched off when the
exterior lamp switch is turned to position M or U.
P54.25-2390-26
Page 179 of 424
176 Automatic climate control
Te ch n ica l
data Instruments
and controlsOperationDrivingInstrument
cluster displayPractical hints Car care Index
Rear window defroster
Turn the electronic key in starter switch to position 2.
To select:
Press the Fbutton in the control panel of the
automatic air conditioner. The indicator lamp in the
button illuminates.
To ca nc el:
Press the Fbutton in the control panel of the
automatic air conditioner. The indicator lamp in the
button goes out.
Notes:
H eavy accu mul ation of snow and ic e shoul d be removed
before activating the defroster. T h e re a r w in d ow d e f r o ste r u s e s a l a rg e a m ou n t of p ow e r.
To keep the battery drain to a minimum, turn off the
defroster as soon as the rear window is clear.
The defroster is automatically turned off after
approximately 6–17 minutes of operation depending on
the outside temperature and vehicle speed.
If several power consumers are turned on
simultaneously, or the battery is only partially charged,
it is possible that the defroster will automatically turn
itself off. When this happens, the indicator lamp inside
the switch starts blinking.
As soon as the battery has sufficient voltage, the
defroster automatically turns itself back on.
Page 181 of 424
178 Interior equipment
Te ch n ica l
data Instruments
and controlsOperationDrivingInstrument
cluster displayPractical hints Car care Index
Power w indows
The control panel is located on the driver’s door.
Switches for:
1left, front
2right, front
3left, rear
4right, rear
5Switch for rear door window overrideControl panel on rear center console.
Turn electronic key in starter switch to position 1 or 2.
Opening the side windows:
Pressk on the switch to resistance point.
Closing the side windows:
Pressj on the switch to resistance point.
Release switch when window is in desired position.
3
3
3
3
Page 243 of 424
238 Parking brake
Te ch n ica l
data Instruments
and controlsOperationDrivingInstrument
cluster displayPractical hints Car care Index
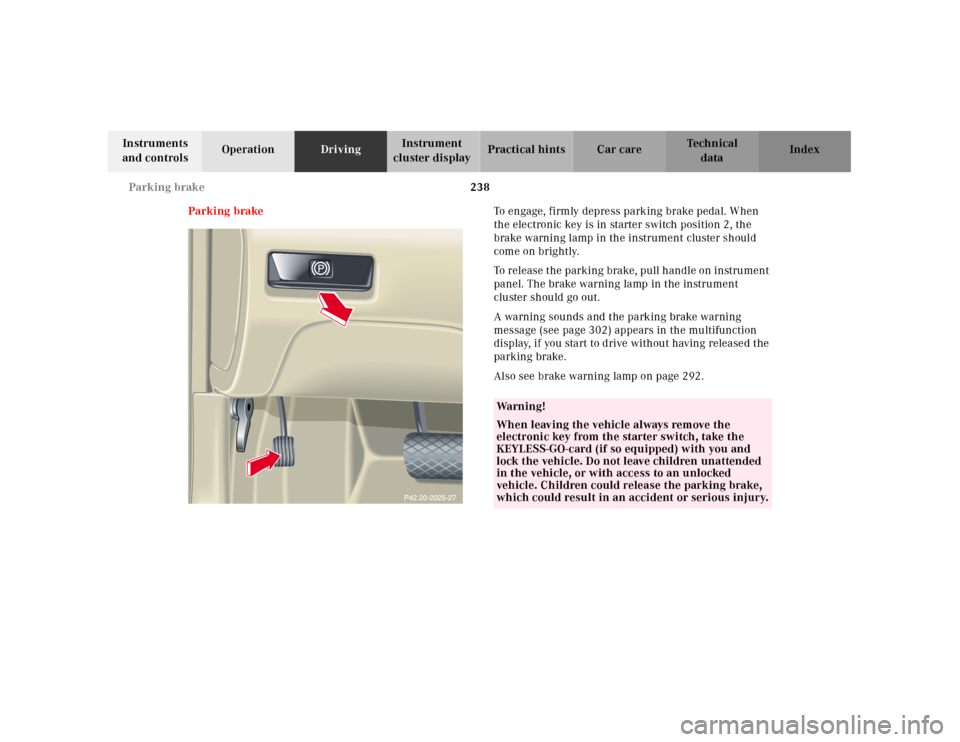
Parking brakeTo engage, firmly depress parking brake pedal. When
the electronic key is in starter switch position 2, the
brake warning lamp in the instrument cluster should
come on brightly.
To rel ease t he parking bra ke, pull h andl e on instru ment
panel. The brake warning lamp in the instrument
cluster should go out.
A warning sounds and the parking brake warning
message (see page 302) appears in the multifunction
display, if you start to drive without having released the
parking brake.
Also see brake warning lamp on page 292.
Wa r n i n g !
When leaving the vehicle always remove the
electronic key from the starter switch, take the
KEYLESS-GO-card (if so equipped) with you and
lock the vehicle. Do not leave children unattended
in the vehicle, or with access to an unlocked
vehicle. Children could release the parking brake,
which could result in an accident or serious injury.
Page 335 of 424
329 Engine compartment
Te ch n ica l
data Instruments
and controlsOperation DrivingInstrument
cluster displayPractical hintsCar care Index To o pen :
To unlock the hood, pull release lever (1) under the
driver’s side of the instrument panel. At the same time a
handle will extend out of the radiator grill.Pull handle (2) to its stop out of radiator grill and open
hood (do not pull up on the handle).
Note:
To avoid dam age to th e w indsh ield w ipers or hood , open
the hood only with the wipers in the parked position.
Page 353 of 424
347 Battery
Te ch n ica l
data Instruments
and controlsOperation DrivingInstrument
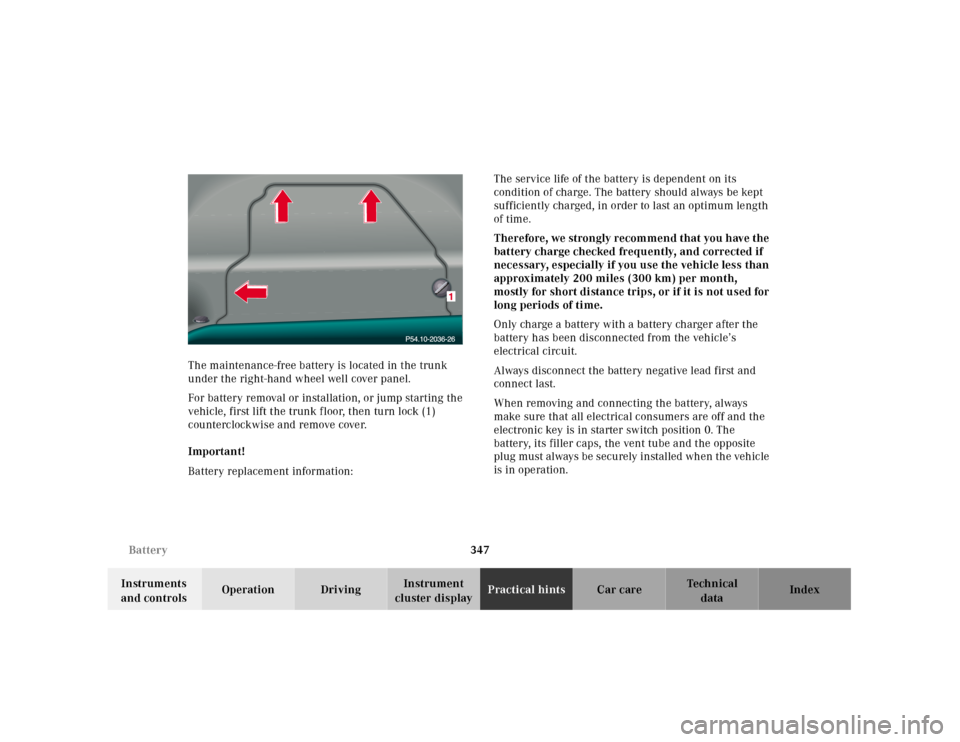
cluster displayPractical hintsCar care Index The maintenance-free battery is located in the trunk
under the right-hand wheel well cover panel.
For battery removal or installation, or jump starting the
vehicle, first lift the trunk f loor, then turn lock (1)
counterclockwise and remove cover.
Important!
Battery replacement information:The service life of the battery is dependent on its
condition of charge. The battery should always be kept
sufficiently charged, in order to last an optimum length
of time.
Therefore, we strongly recommend that you have the
battery charge checked frequently, and corrected if
necessary, especially if you use the vehicle less than
approximately 200 miles (300 km) per month,
mostly for sh ort di stance trips, or if it is not u sed for
long periods of time.
Only charge a battery with a battery charger after the
battery has been disconnected from the vehicle’s
electrical circuit.
Always disconnect the battery negative lead first and
connect last.
When removing and connecting the battery, always
make sure that all electrical consumers are off and the
electronic key is in starter switch position 0. The
battery, its filler caps, the vent tube and the opposite
plug must always be securely installed when the vehicle
is in operation.