2001 MERCEDES-BENZ C320 driver seat adjustment
[x] Cancel search: driver seat adjustmentPage 51 of 381
42 Seats
Te ch n i c a l
data Instruments
and controlsOperationDrivingInstrument
cluster displayPractical hints Car care Index
Front seat adjustment
To operate the front power seat adjustment switches,
turn the electronic key in starter switch to position 1
or 2 (with a front door open, the power seats can also be
operated with the electronic key removed or in starter
switch position 0).
Wa r n i n g !
Do not adjust the driver’s seat while driving.
Adjusting the seat while driving could cause the
driver to lose control of the vehicle.Never ride in a moving vehicle with the seat back
reclined. Sitting in an excessively reclined position
can be dangerous. You could slide under the seat
belt in a collision. If you slide under it, the belt
would apply force at the abdomen or neck. That
could cause serious or fatal injuries. The seat back
and seat belts provide the best restraint when the
wearer is in an upright position and belts are
properly positioned on the body.Never place hands under seat or near any moving
parts while a seat is being adjusted.
When leaving the vehicle always remove the
electronic key from the starter switch, and lock
your vehicle. The power seats can also be operated with the
driver’s or front passenger door open. Do not leave
children unattended in the vehicle, or with access
to an unl ocked vehic l e. Uns upervi s ed us e of vehi cl e
equipment may cause serious personal injury.
Page 58 of 381
49 Seats
Te ch n i c a l
data Instruments
and controlsOperationDrivingInstrument
cluster displayPractical hints Car care Index Multicontour seat (optional)
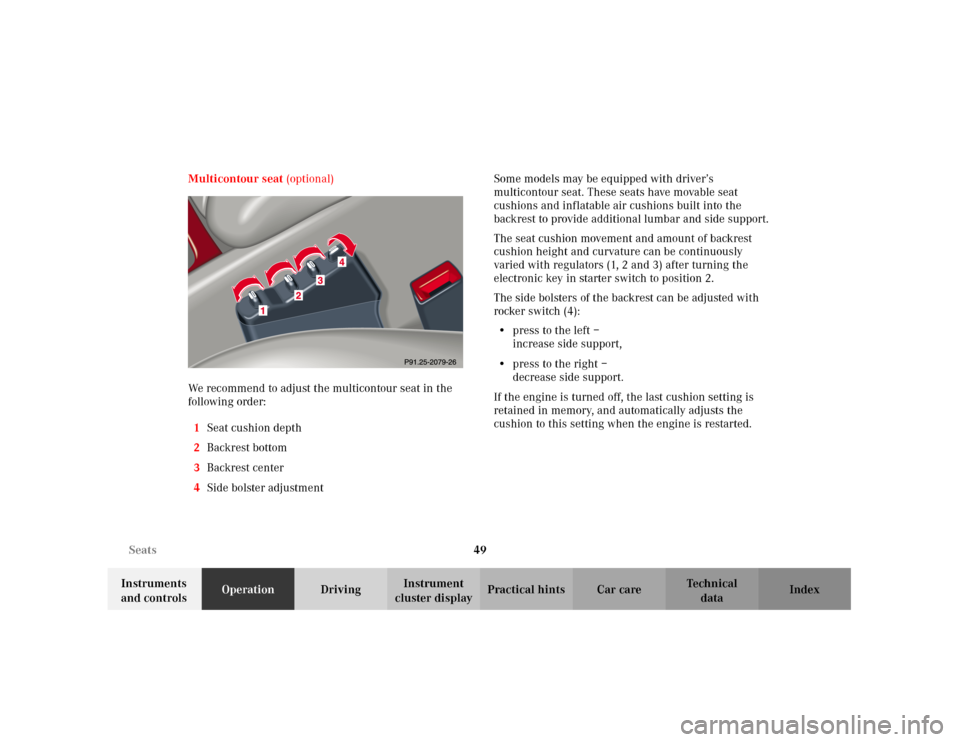
We recommend to adjust the multicontour seat in the
following order:
1Seat cushion depth
2Backrest bottom
3Backrest center
4Side bolster adjustmentSome models may be equipped with driver’s
multicontour seat. These seats have movable seat
cushions and inflatable air cushions built into the
backrest to provide additional lumbar and side support.
The seat cushion movement and amount of backrest
cushion height and curvature can be continuously
varied with regulators (1, 2 and 3) after turning the
electronic key in starter switch to position 2.
The side bolsters of the backrest can be adjusted with
rocker switch (4):
•press to the left –
increase side support,
•press to the right –
decrease side support.
If the engine is turned off, the last cushion setting is
retained in memory, and automatically adjusts the
cushion to this setting when the engine is restarted.
Page 80 of 381

71 Restraint systems
Te ch n i c a l
data Instruments
and controlsOperationDrivingInstrument
cluster displayPractical hints Car care Index
• Sit properly belted in an upright position with
your back against the backrest.• Adjust the driver seat as far as possible
rearward, still permitting proper operation of
vehicle controls. The distance from the center
of the driver’s breastbone to the center of the
airbag cover on the steering wheel must be at
least ten inches (25 cm) or more. You should be
able to accomplish this by a combination of
adjustments to the seat and steering wheel. If
you have any problems, please see your
authorized Mercedes-Benz Center.• Do not lean with your head or chest close to the
steering wheel or dashboard.• Keep hands on the outside of steering wheel
rim. Placing hands and arms inside the rim
can increase the risk and potential severity of
hand / arm injury when driver front airbag
inflates.• Adjust the front passenger seat as far as
possible rearward from the dashboard when
the seat is occupied.
• Occupants, especially children, should never
lean their heads in the area of the door where
the side airbag inflates. This could result in
serious injuries or death should the airbag be
triggered.• Children 12 years old and under must never
ride in the front seat, except in a
Mercedes-Benz authorized Baby Smart
TM
compatible child seat, which operates with the
BabySmart
TM system installed in the vehicle to
deactivate the passenger side front airbag
when it is properly installed. Otherwise they
will be struck by the airbag when it inflates in
a crash. If this happens, serious or fatal injury
can result.
Failure to follow these instructions can result in
severe injuries to you or other occupants.
Page 86 of 381
77 Restraint systems
Te ch n i c a l
data Instruments
and controlsOperationDrivingInstrument
cluster displayPractical hints Car care Index To fold mounts (1) back, press down button (2) on each
mount and return mount into its catch.
Note:
With a child seat installed in the left rear seat, the seat
belt for the center seat occupied by a passenger must
operate freely. Guide seat belt between its seat cushion
mount and backrest mount along outside of right side
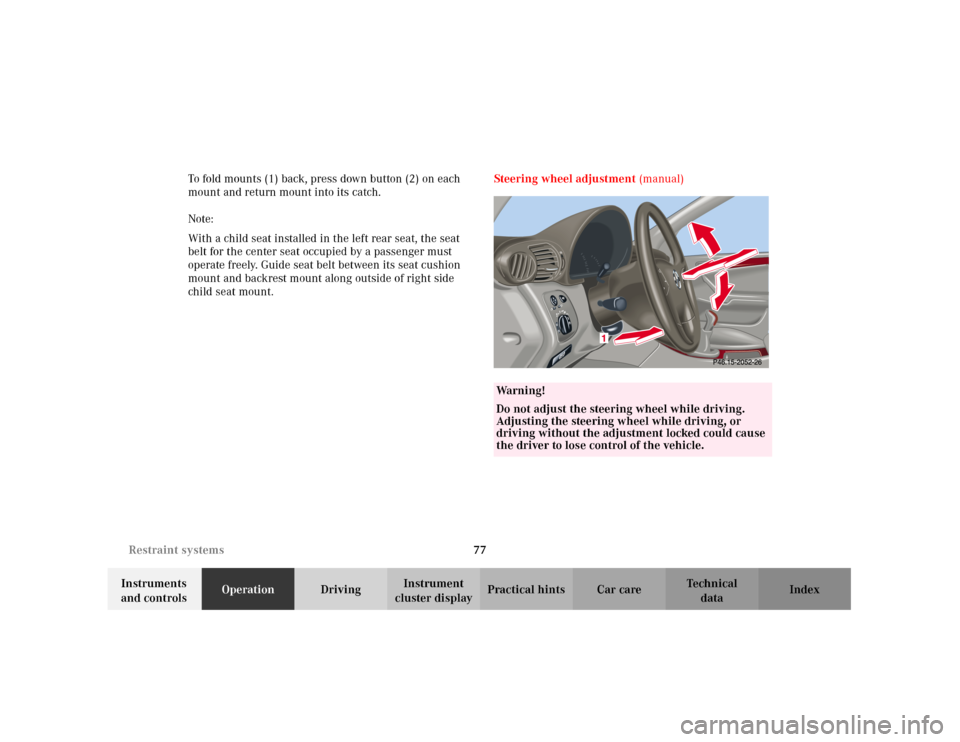
child seat mount.Steering wheel adjustment (manual)
Wa r n i n g !
Do not adjust the steering wheel while driving.
Adjusting the steering wheel while driving, or
driving without the adjustment locked could cause
the driver to lose control of the vehicle.
Page 88 of 381
79 Steering wheel adjustment
Te ch n i c a l
data Instruments
and controlsOperationDrivingInstrument
cluster displayPractical hints Car care Index Steering wheel adjustment (electrical)
To adjust the steering wheel position, turn the electronic
key in starter switch to position 1 or 2. With the driver’s
door open, the steering wheel can also be operated with
the electronic key removed or in starter switch
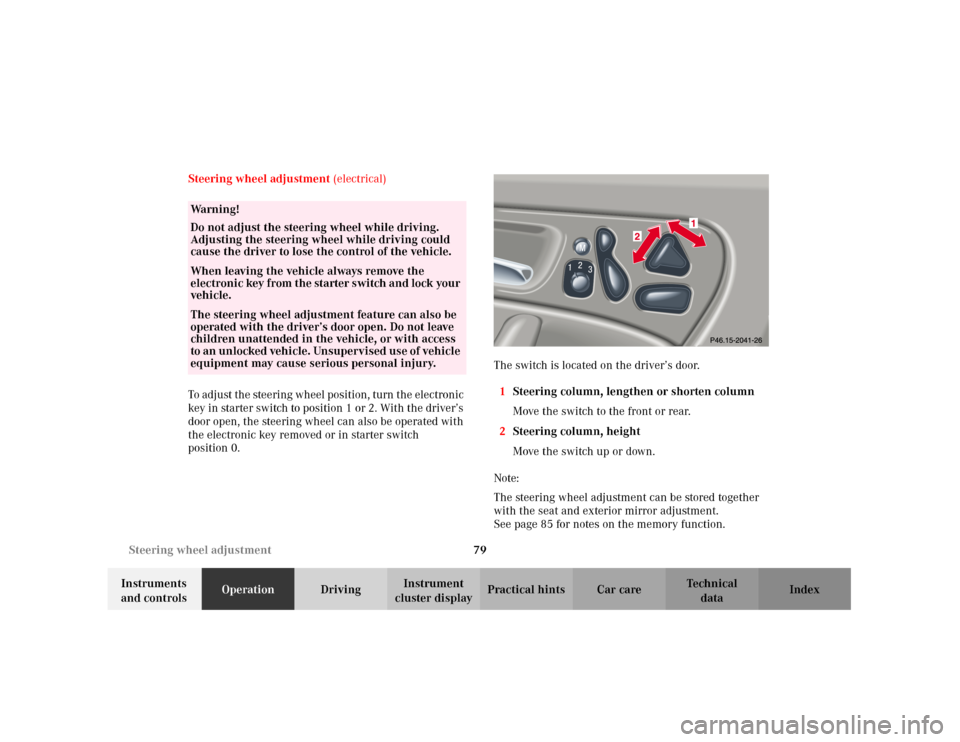
position 0.The switch is located on the driver’s door.
1Steering column, lengthen or shorten column
Move the switch to the front or rear.
2Steering column, height
Move the switch up or down.
Note:
The steering wheel adjustment can be stored together
with the seat and exterior mirror adjustment.
See page 85 for notes on the memory function.
Wa r n i n g !
Do not adjust the steering wheel while driving.
Adjusting the steering wheel while driving could
cause the driver to lose the control of the vehicle.When leaving the vehicle always remove the
electroni c key f rom t he sta rter s wi tch a nd lock your
vehicle.The steering wheel adjustment feature can also be
operated with the driver’s door open. Do not leave
children unattended in the vehicle, or with access
to a n un locked vehi cle. Un supervi sed use of vehicl e
equipment may cause serious personal injury.
Page 90 of 381
81 Rear view mirrors
Te ch n i c a l
data Instruments
and controlsOperationDrivingInstrument
cluster displayPractical hints Car care Index Exterior rear view mirrors
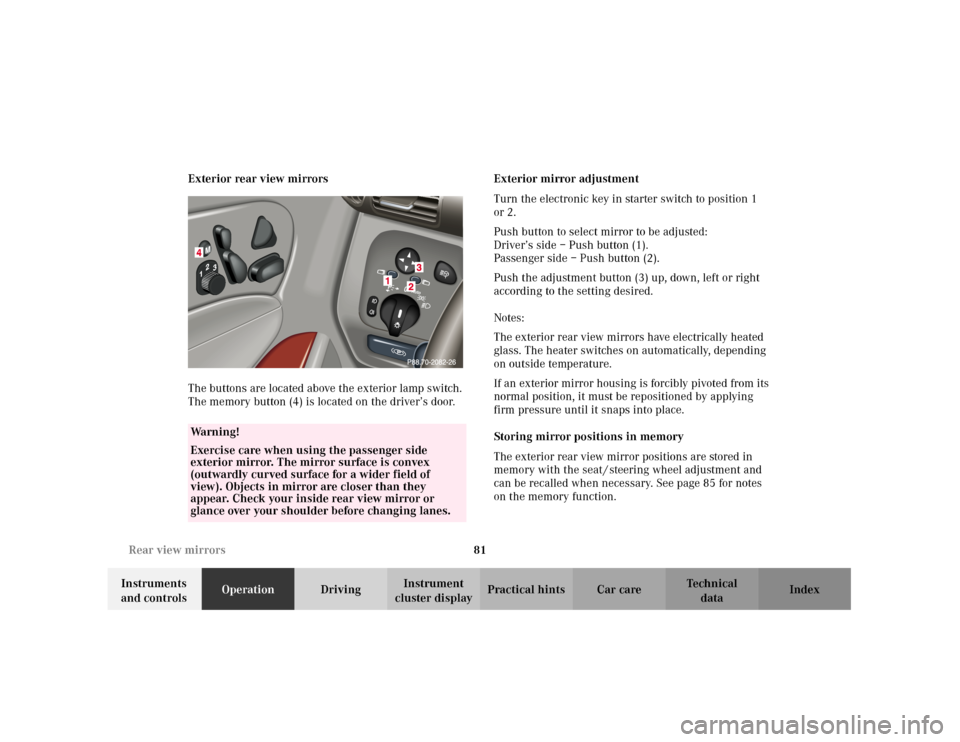
The buttons are located above the exterior lamp switch.
The memory button (4) is located on the driver’s door.Exterior mirror adjustment
Turn the electronic key in starter switch to position 1
or 2.
Push button to select mirror to be adjusted:
Driver’s side – Push button (1).
Passenger side – Push button (2).
Push the adjustment button (3) up, down, left or right
according to the setting desired.
Notes:
The exterior rear view mirrors have electrically heated
glass. The heater switches on automatically, depending
on outside temperature.
If an exterior mirror housing is forcibly pivoted from its
normal position, it must be repositioned by applying
firm pressure until it snaps into place.
Storing mirror positions in memory
The exterior rear view mirror positions are stored in
memory with the seat / steering wheel adjustment and
can be recalled when necessary. See page 85 for notes
on the memory function.
Wa r n i n g !
Exercise care when using the passenger side
exterior mirror. The mirror surface is convex
(outwardly curved surface for a wider field of
view). Objects in mirror are closer than they
appear. Check your inside rear view mirror or
glance over your shoulder before changing lanes.
0
PAuto
Page 91 of 381

82 Rear view mirrors
Te ch n i c a l
data Instruments
and controlsOperationDrivingInstrument
cluster displayPractical hints Car care Index
Parking position exterior mirror
(only vehicles with power seats)
The passenger side exterior mirror can be adjusted and
programmed to assist the driver during parking
maneuvers (e.g. to observe the curb or other objects
close to the vehicle).
With the electronic key in starter switch position 2, and
the exterior rear view mirror switch in the passenger
side position, the passenger side mirror will be turned
downward when placing the gear selector lever in “R”
reverse.Note:
The mirror adjustment is only active if you select “ON”
in the menu “MIRROR SETTING WHEN PARKING”.
Refer to “CONVENIENCE” under individual settings, see
page 121.
The mirror position can now be adjusted as desired.
At speeds above approximately 6 mph (10 km / h), upon
shifting gear selector lever from “R” Reverse, or upon
pressing the driver’s side mirror button, the passenger
side mirror will return to its previous position.
Page 95 of 381
86 Memory function
Te ch n i c a l
data Instruments
and controlsOperationDrivingInstrument
cluster displayPractical hints Car care Index
Storing positions into memory:
With the electronic key in starter switch position 1 or 2
or with the relevant door open and the electronic key
inserted in the starter switch.
Adjust the seat to the desired position.
Driver’s seat:
You can also adjust the steering wheel and the exterior
mirrors electrically for the driver’s seat. See page 81 for
exterior mirror adjustment and page 79 for steering
wheel adjustment.
Turn button (2) to selected memory position.
Push memory button (1), release and push the position
button (2) within 3 seconds.Recalling positions from memory:
To recall a seat / steering wheel and exterior rear view
mirror position, turn button (2) to selected memory
position and press to recall.
The seat / steering wheel and exterior rear view mirror
movement stops when the button is released.
Caution!
Do not operate the power seats using the memory
button if the backrest is in an excessively reclined
position. Doing so could cause damage to front or rear
seats.
First move backrest to an upright position.