Page 335 of 381

326 Exterior lamps
Te ch n i c a l
data Instruments
and controlsOperation DrivingInstrument
cluster displayPractical hintsCar care Index
Exterior lamps
Headlamp adjustment
Correct headlamp adjustment is extremely important.
Check and readjust headlamps at regular intervals and
when a bulb has been replaced.Replacing bulbs
Notes:
To prevent a possible electrical short circuit, switch off
lamp prior to replacing a bulb.
When replacing bulbs, install only 12 volt bulbs with
the specified watt rating.
When replacing halogen bulbs do not touch glass
portion of bulb with bare hands. Use plain paper or a
clean cloth.
If the newly installed bulb does not light up, switch the
lamp off and on again. If the bulb still does not light up,
have the system checked at an authorized
Mercedes-Benz Center.
Wa r n i n g !
Bulbs and bulb holders can be very hot. Allow the
lamp to cool down before changing a bulb.
Halogen lamps contain pressurized gas. A bulb can
explode if you:
• touch or move it when hot,
•drop the bulb,
• scratch the bulb.Wear eye and hand protection.
Wa r n i n g !
Because of high voltage in Xenon lamps, it is
dangerous to replace the bulb or repair the lamp
and its components. We recommend that you have
such work done by a qualified technician.
Page 336 of 381
327 Exterior lamps
Te ch n i c a l
data Instruments
and controlsOperation DrivingInstrument
cluster displayPractical hintsCar care Index Headlamp assembly
1Headlamp cover for low beam headlamp
2Headlamp cover for parking and standing lamp, and
high beam headlamp3Bulb socket for turn signal lamp
4Electrical connector for low beam headlamp bulb
(Halogen type)
5Electrical connector for high beam headlamp bulb
6Bulb socket for parking and standing lamp
Page 337 of 381
328 Exterior lamps
Te ch n i c a l
data Instruments
and controlsOperation DrivingInstrument
cluster displayPractical hintsCar care Index
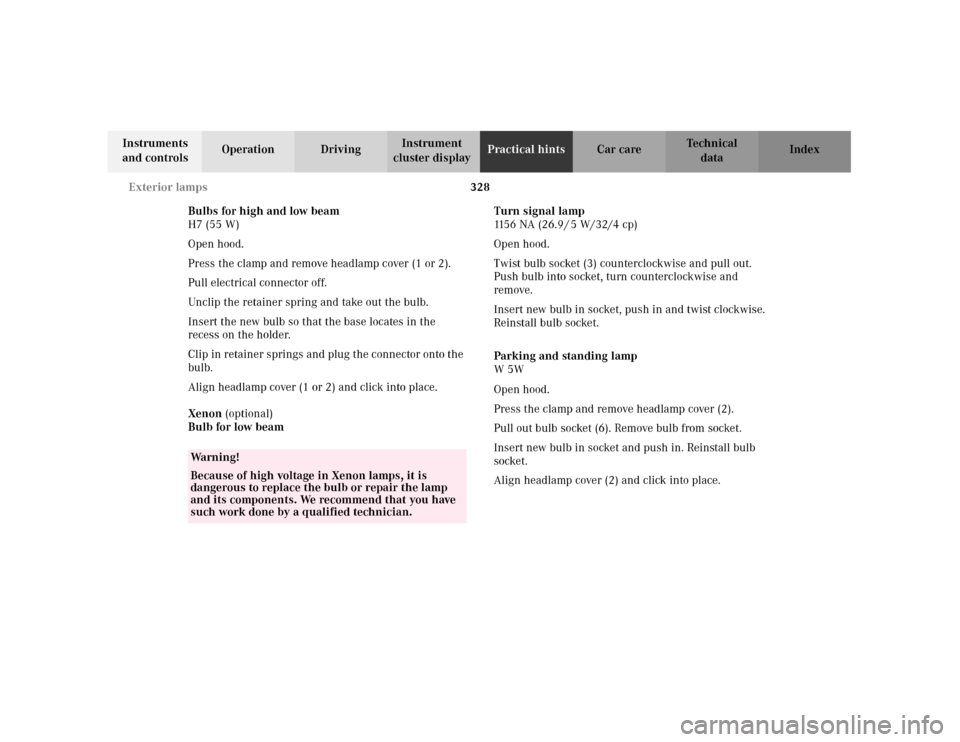
Bulbs for high and low beam
H7 (55 W)
Open hood.
Press the clamp and remove headlamp cover (1 or 2).
Pull electrical connector off.
Unclip the retainer spring and take out the bulb.
Insert the new bulb so that the base locates in the
recess on the holder.
Clip in retainer springs and plug the connector onto the
bulb.
Align headlamp cover (1 or 2) and click into place.
Xenon (optional)
Bulb for low beamTurn signal lamp
1156 NA (26.9 / 5 W/32/4 cp)
Open hood.
Twist bulb socket (3) counterclockwise and pull out.
Push bulb into socket, turn counterclockwise and
remove.
Insert new bulb in socket, push in and twist clockwise.
Reinstall bulb socket.
Parking and standing lamp
W 5W
Open hood.
Press the clamp and remove headlamp cover (2).
Pull out bulb socket (6). Remove bulb from socket.
Insert new bulb in socket and push in. Reinstall bulb
socket.
Align headlamp cover (2) and click into place.
Wa r n i n g !
Because of high voltage in Xenon lamps, it is
dangerous to replace the bulb or repair the lamp
and its components. We recommend that you have
such work done by a qualified technician.
Page 338 of 381
329 Exterior lamps
Te ch n i c a l
data Instruments
and controlsOperation DrivingInstrument
cluster displayPractical hintsCar care Index Taillamp assemblies
Open trunk lid.
Fold trim to the side.
Turn locking lever (1) to vertical position and remove
bulb carrier.
Push bulb into socket, turn counterclockwise and
remove.
Insert new bulb in socket, push in and twist clockwise.
Reinstall bulb socket.
Reinstall trim. 2Driver’s side:
rear fog lamp
(P 21 W/32 cp bulb)
3Backup lamp (P 21 W / 32 cp bulb)
4Stop lamp (P 21 W/32 cp bulb)
5Turn signal lamp (PY 21 W bulb [yellow])
6tail, parking, standing and
side marker lamp (R 5 W / 4 cp bulb)
Page 339 of 381
330 Exterior lamps
Te ch n i c a l
data Instruments
and controlsOperation DrivingInstrument
cluster displayPractical hintsCar care Index
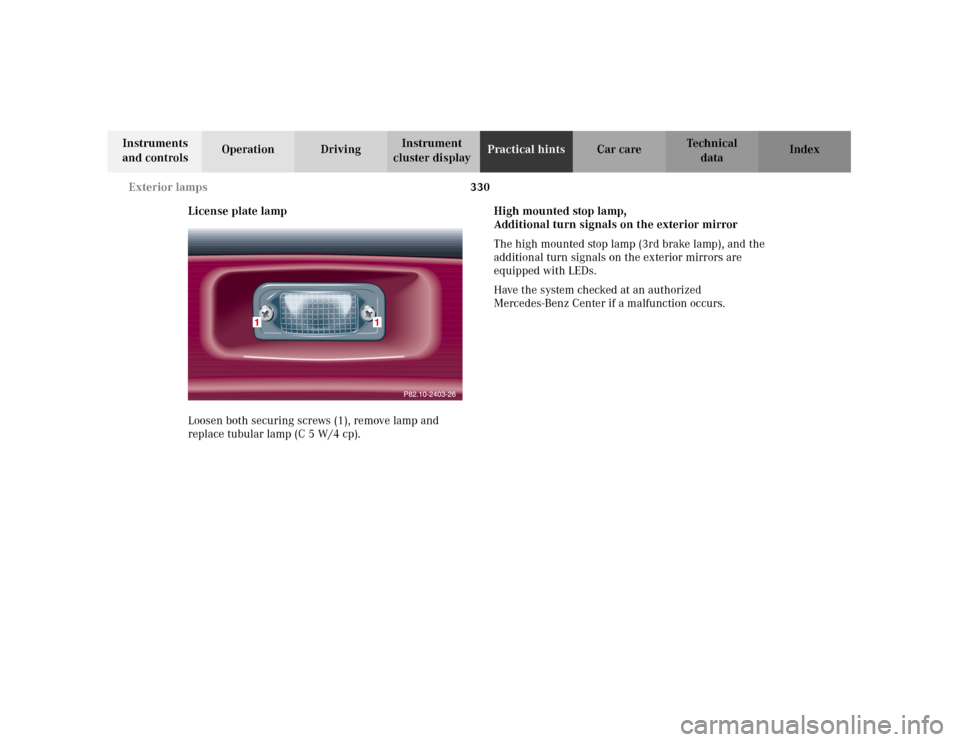
License plate lamp
Loosen both securing screws (1), remove lamp and
replace tubular lamp (C 5 W/4 cp).High mounted stop lamp,
Additional turn signals on the exterior mirror
The high mounted stop lamp (3rd brake lamp), and the
additional turn signals on the exterior mirrors are
equipped with LEDs.
Have the system checked at an authorized
Mercedes-Benz Center if a malfunction occurs.
Page 340 of 381
331 Trunk lamp
Te ch n i c a l
data Instruments
and controlsOperation DrivingInstrument
cluster displayPractical hintsCar care Index Standby bulb function
a) The stop lamps, dimmed, will act as a replacement
lamp, if one taillamp stops working.
b) The left stop lamp acts as a replacement for the rear
fog lamp, if it stops working.
c) The respective fog lamp, dimmed, will act as a
replacement lamp, if the left or right standing lamp
stops working.
Notes:
The multifunction display will indicate that a bulb has
failed. See malfunction and warning messages on
page 274.Trunk lamp
The trunk lamp will switch off after approximately
10 minutes if the trunk lid is left open.
Page 341 of 381
332 Electronic main key
Te ch n i c a l
data Instruments
and controlsOperation DrivingInstrument
cluster displayPractical hintsCar care Index
Changing batteries in the electronic main key
1Transmit buttons
2Lamp for battery check and function control
Checking batteries
If one of the transmit buttons (1) is pressed, the battery
check lamp (2) lights up briefly – indicating that the
batteries are in order.
Change batteries if the battery check lamp (2) does not
light up briefly.Changing batteries
Move locking tab (3) in direction of right arrow and
remove mechanical key (4, left arrow).
P80.20-2201-26
1
2
P80.35-2029-26
4
3
Page 342 of 381
333 Electronic main key
Te ch n i c a l
data Instruments
and controlsOperation DrivingInstrument
cluster displayPractical hintsCar care Index Insert mechanical key (4) in side opening (5) to open
latch. Press briefly (do not use mechanical key as lever)
to release battery compartment.
Remove mechanical key from side opening.
Carefully remove battery compartment in direction of
arrow (6).Change batteries (7), inserting new ones under contact
spring (8) with plus (+) side facing up.
Return battery compartment into housing until locked
in place and slide mechanical key back into electronic
main key.
P80.35-2025-26
5
4
6
P80.35-2027-26
78