2001 MERCEDES-BENZ C320 mirror
[x] Cancel search: mirrorPage 96 of 381
87 Memory function
Te ch n i c a l
data Instruments
and controlsOperationDrivingInstrument
cluster displayPractical hints Car care Index Important!
Prior to operating the vehicle, the driver should check
and adjust if necessary the seat height, seat position
fore and aft, and backrest angle to insure adequate
control, reach and comfort. The head restraint should
also be adjusted for proper height. See also airbag
section for proper seat positioning.
In addition, also adjust the steering wheel to ensure
ad eq uate con tr ol, r each, operation and com fort. B ot h the
inside and outside rear view mirrors should be adjusted
for adequate rearward vision.
Fasten seat belts. Infants and small children should be
seated in a properly secured restraint system that
complies with U.S. Federal Motor Vehicle Safety
Standard 213 and Canadian Motor Vehicle Safety
Standard 213.
All seat, head restraint, steering wheel, and rear view
mirror adjustments as well as fastening of seat belts
should be done before the vehicle is put into motion.
Wa r n i n g !
Children 12 years old and under must never ride in
the front seat, except in a Mercedes-Benz
authorized BabySmart
TM compatible child seat,
which operates with the BabySmart
TM system
installed in the vehicle to deactivate the passenger
side front airbag when it is properly installed.
Otherwise they will be struck by the airbag when it
inflates in a crash. If this happens, serious or fatal
injury can result.
According to accident statistics, children are safer
when properly restrained in the rear seating
positions than in the front seating positions.
Infants and small children must ride in back seats
and be seated in an appropriate infant or child
restraint system, which is properly secured with
the vehicle’s seat belt, fully in accordance with the
child seat manufacturer’s instructions.A child’s risk of serious or fatal injuries is
significantly increased if the child restraints are
not properly secured in the vehicle and the child is
not properly secured in the child restraint.
Page 131 of 381
122 Multifunction steering wheel, multifunction display
Te ch n i c a l
data Instruments
and controlsOperationDrivingInstrument
cluster displayPractical hints Car care Index
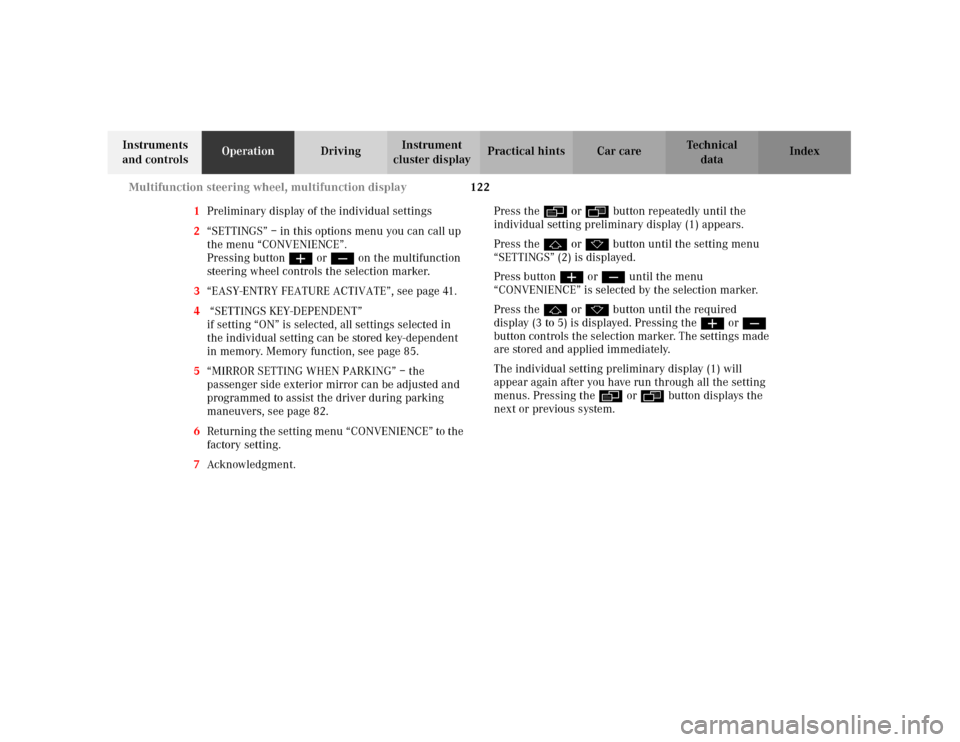
1Preliminary display of the individual settings
2“SETTINGS” – in this options menu you can call up
the menu “CONVENIENCE”.
Pressing buttonæ orç on the multifunction
steering wheel controls the selection marker.
3“EASY-ENTRY FEATURE ACTIVATE”, see page 41.
4 “SETTINGS KEY-DEPENDENT”
if setting “ON” is selected, all settings selected in
the individual setting can be stored key-dependent
in memory. Memory function, see page 85.
5“MIRROR SETTING WHEN PARKING” – the
passenger side exterior mirror can be adjusted and
programmed to assist the driver during parking
maneuvers, see page 82.
6Returning the setting menu “CONVENIENCE” to the
factory setting.
7Acknowledgment.Press the è or ÿ button repeatedly until the
individual setting preliminary display (1) appears.
Press the j or k button until the setting menu
“SETTINGS” (2) is displayed.
Press buttonæ orç until the menu
“CONVENIENCE” is selected by the selection marker.
Press the j or k button until the required
display (3 to 5) is displayed. Pressing the æ orç
button controls the selection marker. The settings made
are stored and applied immediately.
The individual setting preliminary display (1) will
appear again after you have run through all the setting
menus. Pressing the è or ÿ button displays the
next or previous system.
Page 201 of 381
192 Interior equipment
Te ch n i c a l
data Instruments
and controlsOperationDrivingInstrument
cluster displayPractical hints Car care Index
Sun visors
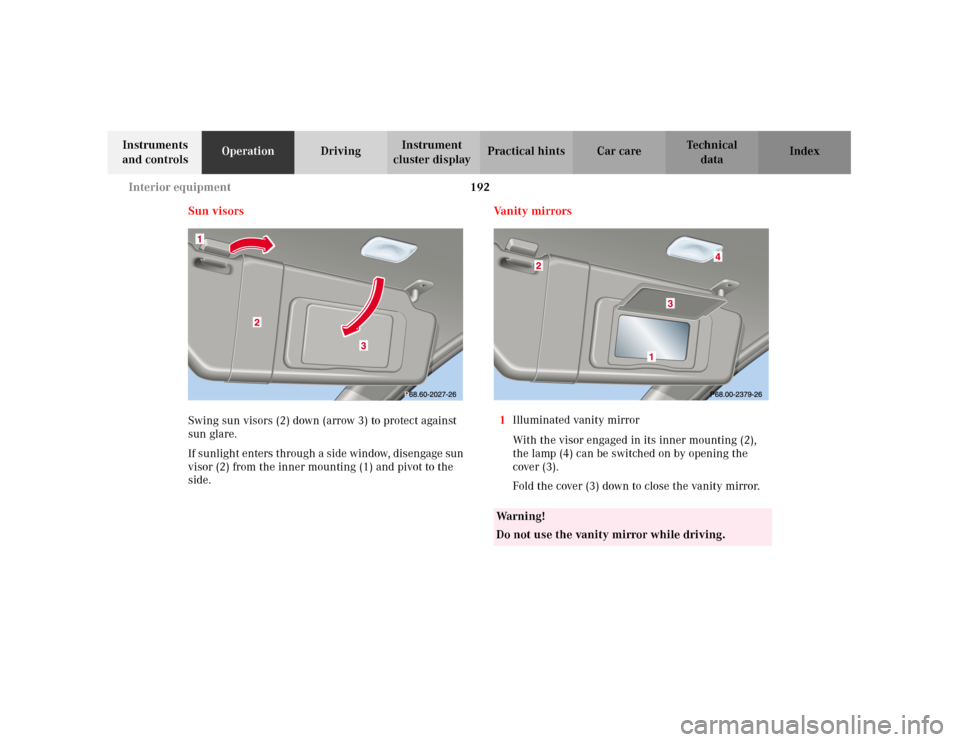
Swing sun visors (2) down (arrow 3) to protect against
sun glare.
If sunlight enters through a side window, disengage sun
visor (2) from the inner mounting (1) and pivot to the
side.Vanity mirrors
1Illuminated vanity mirror
With the visor engaged in its inner mounting (2),
the lamp (4) can be switched on by opening the
cover (3).
Fold the cover (3) down to close the vanity mirror.
Wa r n i n g !
Do not use the vanity mirror while driving.
Page 222 of 381
213 Garage door opener
Te ch n i c a l
data Instruments
and controlsOperationDrivingInstrument
cluster displayPractical hints Car care Index For operation in the USA only: This device complies
with Part 15 of the FCC Rules. Operation is subject to
the following two conditions:
(1) This device may not cause harmful interference, and
(2) this device must accept any interference received,
including interference that may cause undesired
operation.
Any unauthorized modification to this device could void
the user’s authority to operate the equipment.Programming or reprogramming the integrated
remote control:
1. Turn electronic key in starter switch to position 1
or 2.
2. Hold the end of the hand-held transmitter of the
device you wish to train approximately 2 to 5 inches
(5 cm to 12 cm) away from the surface of the
integrated remote control located on the inside rear
view mirror, keeping the indicator lamp in view.
Page 229 of 381
220 Tele Aid
Te ch n i c a l
data Instruments
and controlsOperationDrivingInstrument
cluster displayPractical hints Car care Index
Tele Aid
Important!
The initial activation of the Tele Aid system may only be
performed by completing the subscriber agreement and
placing an acquaintance call using the “SOS” button.
Failure to complete either of these steps will result in a
system that is not activated.
If you have any questions regarding activation, please
call the Response Center at 1-800-756-9018 (in the USA)
or 1-888-923-8367 (in Canada).
(Te l ematic Alarm Identification on Demand)
The Tele Aid system consists of three types of response;
automatic and manual emergency, roadside assistance
and information.
The Tele Aid system is always operational, providing
that the vehicle’s battery is charged and properly
connected. To activate, press the “SOS” button, the
Roadside Assistance button or the Information
button¡, depending on the type of response
required.System self-check
Initially, after turning the electronic key in starter
switch to position 2, malfunctions are detected and
indicated (the indicator lamps in the “SOS” button, the
Roadside Assistance button and the Information
button¡ stay on longer than 5 seconds or do not
come on).
If a malfunction is indicated as outlined above, have the
system checked at the nearest Mercedes-Benz Center as
soon as possible.
Important!
Always make sure that the indicator lamp in the
“SOS” button remains illuminated for approximately
5 seconds during the system self-check after turning
electronic key in starter switch to position 2.
Emergency calls
An emergency call is initiated automatically following
an accident in which the Emergency Tensioning
Retractors (ETR’s) or airbags deploy. An emergency call
can also be initiated manually by opening the cover next
to the inside rear view mirror labeled “SOS”, then
Page 339 of 381
330 Exterior lamps
Te ch n i c a l
data Instruments
and controlsOperation DrivingInstrument
cluster displayPractical hintsCar care Index
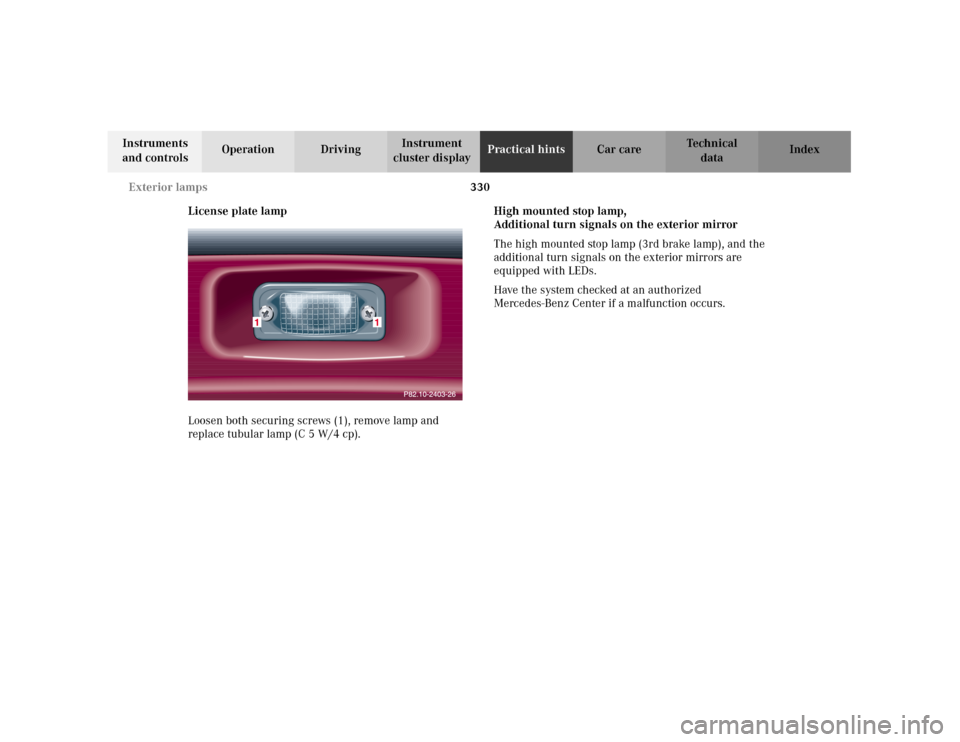
License plate lamp
Loosen both securing screws (1), remove lamp and
replace tubular lamp (C 5 W/4 cp).High mounted stop lamp,
Additional turn signals on the exterior mirror
The high mounted stop lamp (3rd brake lamp), and the
additional turn signals on the exterior mirrors are
equipped with LEDs.
Have the system checked at an authorized
Mercedes-Benz Center if a malfunction occurs.
Page 351 of 381
342 Cleaning and care of the vehicle
Te ch n i c a l
data Instruments
and controlsOperation DrivingInstrument
cluster displayPractical hintsCar careIndex
Engine cleaning
Prior to cleaning the engine compartment make sure to
protect electrical components and connectors from the
intrusion of water and cleaning agents.
Corrosion protection, such as MB Anticorrosion Wax
should be applied to the engine compartment after
every engine cleaning. Before applying, all control
linkage bushings and joints should be lubricated. The
poly-V-belt and all pulleys should be protected from any
wax.Ve h i c l e w a s h i n g
Do not use hot water or wash your vehicle in direct
sunlight. Use only a mild car wash detergent, such as
Mercedes-Benz approved Car Shampoo.
Thoroughly spray the vehicle with a diffused jet of
water. Direct only a very weak spray towards the
ventilation intake. Use plenty of water and rinse the
sponge and chamois frequently.
Rinse with clear water and thoroughly wipe dry with a
chamois. Do not allow cleaning agents to dry on the
finish.
Due to the width of the vehicle, prior to running the
vehicle through an automatic car wash, fold back the
outside mirrors to prevent them from getting damaged.
In the winter, thoroughly remove all traces of road salt
as soon as possible.
When washing the underbody, do not forget to clean the
inner sides of the wheels.
Page 375 of 381
366 Index
Te ch n i c a l
data Instruments
and controlsOperation DrivingInstrument
cluster displayPractical hints Car careIndex
DDashboard ......................................................................... 16
Door control panel ........................................................... 14
Door entry lamps ........................................................... 190
Drive sensibly - Save Fuel ............................................244EEasy-entry/exit feature ................................................... 41
Electronic main key ......................................................... 23
Changing batteries ...................................................332
Synchronizing remote control ................................334
Electronic stability program (ESP) ..............................260
Emergency engine shut-down .....................................334
Emergency operation of sliding/pop-up roof ............335
Emergency tensioning retractor (ETR) ......................... 64
Emergency unlocking in case of accident ................... 34
Engine oil consumption ................................................ 129
Engine oil level indicator .............................................. 128
Enlarged cargo area .......................................................207
ENTRANCE POSITION - malfunction and warning
messages ....................................................................292
Exterior lamp switch ..................................................... 130
Daytime running lamp mode .................................. 132
Exterior lamps ................................................................326Additional turn signals on
the exterior mirror .............................................. 330
Bulbs for high and low beam ................................. 328
Headlamp assembly ................................................. 327
High mounted stop lamp ......................................... 330
License plate lamps ................................................. 330
Parking and standing lamp .................................... 328
Replacing bulbs ........................................................ 326
Taillamp assemblies ................................................ 329
Turn signal lamp ...................................................... 328
Exterior mirror adjustment ............................................ 81
Exterior mirror, front passenger side,
parking position ..........................................................82
FFirst aid kit ..................................................................... 294
Flexible service system (FSS) ......................................125
Front airbags ....................................................................65
Front center console storage
compartment ventilation ......................................... 158
Front seat adjustment .....................................................42
Fuel filler flap, manual release ................................... 335
Fuel reserve warning ..................................................... 271
Fuses ............................................................................... 295