Page 47 of 381

38 Antitheft alarm system
Te ch n i c a l
data Instruments
and controlsOperationDrivingInstrument
cluster displayPractical hints Car care Index
Antitheft alarm system
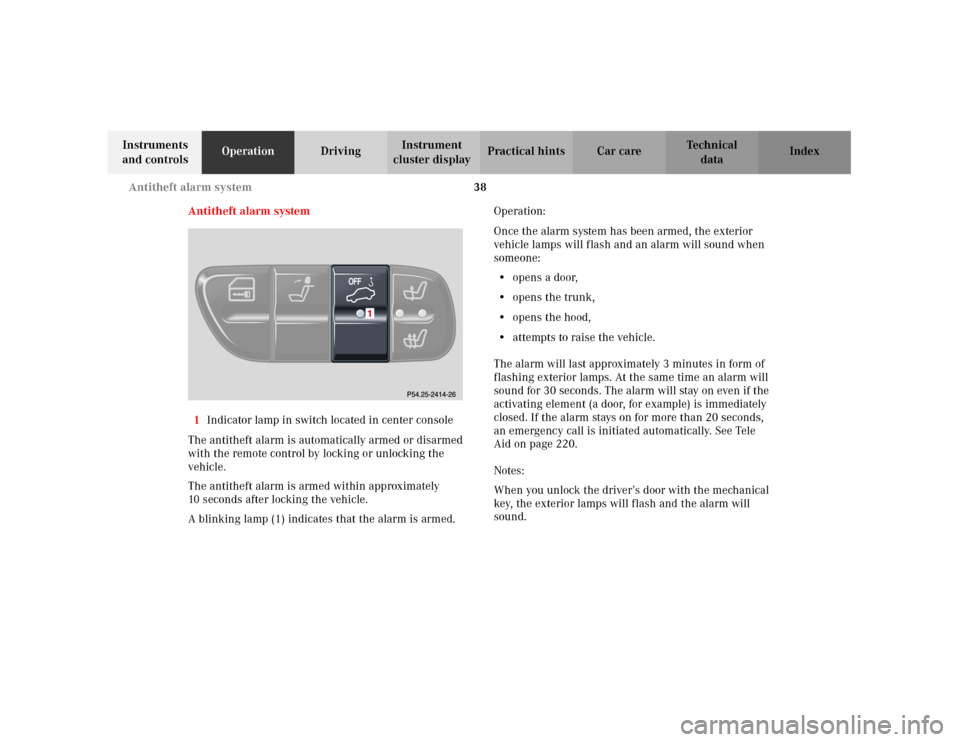
1Indicator lamp in switch located in center console
The antitheft alarm is automatically armed or disarmed
with the remote control by locking or unlocking the
vehicle.
The antitheft alarm is armed within approximately
10 seconds after locking the vehicle.
A blinking lamp (1) indicates that the alarm is armed.Operation:
Once the alarm system has been armed, the exterior
vehicle lamps will flash and an alarm will sound when
someone:
•opens a door,
•opens the trunk,
•opens the hood,
•attempts to raise the vehicle.
The alarm will last approximately 3 minutes in form of
flashing exterior lamps. At the same time an alarm will
sound for 30 seconds. The alarm will stay on even if the
activating element (a door, for example) is immediately
closed. If the alarm stays on for more than 20 seconds,
an emergency call is initiated automatically. See Tele
Aid on page 220.
Notes:
When you unlock the driver’s door with the mechanical
key, the exterior lamps will flash and the alarm will
sound.
Page 202 of 381
193 Interior equipment
Te ch n i c a l
data Instruments
and controlsOperationDrivingInstrument
cluster displayPractical hints Car care Index Interior Storage compartments and armrests
Wa r n i n g !
To help avoid personal injury during a collision or
sudden maneuver, exercise care when stowing
things. Put luggage or cargo in the trunk if
possible. Do not pile luggage or cargo higher than
the seat backs. Do not place anything on the shelf
below the rear window.Luggage nets cannot secure hard or heavy objects.
Wa r n i n g !
Keep compartment lids closed. This will help to
prevent stored objects from being thrown about
and injuring vehicle occupants during an accident.
Page 212 of 381
203 Interior equipment
Te ch n i c a l
data Instruments
and controlsOperationDrivingInstrument
cluster displayPractical hints Car care Index 3. Open hook and loop strap (2) and pull ski sack into
passenger compartment and unfold.4. Open flap in trunk by pulling handle (3).
Page 213 of 381
204 Interior equipment
Te ch n i c a l
data Instruments
and controlsOperationDrivingInstrument
cluster displayPractical hints Car care Index
5. From trunk, slide skis into ski sacks6. Wrap strap around ski sack and armrest.
7. Close clasp (arrows 4 and 5) and pull strap tight to
immobilize skis.
Wa r n i n g !
The ski sack is designed for up to four pairs of skis.
Do not load the ski sack with other objectsAlways fasten the ski sack securely. In an accident,
an unfastened ski sack can cause injury to vehicle
occupants.
Page 214 of 381
205 Interior equipment
Te ch n i c a l
data Instruments
and controlsOperationDrivingInstrument
cluster displayPractical hints Car care Index 8. Connect snap hook (6) of front strap to eye (7)
located on center tunnel in front of rear seat bench.Unloading and folding
1. Loosen strap, open clasp by pressing tabs (arrows)
together, and unload skis.
2. Close flap in trunk.
3. Disconnect snap hook (6) from eye (7).
4. Fold and flatten ski sack lengthwise and place
folded ski sack inside recess of backrest.
Page 215 of 381
206 Interior equipment
Te ch n i c a l
data Instruments
and controlsOperationDrivingInstrument
cluster displayPractical hints Car care Index
5. Close ski sack compartment cover.Removal of ski sack
For removal of the ski sack we recommend that you
contact an authorized Mercedes-Benz Center.
Note:
To prevent unauthorized persons from access to the
trunk, always close the pass-through.
Wa r n i n g !
Never drive vehicle with trunk lid open while the
ski sack is removed. Deadly carbon monoxide (CO)
gases may enter vehicle interior resulting in
unconsciousness and death.
Page 216 of 381
207 Interior equipment
Te ch n i c a l
data Instruments
and controlsOperationDrivingInstrument
cluster displayPractical hints Car care Index Enlarged cargo area (optional)
1. Pull handle (1) located in trunk to unlock backrest.
O n vehicles wi t h op ti onal sp li t fold in g rear seat back rest
you can fold down the two sections separately to enlarge
the cargo area.Split folding rear seat bench
2. Pull handle (2) and fold seat cushion (3) forward.
3. Fully retract and fold down head restraints, see
page 52.
4. Fold backrest (4) forward.
Page 217 of 381
208 Interior equipment
Te ch n i c a l
data Instruments
and controlsOperationDrivingInstrument
cluster displayPractical hints Car care Index
Setting up rear seat bench
1. Pull backrest (4) up until it locks in its upright
position. Check for secure locking by pushing and
pulling on the backrest.
The pop-up indicators (5) (left and right backrest
section) are visible in unlocked position. With
backrest sections in upright and locked position, the
indicators (5) are fully lowered.
2. Fold seat cushion (3) back until it locks in place.
Check for secure locking by pressing on the seat
cushion.Note:
To prevent unauthorized persons from access to the
trunk, always lock backrest in its upright position.
Wa r n i n g !
Always lock backrest in its upright position when
rear seat bench is occupied by passengers, cargo is
being carried in the trunk, or the extended cargo
area is not in use.