2001 LINCOLN TOWN CAR change time
[x] Cancel search: change timePage 143 of 240
Trailer towing tips
²Practice turning, stopping and backing up before starting on a trip to
get the feel of the vehicle trailer combination. When turning, make
wider turns so the trailer wheels will clear curbs and other obstacles.
²Allow more distance for stopping with a trailer attached.
²If you are driving down a long or steep hill, shift to a lower gear. Do
not apply the brakes continuously, as they may overheat and become
less effective.
²The trailer tongue weight should be 10% of the loaded trailer weight.
²After you have traveled 80 km (50 miles), thoroughly check your
hitch, electrical connections and trailer wheel lug nuts.
²When stopped in traffic for long periods of time in hot weather, place
the gearshift in P (Park) and increase idle speed. This aids engine
cooling and air conditioner efficiency.
²Vehicles with trailers should not be parked on a grade. If you must
park on a grade, place wheel chocks under the trailer's wheels.
Launching or retrieving a boat
When backing down a ramp during boat launching or retrieval:
²do not allow the static water level to rise above the bottom edge of
the rear bumper and
²do not allow waves to break higher than 15 cm (6 inches) above the
bottom edge of the rear bumper.
Exceeding these limits may allow water to enter critical vehicle
components, adversely affecting driveability, emissions, reliability and
causing internal transmission damage.
Replace the rear axle lubricant any time the axle has been submerged in
water. Rear axle lubricant quantities are not to be checked or changed
unless a leak is suspected or repair required.
Disconnect the wiring to the trailer before backing the trailer into the
water. Reconnect the wiring to the trailer after the trailer is removed
from the water.
Recreational towing (all wheels on the ground)
Follow these guidelines for your specific powertrain combination to tow
your vehicle with all four wheels on the ground (such as behind a
recreational vehicle).
Driving
143
Page 178 of 240
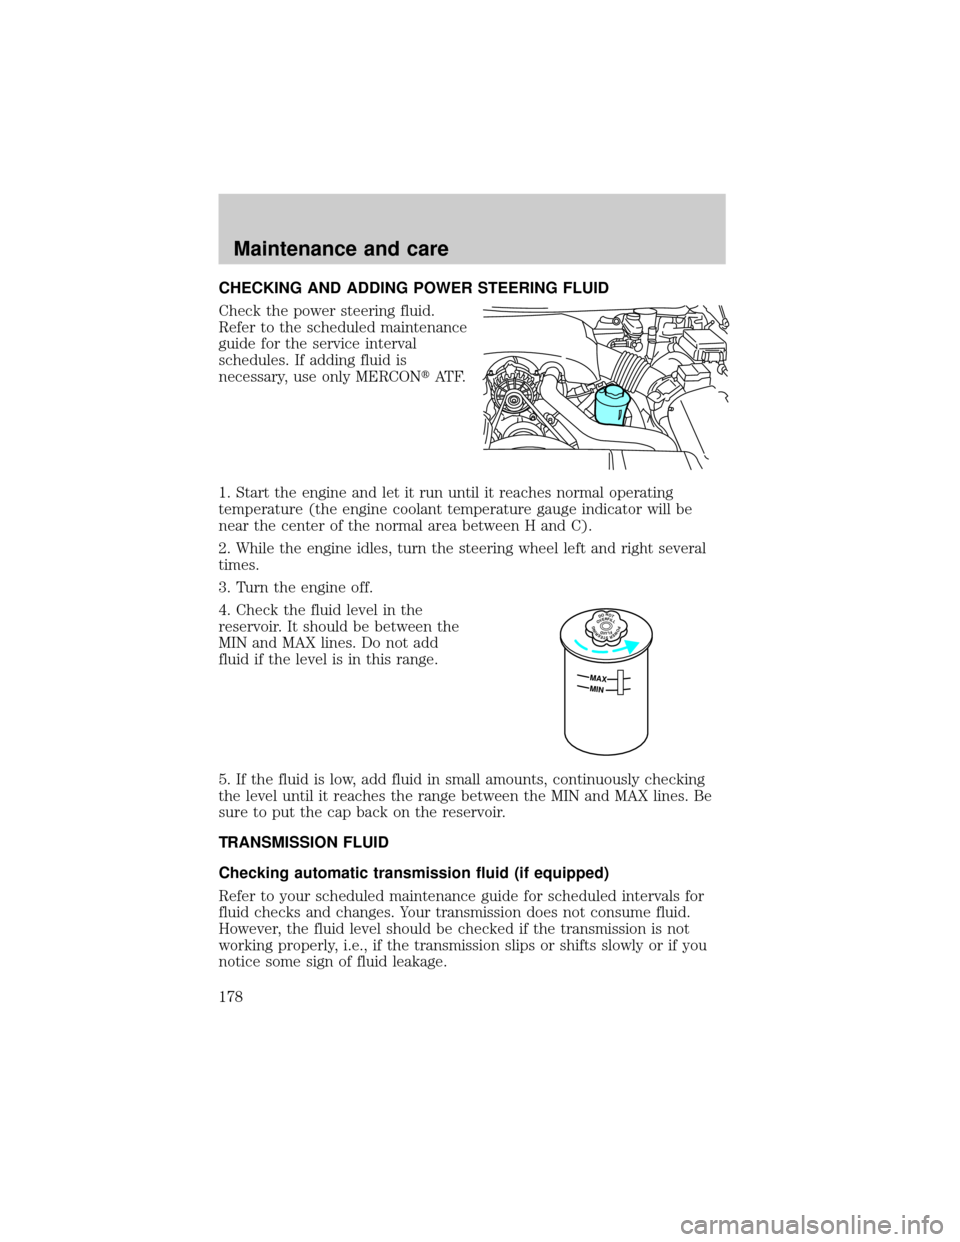
CHECKING AND ADDING POWER STEERING FLUID
Check the power steering fluid.
Refer to the scheduled maintenance
guide for the service interval
schedules. If adding fluid is
necessary, use only MERCONtAT F.
1. Start the engine and let it run until it reaches normal operating
temperature (the engine coolant temperature gauge indicator will be
near the center of the normal area between H and C).
2. While the engine idles, turn the steering wheel left and right several
times.
3. Turn the engine off.
4. Check the fluid level in the
reservoir. It should be between the
MIN and MAX lines. Do not add
fluid if the level is in this range.
5. If the fluid is low, add fluid in small amounts, continuously checking
the level until it reaches the range between the MIN and MAX lines. Be
sure to put the cap back on the reservoir.
TRANSMISSION FLUID
Checking automatic transmission fluid (if equipped)
Refer to your scheduled maintenance guide for scheduled intervals for
fluid checks and changes. Your transmission does not consume fluid.
However, the fluid level should be checked if the transmission is not
working properly, i.e., if the transmission slips or shifts slowly or if you
notice some sign of fluid leakage.
DONOTOVERFILLPOWERSTEERINGFLUID
MAX
MIN
Maintenance and care
178
Page 195 of 240
²Allow no more than 2 automatic click-offs when filling.
²Always use fuel with the recommended octane rating.
²Use a known quality gasoline, preferably a national brand.
²Use the same side of the same pump and have the vehicle facing the
same direction each time you fill up.
²Have the vehicle loading and distribution the same every time.
Your results will be most accurate if your filling method is consistent.
Calculating fuel economy
1. Fill the fuel tank completely and record the initial odometer reading
(in kilometers or miles).
2. Each time you fill the tank, record the amount of fuel added (in liters
or gallons).
3. After at least three to five tank fill-ups, fill the fuel tank and record
the current odometer reading.
4. Subtract your initial odometer reading from the current odometer
reading.
5. Follow one of the simple calculations in order to determine fuel
economy:
Multiply liters used by 100, then divide by total kilometers
traveled.
Divide total miles traveled by total gallons used.
Keep a record for at least one month and record the type of driving (city
or highway). This will provide an accurate estimate of the vehicle's fuel
economy under current driving conditions. Additionally, keeping records
during summer and winter will show how temperature impacts fuel
economy. In general, lower temperatures give lower fuel economy.
Driving style Ð good driving and fuel economy habits
Give consideration to the lists that follow and you may be able to change
a number of variables and improve your fuel economy.
Habits
²Smooth, moderate operation can yield up to 10% savings in fuel.
²Steady speeds without stopping will usually give the best fuel
economy.
Maintenance and care
195
Page 201 of 240
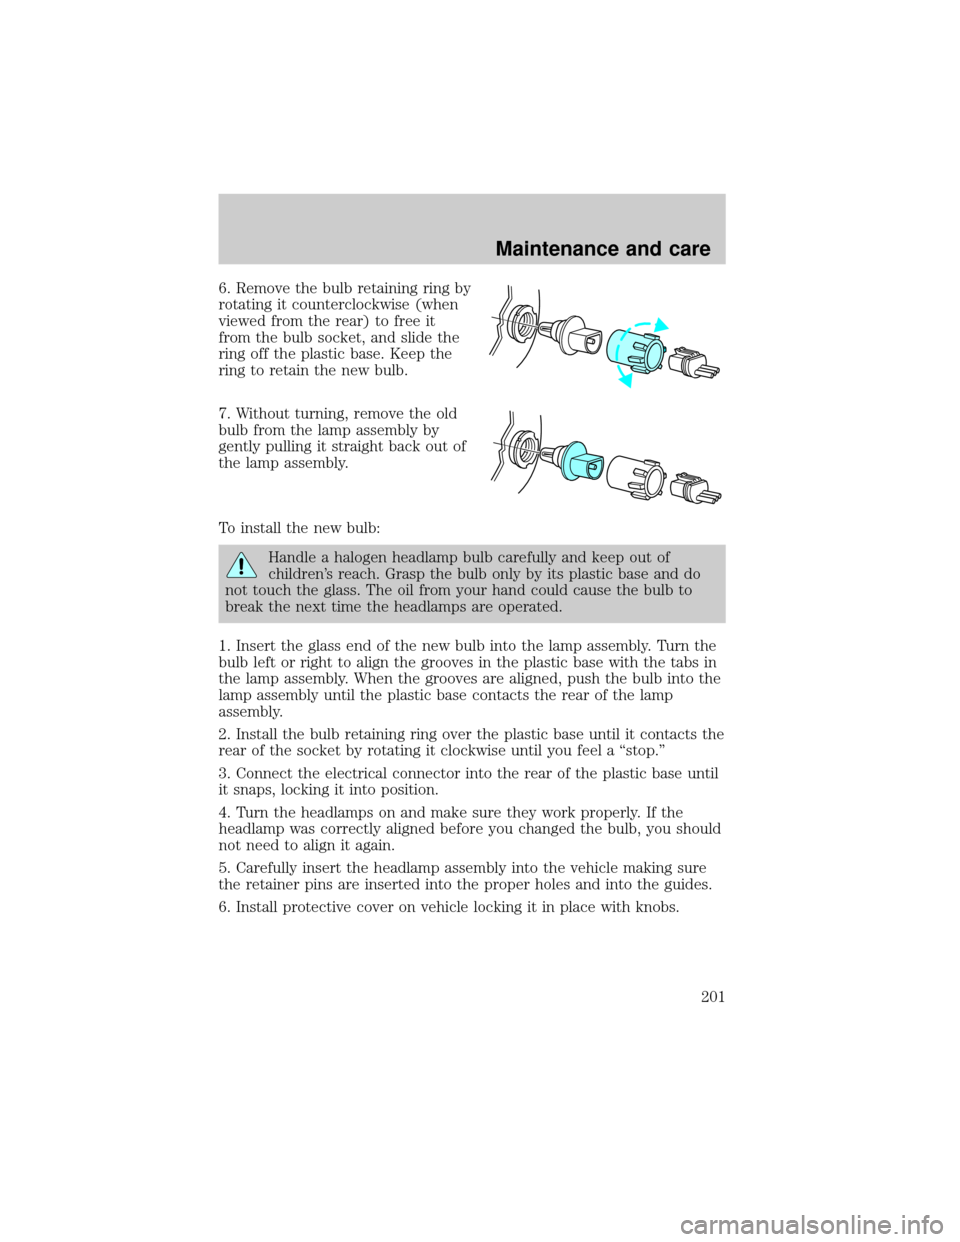
6. Remove the bulb retaining ring by
rotating it counterclockwise (when
viewed from the rear) to free it
from the bulb socket, and slide the
ring off the plastic base. Keep the
ring to retain the new bulb.
7. Without turning, remove the old
bulb from the lamp assembly by
gently pulling it straight back out of
the lamp assembly.
To install the new bulb:
Handle a halogen headlamp bulb carefully and keep out of
children's reach. Grasp the bulb only by its plastic base and do
not touch the glass. The oil from your hand could cause the bulb to
break the next time the headlamps are operated.
1. Insert the glass end of the new bulb into the lamp assembly. Turn the
bulb left or right to align the grooves in the plastic base with the tabs in
the lamp assembly. When the grooves are aligned, push the bulb into the
lamp assembly until the plastic base contacts the rear of the lamp
assembly.
2. Install the bulb retaining ring over the plastic base until it contacts the
rear of the socket by rotating it clockwise until you feel a ªstop.º
3. Connect the electrical connector into the rear of the plastic base until
it snaps, locking it into position.
4. Turn the headlamps on and make sure they work properly. If the
headlamp was correctly aligned before you changed the bulb, you should
not need to align it again.
5. Carefully insert the headlamp assembly into the vehicle making sure
the retainer pins are inserted into the proper holes and into the guides.
6. Install protective cover on vehicle locking it in place with knobs.
Maintenance and care
201
Page 219 of 240
Ford Extended Service Plan
You can get more protection for your new car or light truck by
purchasing Ford Extended Service Plan (Ford ESP) coverage. Ford ESP
is an optional service contract which is backed by Ford Motor Company
or Ford Motor Service Company (in the U.S.) and Ford of Canada (in
Canada). It provides the following:
²Benefits during the warranty period depending on the plan you
purchase (such as: reimbursement for rentals; coverage for certain
maintenance and wear items).
²Protection against covered repair costs after your Bumper-to-Bumper
Warranty expires.
You may purchase Ford ESP from any participating Ford and Lincoln
Mercury and Ford of Canada dealer. There are several plans available in
various time, distance and deductible combinations which can be tailored
to fit your own driving needs. Ford ESP also offers reimbursement
benefits for towing and rental coverage.
When you buy Ford ESP, you receive Peace-of-Mind protection
throughout the United States and Canada, provided by a network of
more than 5,000 participating Ford or Lincoln Mercury and Ford of
Canada dealers.
If you did not take advantage of the Ford Extended Service Plan at the
time of purchasing your vehicle, you may still be eligible. Please contact
your dealer for further information. Since this information is subject to
change, please ask your dealer for complete details about Ford Extended
Service Plan coverage options, or visit the Ford ESP website at
www.ford-esp.com.
GETTING THE SERVICES YOU NEED
At home
Ford Motor Company and Ford of Canada have authorized dealerships to
service your vehicle. It is preferred that you return to the Ford dealer
where your vehicle was purchased when warranty repairs are needed.
However, you may also take your vehicle to another Ford Motor
Company or Ford of Canada dealership authorized for warranty repairs.
Certain warranty repairs require special training though, so not all
dealers are authorized to perform all warranty repairs. That means that
depending on the warranty repair needed, the vehicle may need to be
taken to another dealer. If a particular dealership can not assist you,
then contact the Customer Relationship Center.
Customer assistance
219
Page 234 of 240

aiming ..............................204±206
autolamp system .......................25
bulb specifications ..................204
daytime running lights .............26
flash to pass ..............................26
high beam ...........................11, 26
replacing bulbs .......................199
turning on and off ..............25±26
warning chime ..........................15
Heating ........................................27
HomeLink universal
transceiver (see Garage door
opener) ............................67, 69±70
Hood ..........................................165
I
Ignition .........................59, 215±216
Infant seats
(see Safety seats) .....................119
Inspection/maintenance (I/M)
testing ........................................198
Instrument panel
cleaning ...................................210
cluster ..................................8, 210
lighting up panel and
interior .......................................25
location of components ..............8
J
Jack ............................................154
positioning ...............................154
storage .....................................154
Jump-starting your vehicle ......158
K
Keyless entry system .................85autolock .....................................83
keypad .......................................85
programming entry code .........86
Keys .................................60, 88, 90
key in ignition chime ...............15
positions of the ignition ...........59
L
Lamps
autolamp system .......................25
bulb replacement
specifications chart ................204
cargo lamps ...............................25
daytime running light ...............26
headlamps ...........................25±26
headlamps, flash to pass ..........26
instrument panel, dimming .....25
interior lamps ...................71, 203
replacing bulbs .......199, 202±203
Lane change indicator (see
Turn signal) .................................60
Lights, warning and indicator ......8
air bag ..........................................9
air suspension ...........................13
anti-lock brakes (ABS) ....10, 131
brake ..........................................10
charging system ........................11
cruise indicator .........................14
door ajar ....................................12
fuel cap light .............................10
high beam .................................11
liftgate ajar ................................12
low coolant ................................12
low washer fluid .......................14
oil pressure ...............................11
safety belt ...................................9
service engine soon ....................8
speed control ............................65
traction control system ............13
Index
234