2001 LINCOLN CONTINENTAL turn signal bulb
[x] Cancel search: turn signal bulbPage 10 of 224

Brake system warning
Momentarily illuminates when the
ignition is turned to the ON position
to indicate a system check. Also
illuminates if the parking brake is
engaged. If the brake warning lamp
does not illuminate at these times, seek service immediately. Illumination
after releasing the parking brake indicates low brake fluid level and the
brake system should be inspected immediately.
Anti-lock brake system (ABS)
Momentarily illuminates when the
ignition is turned to the ON position
to indicate a system check. If the
light remains on, continues to flash
or fails to illuminate, have the
system serviced immediately. With the ABS light on, the anti-lock brake
system is disabled and normal braking is still effective unless the brake
warning light also remains illuminated with the parking brake released.
Turn signal
Illuminates when the left or right
turn signal or the hazard lights are
turned on. If one or both of the
indicators stay on continuously or
flash faster, check for a burned-out
turn signal bulb. Refer toBulbsin theMaintenance and carechapter.
High beams
Illuminates when the high beam
headlamps are turned on.
Turn on headlamps (if equipped)
Illuminates to remind the driver to
turn the headlamps on when:
²the daytime running lamps are on
(if equipped)
P!
BRAKE
ABS
TURN ON
HEAD
LAMPS
Instrumentation
10
Page 50 of 224

Cornering lamps
When the turn signal is used and the headlamps are on, the cornering
lamps will light either the right or left side depending on the direction of
the turn.
The flash rate of the turn signal will speed up considerably if the
Lighting Control Module detects a left or right turn lamp bulb (front or
rear) is burned out.
WINDSHIELD WIPER/WASHER CONTROLS
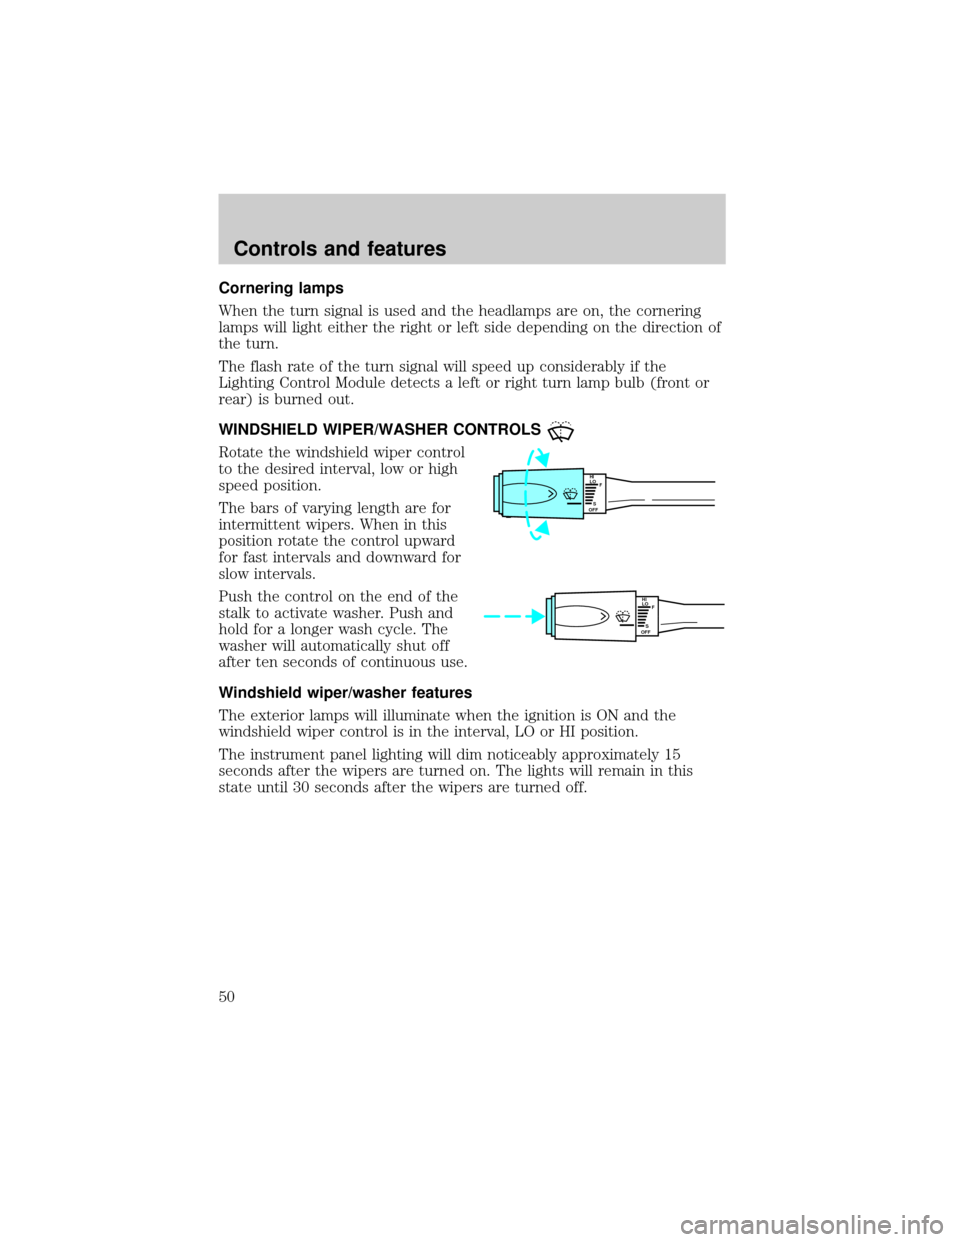
Rotate the windshield wiper control
to the desired interval, low or high
speed position.
The bars of varying length are for
intermittent wipers. When in this
position rotate the control upward
for fast intervals and downward for
slow intervals.
Push the control on the end of the
stalk to activate washer. Push and
hold for a longer wash cycle. The
washer will automatically shut off
after ten seconds of continuous use.
Windshield wiper/washer features
The exterior lamps will illuminate when the ignition is ON and the
windshield wiper control is in the interval, LO or HI position.
The instrument panel lighting will dim noticeably approximately 15
seconds after the wipers are turned on. The lights will remain in this
state until 30 seconds after the wipers are turned off.
HI
LO
F
S
OFF
HI
LO
F
S
OFF
Controls and features
50
Page 186 of 224

engine must warm up to its normal operating temperature. Once started,
do not turn off the engine until the above driving cycle is complete.
REPLACING EXTERIOR BULBS
Check the operation of the following lamps frequently:
²Headlamps
²Tail lamps
²Brakelamps
²High-mount brakelamp
²Turn signals
²Backup lamps
²License plate lamp
Do not remove lamp bulbs unless they will be replaced immediately. If a
bulb is removed for an extended period of time, contaminants may enter
the lamp housings and affect performance.
Replacing headlamp bulbs
To remove the headlamp bulb:
1. Make sure headlamp switch is in OFF position.
2. Lift the hood and remove the protective cover from the top of the
headlamps by lifting up on the rear corners and release the velcro
attachments. Lift the cover and pull towards the windshield.
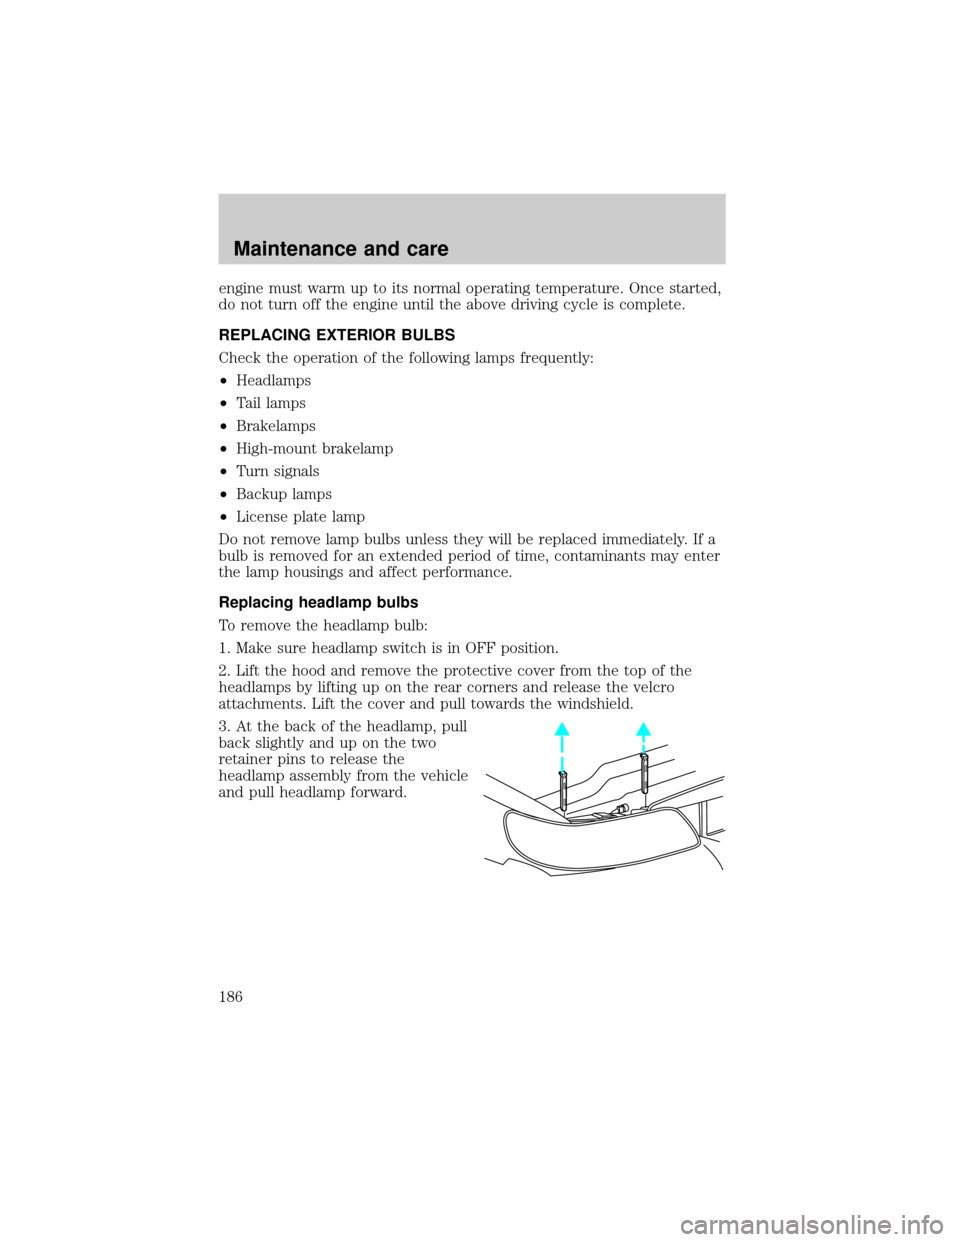
3. At the back of the headlamp, pull
back slightly and up on the two
retainer pins to release the
headlamp assembly from the vehicle
and pull headlamp forward.
Maintenance and care
186
Page 188 of 224

To install the new bulb:
Handle a halogen headlamp bulb carefully and keep out of
children's reach. Grasp the bulb only by its plastic base and do
not touch the glass. The oil from your hand could cause the bulb to
break the next time the headlamps are operated.
1. Install the new bulb in lamp assembly by pushing straight in with the
bulb's plastic base facing upward. You may need to turn the bulb slightly
to align the grooves in the plastic base with the tabs in the lamp
assembly.
2. Install the bulb retaining ring over the plastic base and lock the ring
by rotating clockwise until it snaps into place.
3. Connect the electrical connector to the bulb.
4. Install the protective dust shield and lock the shield by rotating it
clockwise until it locks into position.
5. Carefully position the headlamp assembly onto the vehicle making sure
the alignment pins are inserted into the proper holes.
6. Hold the headlamp assembly snugly against the vehicle and push down
on the retainer pins to lock the lamp into place.
7. Before reinstalling the protective cover, make sure the cover tabs are
fully seated under the grille molding.
8. Turn the headlamps on and make sure they work properly. If the
headlamp was correctly aligned before you changed the bulb, you should
not need to align it again.
Replacing front parking lamp/turn signal/cornering lamp bulbs
1. Make sure the headlamp control is in the OFF position.
2. Open the hood and remove the protective cover from the top of the
headlamps by lifting up on the rear corners and release the velcro
attachments. Lift the cover and pull towards the windshield.
Maintenance and care
188
Page 221 of 224

Heating ........................................27
HomeLink universal
transceiver (see Garage door
opener) ..................................57±60
Hood ..........................................151
I
Ignition .................................49, 202
Infant seats
(see Safety seats) .....................105
Inspection/maintenance (I/M)
testing ........................................185
Instrument panel
cleaning ...................................198
cluster ..................................8, 198
lighting up panel and interior .26
location of components ..............8
J
Jack ............................................140
positioning ...............................140
storage .....................................140
Jump-starting your vehicle ......144
K
Keyless entry system .................76
autolock .....................................78
keypad .......................................76
programming entry code .........77
Keys .................................49, 79±81
key in ignition chime ...............12
positions of the ignition ...........49L
Lamps
autolamp system .......................26
bulb replacement
specifications chart ................191
cargo lamps ...............................26
daytime running light ...............25
headlamps .................................25
headlamps, flash to pass ..........26
instrument panel, dimming .....26
interior lamps ...................56, 191
replacing bulbs .......186, 188±191
Lane change indicator
(see Turn signal) ........................49
Lights, warning and indicator ......8
air bag ..........................................9
anti-lock brakes (ABS) ....10, 117
brake ..........................................10
charging system ........................11
high beam .................................10
oil pressure ...............................11
safety belt ...................................9
service engine soon ....................8
traction control active ..............11
turn signal indicator .................10
Load limits .................................126
GAWR ......................................126
GVWR ......................................126
trailer towing ..........................126
Locks
autolock .....................................78
childproof ..................................67
doors ..........................................64
Lubricant specifications ...201±202
Lug nuts, anti-theft ...................143
Lumbar support, seats ...............86
Index
221