2001 LINCOLN CONTINENTAL tire pressure
[x] Cancel search: tire pressurePage 17 of 224

²exterior lamps (front turn, brake and tail)
²fuel level
²distance to empty
²traction control
²ride control
System warnings
System warnings alert you to possible problems or malfunctions in your
vehicle's operating systems.
The message center will display the
last selected feature if there are no
more warning messages. This allows
you to use the full functionality of
the message center after you acknowledge the warning by pressing the
RESET control and clearing the warning message.
Warning messages that have been reset are divided into two categories:
²They will reappear on the display ten minutes from the reset.
²They will not reappear until an ignition OFF-ON cycle has been
completed. This acts as a reminder that these warning conditions still
exist within the vehicle.
Door Ajar Cannot be reset
Driver's Door Ajar
Check Engine Temp Warning returns after 10 minutes
Transmission Overheat
Check Transmission
Low Oil Level
Check Charging System
Low Fuel Level
Low Engine Coolant
Low Tire Pressure (if equipped)
RESET
Instrumentation
17
Page 19 of 224

electrical loads as soon as possible. If the warning stays on or comes on
when the engine is operating at normal speeds, have the electrical
system checked as soon as possible.
LOW FUEL LEVEL.Displayed when you have approximately 80 km (50
miles) to empty.
LOW ENGINE COOLANT.Displayed when the engine coolant level is
low. Stop the vehicle as soon as safely possible, turn off the engine and
let it cool. Check the coolant and level. Refer toEngine coolantin the
Maintenance and carechapter.
LOW TIRE PRESSURE (if equipped).Displayed when the tire
pressure is low. Check the tire pressure. Refer toChecking the tire
pressurein theMaintenance and carechapter.
GEAR DISPLAY DATA ERR.Displayed when the data used to provide
the redundant gear selection display on the instrument cluster is missing
or invalid. In this case, the instrument cluster redundant gear selection
display is turned off. The driver should use the mechanical position
indication on the center console gear selector as temporary indication. If
this warning stays on, contact your dealer as soon as safely possible.
CHECK/TIGHTEN FUEL CAP.Displayed when the fuel filler cap is
not properly installed. Proper fuel filler cap installation is checked
automatically as the vehicle is driven but not until after some fuel is used
(fuel gauge drops below full). Once the fuel filler cap is properly
secured, the ªCHECK/TIGHTEN FUEL CAPº message will turn off after a
short period of driving. Refer toFuel Filler Capin theMaintenance
and carechapter.
BRAKE LAMP OUT.Displayed when the brake lamps are activated and
at least one is burned out. Check the lamps as soon as safely possible
and have the burned out lamp replaced. The center high-mount
brakelamp is not monitored.
CHECK TRACTION CONTROL.Displayed when the Traction
Controlysystem is not operating properly. If this message is displayed
on the message centerandthe amber T/C OFF light in the Traction
Controlyon/off switch isnotilluminated, the Traction Controlysystem
will be partially operable. If this warning stays on, contact your dealer for
service as soon as possible. For further information, refer toTraction
controlyin theDrivingchapter.
CHECK RIDE CONTROL.Displayed when the air suspension system is
not operating properly. If this message is displayed while driving, pull off
the road as soon as safely possible. The message may also be displayed if
Instrumentation
19
Page 138 of 224

Fuse/Relay
LocationFuse Amp
RatingPassenger Compartment
Fuse Panel Description
25 10A Lighting Control Module (LCM): Right
Headlamp
26 10A Virtual Image Instrument Cluster, EATC
Module
27 Ð Not Used
28 10A Shift Lock Actuator, Vehicle Dynamic
Module, Virtual Image Instrument Cluster,
Rear Window Defrost, Heated Seat Switch
Assembly, Low Tire Pressure Module
29 10A Radio
30 10A Heated Mirrors
31 15A Lighting Control Module (LCM): FCU,
Electronic Day/Night Mirror, RH and LH
Courtesy Lamp, Door Courtesy Lamps, RH
and LH Map Lamps, RR and LR Reading
Lamps, RH and LH Visor Lamps, Storage
Bin Lamps, Trunk Lid Lamp, Glove Box
Lamp, Light Sensor Amplifier
32 15A Speed Control DEAC. Switch, Brake On/Off
(BOO) Switch
33 Ð Not Used
34 15A Console Shift Illumination, A/C Clutch
Cycling Pressure Switch, A/C Clutch Relay
(DTR) Sensor, Intake Manifold Runner
Control, Backup Lamps
35 Ð Not Used
36 Ð Not Used
37 30A Subwoofer Amplifier, Radio
38 10A Analog Clock, CD Player, Mobile Telephone
Transceiver, RESCU
39 10A Power Door Locks, Power Seats, Power
Mirrors, Keyless Entry, LF Seat Module, LF
Door Module
40 10A Cornering Lamps
41 20A Door Locks
Roadside emergencies
138
Page 143 of 224
To lessen the risk of personal injury, do not put any part of your
body under the vehicle while changing a tire. Do not start the
engine when your vehicle is on the jack. The jack is only meant for
changing the tire.
7. Remove the lug nuts with the lug wrench. Replace the flat tire with
the spare tire, making sure the valve stem is facing outward. Reinstall lug
nuts until the wheel is snug against the hub. Do not fully tighten the lug
nuts until the wheel has been lowered.
8. Lower the wheel by turning the jack handle counterclockwise.
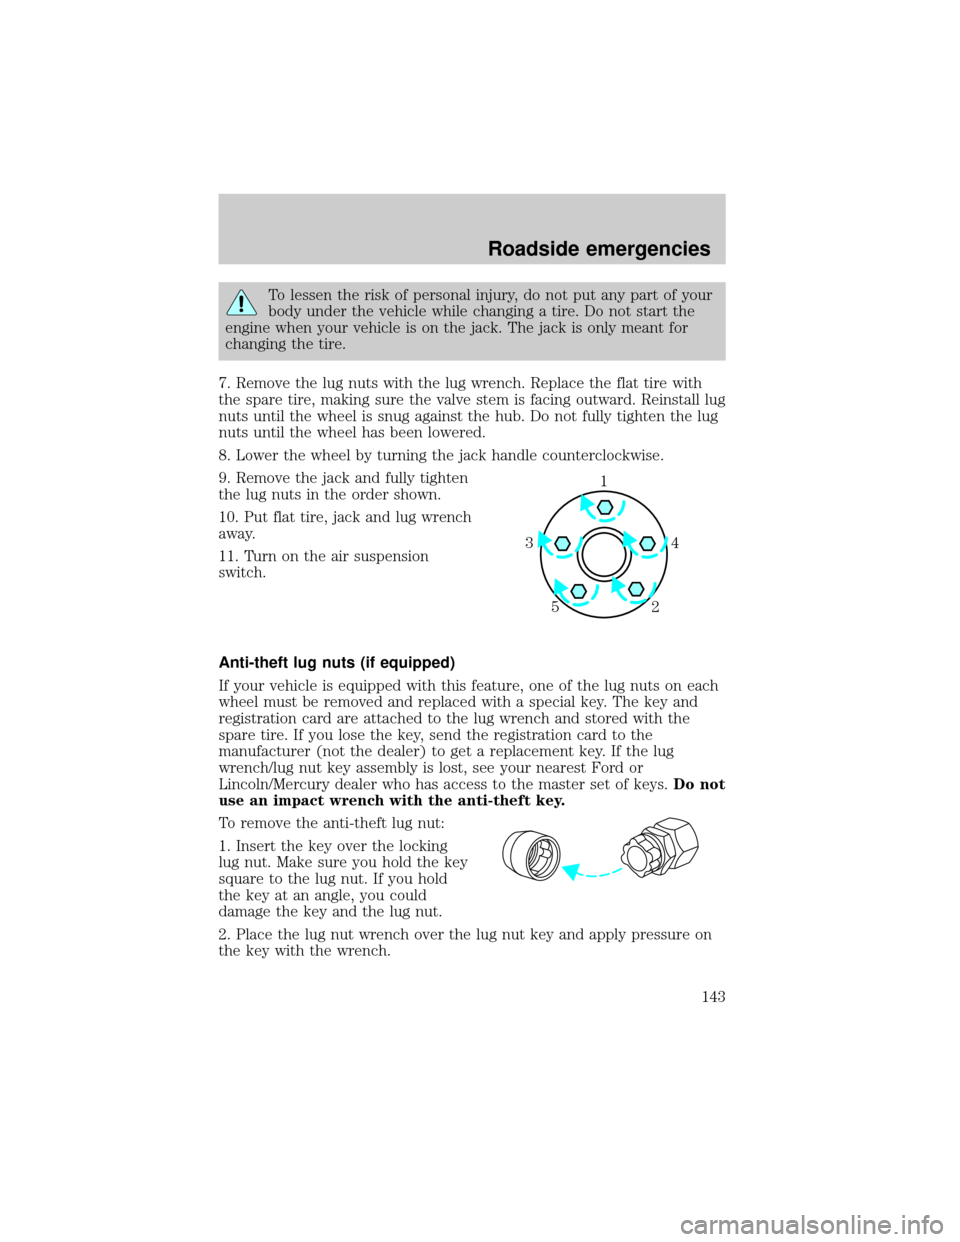
9. Remove the jack and fully tighten
the lug nuts in the order shown.
10. Put flat tire, jack and lug wrench
away.
11. Turn on the air suspension
switch.
Anti-theft lug nuts (if equipped)
If your vehicle is equipped with this feature, one of the lug nuts on each
wheel must be removed and replaced with a special key. The key and
registration card are attached to the lug wrench and stored with the
spare tire. If you lose the key, send the registration card to the
manufacturer (not the dealer) to get a replacement key. If the lug
wrench/lug nut key assembly is lost, see your nearest Ford or
Lincoln/Mercury dealer who has access to the master set of keys.Do not
use an impact wrench with the anti-theft key.
To remove the anti-theft lug nut:
1. Insert the key over the locking
lug nut. Make sure you hold the key
square to the lug nut. If you hold
the key at an angle, you could
damage the key and the lug nut.
2. Place the lug nut wrench over the lug nut key and apply pressure on
the key with the wrench.
1
4 3
2 5
Roadside emergencies
143
Page 170 of 224
Changing the wiper blades
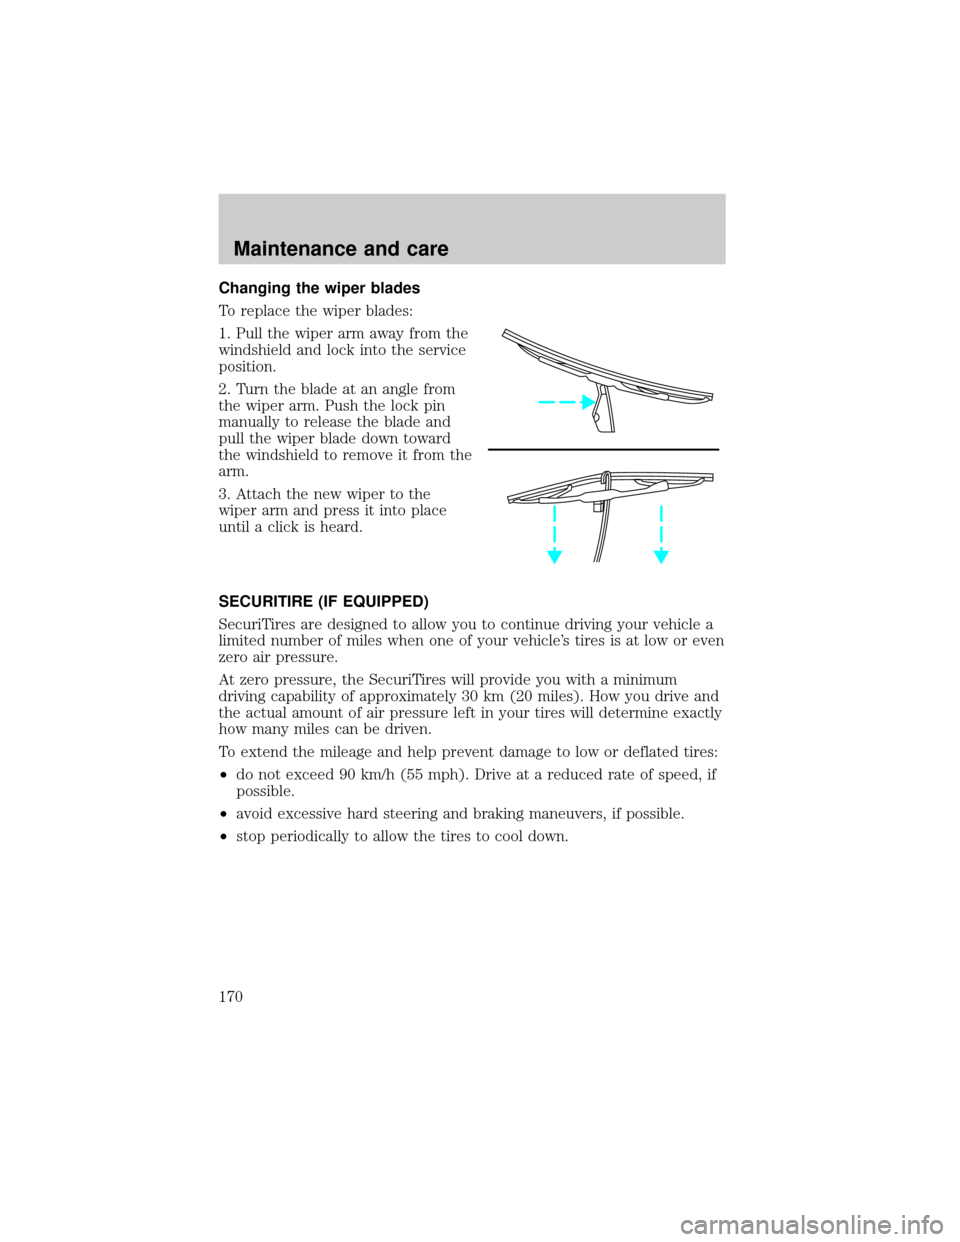
To replace the wiper blades:
1. Pull the wiper arm away from the
windshield and lock into the service
position.
2. Turn the blade at an angle from
the wiper arm. Push the lock pin
manually to release the blade and
pull the wiper blade down toward
the windshield to remove it from the
arm.
3. Attach the new wiper to the
wiper arm and press it into place
until a click is heard.
SECURITIRE (IF EQUIPPED)
SecuriTires are designed to allow you to continue driving your vehicle a
limited number of miles when one of your vehicle's tires is at low or even
zero air pressure.
At zero pressure, the SecuriTires will provide you with a minimum
driving capability of approximately 30 km (20 miles). How you drive and
the actual amount of air pressure left in your tires will determine exactly
how many miles can be driven.
To extend the mileage and help prevent damage to low or deflated tires:
²do not exceed 90 km/h (55 mph). Drive at a reduced rate of speed, if
possible.
²avoid excessive hard steering and braking maneuvers, if possible.
²stop periodically to allow the tires to cool down.
Maintenance and care
170
Page 171 of 224
Pressure alert system
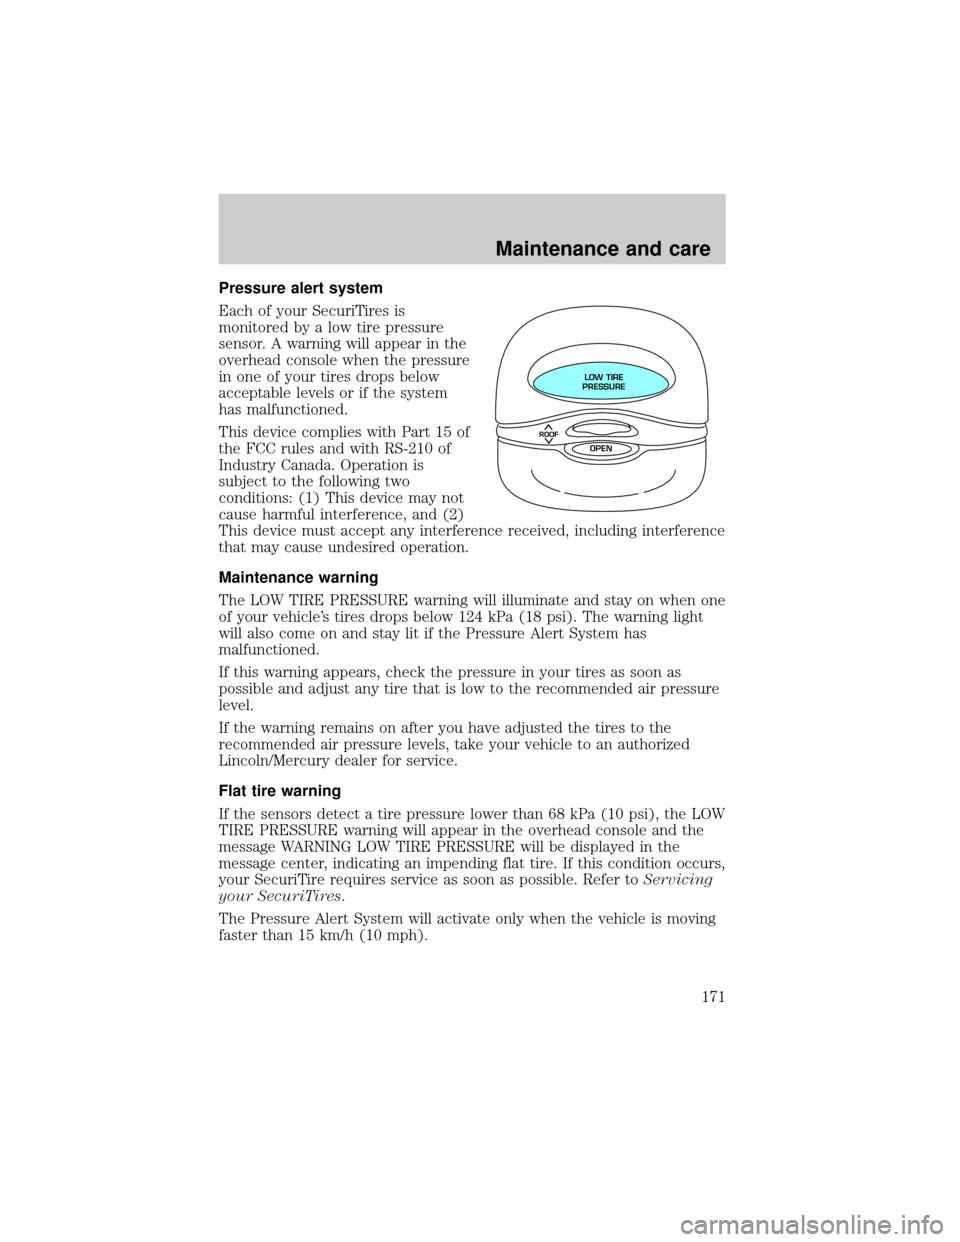
Each of your SecuriTires is
monitored by a low tire pressure
sensor. A warning will appear in the
overhead console when the pressure
in one of your tires drops below
acceptable levels or if the system
has malfunctioned.
This device complies with Part 15 of
the FCC rules and with RS-210 of
Industry Canada. Operation is
subject to the following two
conditions: (1) This device may not
cause harmful interference, and (2)
This device must accept any interference received, including interference
that may cause undesired operation.
Maintenance warning
The LOW TIRE PRESSURE warning will illuminate and stay on when one
of your vehicle's tires drops below 124 kPa (18 psi). The warning light
will also come on and stay lit if the Pressure Alert System has
malfunctioned.
If this warning appears, check the pressure in your tires as soon as
possible and adjust any tire that is low to the recommended air pressure
level.
If the warning remains on after you have adjusted the tires to the
recommended air pressure levels, take your vehicle to an authorized
Lincoln/Mercury dealer for service.
Flat tire warning
If the sensors detect a tire pressure lower than 68 kPa (10 psi), the LOW
TIRE PRESSURE warning will appear in the overhead console and the
message WARNING LOW TIRE PRESSURE will be displayed in the
message center, indicating an impending flat tire. If this condition occurs,
your SecuriTire requires service as soon as possible. Refer toServicing
your SecuriTires.
The Pressure Alert System will activate only when the vehicle is moving
faster than 15 km/h (10 mph).
ROOF
LOW TIRE
PRESSURE
OPEN
Maintenance and care
171
Page 172 of 224
Servicing your SecuriTires
If you cannot service your SecuriTire immediately, replace it with your
temporary spare as soon as safely possible.
Your temporary spare tire can be used until your SecuriTire has been
repaired.
It is recommended that you always have your SecuriTires serviced by an
authorized Michelin tire dealer.Each SecuriTire is equipped with a
pressure sensor around the wheel rim. This sensor could be
damaged when removing and installing the tire.Servicing a
SecuriTire at locations other than your Michelin tire dealer may
adversely affect your warranty.
If you have questions concerning your SecuriTires or servicing, please
call the Michelin Tire Information Line at 1-800-847-3435 or contact your
local Michelin tire dealer.
INFORMATION ABOUT UNIFORM TIRE QUALITY GRADING
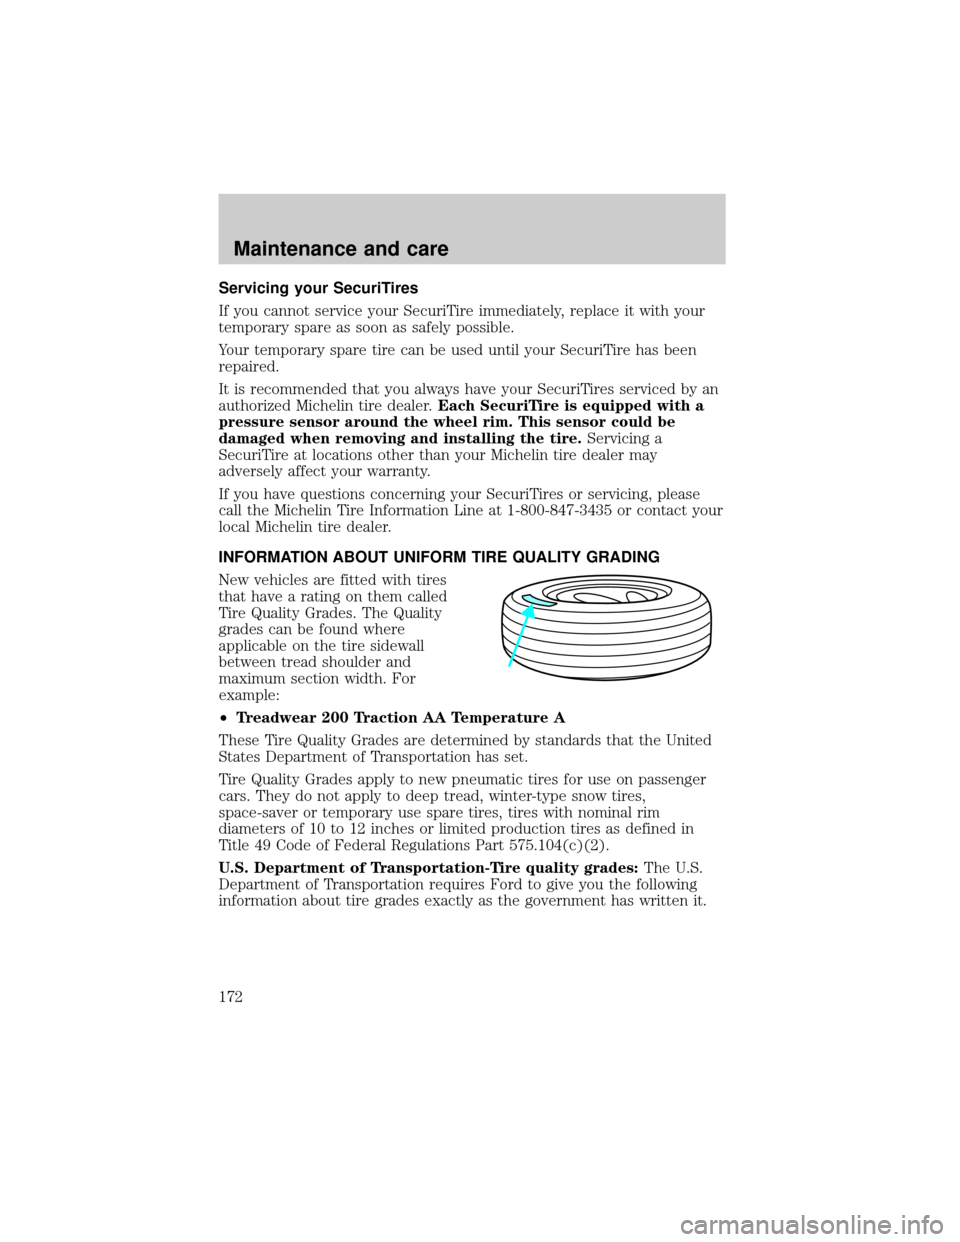
New vehicles are fitted with tires
that have a rating on them called
Tire Quality Grades. The Quality
grades can be found where
applicable on the tire sidewall
between tread shoulder and
maximum section width. For
example:
²Treadwear 200 Traction AA Temperature A
These Tire Quality Grades are determined by standards that the United
States Department of Transportation has set.
Tire Quality Grades apply to new pneumatic tires for use on passenger
cars. They do not apply to deep tread, winter-type snow tires,
space-saver or temporary use spare tires, tires with nominal rim
diameters of 10 to 12 inches or limited production tires as defined in
Title 49 Code of Federal Regulations Part 575.104(c)(2).
U.S. Department of Transportation-Tire quality grades:The U.S.
Department of Transportation requires Ford to give you the following
information about tire grades exactly as the government has written it.
Maintenance and care
172
Page 174 of 224
SERVICING YOUR TIRES
Checking the tire pressure
²Use an accurate tire pressure gauge.
²Check the tire pressure when tires are cold, after the vehicle has been
parked for at least one hour or has been driven less than 5 km (3
miles).
²Adjust tire pressure to recommended specifications found on the
Certification Label.
Improperly inflated tires can affect vehicle handling and can fail
suddenly, possibly resulting in loss of vehicle control.
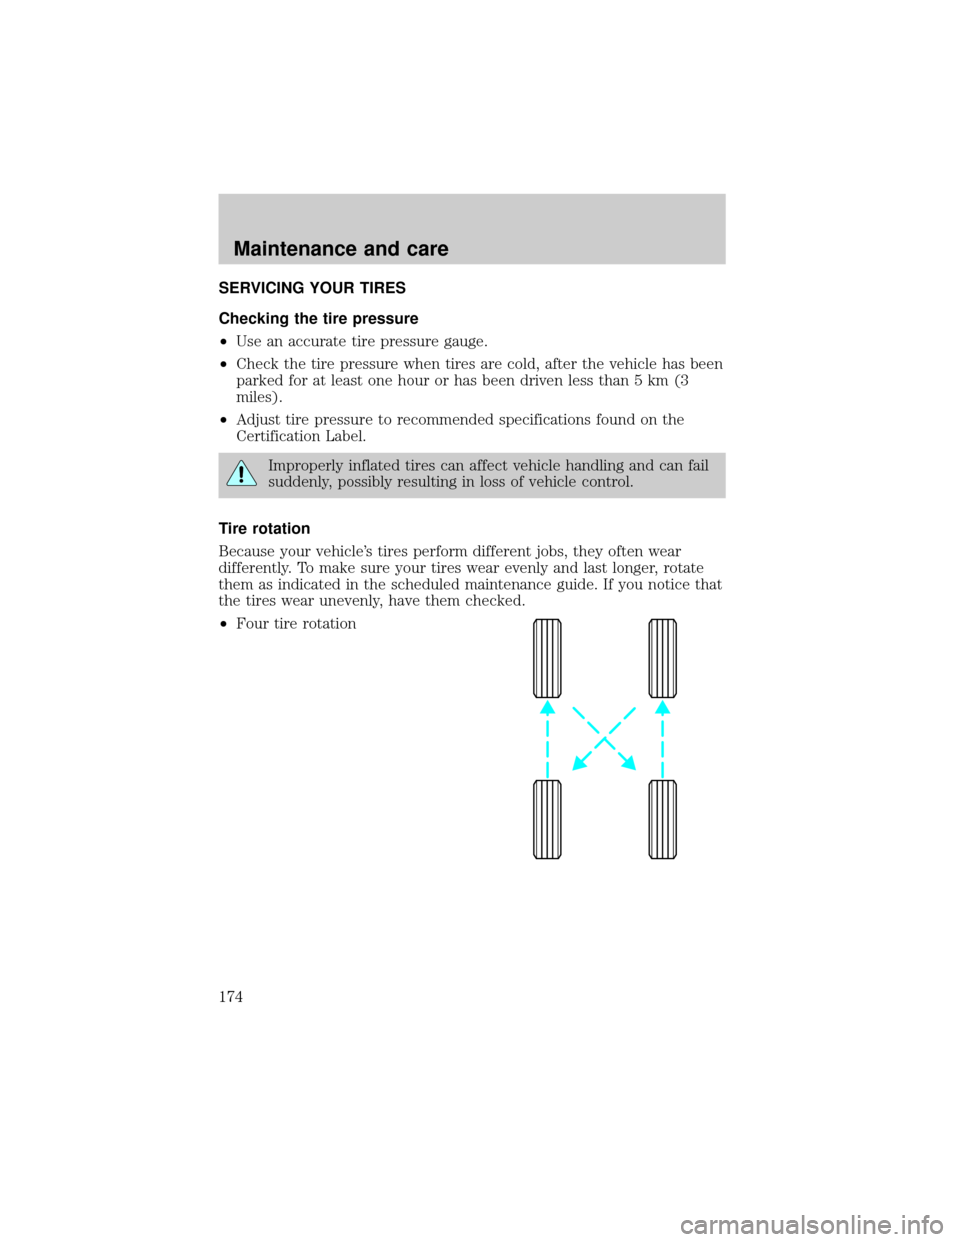
Tire rotation
Because your vehicle's tires perform different jobs, they often wear
differently. To make sure your tires wear evenly and last longer, rotate
them as indicated in the scheduled maintenance guide. If you notice that
the tires wear unevenly, have them checked.
²Four tire rotation
Maintenance and care
174