Page 27 of 224

²To turn autolamps on, push the control up toward the MAX position.
As you press this switch, the autolamp system's status will be
displayed in the message center. The system can be set to provide
light for up to three minutes after you turn the ignition OFF.
²To turn autolamps off, push the control down toward OFF.
CLIMATE CONTROL SYSTEM
Electronic Automatic Temperature Control (EATC) system
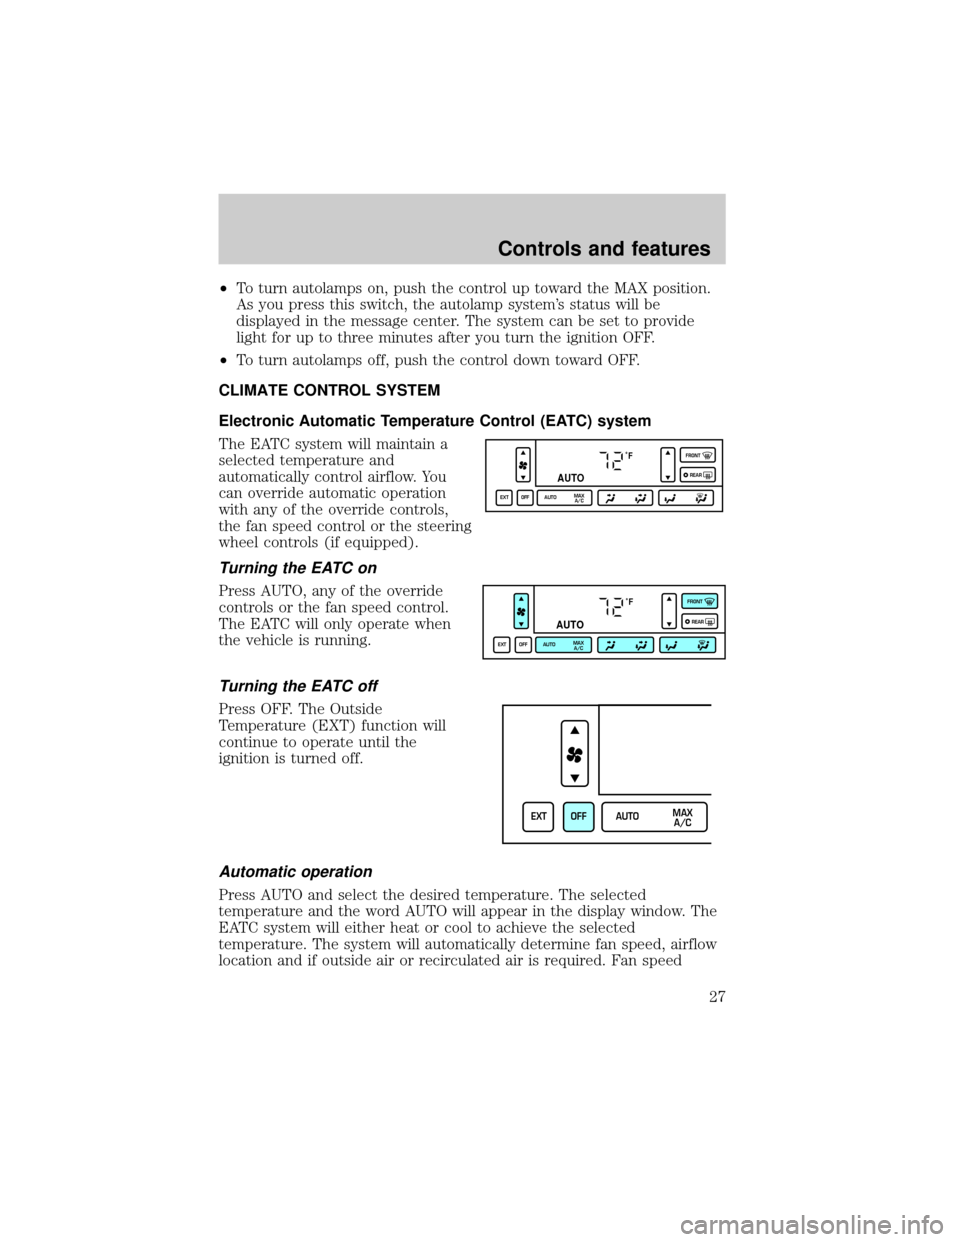
The EATC system will maintain a
selected temperature and
automatically control airflow. You
can override automatic operation
with any of the override controls,
the fan speed control or the steering
wheel controls (if equipped).
Turning the EATC on
Press AUTO, any of the override
controls or the fan speed control.
The EATC will only operate when
the vehicle is running.
Turning the EATC off
Press OFF. The Outside
Temperature (EXT) function will
continue to operate until the
ignition is turned off.
Automatic operation
Press AUTO and select the desired temperature. The selected
temperature and the word AUTO will appear in the display window. The
EATC system will either heat or cool to achieve the selected
temperature. The system will automatically determine fan speed, airflow
location and if outside air or recirculated air is required. Fan speed
˚F
AUTO
EXT OFF AUTOMAX
A/CFRONT
REAR
˚F
AUTO
EXT OFF AUTOMAX
A/CFRONT
REAR
EXT OFF AUTOMAX
A/C
Controls and features
27
Page 28 of 224

remains automatic unless the fan speed control is pressed or the steering
wheel controls (if equipped) are pressed.
When in AUTO and weather conditions require heat, air will be sent to
the floor. However, if the engine is not warm enough to provide heat, the
fan will not operate. In 3
1¤2minutes or less, the fan speed will start to
increase and the airflow location will change to the floor area.
If unusual conditions exist (i.e.-window fogging, etc.), the manual
override controls allow you to select airflow locations and the fan control
allows you to adjust fan speed as necessary.
Temperature selection
The display window indicates the
selected temperature, function
(AUTO or one of the override
controls) and manual control of fan
speed (
) if automatic fan speed
is not desired.
To control the temperature, select
any temperature between 18ÉC
(65ÉF) and 29ÉC (85ÉF) by pressing
the temperature control.
For continuous maximum cooling, push the temperature control until
16ÉC (60ÉF) is shown in the display window. The EATC will continue
maximum cooling (disregarding the displayed temperature) until a
warmer temperature is selected by pressing the temperature control.
For continuous maximum heating, push the temperature control until
32ÉC (90ÉF) is shown in the display window. The EATC will continue
maximum heating (disregarding the displayed temperature) until a
cooler temperature is selected by pressing the temperature control.
˚F
AUTO
FRONT
REAR
Controls and features
28
Page 29 of 224

Temperature conversion
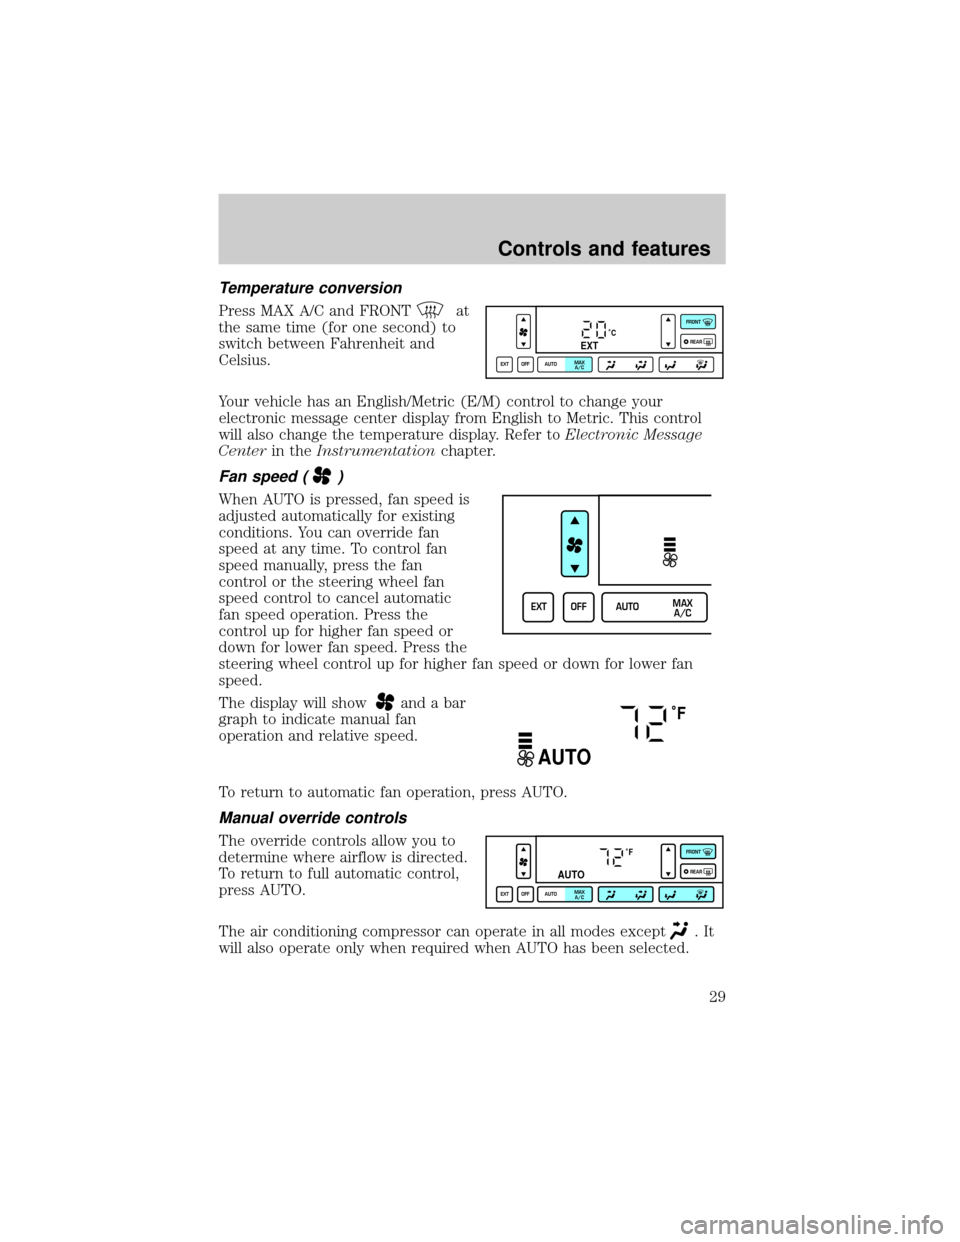
Press MAX A/C and FRONTat
the same time (for one second) to
switch between Fahrenheit and
Celsius.
Your vehicle has an English/Metric (E/M) control to change your
electronic message center display from English to Metric. This control
will also change the temperature display. Refer toElectronic Message
Centerin theInstrumentationchapter.
Fan speed ()
When AUTO is pressed, fan speed is
adjusted automatically for existing
conditions. You can override fan
speed at any time. To control fan
speed manually, press the fan
control or the steering wheel fan
speed control to cancel automatic
fan speed operation. Press the
control up for higher fan speed or
down for lower fan speed. Press the
steering wheel control up for higher fan speed or down for lower fan
speed.
The display will show
and a bar
graph to indicate manual fan
operation and relative speed.
To return to automatic fan operation, press AUTO.
Manual override controls
The override controls allow you to
determine where airflow is directed.
To return to full automatic control,
press AUTO.
The air conditioning compressor can operate in all modes except
.It
will also operate only when required when AUTO has been selected.
˚CEXT
EXT OFF AUTOMAX
A/CFRONT
REAR
EXT OFF AUTOMAX
A/C
˚F
AUTO
˚F
AUTO
EXT OFF AUTOMAX
A/CFRONT
REAR
Controls and features
29
Page 49 of 224

POSITIONS OF THE IGNITION
1. ACCESSORY, allows the electrical
accessories such as the radio to
operate while the engine is not
running.
2. LOCK, locks the steering wheel,
automatic transmission gearshift
lever and allows key removal.
3. OFF, shuts off the engine and all
accessories without locking the
steering wheel.
4. ON, all electrical circuits operational. Warning lights illuminated. Key
position when driving.
5. START, cranks the engine. Release the key as soon as the engine
starts.
Refer to theSecurilockyPassive Anti-Theft Systemsection in this
chapter for more information on Securilockykeys.
KEYS
The vehicle is equipped with a master key and valet key lock system.
The master key will actuate doors, trunk, glove box, ignition and remote
trunk release. The valet key (marked ªvaletº) will actuate doors and
ignition only. Before using this key, lock the trunk remote control to
disable theTrunk remote controlon the drivers door, then lock the
glove compartment with your master key.
TURN SIGNAL CONTROL
²Push down to activate the left
turn signal.
²Push up to activate the right turn
signal.
3
1
2
5
4
HI
LO
F
S
OFF
Controls and features
49
Page 51 of 224
STEERING WHEEL CONTROLS (IF EQUIPPED)
Radio control features
²Press BAND/MODE to select AM,
FM1, FM2, TAPE or CD (if
equipped).
In Radio mode:
²Press MEM/NEXT to select a
preset station from memory.
In Tape mode:
²Press MEM/NEXT to listen to the
next selection on the tape.
In CD mode:
²Press MEM/NEXT to listen to the
next track on the disc.
In any mode:
²Press VOL up or down to adjust the volume.
Climate control features
²Press TEMP up or down to adjust temperature.
²Press FAN up or down to adjust fan speed.
SPEED CONTROL
To turn speed control on
²Press ON.
Vehicle speed cannot be controlled
until the vehicle is traveling at or
above 48 km/h (30 mph).
When the ON control is pressed, the
message ªSPEED CONTROL
READYº will appear for 5 seconds in
your message center. Or, if the
speed control is already ON and
SET, the message ªSPEED CONTROL SETº will appear for 5 seconds in
your message center.
NEXT
MODE
ON
OFF
Controls and features
51
Page 55 of 224
To return to a previously set speed
²Press RES/RESUME. For
RES/RESUME to operate, the
vehicle speed must be faster than
48 km/h (30 mph).
When the RESUME control is
pressed, the message ªSPEED
CONTROL SETº will appear for 5
seconds in your message center.
TILT STEERING
Pull the tilt steering control toward
you to move the steering wheel up
or down. Hold the control while
adjusting the wheel to the desired
position, then release the control.
Never adjust the steering wheel when the vehicle is moving.
RES
SET
ACCEL
COAST
Controls and features
55
Page 86 of 224
Press to move the rear portion of
the seat cushion up or down.
Heated seats (if equipped)
To operate the heated seats:
²Slide the control to BACK to heat
the seatback only.
²Slide the control to BOTH to heat
the seatback and the seat
cushion.
²Rotate the thumbwheel to select
the desired heat (from 0 (OFF)
to 5 (HI)). Allow five minutes for
the heat level to stabilize.
If the heated seat switch is not
turned OFF, the seat will heat up to
the selected temperature level each
time the vehicle is started.
Using the power lumbar support
The power lumbar control is located
on the outboard side of the seat.
Press one side of the control to
adjust firmness.
Press the other side of the control
to adjust softness.
BACK
BOTH
O
HI
OFF
Seating and safety restraints
86
Page 113 of 224
2. Make sure the headlamps and vehicle accessories are off.
²Make sure the parking brake is
set.
²Make sure the gearshift is in P
(Park).
3. Turn the key to 4 (ON) without
turning the key to 5 (START).
If there is difficulty in turning the
key, firmly rotate the steering wheel
left and right until the key turns
freely. This condition may occur
when:
²front wheels are turned
²front wheel is against the curb
²steering wheel is turned when getting in or out of the vehicle
BRAKE RELEASEHOOD
1
2
34
5
Starting
113