Page 79 of 363
Youshouldhavereceivedakey
number plate with your keys. You
will need this key number if you ever
have to get a lost key replaced. Keep
the plate stored in a saf e place. If you
need to replace a key, use only
Honda-approved key blanks.
Your vehicle comes with two master
keys and a valet key.
These buttons let you control some
f unctions of the audio system with-
out removing your hands f rom the
wheel. Ref er to page f or a com-
plete explanation. The master key fits all the locks on
your vehicle:
Ignition
Doors
Glovebox
TailgateThe valet key works only in the
ignition and the door locks. You can
keepthegloveboxlockedwhenyou
leave your vehicle and valet key at a
parking f acility.
185
On EX model
Keys
Remote Audio Controls
Steering Wheel Controls, K eys and L ocks
Inst rument s and Cont rols
80
KKEEYYNNUUMMBBEERRPPLLAATTEE
VVAALLEETTKKEEYY((GGRRAAYY))MMAASSTTEERRKKEEYYSS((BBLLAACCKK))
Page 95 of 363

Each power sliding door has an auto-
reverse f eature. If a door meets
resistance while closing, it will beep
three times and automatically
reverse direction. However, the door
may not immediately reverse
direction (like some elevator doors),
and the f orce of a closing door may
cause bruising or discomf ort. Always
make sure passengers and any
objects are well away f rom the power
sliding doors bef ore closing them.
Also check that passengers,
especially children, do not have their
hands on the edge of the sliding door
or on the door pillar. The auto-
reverse f eature stops working when
the door is about to latch so the
motor can pull the door shut.
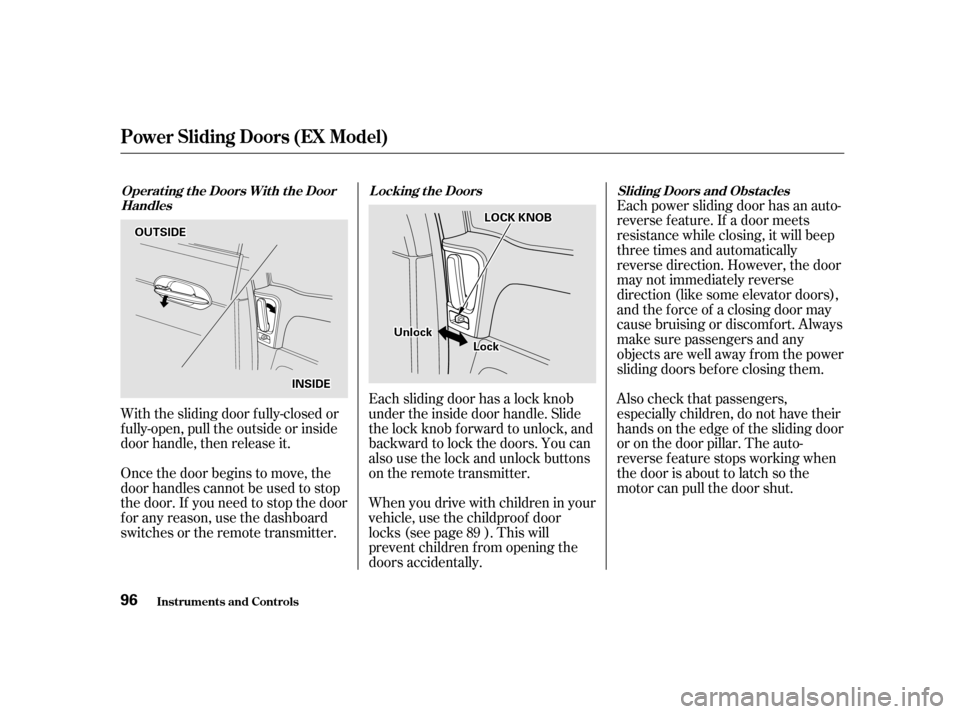
With the sliding door f ully-closed or
f ully-open, pull the outside or inside
door handle, then release it.
Once the door begins to move, the
door handles cannot be used to stop
the door. If you need to stop the door
f or any reason, use the dashboard
switches or the remote transmitter. Each sliding door has a lock knob
under the inside door handle. Slide
the lock knob f orward to unlock, and
backward to lock the doors. You can
also use the lock and unlock buttons
on the remote transmitter.
Whenyoudrivewithchildreninyour
vehicle, use the childproof door
locks (see page ). This will
prevent children f rom opening the
doors accidentally.
89
Inst rument s and Cont rols
Operat ing t he Doors Wit h t he Door Handles L ocking t he Doors Sliding Doors and Obst acles
Power Sliding Doors (EX Model)
96
OOUUTTSSIIDDEE
IINNSSIIDDEE
UUnnlloocckk
LLoocckk
LLOOCCKKKKNNOOBB
Page 99 of 363

�µIf you just took
delivery of your vehicle and have not
trained any of the buttons in the
HomeLink transmitter bef ore, you
should erase any previously learned
codes bef ore training the f irst button.
Todothis,pressandholdthetwo
outside buttons on the HomeLink
transmitter for about 20 seconds
until the red light f lashes. Release
the buttons, then proceed to Step 1.
If you are training the second or
third buttons, go directly to Step 1.
Unplug the garage door opener
motor f rom the house current.
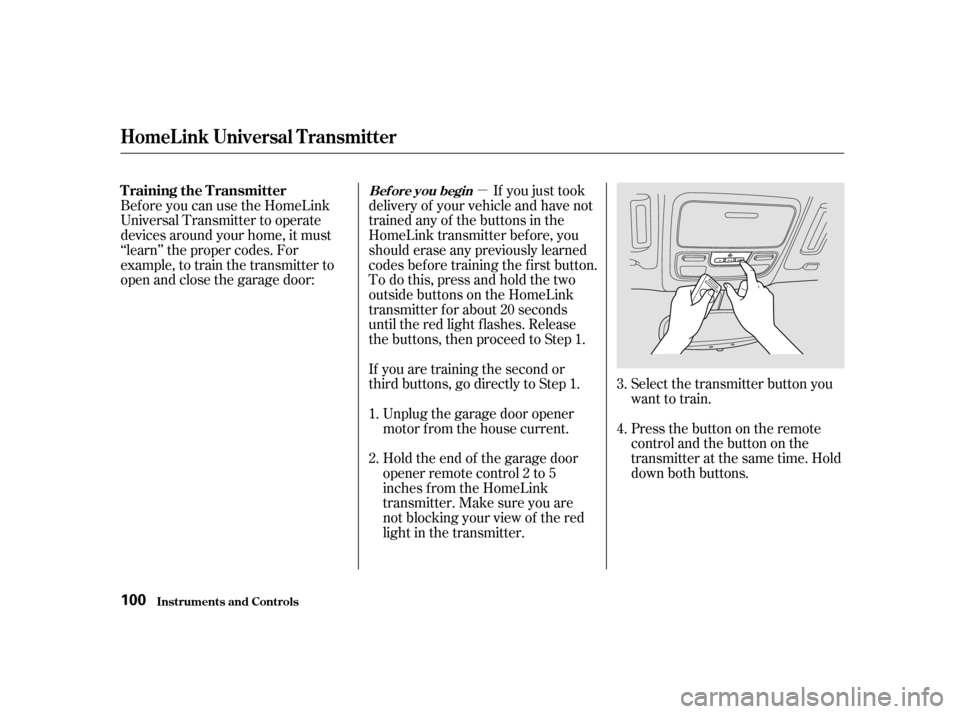
Holdtheendof thegaragedoor
opener remote control 2 to 5
inches f rom the HomeLink
transmitter. Make sure you are
not blocking your view of the red
light in the transmitter.
Bef ore you can use the HomeLink
Universal Transmitter to operate
devices around your home, it must
‘‘learn’’ the proper codes. For
example, to train the transmitter to
open and close the garage door:
Press the button on the remote
control and the button on the
transmitter at the same time. Hold
down both buttons.
Select the transmitter button you
want to train.
2. 3. 4.
1.
T raining the T ransmitterBef ore you begin
HomeL ink Universal T ransmitter
Inst rument s and Cont rols
100
Page 100 of 363

Canadian Owners:
The remote control you are training
from may stop transmitting after two
seconds. This is not long enough f or
the HomeLink transmitter to learn
thecode.Releaseandpressthe
button on the remote control every
two seconds until the transmitter has
learned the code.The red light in the transmitter
should begin f lashing. It will f lash
slowly at first, then rapidly.
When the red light f lashes rapidly,
release both buttons. The
transmitter should have learned
the code f rom the remote control.
Plug in the garage door opener
motor, then test the transmitter
button by pushing it. It should
operate the garage door.
If the button does not work, repeat
this procedure to train it again. If it still does not work, you may have a
variable or rolling code garage
door opener. Test this by pressing
and holding the HomeLink
transmitter button you just trained.
If the red light blinks f or two
seconds,thenstayson,youhavea
rolling code garage door opener.
You may be able to verify this with
the manufacturer’s documentation.
Go to ‘‘Training With a Rolling
Code System.’’
Repeat these steps to train the
other two transmitter buttons to
operate any other remotely-
controlled devices around your
home (lighting, automatic gate,
security system, etc.).
For security purposes, newer garage
door opening systems use a ‘‘rolling’’
or variable code. Inf ormation f rom
the remote control and the garage
door opener are needed bef ore the
HomeLink transmitter can operate
the garage door opener.
The‘‘Training the Transmitter’’
procedure trains the HomeLink
transmitter to the proper garage
door opener code. The f ollowing
procedure synchronizes the
HomeLink transmitter to the garage
door opener so they send and
receive the correct codes.
5. 6.
8.
7.
CONT INUED
T raining With a Rolling Code
System
HomeL ink Universal T ransmitter
Inst rument s and Cont rols 101
Page 102 of 363

As required by the FCC:This device complies with Part 15 of theFCC rules. Operation is subject to thef ollowing two conditions: (1) This devicemay not cause harmf ul interf erence, and(2) this device must accept anyinterf erence received, includinginterf erence that may cause undesired
operation.
Changes or modif ications not expresslyapproved by the party responsible f orcompliance could void the user’sauthority to operate the equipment.
This device complies with IndustryCanada Standard RSS-210.Operation is subject to the f ollowing twoconditions: (1) this device may not causeinterf erence, and (2) this device mustaccept any interf erence that may causeundesired operation of the device.
Totrainanalreadyprogrammed
transmitter button to operate a new
device:
Select the transmitter button you
want to train.
Press and hold the transmitter
button until the red light begins to
f lash slowly (approximately 20
seconds).
While continuing to hold the
transmitter button, place the
remotecontrolforthedevice2to
5 inches f rom the HomeLink
transmitter.
Press and hold the button on the
remote control. Hold both buttons
until the red light begins to f lash
rapidly. Release both buttons. The
transmitter should now be trained
to operate the device.
Toerasethecodesstoredinallthree
buttons, press and hold the two
outside buttons until the red light
begins to f lash, then release the
buttons.
Youshoulderaseallthreecodes
bef ore selling the vehicle.
1. 2. 3. 4. 5.
Retraining a Button
Erasing Codes
HomeL ink Universal T ransmitter
Inst rument s and Cont rols103
Page 114 of 363
To create more cargo space, you can
fold the third seat into the floor
recess.
To fold the third seat:Remove the head restraints by
pushing the release buttons and
pulling the restraints out. Store the head restraints in the
sidecargonet.Toinstalltheside
cargo net, hook the f our loops on
the net to the tabs on the left side
panel.
Unlock the seat-back by pulling
the handle. Push the seat-back
forward.
Make sure the head restraint legs
areinsidethecargonetsotheydo
not damage the seat as you fold it.
1. 2.
3.
CONT INUED
Folding the T hird Seat
Seats
Inst rument s and Cont rols115
RREELLEEAASSEEBBUUTTTTOONNHHAANNDDLLEE
Page 136 of 363
Use the MODE buttons to select the
vents the air flows from. Some air
will f low f rom the dashboard corner
vents in all modes.Air f lows f rom the f loor
vents. Air f low is divided between
the vents in the dashboard and the
f loor vents. Air flows from the center
and corner vents in the dashboard.
Air f low is divided between
the f loor vents and the def roster
vents at the base of the windshield.
Air f lows f rom the def roster
vents at the base of the windshield. When you select or ,
the system automatically switches to
Fresh Air mode and turns on the
A/C. In this case you cannot turn it
off.
When you select , the system
automatically switches to Fresh Air
mode.
Heating and Cooling
Comf ort and Convenience Feat ures
Mode Buttons
137
Page 152 of 363
You can manually select various
f unctions of the Climate Control
system when it is in FULL AUTO.
All other f eatures remain auto-
matically controlled. Some of these
f unctions appear in the Navigation
System display. Press the A/C
button next to the display to show
these functions.
Pressing ‘‘ON’’ or ‘‘OFF’’ in the
display turns the air conditioning on
andoff.YouwillseeA/CONorA/C
OFF activated in the display.
When you turn the A/C of f , the
system cannot regulate the inside
temperature if you set it below the
outside temperature. With the A/C
on, use the temperature buttons to
adjust the temperature of the air
flow to a comfortable setting.
CONT INUED
Climat e Cont rol Syst em
Comf ort and Convenience Feat ures
Semi-automatic Operation
A ir Condit ioning (A /C) But t ons
153
AAIIRRCCOONNDDIITTIIOONNIINNGG((AA//CC))BBUUTTTTOONNSS
TTEEMMPPEERRAATTUURREEBBUUTTTTOONNSS
RREECCIIRRCCUULLAATTIIOONNBBUUTTTTOONN