Page 86 of 323
�µ
�µ �µ
In this position,
you can operate the audio system
and the accessory power socket.
This is the normal key
position when driving. All f eatures
and accessories on the car are usable.
Several of the lights on the instru-
ment panel come on as a test when
you turn the ignition switch f rom
ACCESSORY to ON.
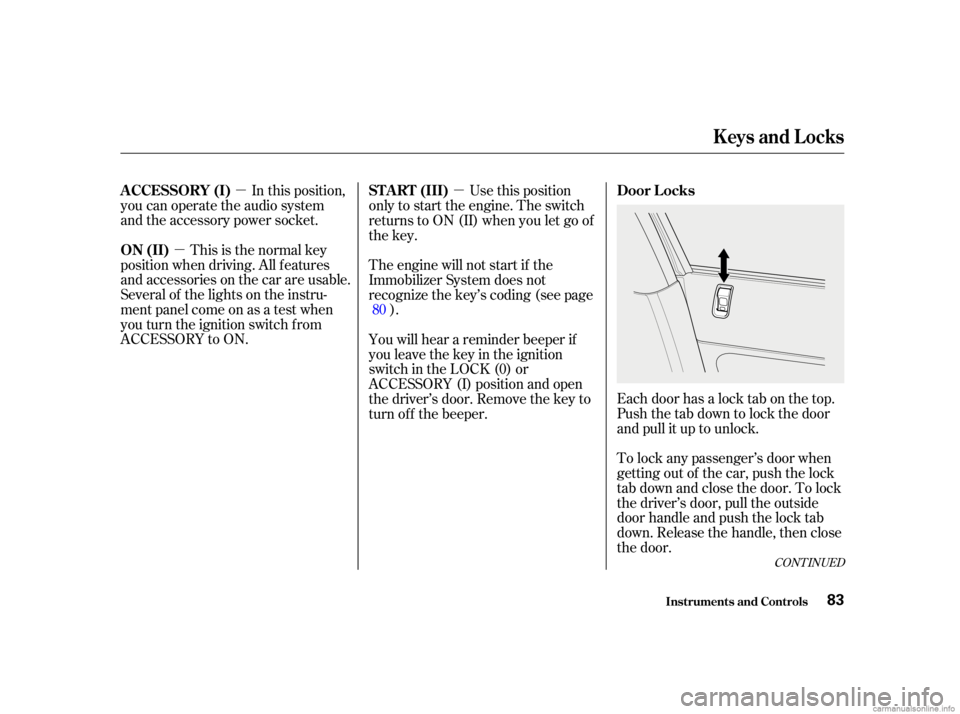
Each door has a lock tab on the top.
Push the tab down to lock the door
andpullituptounlock.
To lock any passenger’s door when
getting out of the car, push the lock
tab down and close the door. To lock
the driver’s door, pull the outside
door handle and push the lock tab
down. Release the handle, then close
the door.
Use this position
only to start the engine. The switch
returns to ON (II) when you let go of
the key.
The engine will not start if the
Immobilizer System does not
recognize the key’s coding (see page ).
You will hear a reminder beeper if
you leave the key in the ignition
switch in the LOCK (0) or
ACCESSORY (I) position and open
thedriver’sdoor.Removethekeyto
turn of f the beeper. 80
CONT INUED
Keys and Locks
Inst rument s and Cont rols
A CCESSORY (I)
ON (II)
Door L ocks
ST A RT (III)
83
Page 88 of 323
CONT INUED
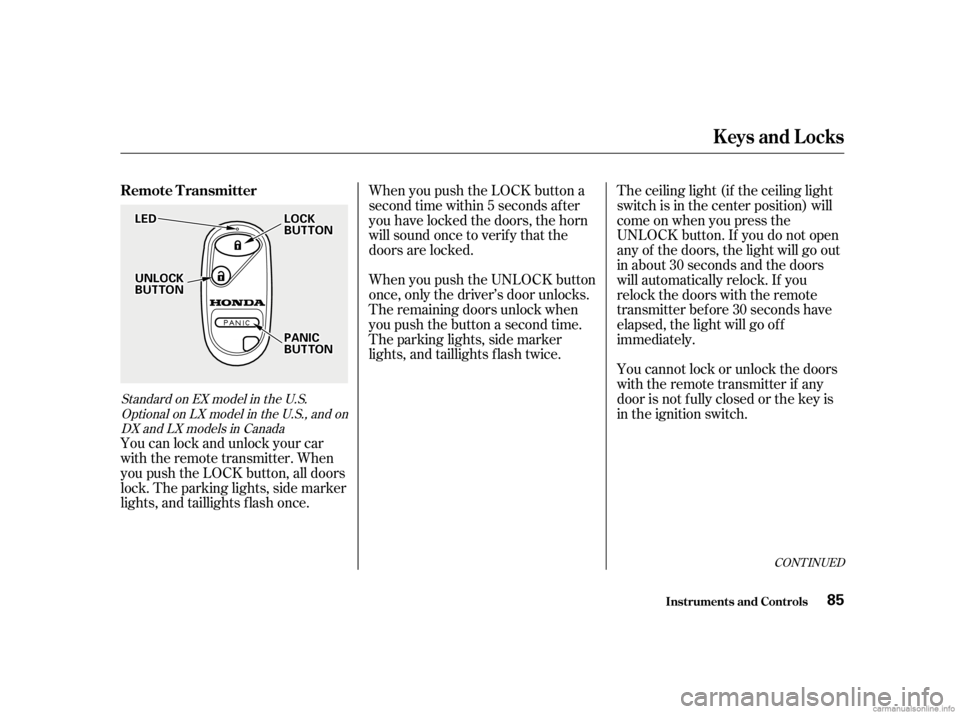
You can lock and unlock your car
with the remote transmitter. When
you push the LOCK button, all doors
lock. The parking lights, side marker
lights, and taillights f lash once.When you push the LOCK button a
second time within 5 seconds after
you have locked the doors, the horn
will sound once to verify that the
doors are locked.
When you push the UNLOCK button
once, only the driver’s door unlocks.
The remaining doors unlock when
you push the button a second time.
The parking lights, side marker
lights, and taillights f lash twice.
The ceiling light (if the ceiling light
switch is in the center position) will
come on when you press the
UNLOCK button. If you do not open
any of the doors, the light will go out
in about 30 seconds and the doors
will automatically relock. If you
relock the doors with the remote
transmitter before 30 seconds have
elapsed, the light will go of f
immediately.
You cannot lock or unlock the doors
with the remote transmitter if any
door is not f ully closed or the key is
in the ignition switch.
Standard on EX model in the U.S.
Optional on LX model in the U.S., and onDX and LX models in Canada
Remote Transmitter
Keys and Locks
Inst rument s and Cont rols85
L LE E D
D
U
UN NLLOOC CKK
B
BU UT TT
TO
ON N L
LO
OC CKK
B
BU UT TT
TO
ON N
P
P A
A N
NI ICC
B
BU UT TT
TO
ON N
Page 89 of 323
�´
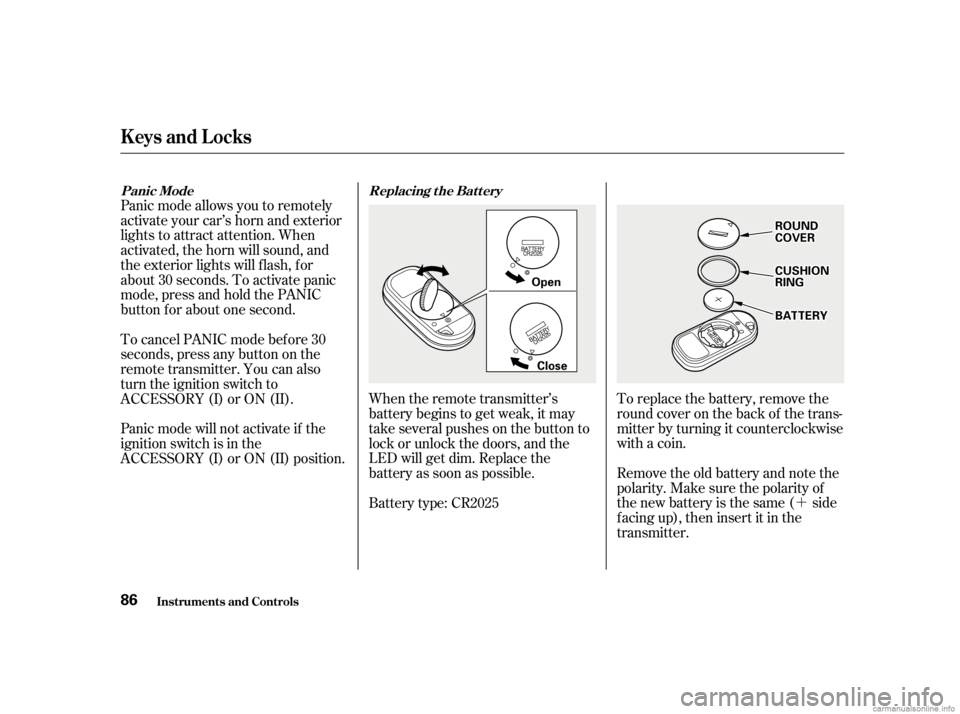
To replace the battery, remove the
round cover on the back of the trans-
mitter by turning it counterclockwise
with a coin.
Remove the old battery and note the
polarity. Make sure the polarity of
the new battery is the same ( side
f acing up), then insert it in the
transmitter.
When the remote transmitter’s
battery begins to get weak, it may
take several pushes on the button to
lock or unlock the doors, and the
LED will get dim. Replace the
battery as soon as possible.
Battery type: CR2025
Panic mode allows you to remotely
activate your car’s horn and exterior
lights to attract attention. When
activated, the horn will sound, and
the exterior lights will f lash, f or
about 30 seconds. To activate panic
mode,pressandholdthePANIC
button f or about one second.
To cancel PANIC mode bef ore 30
seconds, press any button on the
remote transmitter. You can also
turn the ignition switch to
ACCESSORY (I) or ON (II).
Panic mode will not activate if the
ignition switch is in the
ACCESSORY (I) or ON (II) position.
Inst rument s and Cont rols
Keys and Locks
Replacing the Battery
Panic Mode
86
O Op pe
enn
C
Cl loo s
see R
RO
OU UNNDD
C
CO OV VE
ER
R
C
CU US SHH I
IOON N
R
RI INNG G
B
BA A T
TT
TE
ER
RY Y
Page 101 of 323
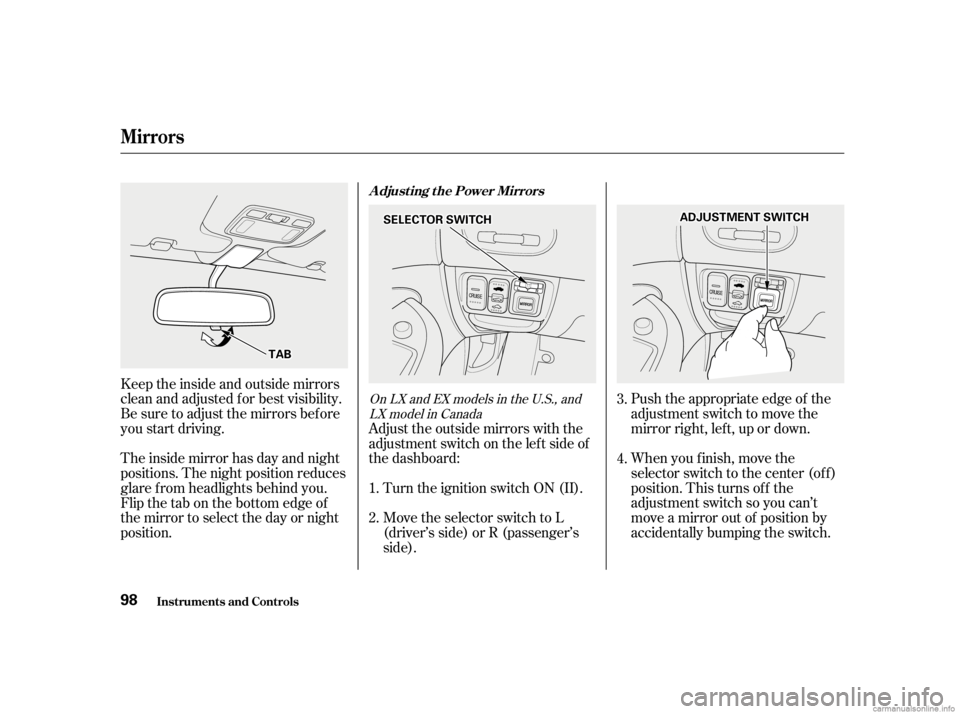
Push the appropriate edge of the
adjustment switch to move the
mirror right, lef t, up or down.
When you f inish, move the
selector switch to the center (off)
position. This turns of f the
adjustment switch so you can’t
move a mirror out of position by
accidentally bumping the switch.
Adjust the outside mirrors with the
adjustment switch on the lef t side of
the dashboard:
Turn the ignition switch ON (II).
Move the selector switch to L
(driver’s side) or R (passenger’s
side).
Keeptheinsideandoutsidemirrors
clean and adjusted f or best visibility.
Be sure to adjust the mirrors bef ore
you start driving.
The inside mirror has day and night
positions. The night position reduces
glare f rom headlights behind you.
Flip the tab on the bottom edge of
the mirror to select the day or night
position.
3.
4.
1.
2.OnLXandEXmodelsintheU.S.,and LX model in Canada
Inst rument s and Cont rols
Mirrors
Adjusting the Power Mirrors
98
S SE EL
LEE C
CT TO
OR R S
SWWI ITT C
CH H
T
T A
A B
B A
A
D
DJ
JUUS STTM
M E
EN
NT T S
SWWI ITT C
CH H
Page 106 of 323
The ceiling light has a three-position
switch. In the OFF position, the light
does not come on. In the center
position, the ceiling light comes on
when you open any door. In the ON
position, the ceiling light stays on
continuously.The ceiling light (with the switch in
the center position) comes on when
you remove the key f rom the ignition
switch. If you do not open a door, the
light stays on, then f ades out in
about 10 seconds.
Your car also has a f ront ceiling light
between the sun visors. The ceiling light (with the switch in
the center position) also comes on
when you unlock the door with the
key or the remote transmitter (see
page ).
85On EX model in U.S.
Ceiling L ight
Interior Lights
Inst rument s and Cont rols103
E EX
X
Page 107 of 323
Turn on the spotlight by pushing the
button next to each light. Push the
button again to turn it off. You can
use the spotlights at all times.Your car also has a courtesy light in
the ignition switch. This light comes
on when you open the driver’s door.
It remains on f or several seconds
af ter the door is closed.
Turn on the spotlight by pushing the
lens. Push the lens again to turn it
of f . You can use the spotlights at all
times.
On EX model in U.S.
On EX model in U.S.
On LX model in U.S. and Canada
Interior Lights
Spotlights Courtesy L ights
Inst rument s and Cont rols104
E EX
X L
LXX
Page 109 of 323
Proper use of the Heating and
Cooling system can make the
interior dry and comf ortable, and
keep the windows clear f or best
visibility.
If your car does not have air
conditioning, it can be installed at
any time. Your dealer can install a
Genuine Honda air conditioning
system that meets Honda’s high
quality standards and is designed to
exactly f it your car. Please contact
your dealer f or more inf ormation.
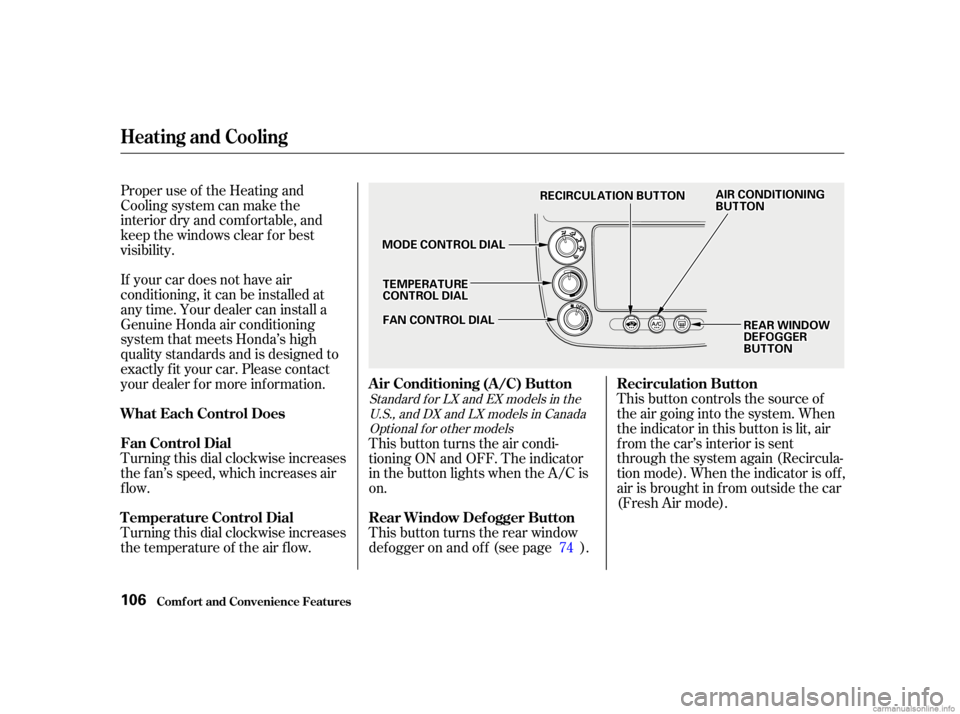
Turning this dial clockwise increases
the f an’s speed, which increases air
flow.This button controls the source of
the air going into the system. When
the indicator in this button is lit, air
from the car’s interior is sent
through the system again (Recircula-
tion mode). When the indicator is off,
air is brought in f rom outside the car
(Fresh Air mode).
Turning this dial clockwise increases
the temperature of the air flow. This button turns the air condi-
tioning ON and OFF. The indicator
in the button lights when the A/C is
on.
This button turns the rear window
def ogger on and of f (see page ).
74
Standard f or LX and EX models in the
U.S., and DX and LX models in CanadaOptional f or other models
Comf ort and Convenience Feat ures
Heating and Cooling
Recirculation Button
What Each Control Does
Fan Control Dial
T emperature Control Dial Air Conditioning (A/C) Button
Rear Window Def ogger Button
106
A A
I
IRR C
COON NDDI
ITT I
IOON NIINNG G
B
BU UT TT
TO
ON N
M
M O
ODDE
E C
COON NTTR
RO OL L D
DI
IAA L
L R
RE
EC
CI IRRC CUUL LAA T
TI
IOON N B
BUUT TT
TO
ON N
R
REEA
A R
R W
WI INND DO
OW W
D
D E
EF
FOOG GGGEER
R
B
BU UT TT
TO
ON N
F
FA
A N
N C
COON NTTR
RO OL L D
DI
IAA L
L
T
T
E
EM
M P
PE
ER
RA A T
TU
UR REE
C
CO ON NTTR
RO OL L D
DI
IAA L
L
Page 122 of 323
You can use the instrument panel
brightness control dial to adjust the il-
lumination of the audio system (see
page ). The audio system
illuminates when the parking lights
are on, even if the radio is turned of f .
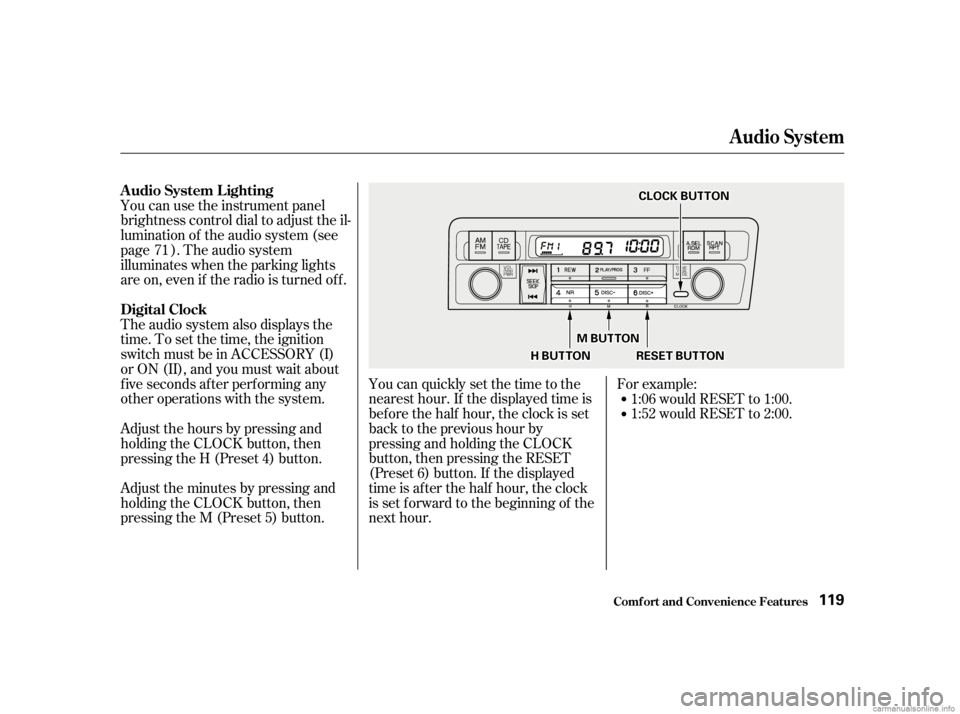
Theaudiosystemalsodisplaysthe
time. To set the time, the ignition
switch must be in ACCESSORY (I)
or ON (II), and you must wait about
f ive seconds af ter perf orming any
other operations with the system.You can quickly set the time to the
nearest hour. If the displayed time is
bef ore the half hour, the clock is set
back to the previous hour by
pressing and holding the CLOCK
button, then pressing the RESET
(Preset 6) button. If the displayed
time is af ter the half hour, the clock
is set forward to the beginning of the
next hour.For example:
1:06 would RESET to 1:00.
1:52 would RESET to 2:00.
Adjust the minutes by pressing and
holding the CLOCK button, then
pressing the M (Preset 5) button. Adjust the hours by pressing and
holding the CLOCK button, then
pressing the H (Preset 4) button. 71
Audio System
Comf ort and Convenience Feat ures
A udio System L ighting
Digital Clock
119
C CL
LOOC CKK B
BUUT TT
TO
ON N
R
RE ES
SE ET
T B
BUUT TT
TO
ON N
M
M
B
BUUT TT
TO
ON N
H
H B
BUUT TT
TO
ON N