2001 HONDA CIVIC COUPE fuel
[x] Cancel search: fuelPage 1 of 325

2001 Civic Coupe Online Reference Owner's Manual
Use these links (and links throughout this manual) to navigate through\
this reference.
For a printed owner's manual, click on authorized manuals or go to www.h\
elminc.com.
Contents
Owner's Identification Form
Introduction ........................................................................\
................................................................. i
A Few Words About Safety........................................................................\
........................................ .ii
Your Vehicle at a Glance........................................................................\
............................................ .2
Driver and Passenger Safety ........................................................................\
......................................5
Proper use and care of your vehicle's seat belts, and Supplemental Restr\
aint System.
Instruments and Controls........................................................................\
........................................ .57
Instrume nt panel indicator and gauge, and how to use dashboard and steering colu\
mn controls.
Comfort and Convenience Features ........................................................................\
..................... .107
How to operate the climate control system, the audio system, and other c\
onvenience features.
Before Driving........................................................................\
..........................................................161
What gasoline to use, how to break -in your new vehicle, and how to load luggage and other cargo.
Driving ........................................................................\
..................................................................... .175
The proper way to start the engine, shift the transmission, and park, pl\
us towing a trailer.
Maintenance........................................................................\
.............................................................195
The Maintenance Schedule shows you when you need to take you r vehicle to the dealer.
Appearance Care........................................................................\
..................................................... .255
Tips on cleaning and protecting your vehicle. Things to look for if your\
vehicle ever needs body repairs.
Taking Care of the Unexpected........................................................................\
..............................263
This section covers several problems motorists sometimes experience, an d how to handle them.
Technical Information........................................................................\
............................................ .291
ID numbers, dimensions, capacities, and technical information.
Warranty and Customer Relations (U.S. and Canada)................................................................305
A summary of the warranties covering your new Acura, and how to contact \
us.
Authorized Manuals (U.S. only)........................................................................\
..............................311
How to order manuals and other technical literature.
Index........................................................................\
........................................................................\
...... I
Service Information Summary
A summary of information you need when you pull up to the fuel pump.
Page 60 of 325

This section gives inf ormation about
the controls and displays that
contribute to the daily operation of
your Honda. All the essential
controls are within easy reach............................
Control Locations .58
...............................
Indicator Lights .59
.............................................
Gauges .66
...............................
Speedometer .66
.................................
Tachometer .66 .....................................
Odometer .66
...................................
Trip Meter .67
..................................
Fuel Gauge .67
...................
Temperature Gauge . 68
Controls Near the Steering .......................................
Wheel .69
...................................
Headlights .70
............
Daytime Running Lights . 71
....
Instrument Panel Brightness . 71
................................
Turn Signals .72
.....................
Windshield Wipers .72
..................
Windshield Washers . 73
..........................
Hazard Warning .74
.............
Rear Window Def ogger . 74
......
Steering Wheel Adjustment . 75
...............
Steering Wheel Controls . 76
.............................
Cruise Control .76
...............................
Keys and Locks .79
..............................................
Keys .79
....................
Immobilizer System . 80
............................
Ignition Switch .82
..................................
Door Locks .83
......................
Power Door Locks .84
...................
Remote Transmitter . 85
...........................................
Trunk .88
........
Emergency Trunk Opener . 89............................
Seat Adjustments .90
.............
Front Seat Adjustments . 90
Driver’s Seat Height ..............................
Adjustment .91
................
Driver’s Seat Armrest . 91
........................
Rear Seat Access .91
..........................
Head Restraints .93
...........................
Folding Rear Seat .94
..............................
Power Windows .96
.........................................
Moonroof .98
.............................................
Mirrors .99
....
Adjusting the Power Mirrors . 99
...............................
Parking Brake .100
......................................
Glove Box .101
...........................
Beverage Holder .102
.................
Console Compartment . 102
........................................
Coin Box .103
...............................
Center Pocket .103
.............
Accessory Power Socket . 103
......................................
Coat Hook .104
.................................
Cargo Hooks .104
..................................
Cargo Net .104
...............................
Interior Lights .105
..............................
Ceiling Light .105
...................................
Spotlights .106
........................
Courtesy Lights .106
Instruments and Controls
Inst rument s and Cont rols57
Page 66 of 325

This light comes on with the high
beam headlights. See page for
inf ormation on the headlight
controls.
This lights when you set the cruise
control. See page f or inf ormation
on operating the cruise control. On Canadian models, this indicator
comes on with reduced brightness
when the Daytime Running Lights
(DRL) are on (see page ).
See page .
The lef t or right turn signal light
blinks when you signal a lane change
or turn. If the light does not blink or
blinks rapidly, it usually means one
of the turn signal bulbs is burned out
(see page ). Replace the bulb as
soon as possible, since other drivers
cannot see that you are signalling. This light comes on if the trunk lid is
not closed tightly.
This light comes on as a reminder
that you must ref uel soon.
WhenyouturnontheHazard
Warning switch, both turn signal
lights blink. All turn signals on the
outside of the car should f lash. This light comes on when the
washer f luid level is low. Add washer
f luid when you see this light come on
(see page ).
70
71
76
280
248 219
Only on models equipped with CruiseControl System Canadian models only
CONT INUED
High Beam Indicator
Cruise Control Indicator
Malf unction Indicator
Lamp
Turn Signal and
Hazard Warning
Indicators Low Fuel Indicator
Washer Level Indicator Trunk-open Indicator
Indicator L ights
Inst rument s and Cont rols63
Page 70 of 325

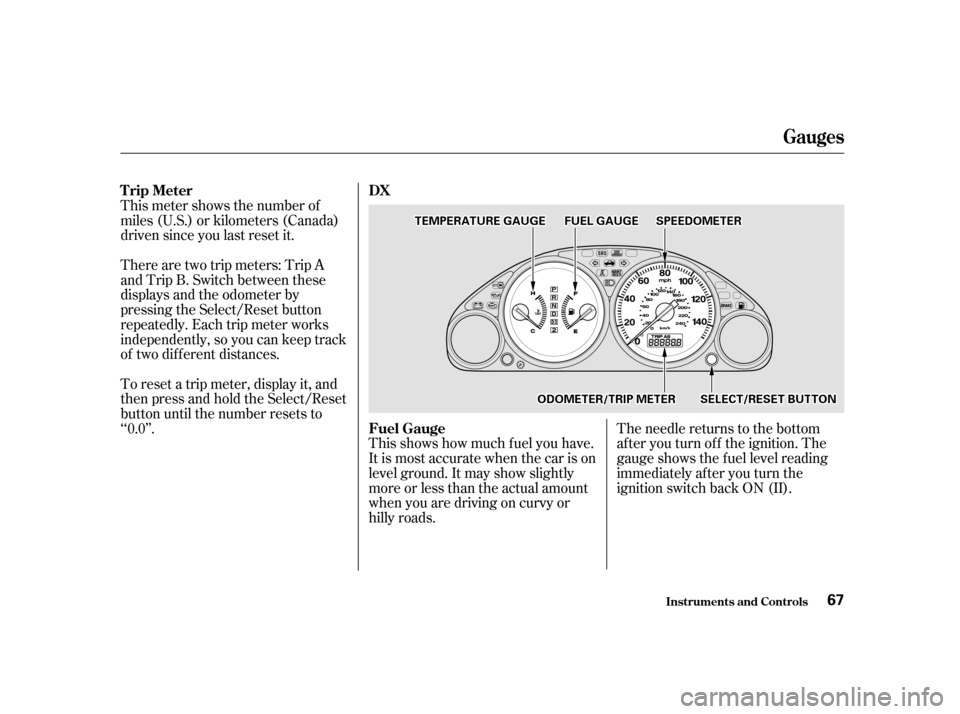
This shows how much f uel you have.
It is most accurate when the car is on
level ground. It may show slightly
more or less than the actual amount
whenyouaredrivingoncurvyor
hilly roads.The needle returns to the bottom
after you turn off the ignition. The
gauge shows the f uel level reading
immediately af ter you turn the
ignition switch back ON (II).
This meter shows the number of
miles (U.S.) or kilometers (Canada)
driven since you last reset it.
To reset a trip meter, display it, and
then press and hold the Select/Reset
button until the number resets to
‘‘0.0’’. There are two trip meters: Trip A
and Trip B. Switch between these
displays and the odometer by
pressing the Select/Reset button
repeatedly. Each trip meter works
independently, so you can keep track
of two dif f erent distances.
Gauges
Inst rument s and Cont rols
Trip Meter
Fuel Gauge DX
67
F FUUE EL
L G
GAAU
UG GEE
T
T
E
EM
M P
PE
ER
RA A T
TU
UR REE G
GAAU
UG GEE
O
OD DO
OM M E
ET
TE
ER
R/ /T
T R
RI IPP M
M E
ET
TE
ER
R S
SEEL
LEE C
CT T/
/R
RE ES
SE ET
T B
BUUT TT
TO
ON N
S
SP
PE
EE
ED
D O
OM M E
ET
TE
ER
R
Page 164 of 325

Bef ore you begin driving your Honda,
youshouldknowwhatgasolineto
use, and how to check the levels of
important f luids. You also need to
know how to properly store luggage
or packages. The inf ormation in this
section will help you. If you plan to
add any accessories to your car,
please read the inf ormation in this
section f irst..............................
Break-in Period .162
.........................................
Gasoline .162
.........
Service Station Procedures . 163
................
Filling the Fuel Tank . 163
....................
Opening the Hood .164
...............................
Oil Check .166
.........
Engine Coolant Check . 167
...............................
Fuel Economy .168
.....................
Vehicle Condition .168
...........................
Driving Habits .168
...
Accessories and Modif ications . 169
.............................
Carrying Cargo .171
Bef ore Driving
Bef ore Driving161
Page 166 of 325

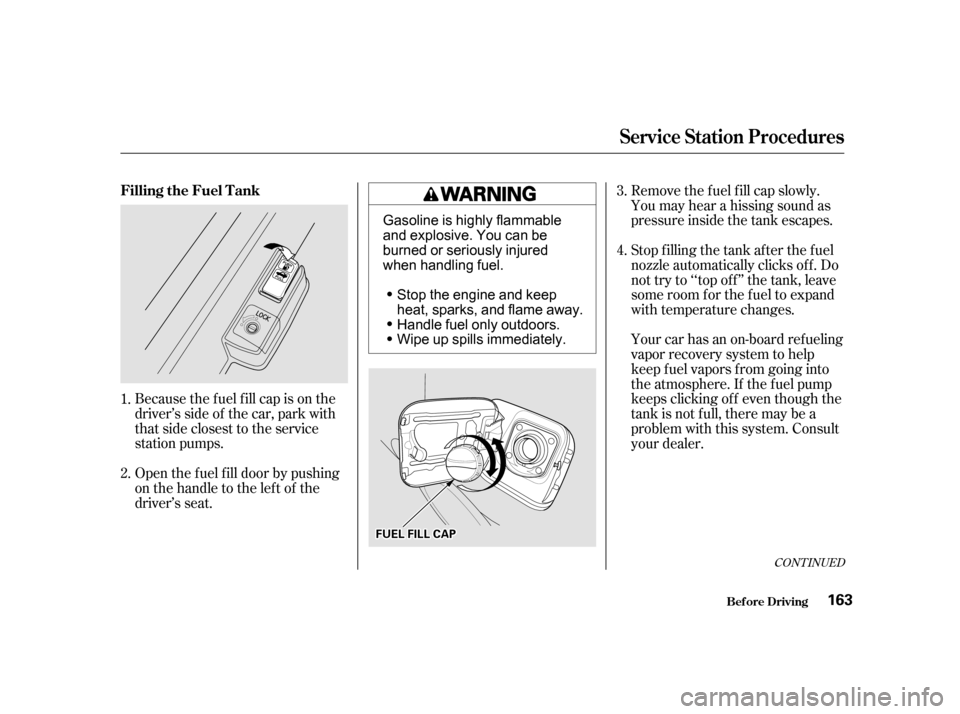
Removethefuelfillcapslowly.
You may hear a hissing sound as
pressure inside the tank escapes.
Because the f uel f ill cap is on the
driver’s side of the car, park with
that side closest to the service
station pumps. Your car has an on-board ref ueling
vapor recovery system to help
keep f uel vapors f rom going into
the atmosphere. If the fuel pump
keeps clicking of f even though the
tank is not f ull, there may be a
problem with this system. Consult
your dealer. Stop f illing the tank af ter the f uel
nozzle automatically clicks of f . Do
not try to ‘‘top off’’ the tank, leave
some room f or the f uel to expand
with temperature changes.
Open the f uel f ill door by pushing
onthehandletotheleftof the
driver’s seat.
1.
2. 3.
4.
CONT INUED
Filling the Fuel Tank
Service Station Procedures
Bef ore Driving163
F FU
UE EL
L F
FIILLL L C
CAA P
P
Gasoline is highly flammable
and explosive. You can be
burned or seriously injured
when handling fuel.
Stop the engine and keep
heat, sparks, and flame away.
Handle fuel only outdoors.
Wipe up spills immediately.
Page 171 of 325

A cold engine uses more f uel than a
warm engine. It is not necessary to
‘‘warm-up’’ a cold engine by letting it
idle f or a long time. You can drive
away in about a minute, no matter
how cold it is outside. The engine
will warm up f aster, and you get
better f uel economy. To cut down on
the number of ‘‘cold starts,’’ try to
combine several short trips into one.
You can improve f uel economy by
driving moderately. Rapid acceler-
ation, abrupt cornering, and hard
braking use more f uel.
Always drive in the highest gear that
allows the engine to run and acceler-
ate smoothly.
The air conditioning puts an extra
load on the engine which makes it
usemorefuel.Turnoff theA/Cto
cutdownonairconditioninguse.
Use the f low-through ventilation
when the outside air temperature is
moderate.
The condition of your car and your
driving habits are the two most
important things that affect the fuel
mileage you get.
Always maintain your car according
to the maintenance schedule. This
will keep it in top operating condition.
Depending on traf f ic conditions, try
to maintain a constant speed. Every
time you slow down and speed up,
your car uses extra f uel. Use the
cruise control, when appropriate, to
increase f uel economy.
An important part of that mainte-
nance is the
(see page ). For
example, an underinf lated tire
causes more ‘‘rolling resistance,’’
which uses f uel. It also wears out
f aster, so check the tire pressure at
least monthly.
In winter, the build-up of snow on
your car’s underside adds weight and
rolling resistance. Frequent cleaning
helps your f uel mileage and reduces
thechanceof corrosion. 207
Vehicle Condition
Driving Habits
Owner Maintenance
Checks
Bef ore Driving
Fuel Economy
168
Page 183 of 325

Your Honda’s transmission has f our
f orward speeds, and is electronically
controlled f or smoother shif ting. It
also has a ‘‘lock-up’’ torque converter
forbetterfueleconomy.Youmay
f eel what seems like another shif t
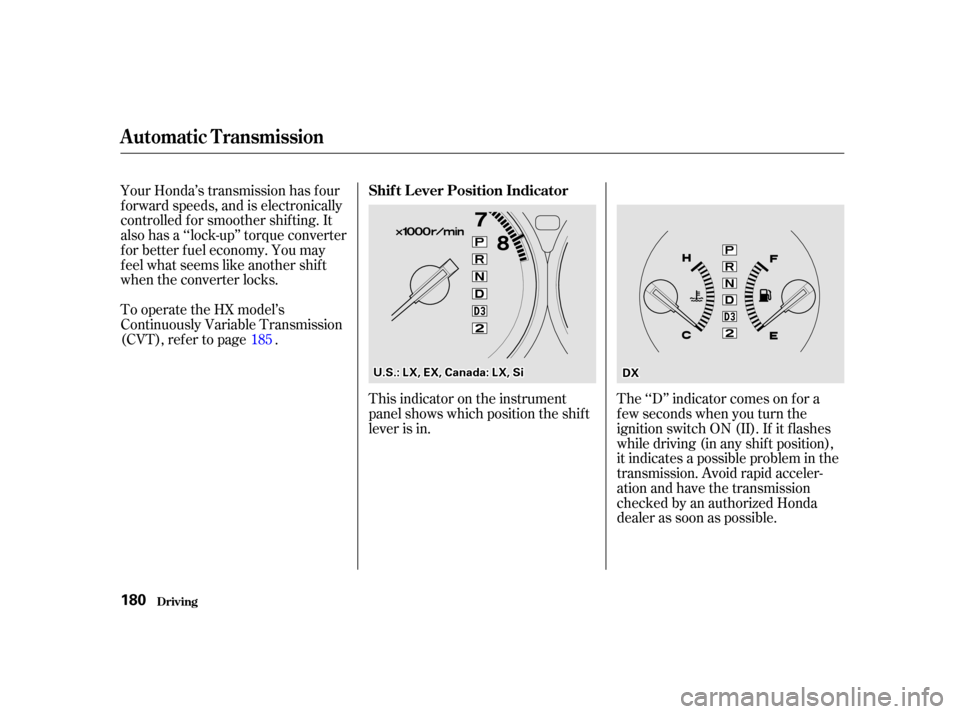
when the converter locks.This indicator on the instrument
panel shows which position the shif t
lever is in.The ‘‘D’’ indicator comes on f or a
f ew seconds when you turn the
ignition switch ON (II). If it f lashes
while driving (in any shif t position),
it indicates a possible problem in the
transmission. Avoid rapid acceler-
ation and have the transmission
checkedbyanauthorizedHonda
dealer as soon as possible.
To operate the HX model’s
Continuously Variable Transmission
(CVT), refer to page .
185
Automatic Transmission
Driving
Shif t L ever Position Indicator
180
U U..SS. .:: L
LX X ,
,E
E X
X ,
,C
Ca ann a
add a
a::L
LX X ,
,S
Si i
D
DX
X