Page 136 of 325

You can use the instrument panel
brightness control dial to adjust the il-
lumination of the audio system (see
page ). The audio system
illuminates when the parking lights
are on, even if the radio is turned of f .
The audio system usually shows the
time when the ignition switch is in
ACCESSORY (I) or ON (II). It
shows the operation mode of the
radio, cassette player, or optional CD
changer when you operate them,
then goes back to the time display
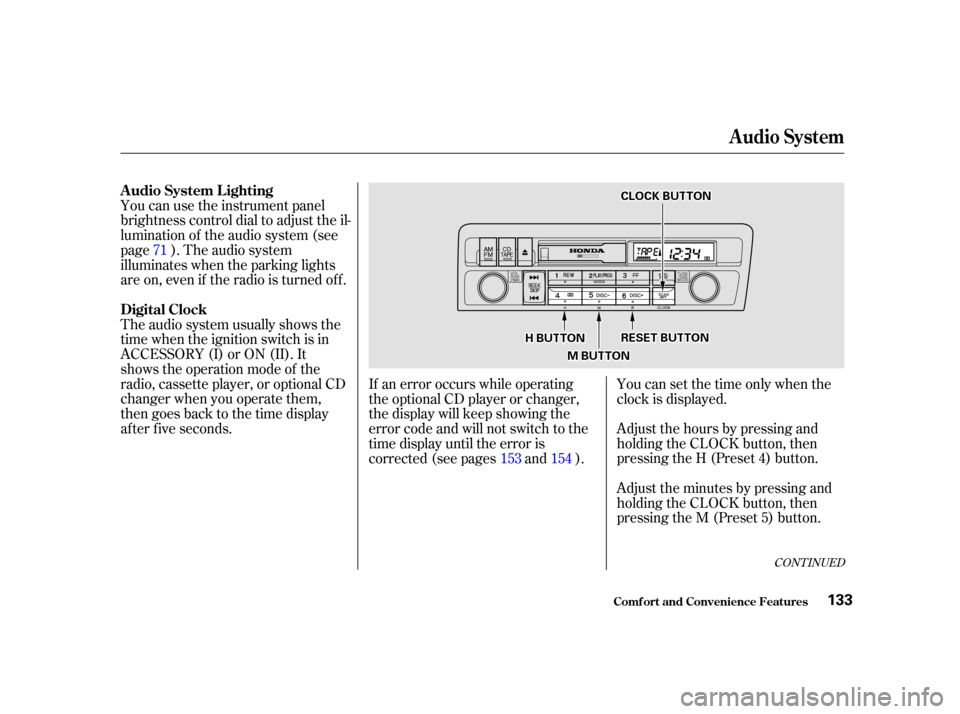
af ter f ive seconds.Adjust the hours by pressing and
holding the CLOCK button, then
pressing the H (Preset 4) button.
Adjust the minutes by pressing and
holding the CLOCK button, then
pressing the M (Preset 5) button. You can set the time only when the
clock is displayed.
If an error occurs while operating
the optional CD player or changer,
the display will keep showing the
error code and will not switch to the
time display until the error is
corrected (see pages and ).
71
154
153
CONT INUED
Audio System
Comf ort and Convenience Feat ures
A udio System L ighting
Digital Clock
133
C CL LOOC CKK B
BUUT TT
TO
ON N
R
RE ES
SE ET
T B
BUUT TT
TO
ON N
M
M B
BUUT TT
TO
ON N
H
H
B
BUUT TT
TO
ON N
Page 137 of 325

�Û
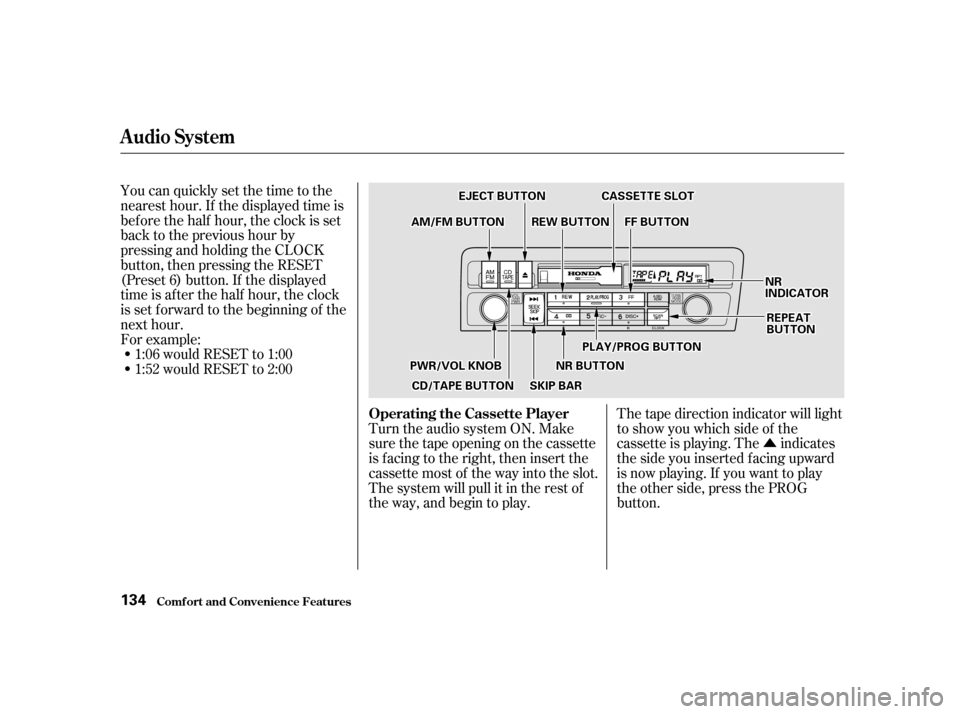
Turn the audio system ON. Make
sure the tape opening on the cassette
is f acing to the right, then insert the
cassette most of the way into the slot.
The system will pull it in the rest of
the way, and begin to play. The tape direction indicator will light
to show you which side of the
cassette is playing. The indicates
thesideyouinsertedfacingupward
is now playing. If you want to play
the other side, press the PROG
button.
You can quickly set the time to the
nearest hour. If the displayed time is
bef ore the half hour, the clock is set
back to the previous hour by
pressing and holding the CLOCK
button, then pressing the RESET
(Preset 6) button. If the displayed
time is af ter the half hour, the clock
is set forward to the beginning of the
next hour.
1:06 would RESET to 1:00
1:52 would RESET to 2:00
For example:
Operating the Cassette Player
Audio System
Comf ort and Convenience Feat ures134
R REEW
W B
BUUT TT
TO
ON N
E
E
J
JEE C
CT T B
BUUT TT
TO
ON N
A
A M
M /
/F
FM M B
BUUT TT
TO
ON N
R
REEP
PE
EA
A T
T
B
BU UT TT
TO
ON N
C
CA
A S
SSSEET
TT
TE
E S
SLLOOT T
N
NRR
I
IN ND DI
ICCA A T
TO
OR R
P
P L
LAA Y
Y//P
P R
RO OG G B
BUUT TT
TO
ON N
C
CD D /
/T
T A
A P
PE
E B
BUUT TT
TO
ON N
P
P
W
WR R//V
V O
OL L K
KNNO OBB
S
SKKIIPP B
BAA R
R
N
NR
R B
BUUT TT
TO
ON NF
FF
F B
BUUT TT
TO
ON N
Page 144 of 325

�µ�µ�µ
CONT INUED
Use the TUNE knob to
tune the radio to a desired f requency.
Turn the knob clockwise to tune to a
higher f requency, or
counterclockwise to tune to a lower
f requency. You can use any of f ive methods to
find radio stations on the selected
band: TUNE, SEEK, SCAN, AUTO
SELECT, and the Preset buttons.
To change the f requency rapidly,
press and hold the top or bottom of
theSEEKbar.Releasethebarwhen
the display reaches the desired
f requency. Depending on which part
of the bar you press, the system
scans upward or downward f rom the
current f requency. The SEEK f unction
searches the band for a station with
a strong signal. To activate it, press
and release the top or bottom of the
SEEK bar. Depending on which part
of the bar you press, the system
scans upward or downward f rom the
current f requency. It stops when it
finds a station with a strong signal. The SCAN f unction
samples all the stations with strong
signals on the selected band. To
activate it, press the SCAN button,
then release it. The system will scan
up the band for a station with a
strong signal. When it f inds one, it
will stop and play that station f or
approximately f ive seconds. If you do
nothing, the system will then scan
f or the next strong station and play
that f or f ive seconds. When it plays a
station that you want to continue
listening to, press the SCAN button
again.
Audio System
Comf ort and Convenience Feat ures
TUNE SEEK
SCA N
141
Page 148 of 325

You can use the instrument panel
brightness control dial to adjust the il-
lumination of the audio system (see
page ). The audio system
illuminates when the parking lights
are on, even if the radio is turned of f .
The display of your audio system
usually shows the time when the
ignition switch is in ACCESSORY (I)
or ON (II). It shows the operation
mode of the radio, CD player, or
optional CD changer/cassette player
when you operate them, and goes
back to the time display after five
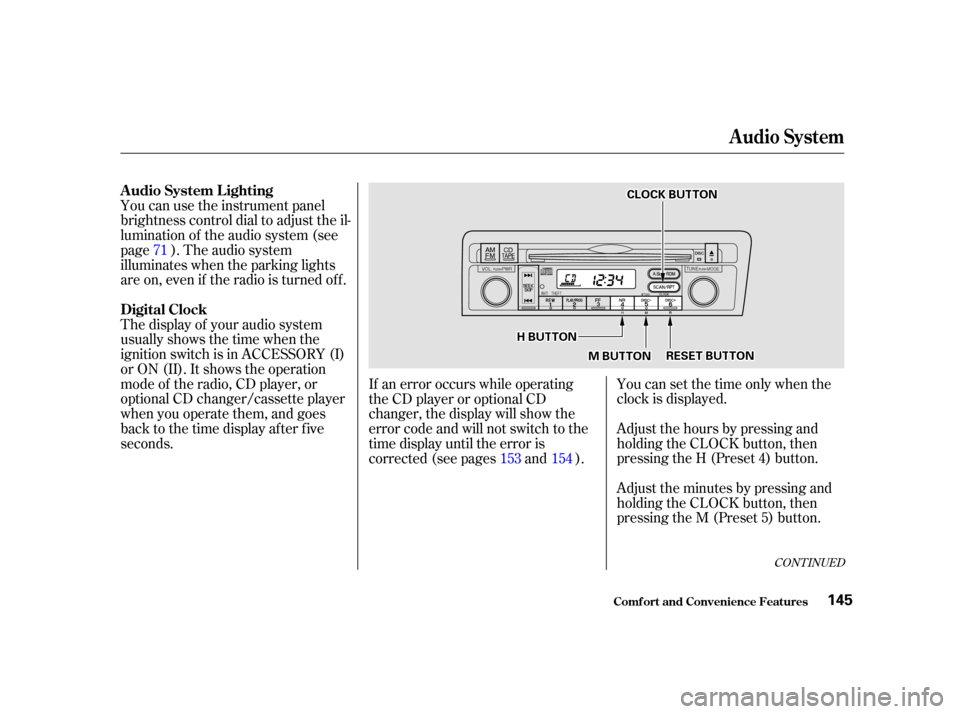
seconds.You can set the time only when the
clock is displayed.
Adjust the hours by pressing and
holding the CLOCK button, then
pressing the H (Preset 4) button.
Adjust the minutes by pressing and
holding the CLOCK button, then
pressing the M (Preset 5) button.
If an error occurs while operating
the CD player or optional CD
changer, the display will show the
error code and will not switch to the
time display until the error is
corrected (see pages and ).
71
153 154
CONT INUED
A udio System L ighting
Digital Clock
Audio System
Comf ort and Convenience Feat ures145
C CLLOOC CKK B
BUUT TT
TO
ON N
M
M B
BUUT TT
TO
ON N R
RE
ES
SE ET
T B
BUUT TT
TO
ON N
H
H
B
BUUT TT
TO
ON N
Page 149 of 325

You can quickly set the time to the
nearest hour. If the displayed time is
bef ore the half hour, the clock is set
back to the previous hour by
pressing and holding the CLOCK
button, then pressing the RESET
(Preset 6) button. If the displayed
time is af ter the half hour, the clock
is set forward to the beginning of the
next hour.Your Honda’s radio can receive the
complete AM and FM bands.
Those bands cover these f requen-
cies:
AM band:
530 to 1,710 kilohertz
FM band:
87.7 to 107.9 megahertz
Radio stations on the AM band are
assigned f requencies at least ten
kilohertz apart (530, 540, 550).
Stations on the FM band are
assigned f requencies at least 0.2
megahertz apart (87.9, 88.1, 88.3).Stations must use these exact
f requencies. It is f airly common f or
stations to round-of f the f requency in
their advertising, so your radio could
display a f requency of 100.9 even
though the announcer may identif y
the station as ‘‘FM101.’’
1:06 would RESET to 1:00.
1:52 would RESET to 2:00.
For example:
Audio System
Comf ort and Convenience Feat ures
Radio Frequencies
146
Page 217 of 325
Remove the radiator cap by
pushing down and turning
counterclockwise. Turn the radiator cap counter-
clockwise, without pressing down
on it, until it stops. This relieves
any pressure remaining in the
cooling system.Pour coolant into the reserve tank.
Fill it to half way between the MAX
and MIN marks. Put the cap back
on the reserve tank. Put the radiator cap back on.
Tighten it f ully. The coolant level should be up to
the base of the f iller neck. Add
coolant if it is low.Do not add any rust inhibitors or
other additives to your car’s cooling
system. They may not be compatible
with the coolant or engine compo-
nents.
2.
3. 4.
5.
6.
Cooling Syst em
Maint enance214
R RA
A D
DI
IAA T
TO
OR R C
CAA P
P R
RE
ES
SE ER
RV V E
E T
TA
A N
NK K
Page 230 of 325
The spark plugs in your car should
be replaced according to the time
and distance recommendations in
the maintenance schedule.Remove the cover by turning the
two clips one quarter turn
counterclockwise.
Clean up any dirt and oil that have
collected around the ignition coils.Use a wrench to remove the nut
holding the ignition coil. Remove
the ignition coil by pulling it
straight out.
Disconnect the wire connector
f rom the ignition coil by pushing
on the lock tab and pulling on the
connector. Pull on the plastic
connector, not the wires.
1.
2.
3.
4.
CONT INUED
Maint enance
Spark Plugs
Replacement
227
C CL
LIIPP S
S
Page 252 of 325
Use a f lat-tipped screwdriver to
remove the holding clip f rom the
inner f ender.
Pull the inner f ender cover back.Remove the socket from the
headlight assembly by turning it
one-quarter turn counterclockwise.
Pull the bulb straight out of its
socket.
Push the new bulb straight into
the socket until it bottoms.Insert the socket back into the
headlight assembly. Turn it
clockwise to lock it in place.
Testthelightstomakesurethe
new bulb is working.
Put the inner f ender cover in place.
Install the holding clip. Lock it in
placebypushingonthecenter.
3. 2. 4.
5.6.
7.
8.
Lights
Maint enance249
H H
O
OL LDD I
INNG G C
CLLIIPP