Page 289 of 394

6-
6-1
Section 6 Service and Appearance Care
Here you will find information about the care of your vehicle. This section begins with service and fuel information,
and then it shows how to check important fluid and lubricant levels. There is also technical information about your
vehicle, and a part devoted to its appearance care.
6
-2 Service
6
-3 Fuel
6
-5 Fuels in Foreign Countries
6
-5 Filling Your Tank
6
-7 Filling a Portable Fuel Container
6
-8 Checking Things Under the Hood
6
-10 Engine Oil
6
-15 Engine Air Cleaner/Filter
6
-17 Passenger Compartment Air Filter
6
-17 Automatic Transmission Fluid
6
-21 Rear Axle
6
-21 All-Wheel Drive
6
-24 Engine Coolant
6
-27 Coolant Surge Tank Pressure Cap
6
-28 Power Steering Fluid6
-29 Windshield Washer Fluid
6
-30 Brakes
6
-34 Battery
6
-35 Bulb Replacement
6
-39 Windshield Wiper Blade Replacement
6
-40 Tires
6
-48 Appearance Care
6
-49 Cleaning the Inside of Your Vehicle
6
-52 Cleaning the Outside of Your Vehicle
6
-56 GM Vehicle Care/Appearance Materials
6
-57 Vehicle Identification Number (VIN)
6
-58 Electrical System
6
-66 Replacement Bulbs
6
-66 Capacities and Specifications
6
-67 Normal Maintenance Replacement Parts
Page 296 of 394
6-8
Checking Things Under the Hood
CAUTION:
Things that burn can get on hot engine parts and
start a fire. These include liquids like fuel, oil,
coolant, brake fluid, windshield washer and other
fluids, and plastic or rubber. You or others could
be burned. Be careful not to drop or spill things
that will burn onto a hot engine.
Hood Release
To open the hood, first pull
the handle inside the vehicle
located under and to the left
of the steering wheel.Then go to the front of the vehicle and pull up on
the secondary hood release located near the center of
the grill.
Lift the hood.
Before closing the hood, be sure all filler caps are on
properly. Pull down the hood and close it firmly.
Page 309 of 394
6-21
Rear Axle
When to Check Lubricant
Refer to the Maintenance Schedule to determine how
often to check the lubricant. See ªScheduled
Maintenance Servicesº in the Index.
How to Check Lubricant
If the level is below the bottom of the filler plug hole,
you'll need to add some lubricant. Add enough lubricant
to raise the level to the bottom of the filler plug hole.
The proper level is from 5/8 inch to 1 5/8 inch (15 mm
to 40 mm) below the filler plug. Add only enough fluid
to reach the proper level.
What to Use
Refer to the Maintenance Schedule to determine what
kind of lubricant to use. See ªRecommended Fluids and
Lubricantsº in the Index.
All-Wheel Drive
Transfer Case
When to Check Lubricant
Refer to the Maintenance Schedule to determine how
often to check the lubricant. See ªPeriodic Maintenance
Inspectionsº in the Index.
Page 321 of 394

6-33 Brake Wear
Your vehicle has four-wheel disc brakes.
Disc brake pads have built
-in wear indicators that
make a high
-pitched warning sound when the brake
pads are worn and new pads are needed. The sound
may come and go or be heard all the time your vehicle
is moving (except when you are pushing on the brake
pedal firmly).
CAUTION:
The brake wear warning sound means that soon
your brakes won't work well. That could lead to
an accident. When you hear the brake wear
warning sound, have your vehicle serviced.
NOTICE:
Continuing to drive with worn-out brake pads
could result in costly brake repair.
Some driving conditions or climates may cause a brake
squeal when the brakes are first applied or lightly
applied. This does not mean something is wrong with
your brakes.
Properly torqued wheel nuts are necessary to help
prevent brake pulsation. When tires are rotated, inspect
brake pads for wear and evenly tighten wheel nuts in
the proper sequence to GM torque specifications.
Brake linings should always be replaced as complete
axle sets.
See ªBrake System Inspectionº in Section 7 of
this manual under Part C ªPeriodic
Maintenance Inspections.º
Brake Pedal Travel
See your dealer if the brake pedal does not return to
normal height, or if there is a rapid increase in pedal
travel. This could be a sign of brake trouble.
Brake Adjustment
Every time you make a brake stop, your disc brakes
adjust for wear.
Page 330 of 394

6-42 Tire Inspection and Rotation
Tires should be rotated every 6,000 to 8,000 miles
(10 000 to 13 000 km). Any time you notice unusual
wear, rotate your tires as soon as possible and check
wheel alignment. Also check for damaged tires or
wheels. See ªWhen It's Time for New Tiresº and
ªWheel Replacementº later in this section for more
information. Make sure the spare tire is stored securely.
Push, pull, and then try to rotate or turn the tire. If it
moves, use the wheel wrench to tighten the cable. See
ªStoring a Flat or Spare Tire and Toolsº in the Index.
The purpose of regular rotation is to achieve more
uniform wear for all tires on the vehicle. The first
rotation is the most important. See ªScheduled
Maintenance Servicesº in the Index for scheduled
rotation intervals.
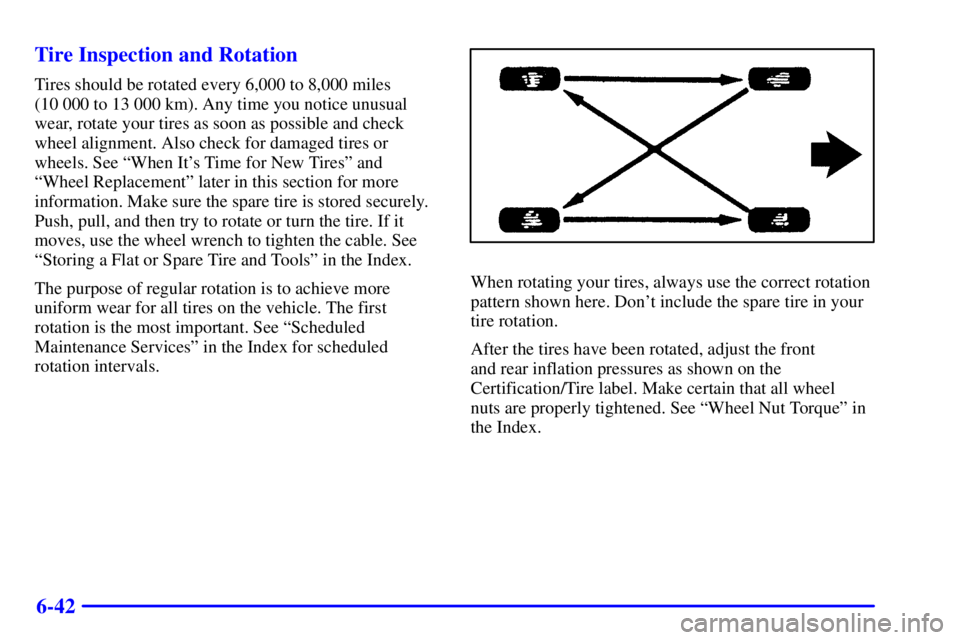
When rotating your tires, always use the correct rotation
pattern shown here. Don't include the spare tire in your
tire rotation.
After the tires have been rotated, adjust the front
and rear inflation pressures as shown on the
Certification/Tire label. Make certain that all wheel
nuts are properly tightened. See ªWheel Nut Torqueº in
the Index.
Page 331 of 394

6-43
CAUTION:
Rust or dirt on a wheel, or on the parts to which
it is fastened, can make wheel nuts become loose
after a time. The wheel could come off and cause
an accident. When you change a wheel, remove
any rust or dirt from places where the wheel
attaches to the vehicle. In an emergency, you can
use a cloth or a paper towel to do this; but be
sure to use a scraper or wire brush later, if you
need to, to get all the rust or dirt off. See
ªChanging a Flat Tireº in the Index.
When It's Time for New Tires
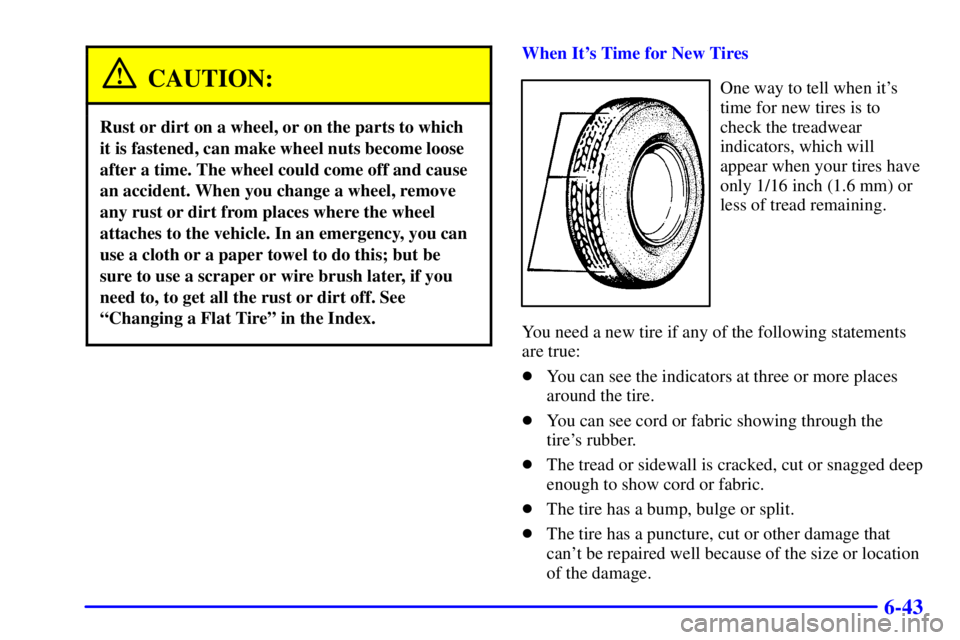
One way to tell when it's
time for new tires is to
check the treadwear
indicators, which will
appear when your tires have
only 1/16 inch (1.6 mm) or
less of tread remaining.
You need a new tire if any of the following statements
are true:
�You can see the indicators at three or more places
around the tire.
�You can see cord or fabric showing through the
tire's rubber.
�The tread or sidewall is cracked, cut or snagged deep
enough to show cord or fabric.
�The tire has a bump, bulge or split.
�The tire has a puncture, cut or other damage that
can't be repaired well because of the size or location
of the damage.
Page 332 of 394

6-44 Buying New Tires
To find out what kind and size of tires you need, look at
the Certification/Tire label.
The tires installed on your vehicle when it was new had
a Tire Performance Criteria Specification (TPC Spec)
number on each tire's sidewall. When you get new tires,
get ones with that same TPC Spec number. That way
your vehicle will continue to have tires that are designed
to give proper endurance, handling, speed rating,
traction, ride and other things during normal service on
your vehicle. If your tires have an all
-season tread
design, the TPC number will be followed by an ªMSº
(for mud and snow).
If you ever replace your tires with those not having a
TPC Spec number, make sure they are the same
size, load range, speed rating and construction type
(bias, bias
-belted or radial) as your original tires.
CAUTION:
Mixing tires could cause you to lose control while
driving. If you mix tires of different sizes or types
(radial and bias
-belted tires), the vehicle may not
handle properly, and you could have a crash.
Using tires of different sizes may also cause
damage to your vehicle. Be sure to use the same
size and type tires on all wheels.
CAUTION:
If you use bias-ply tires on your vehicle, the
wheel rim flanges could develop cracks after
many miles of driving. A tire and/or wheel could
fail suddenly, causing a crash. Use only radial
-ply
tires with the wheels on your vehicle.
Page 334 of 394

6-46
Temperature -- A, B, C
The temperature grades are A (the highest), B, and C,
representing the tire's resistance to the generation of
heat and its ability to dissipate heat when tested under
controlled conditions on a specified indoor laboratory
test wheel. Sustained high temperature can cause the
material of the tire to degenerate and reduce tire life, and
excessive temperature can lead to sudden tire failure.
The grade C corresponds to a level of performance
which all passenger car tires must meet under the
Federal Motor Vehicle Safety Standard No. 109.
Grades B and A represent higher levels of performance
on the laboratory test wheel than the minimum required
by law.
Warning: The temperature grade for this tire is
established for a tire that is properly inflated and not
overloaded. Excessive speed, underinflation, or
excessive loading, either separately or in combination,
can cause heat buildup and possible tire failure.
Wheel Alignment and Tire Balance
The wheels on your vehicle were aligned and balanced
carefully at the factory to give you the longest tire life
and best overall performance.Scheduled wheel alignment and wheel balancing are not
needed. However, if you notice unusual tire wear or
your vehicle pulling one way or the other, the alignment
may need to be reset. If you notice your vehicle
vibrating when driving on a smooth road, your wheels
may need to be rebalanced.
Wheel Replacement
Replace any wheel that is bent, cracked, or badly rusted
or corroded. If wheel nuts keep coming loose, the wheel,
wheel bolts and wheel nuts should be replaced. If the
wheel leaks air, replace it (except some aluminum
wheels, which can sometimes be repaired). See your
dealer if any of these conditions exist.
Your dealer will know the kind of wheel you need.
Each new wheel should have the same load
-carrying
capacity, diameter, width, offset and be mounted the
same way as the one it replaces.
If you need to replace any of your wheels, wheel bolts
or wheel nuts, replace them only with new GM original
equipment parts. This way, you will be sure to have the
right wheel, wheel bolts and wheel nuts for your vehicle.