Page 6 of 394
iv
Fuel
Checking Fluids and Lubricants
GM Oil Life System™
Engine Air Cleaner/Filter
Passenger Compartment Air Filter
Brakes
Bulb ReplacementWindshield Wiper Blade Replacement
Tires and Wheels
Appearance Care
Electrical System/Fuses and Circuit Breakers
Capacities and Specifications
Normal Maintenance Replacement Parts
Table of Contents (cont'd)
Maintenance Schedule Service and Appearance Care
Section
7
Section
6
Scheduled Maintenance
Owner Checks and Services
Periodic Maintenance InspectionsRecommended Fluids and Lubricants
Maintenance Records
Page 228 of 394

4-27
CAUTION:
Driving through rushing water can be dangerous.
Deep water can sweep your vehicle downstream
and you and your passengers could drown. If it's
only shallow water, it can still wash away the
ground from under your tires, and you could lose
traction and roll the vehicle over. Don't drive
through rushing water.
See ªDriving Through Waterº in the Index for more
information on driving through water.
After Off-Road Driving
Remove any brush or debris that has collected on the
underbody, chassis or under the hood. These
accumulations can be a fire hazard.
After operation in mud or sand, have the brake linings
cleaned and checked. These substances can cause
glazing and uneven braking. Check the body structure,
steering, suspension, wheels, tires and exhaust system
for damage. Also, check the fuel lines and cooling
system for any leakage.Your vehicle will require more frequent service due to
off
-road use. Refer to the Maintenance Schedule for
additional information.
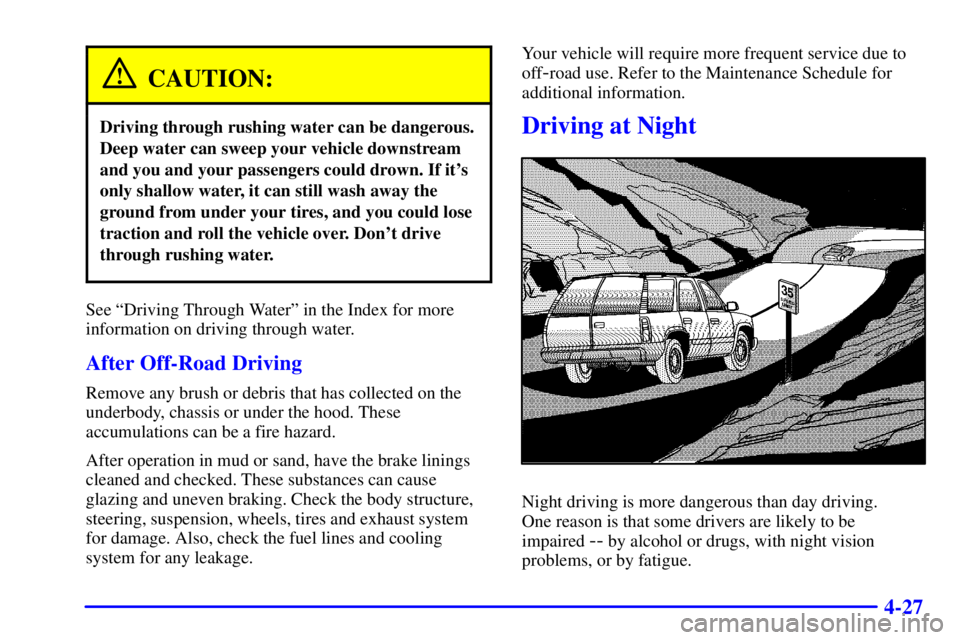
Driving at Night
Night driving is more dangerous than day driving.
One reason is that some drivers are likely to be
impaired
-- by alcohol or drugs, with night vision
problems, or by fatigue.
Page 253 of 394
4-52 Maintenance When Trailer Towing
Your vehicle will need service more often when you're
pulling a trailer. See the Maintenance Schedule for more
on this. Things that are especially important in trailer
operation are automatic transmission fluid (don't
overfill), engine oil, axle lubricant, belt, cooling system
and brake system. Each of these is covered in this
manual, and the Index will help you find them quickly.
If you're trailering, it's a good idea to review these
sections before you start your trip.
Check periodically to see that all hitch nuts and bolts
are tight.
Trailer Wiring Harness
Heavy-Duty Trailer Wiring Package
Your vehicle is equipped with the seven-wire trailer
towing harness. This harness with a seven
-pin universal
heavy
-duty trailer connector is attached to a bracket on
the platform hitch.
Page 304 of 394

6-16
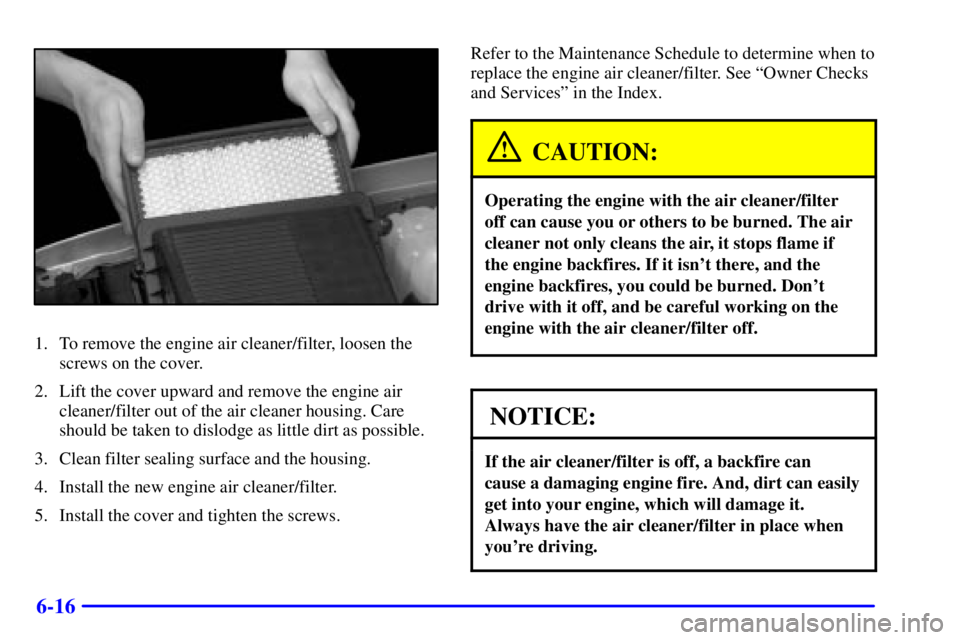
1. To remove the engine air cleaner/filter, loosen the
screws on the cover.
2. Lift the cover upward and remove the engine air
cleaner/filter out of the air cleaner housing. Care
should be taken to dislodge as little dirt as possible.
3. Clean filter sealing surface and the housing.
4. Install the new engine air cleaner/filter.
5. Install the cover and tighten the screws.Refer to the Maintenance Schedule to determine when to
replace the engine air cleaner/filter. See ªOwner Checks
and Servicesº in the Index.
CAUTION:
Operating the engine with the air cleaner/filter
off can cause you or others to be burned. The air
cleaner not only cleans the air, it stops flame if
the engine backfires. If it isn't there, and the
engine backfires, you could be burned. Don't
drive with it off, and be careful working on the
engine with the air cleaner/filter off.
NOTICE:
If the air cleaner/filter is off, a backfire can
cause a damaging engine fire. And, dirt can easily
get into your engine, which will damage it.
Always have the air cleaner/filter in place when
you're driving.
Page 305 of 394

6-17
Passenger Compartment Air Filter
The filter is located under the instrument panel below
the glove compartment.
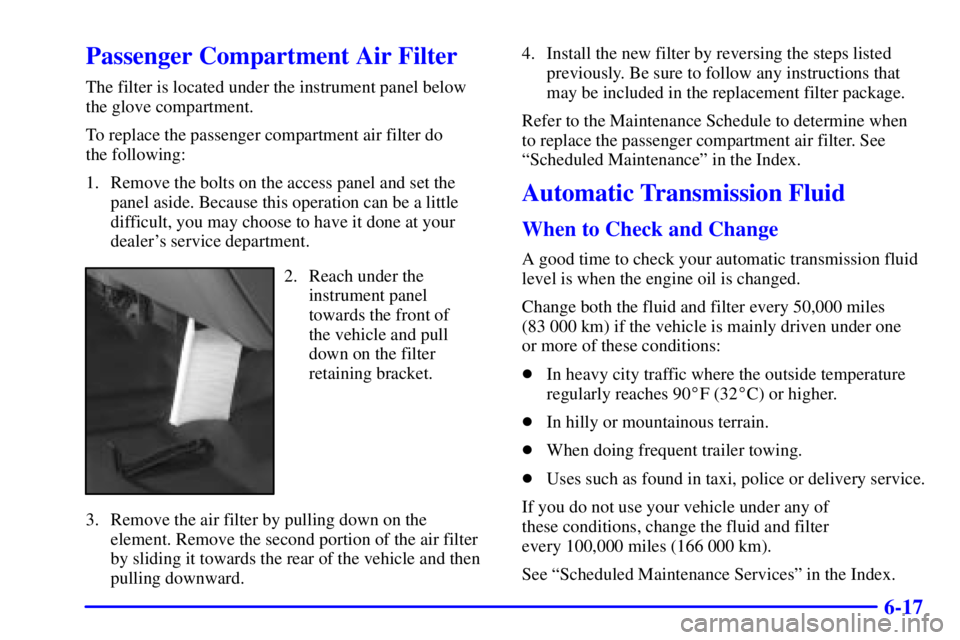
To replace the passenger compartment air filter do
the following:
1. Remove the bolts on the access panel and set the
panel aside. Because this operation can be a little
difficult, you may choose to have it done at your
dealer's service department.
2. Reach under the
instrument panel
towards the front of
the vehicle and pull
down on the filter
retaining bracket.
3. Remove the air filter by pulling down on the
element. Remove the second portion of the air filter
by sliding it towards the rear of the vehicle and then
pulling downward.4. Install the new filter by reversing the steps listed
previously. Be sure to follow any instructions that
may be included in the replacement filter package.
Refer to the Maintenance Schedule to determine when
to replace the passenger compartment air filter. See
ªScheduled Maintenanceº in the Index.
Automatic Transmission Fluid
When to Check and Change
A good time to check your automatic transmission fluid
level is when the engine oil is changed.
Change both the fluid and filter every 50,000 miles
(83 000 km) if the vehicle is mainly driven under one
or more of these conditions:
�In heavy city traffic where the outside temperature
regularly reaches 90�F (32�C) or higher.
�In hilly or mountainous terrain.
�When doing frequent trailer towing.
�Uses such as found in taxi, police or delivery service.
If you do not use your vehicle under any of
these conditions, change the fluid and filter
every 100,000 miles (166 000 km).
See ªScheduled Maintenance Servicesº in the Index.
Page 309 of 394
6-21
Rear Axle
When to Check Lubricant
Refer to the Maintenance Schedule to determine how
often to check the lubricant. See ªScheduled
Maintenance Servicesº in the Index.
How to Check Lubricant
If the level is below the bottom of the filler plug hole,
you'll need to add some lubricant. Add enough lubricant
to raise the level to the bottom of the filler plug hole.
The proper level is from 5/8 inch to 1 5/8 inch (15 mm
to 40 mm) below the filler plug. Add only enough fluid
to reach the proper level.
What to Use
Refer to the Maintenance Schedule to determine what
kind of lubricant to use. See ªRecommended Fluids and
Lubricantsº in the Index.
All-Wheel Drive
Transfer Case
When to Check Lubricant
Refer to the Maintenance Schedule to determine how
often to check the lubricant. See ªPeriodic Maintenance
Inspectionsº in the Index.
Page 310 of 394
6-22
How to Check Lubricant
Automatic Transfer Case
(A) Fill Plug (B) Drain Plug
If the level is below the bottom of the filler plug hole,
you'll need to add some lubricant. Add enough lubricant
to raise the level to the bottom of the filler plug hole.
Use care not to overtighten plug.What to Use
Refer to the Maintenance Schedule to determine what
kind of lubricant to use. See ªRecommended Fluids and
Lubricantsº in the Index.
Front Axle
When to Check and Change Lubricant
Refer to the Maintenance Schedule to determine how
often to check the lubricant and when to change it.
See ªScheduled Maintenance Servicesº in the Index.
Page 330 of 394

6-42 Tire Inspection and Rotation
Tires should be rotated every 6,000 to 8,000 miles
(10 000 to 13 000 km). Any time you notice unusual
wear, rotate your tires as soon as possible and check
wheel alignment. Also check for damaged tires or
wheels. See ªWhen It's Time for New Tiresº and
ªWheel Replacementº later in this section for more
information. Make sure the spare tire is stored securely.
Push, pull, and then try to rotate or turn the tire. If it
moves, use the wheel wrench to tighten the cable. See
ªStoring a Flat or Spare Tire and Toolsº in the Index.
The purpose of regular rotation is to achieve more
uniform wear for all tires on the vehicle. The first
rotation is the most important. See ªScheduled
Maintenance Servicesº in the Index for scheduled
rotation intervals.
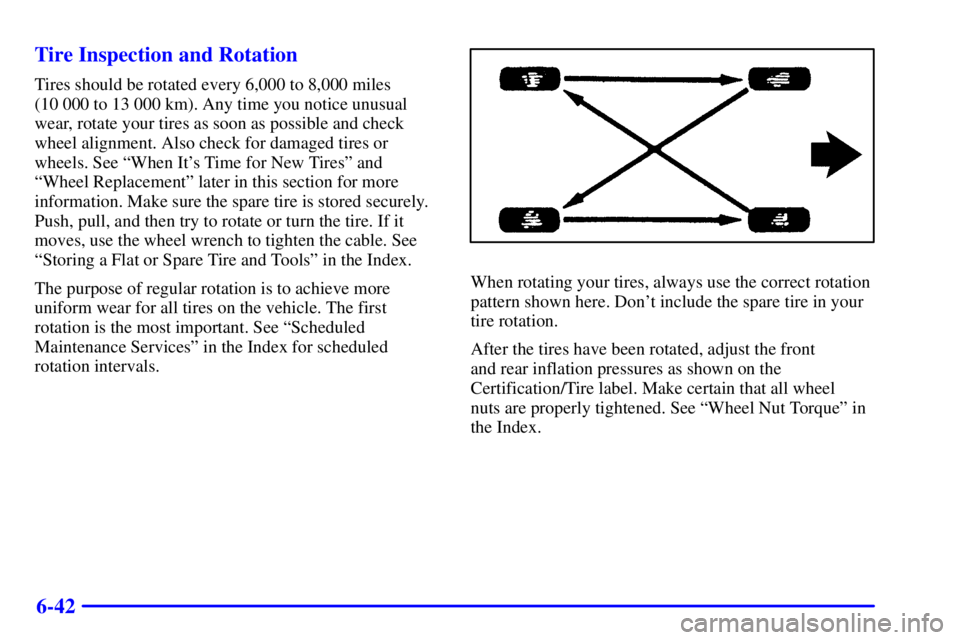
When rotating your tires, always use the correct rotation
pattern shown here. Don't include the spare tire in your
tire rotation.
After the tires have been rotated, adjust the front
and rear inflation pressures as shown on the
Certification/Tire label. Make certain that all wheel
nuts are properly tightened. See ªWheel Nut Torqueº in
the Index.