2-62
OnStar� System (If Equipped)
OnStar is a vehicle communications system that
offers a variety of services and provides a hands
-free
communication link between you and the OnStar Center.
A service subscription agreement and fee are required in
order to receive OnStar service. Services are available
24 hours a day, 7 days a week. For more information,
call 1
-888-ONSTAR-7 (1-888-667-8277).
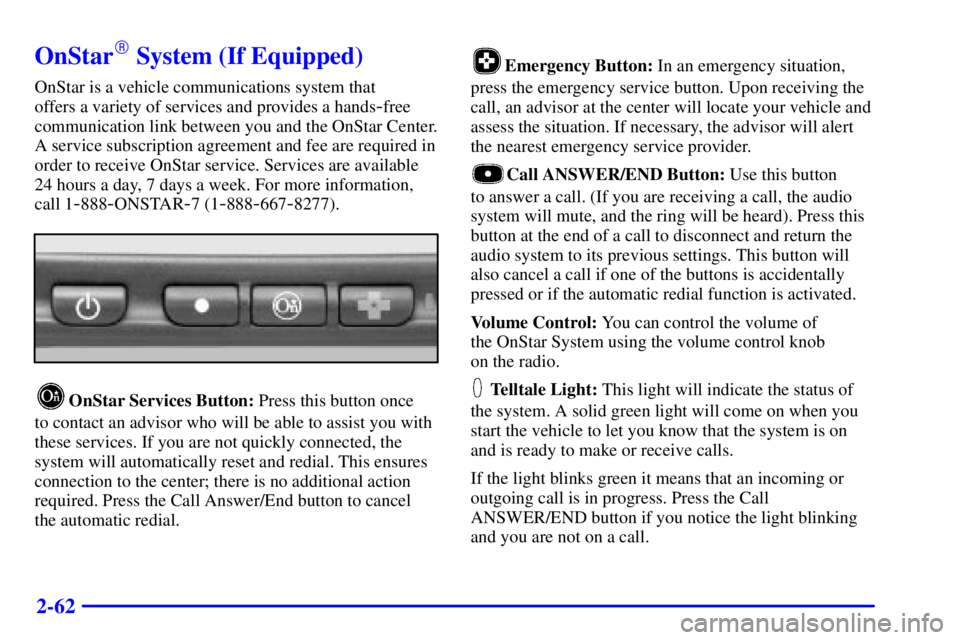
OnStar Services Button: Press this button once
to contact an advisor who will be able to assist you with
these services. If you are not quickly connected, the
system will automatically reset and redial. This ensures
connection to the center; there is no additional action
required. Press the Call Answer/End button to cancel
the automatic redial.
Emergency Button: In an emergency situation,
press the emergency service button. Upon receiving the
call, an advisor at the center will locate your vehicle and
assess the situation. If necessary, the advisor will alert
the nearest emergency service provider.
Call ANSWER/END Button: Use this button
to answer a call. (If you are receiving a call, the audio
system will mute, and the ring will be heard). Press this
button at the end of a call to disconnect and return the
audio system to its previous settings. This button will
also cancel a call if one of the buttons is accidentally
pressed or if the automatic redial function is activated.
Volume Control: You can control the volume of
the OnStar System using the volume control knob
on the radio.
Telltale Light: This light will indicate the status of
the system. A solid green light will come on when you
start the vehicle to let you know that the system is on
and is ready to make or receive calls.
If the light blinks green it means that an incoming or
outgoing call is in progress. Press the Call
ANSWER/END button if you notice the light blinking
and you are not on a call.
3-26
3. Press and hold the TAPE AUX button for
five seconds. The tape symbol on the display
will flash for two seconds.
4. Insert the scrubbing action cleaning cassette.
5. Eject the cleaning cassette after the manufacturer's
recommended cleaning time.
When the cleaning cassette has been ejected, the cut tape
detection feature is active again.
You may also choose a non
-scrubbing action, wet-type
cleaner which uses a cassette with a fabric belt to clean
the tape head. This type of cleaning cassette will not
eject on its own. A non
-scrubbing action cleaner may
not clean as thoroughly as the scrubbing type cleaner.
The use of a non
-scrubbing action, dry-type cleaning
cassette is not recommended.
After you clean the player, press and hold EJECT for
five seconds to reset the CLN indicator. The radio will
display
--- to show the indicator was reset.
Cassettes are subject to wear and the sound quality
may degrade over time. Always make sure the cassette
tape is in good condition before you have your tape
player serviced.
Care of Your Compact Discs
Handle discs carefully. Store them in their original cases
or other protective cases and away from direct sunlight
and dust. If the surface of a disc is soiled, dampen a
clean, soft cloth in a mild, neutral detergent solution
and clean it, wiping from the center to the edge.
Be sure never to touch the side without writing when
handling discs. Pick up discs by grasping the outer
edges or the edge of the hole and the outer edge.
Care of Your Compact Disc Player
The use of CD lens cleaner discs is not advised, due to
the risk of contaminating the lens of the CD optics with
lubricants internal to the CD mechanism.
Fixed Mast Antenna
The fixed mast antenna can withstand most car washes
without being damaged. If the mast should ever become
slightly bent, you can straighten it out by hand. If the
mast is badly bent, as it might be by vandals, you should
replace it.
Check every once in a while to be sure the mast is still
tightened to the fender. If tightening is required, tighten
by hand, then with a wrench one quarter turn.