Page 13 of 412
Service Station Guide
Oil Viscosity
Engine Oil
See Section 6*
Engine Oil Dipstick
See Section 6*
Fuel
See Section 6*
Cooling System
See Section 5*
Hood Release
See Section 6
Windshield Washer
Fluid
See Section 6
Spare Tire
See Section 5
Battery
See Section 6
Fuel Door
See Section 6*
Tire Pressure
See Section 6
For
a More
Detailed Look at
What's Under the Hood
See Section 6*
*For vehicles equipped with a diesel engine, see the Diesel Engine Supplement
Page 255 of 412

5-21 Removing the Spare Tire and Tools
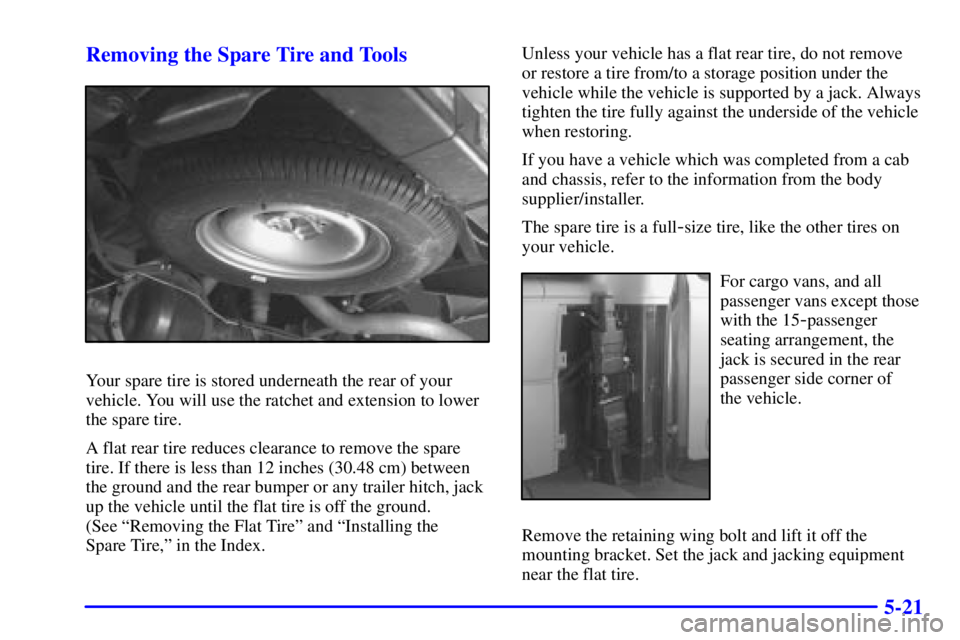
Your spare tire is stored underneath the rear of your
vehicle. You will use the ratchet and extension to lower
the spare tire.
A flat rear tire reduces clearance to remove the spare
tire. If there is less than 12 inches (30.48 cm) between
the ground and the rear bumper or any trailer hitch, jack
up the vehicle until the flat tire is off the ground.
(See ªRemoving the Flat Tireº and ªInstalling the
Spare Tire,º in the Index.Unless your vehicle has a flat rear tire, do not remove
or restore a tire from/to a storage position under the
vehicle while the vehicle is supported by a jack. Always
tighten the tire fully against the underside of the vehicle
when restoring.
If you have a vehicle which was completed from a cab
and chassis, refer to the information from the body
supplier/installer.
The spare tire is a full
-size tire, like the other tires on
your vehicle.
For cargo vans, and all
passenger vans except those
with the 15
-passenger
seating arrangement, the
jack is secured in the rear
passenger side corner of
the vehicle.
Remove the retaining wing bolt and lift it off the
mounting bracket. Set the jack and jacking equipment
near the flat tire.
Page 257 of 412
5-23
Turn the ratchet counterclockwise to lower the spare tire
to the ground. If you are changing a flat rear tire and the
vehicle is already jacked up, use the jack handle and
extension to hook the cable. Then pull the spare from
beneath the vehicle. If the retainer pulls out, hook the
inside of the wheel and pull the spare tire out from under
the vehicle.
When the tire has been lowered, tilt the retainer at the
end of the cable and pull it through the wheel opening.
NOTICE:
To help avoid vehicle damage, do not drive the
vehicle before the cable is restored.
Page 260 of 412
5-26
3. Remove the center cap.
Removing the Flat Tire and Installing the
Spare Tire
1. With the DOWN side facing you, use the ratchet and
socket to loosen all the wheel nuts. Don't remove
them yet.
Page 263 of 412
5-29
5. Raise the vehicle by turning the ratchet clockwise.
Make sure the UP mark faces you. Raise the vehicle
far enough off the ground so there is enough room
for the spare tire to fit.
6. Remove all the wheel
nuts, and take off the
flat tire.
7. Remove any rust or dirt
from the wheel bolts,
mounting surfaces and
spare wheel.
Page 266 of 412
5-32 Storing a Flat or Spare Tire and Tools
CAUTION:
Storing a jack, a tire or other equipment in the
passenger compartment of the vehicle could
cause injury. In a sudden stop or collision, loose
equipment could strike someone. Store all these
in the proper place.
1. Put the tire on the ground at the rear of the vehicle
with the valve stem pointed down.
2. Pull the retaining bar through the center of the
wheel, making sure it is properly attached.
Page 268 of 412
5-34
5. Put the flat end of the extension on an angle through
the hole in the rear door frame, above the bumper.
6. Raise the tire fully against the underside of the
vehicle. Continue turning the ratchet/wheel wrench
until the tire is secure and the cable is tight. The
spare tire hoist cannot be overtightened.
7. Make sure the tire is stored securely. Push, pull, and
then try to rotate or turn the tire. If the tire moves,
use the ratchet/wheel wrench to tighten the cable.
You will hear two ªclicksº when the tire is up all
the way.
Return the jacking equipment to the proper location.
Secure the items and replace the jack cover.
Page 311 of 412

6-42 Inflation -- Tire Pressure
The Certification/Tire label, which is on the rear edge of
the driver's door, shows the correct inflation pressures
for your tires when they're cold. ªColdº means your
vehicle has been sitting for at least three hours or driven
no more than 1 mile (1.6 km).
NOTICE:
Don't let anyone tell you that underinflation or
overinflation is all right. It's not. If your tires
don't have enough air (underinflation), you can
get the following:
�Too much flexing
�Too much heat
�Tire overloading
�Bad wear
�Bad handling
�Bad fuel economy.
NOTICE: (Continued)
NOTICE: (Continued)
If your tires have too much air (overinflation),
you can get the following:
�Unusual wear
�Bad handling
�Rough ride
�Needless damage from road hazards.
When to Check
Check your tires once a month or more. Also, check the
tire pressure of the spare tire.
How to Check
Use a good quality pocket
-type gage to check tire
pressure. You can't tell if your tires are properly inflated
simply by looking at them. Radial tires may look
properly inflated even when they're underinflated.
Be sure to put the valve caps back on the valve
stems. They help prevent leaks by keeping out
dirt and moisture.