Page 199 of 288
OPENING THE HOOD
1. Inside the vehicle, pull the hood
release handle located under the
bottom left corner of the instrument
panel.
2. Go to the front of the vehicle and
release the auxiliary latch located
under the right center of the hood.
Slide the handle to release the
auxiliary latch.
3. Lift the hood until the lift
cylinders hold it open.
HOOD
Maintenance and care
199
Page 201 of 288
ENGINE OIL
Checking the engine oil
Refer to the scheduled maintenance guide for the appropriate intervals
for checking the engine oil.
1. Make sure the vehicle is on level ground.
2. Turn the engine off and wait a few minutes for the oil to drain into the
oil pan.
3. Set the parking brake and ensure the gearshift is securely latched in P
(Park) (automatic transmission) or 1 (First) (manual transmission).
4. Open the hood. Protect yourself from engine heat.
5. Locate and carefully remove the
engine oil level indicator (dipstick).
6. Wipe the indicator clean. Insert the indicator fully, then remove it
again.
•If the oil level isbetween the MIN and MAX marks,the oil level is
acceptable.DO NOT ADD OIL.
MIN MAX
Maintenance and care
201
Page 237 of 288

Allow the vehicle to sit for at least eight hours without starting the
engine. Then, start the engine and complete the above driving cycle. The
engine must warm up to its normal operating temperature. Once started,
do not turn off the engine until the above driving cycle is complete.
BULBS
Replacing exterior bulbs
Check the operation of the following lamps frequently:
•Headlamps
•High-mount brakelamp
•Brakelamps
•Turn signals
•License plate lamp
•Tail lamps
•Back-up lamps
Do not remove lamp bulbs unless they can be replaced immediately with
new ones. If a bulb is removed for an extended period of time,
contaminants may enter the lamp housings and affect lamp performance.
Replacing headlamp bulbs (aerodynamic)
1. Make sure that the headlamp control is in the OFF position.
2. Open the hood.
3. Disconnect the electrical connector from the bulb by pulling rearward.
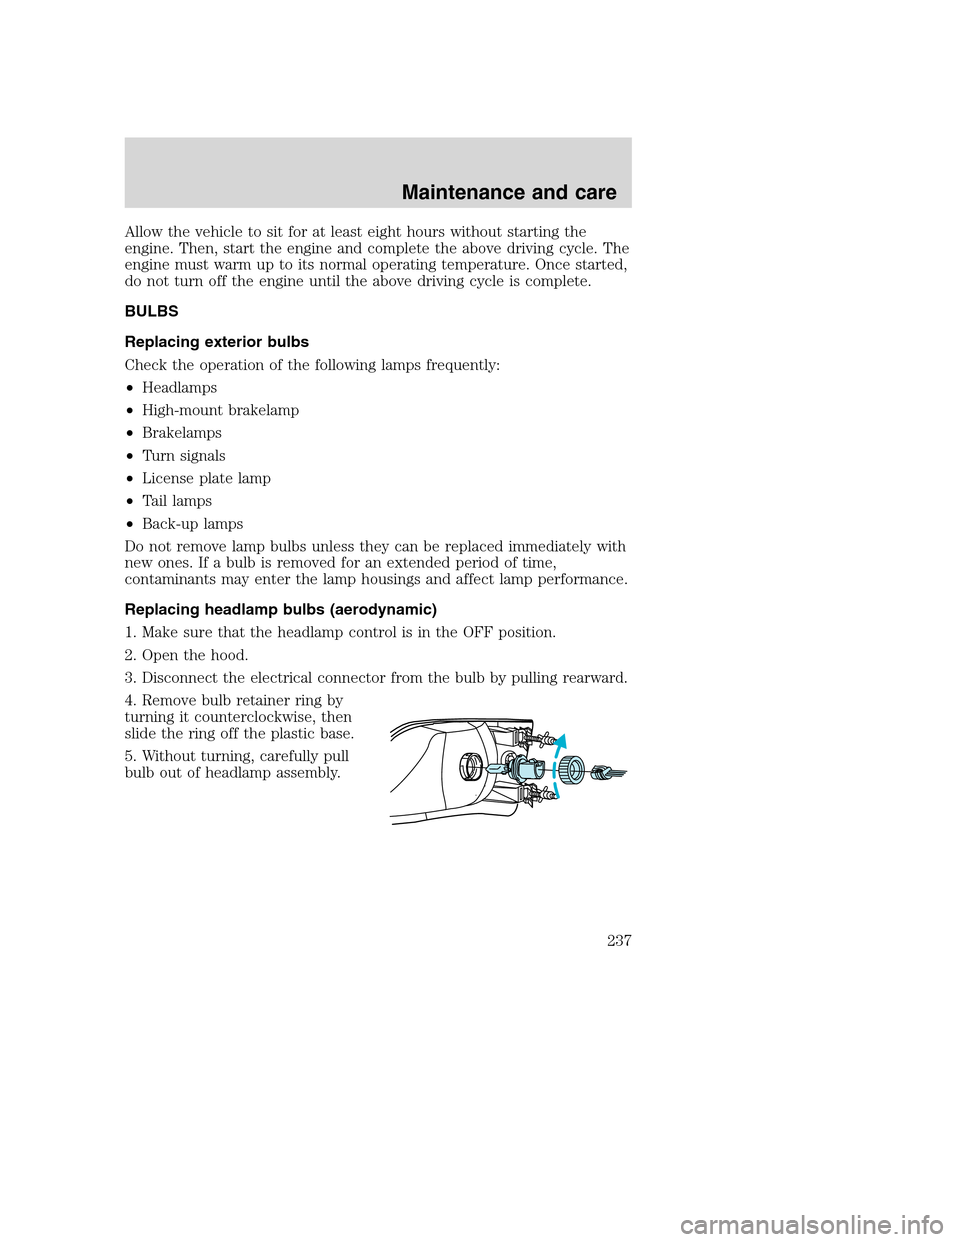
4. Remove bulb retainer ring by
turning it counterclockwise, then
slide the ring off the plastic base.
5. Without turning, carefully pull
bulb out of headlamp assembly.
Maintenance and care
237
Page 238 of 288

Handle a halogen headlamp bulb carefully and keep out of
children’s reach. Grasp the bulb only by its plastic base and do
not touch the glass. The oil from your hand could cause the bulb to
break the next time the headlamps are operated.
6. Insert the glass end of the new bulb into the headlamp assembly.
When the grooves in the plastic base are aligned, push the bulb into the
lamp assembly until the plastic base contacts the rear of the lamp
assembly.
7. Install bulb retaining ring over the plastic base and lock the ring into
the socket by turning it clockwise until you feel a “stop.”
8. Connect the electrical connector into the rear of the plastic base until
it “snaps.”
Replacing headlamp bulbs (sealed beam)
To remove the headlamp bulb:
1. Make sure headlamp switch is in OFF position.
2. Open the hood.
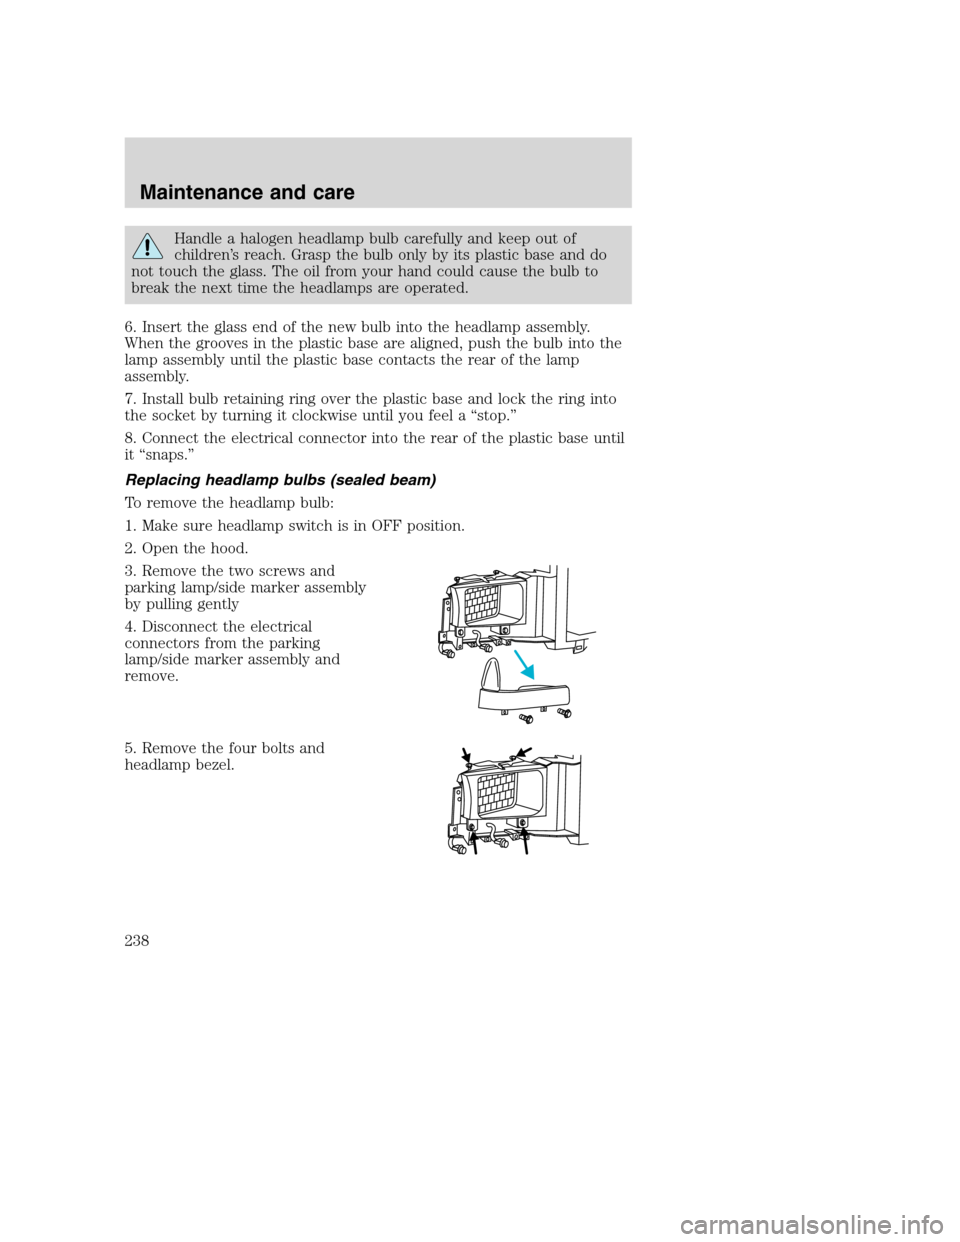
3. Remove the two screws and
parking lamp/side marker assembly
by pulling gently
4. Disconnect the electrical
connectors from the parking
lamp/side marker assembly and
remove.
5. Remove the four bolts and
headlamp bezel.
Maintenance and care
238
Page 239 of 288
6. Remove the four screws and the
headlamp retaining ring from
headlamp.
7. Disconnect the electrical
connector and remove headlamp.
To install the new headlamp, reverse the removal procedure.
Replacing front parking/turn signal bulbs
1. Make sure headlamp switch is in OFF position.
2. Open the hood.
3. Remove the two screws and
carefully disengage parking
lamp/turn signal assembly from the
vehicle.
4. Rotate bulb socket
counterclockwise about
1�4turn and
remove from lamp assembly.
Maintenance and care
239