Page 26 of 288

Foglamp control (if equipped)
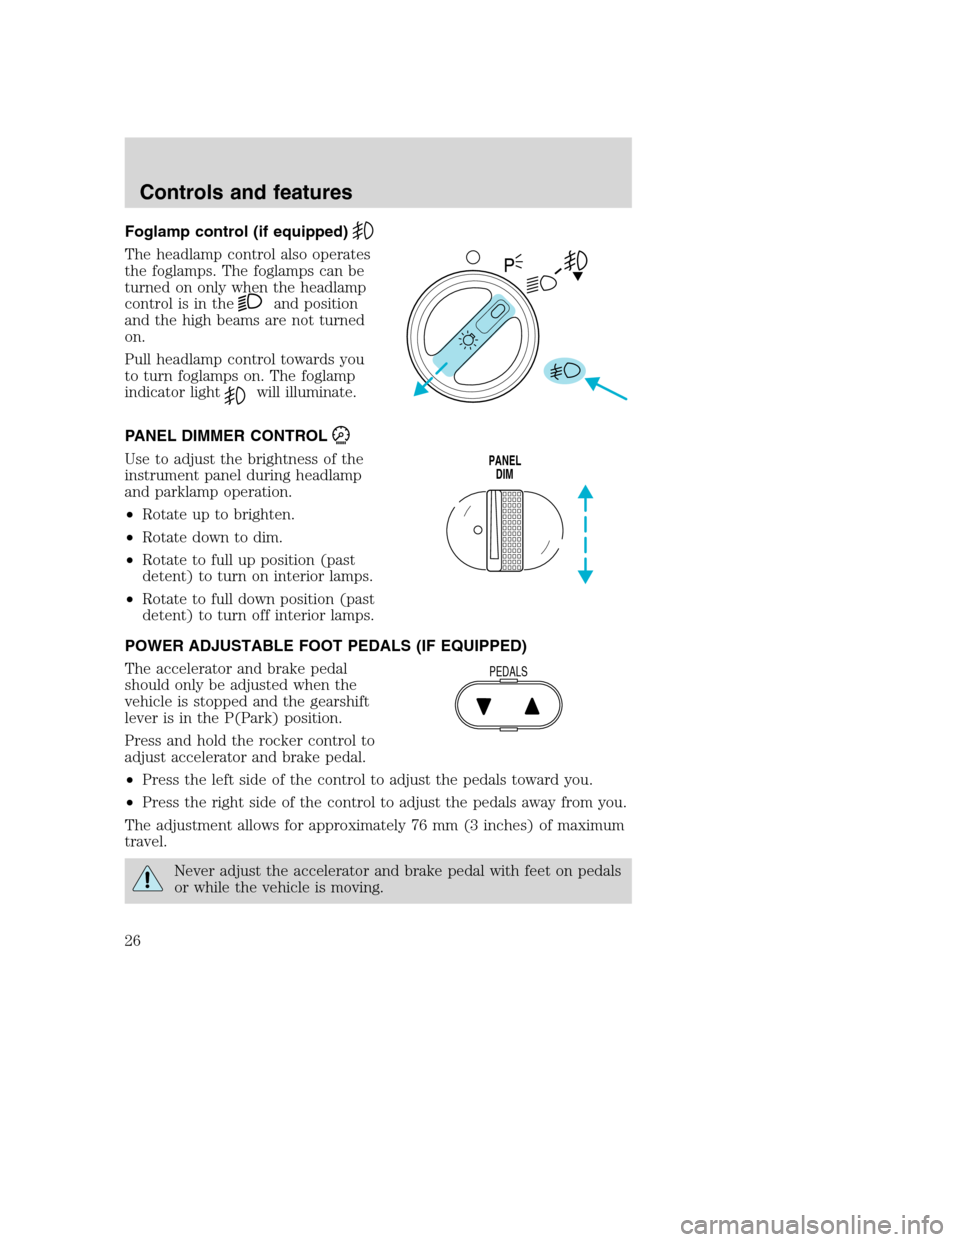
The headlamp control also operates
the foglamps. The foglamps can be
turned on only when the headlamp
control is in the
and position
and the high beams are not turned
on.
Pull headlamp control towards you
to turn foglamps on. The foglamp
indicator light
will illuminate.
PANEL DIMMER CONTROL
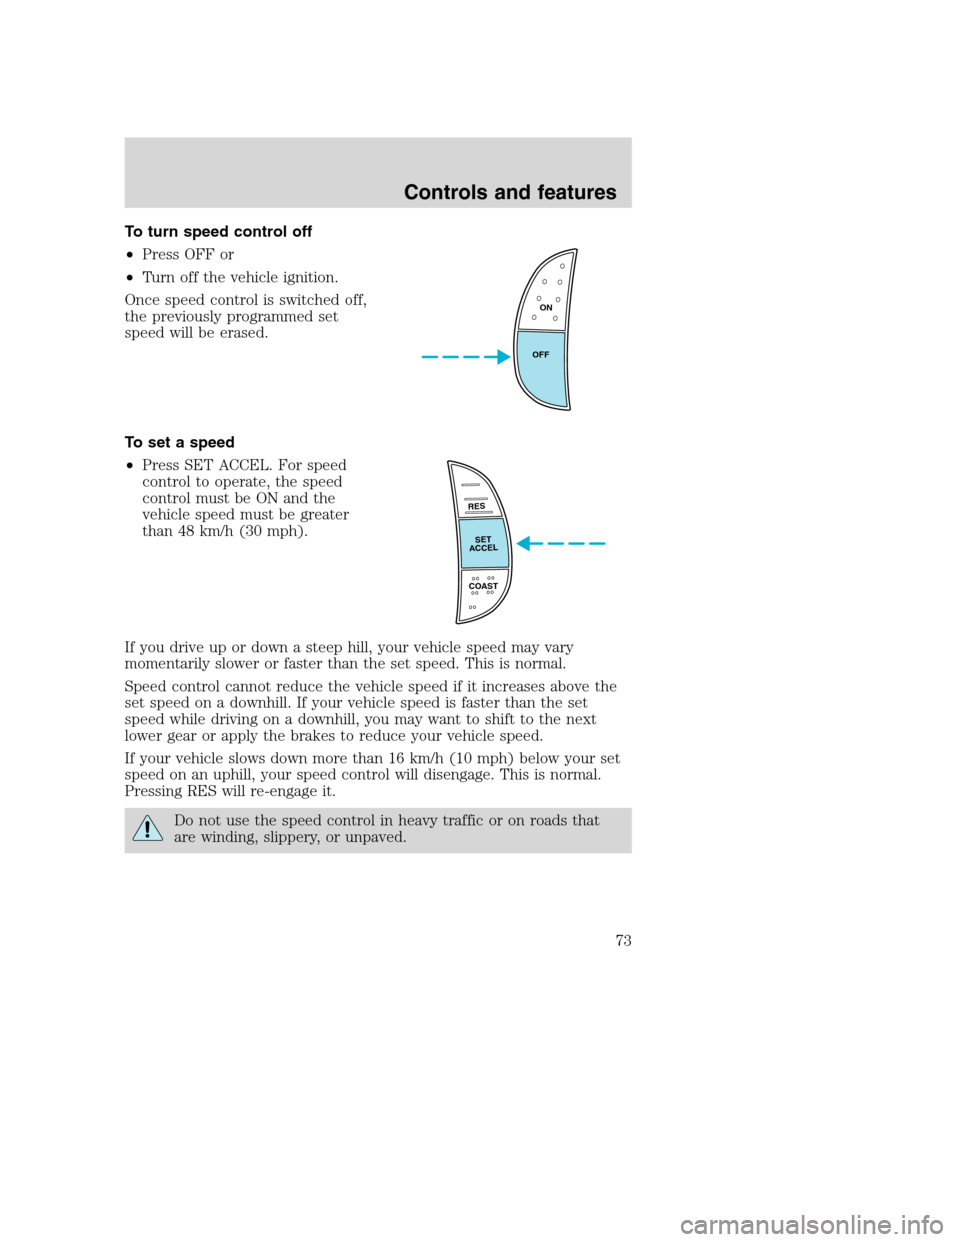
Use to adjust the brightness of the
instrument panel during headlamp
and parklamp operation.
•Rotate up to brighten.
•Rotate down to dim.
•Rotate to full up position (past
detent) to turn on interior lamps.
•Rotate to full down position (past
detent) to turn off interior lamps.
POWER ADJUSTABLE FOOT PEDALS (IF EQUIPPED)
The accelerator and brake pedal
should only be adjusted when the
vehicle is stopped and the gearshift
lever is in the P(Park) position.
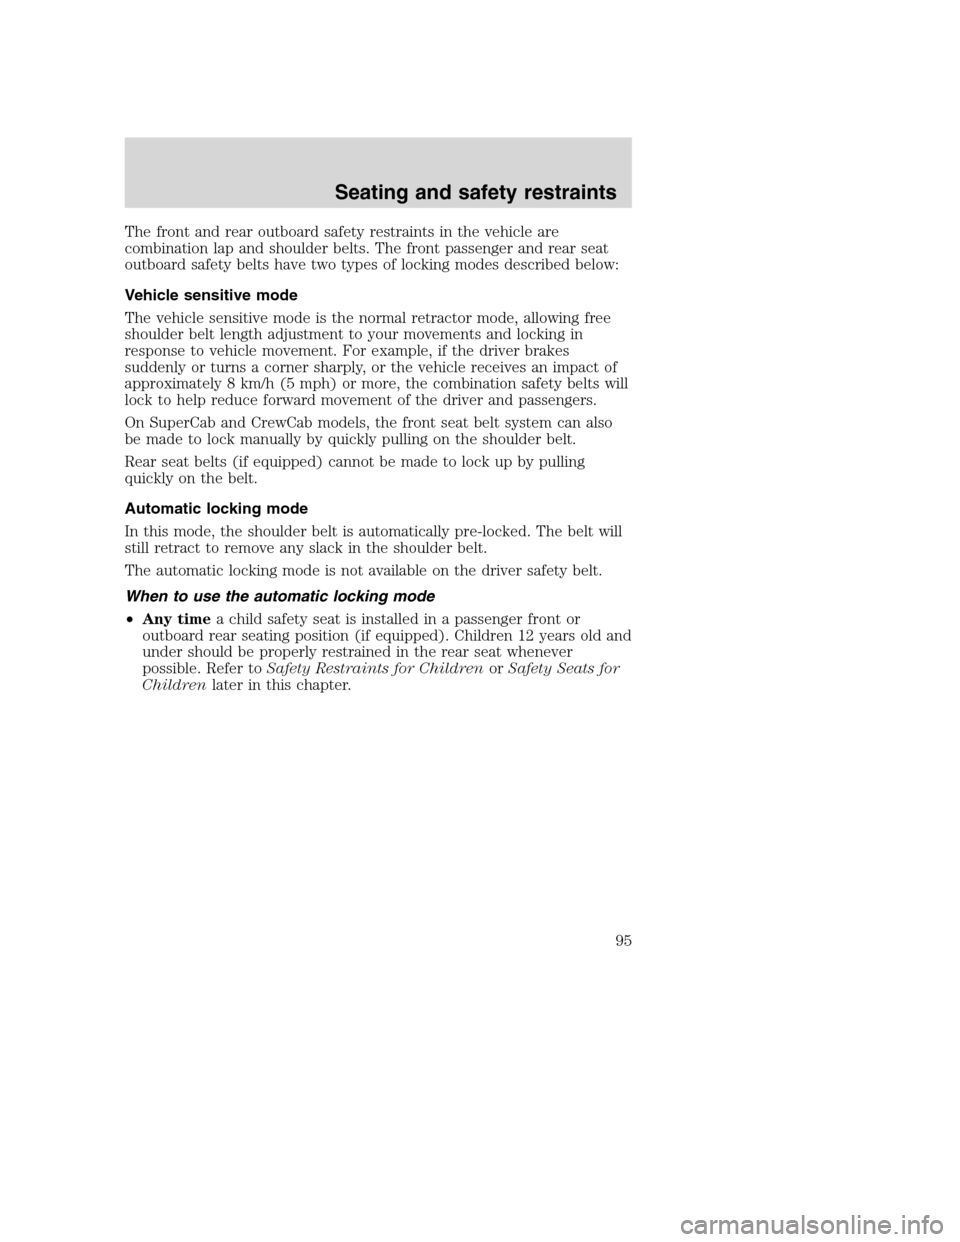
Press and hold the rocker control to
adjust accelerator and brake pedal.
•Press the left side of the control to adjust the pedals toward you.
•Press the right side of the control to adjust the pedals away from you.
The adjustment allows for approximately 76 mm (3 inches) of maximum
travel.
Never adjust the accelerator and brake pedal with feet on pedals
or while the vehicle is moving.
PANEL
DIM
PEDALS
Controls and features
26
Page 73 of 288

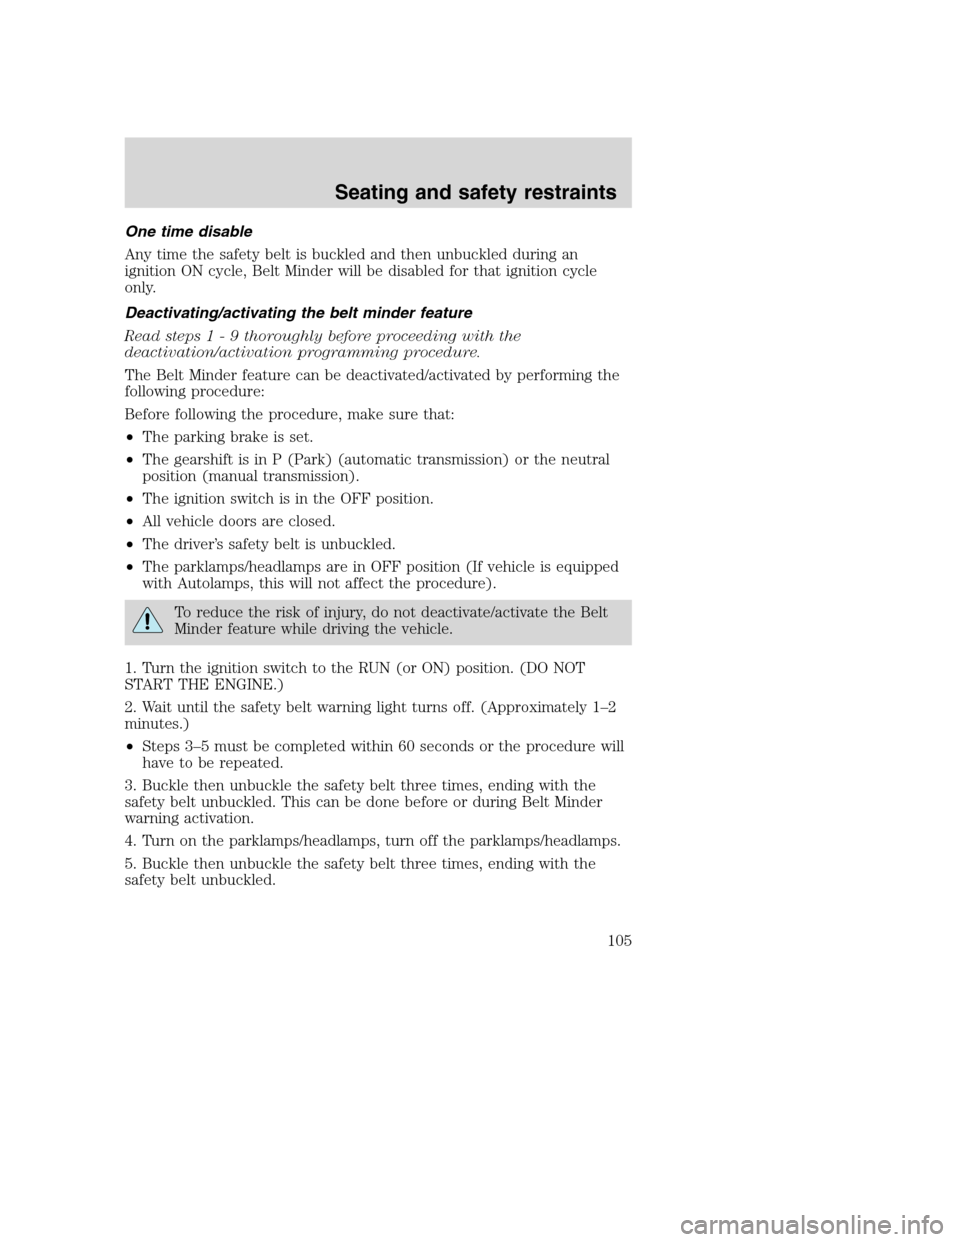
To turn speed control off
•Press OFF or
•Turn off the vehicle ignition.
Once speed control is switched off,
the previously programmed set
speed will be erased.
To set a speed
•Press SET ACCEL. For speed
control to operate, the speed
control must be ON and the
vehicle speed must be greater
than 48 km/h (30 mph).
If you drive up or down a steep hill, your vehicle speed may vary
momentarily slower or faster than the set speed. This is normal.
Speed control cannot reduce the vehicle speed if it increases above the
set speed on a downhill. If your vehicle speed is faster than the set
speed while driving on a downhill, you may want to shift to the next
lower gear or apply the brakes to reduce your vehicle speed.
If your vehicle slows down more than 16 km/h (10 mph) below your set
speed on an uphill, your speed control will disengage. This is normal.
Pressing RES will re-engage it.
Do not use the speed control in heavy traffic or on roads that
are winding, slippery, or unpaved.
ON
OFF
RES
SET
ACCEL
COAST
Controls and features
73
Page 74 of 288
To set a higher set speed
•Press and hold SET ACCEL.
Release the control when the
desired vehicle speed is reached
or
•Press and release SET ACCEL to
operate the Tap-Up function.
Each press will increase the set
speed by 1.6 km/h (1 mph) or
•Accelerate with your accelerator
pedal. When the desired vehicle
speed is reached, press and release SET ACCEL.
You can accelerate with the accelerator pedal at any time during speed
control usage. Releasing the accelerator pedal will return your vehicle to
the previously programmed set speed.
To set a lower set speed
•Press and hold COAST. Release
the control when the desired
speed is reached or
•Press and release COAST to
operate the Tap-Down function.
Each press will decrease the set
speed by 1.6 km/h (1 mph) or
•Depress the brake pedal. When
the desired vehicle speed is
reached, press SET ACCEL.
RES
SET
ACCEL
COAST
RES
SET
ACCEL
COAST
RES
SET
ACCEL
COAST
Controls and features
74
Page 75 of 288
To disengage speed control
•Depress the brake pedal or
•Depress the clutch pedal
(if equipped).
Disengaging the speed control will
not erase the previously
programmed set speed.
Pressing OFF will erase the
previously programmed set speed.
ON
OFF
Controls and features
75
Page 76 of 288
To return to a previously set speed
•Press RES. For RES to operate,
the vehicle speed must be faster
than 48 km/h (30 mph).
Indicator light
This light comes on when either the
SET ACCEL or RES controls are
pressed. The vehicle speed must be
at or above 48 km/h (30 mph). It turns off when the speed control OFF
control is pressed, the brake or clutch is applied, or the ignition is turned
to the OFF position.
RES
SET
ACCEL
COAST
CRUISE
Controls and features
76
Page 95 of 288

The front and rear outboard safety restraints in the vehicle are
combination lap and shoulder belts. The front passenger and rear seat
outboard safety belts have two types of locking modes described below:
Vehicle sensitive mode
The vehicle sensitive mode is the normal retractor mode, allowing free
shoulder belt length adjustment to your movements and locking in
response to vehicle movement. For example, if the driver brakes
suddenly or turns a corner sharply, or the vehicle receives an impact of
approximately 8 km/h (5 mph) or more, the combination safety belts will
lock to help reduce forward movement of the driver and passengers.
On SuperCab and CrewCab models, the front seat belt system can also
be made to lock manually by quickly pulling on the shoulder belt.
Rear seat belts (if equipped) cannot be made to lock up by pulling
quickly on the belt.
Automatic locking mode
In this mode, the shoulder belt is automatically pre-locked. The belt will
still retract to remove any slack in the shoulder belt.
The automatic locking mode is not available on the driver safety belt.
When to use the automatic locking mode
•Any timea child safety seat is installed in a passenger front or
outboard rear seating position (if equipped). Children 12 years old and
under should be properly restrained in the rear seat whenever
possible. Refer toSafety Restraints for ChildrenorSafety Seats for
Childrenlater in this chapter.
Seating and safety restraints
95
Page 105 of 288

One time disable
Any time the safety belt is buckled and then unbuckled during an
ignition ON cycle, Belt Minder will be disabled for that ignition cycle
only.
Deactivating/activating the belt minder feature
Read steps1-9thoroughly before proceeding with the
deactivation/activation programming procedure.
The Belt Minder feature can be deactivated/activated by performing the
following procedure:
Before following the procedure, make sure that:
•The parking brake is set.
•The gearshift is in P (Park) (automatic transmission) or the neutral
position (manual transmission).
•The ignition switch is in the OFF position.
•All vehicle doors are closed.
•The driver’s safety belt is unbuckled.
•The parklamps/headlamps are in OFF position (If vehicle is equipped
with Autolamps, this will not affect the procedure).
To reduce the risk of injury, do not deactivate/activate the Belt
Minder feature while driving the vehicle.
1. Turn the ignition switch to the RUN (or ON) position. (DO NOT
START THE ENGINE.)
2. Wait until the safety belt warning light turns off. (Approximately 1–2
minutes.)
•Steps 3–5 must be completed within 60 seconds or the procedure will
have to be repeated.
3. Buckle then unbuckle the safety belt three times, ending with the
safety belt unbuckled. This can be done before or during Belt Minder
warning activation.
4. Turn on the parklamps/headlamps, turn off the parklamps/headlamps.
5. Buckle then unbuckle the safety belt three times, ending with the
safety belt unbuckled.
Seating and safety restraints
105
Page 127 of 288
2. Make sure the headlamps and vehicle accessories are off.
If starting a vehicle with an automatic transmission:
•Make sure the parking brake is
set.
•Make sure the gearshift is in P (Park).
If starting a vehicle with a manual transmission:
•Make sure the parking brake is set.
•Push the clutch pedal to the
floor.
3. Turn the key to 4 (ON) without
turning the key to 5 (START).
If there is difficulty in turning the
key, firmly rotate the steering wheel
left and right until the key turns
freely. This condition may occur
when:
•front wheels are turned
•front wheel is against the curb
•steering wheel is turned when getting in or out of the vehicle
1
2
34
5
Starting
127