2001 FORD RANGER ignition
[x] Cancel search: ignitionPage 87 of 272

If your keys are lost or stolen you
will need to do the following:
²Use your spare key to start the
vehicle, or
²Have your vehicle towed to a
dealership or locksmith. The key
codes will need to be erased from
your vehicle and new key codes will need to be re-coded.
Replacing coded keys can be very costly and you may want to store an
extra programmed key away from the vehicle in a safe place to prevent
an unforeseen inconvenience.
The correctcoded keymust be used for your vehicle. The use of the
wrong type ofcoded keymay lead to a ªNO-STARTº condition.
If an unprogrammed key is used in the ignition it will cause a
ªNO STARTº condition.
Programming spare keys
A maximum of eight keys can be coded to your vehicle. Only
SecuriLockykeys can be used. To program acoded keyyourself, you
will need two previously programmedcoded keys(keys that already
operate your vehicle's engine) and the new unprogrammed key(s) readily
accessible for timely implementation of each step in the procedure.
If two previously programmed coded keys are not available, you must
bring your vehicle to your dealership to have the spare coded key(s)
programmed.
Please read and understand the entire procedure before you begin.
Controls and features
87
Page 88 of 272
1. Insert the first previously
programmedcoded keyinto the
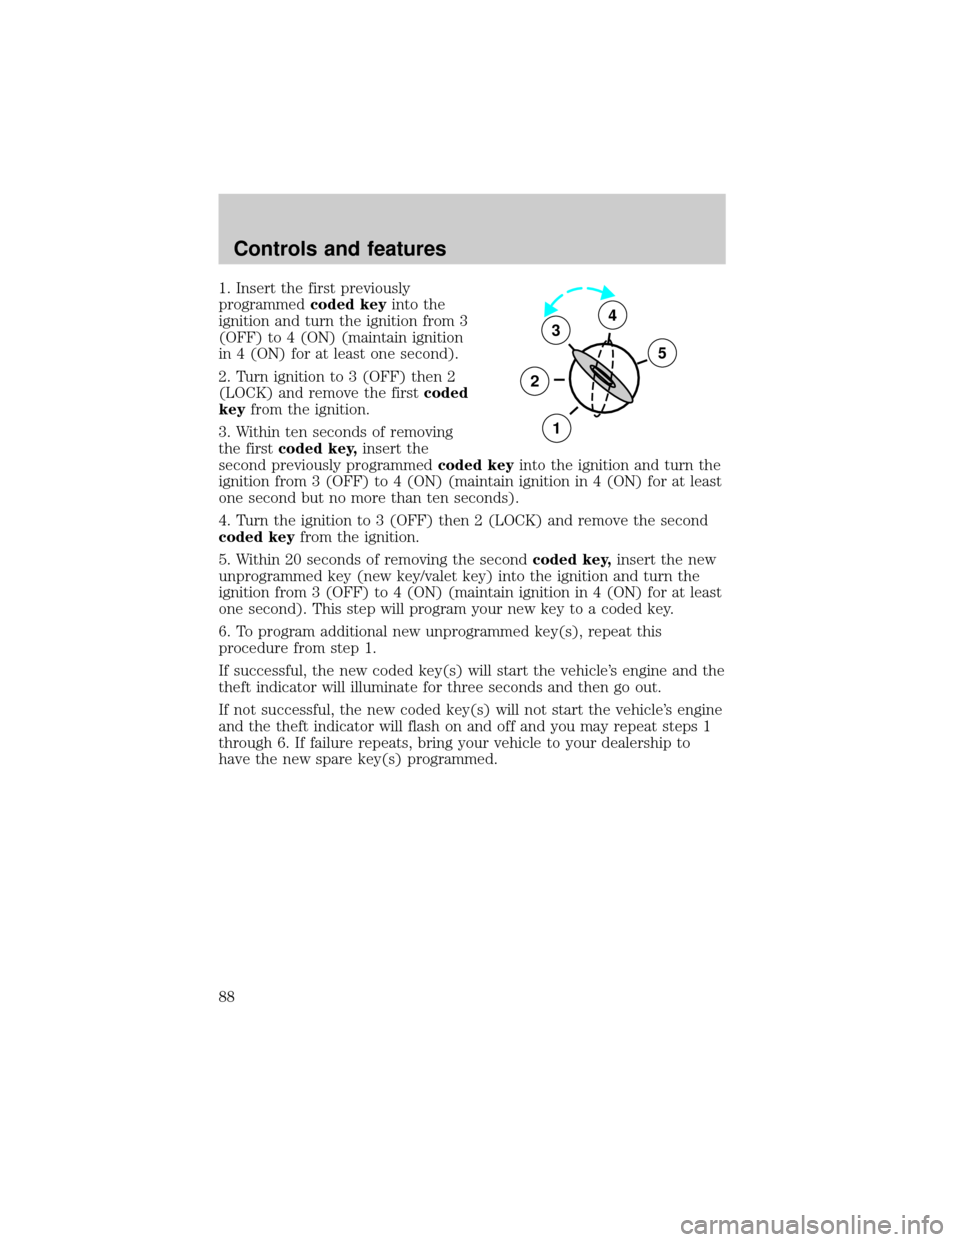
ignition and turn the ignition from 3
(OFF) to 4 (ON) (maintain ignition
in 4 (ON) for at least one second).
2. Turn ignition to 3 (OFF) then 2
(LOCK) and remove the firstcoded
keyfrom the ignition.
3. Within ten seconds of removing
the firstcoded key,insert the
second previously programmedcoded keyinto the ignition and turn the
ignition from 3 (OFF) to 4 (ON) (maintain ignition in 4 (ON) for at least
one second but no more than ten seconds).
4. Turn the ignition to 3 (OFF) then 2 (LOCK) and remove the second
coded keyfrom the ignition.
5. Within 20 seconds of removing the secondcoded key,insert the new
unprogrammed key (new key/valet key) into the ignition and turn the
ignition from 3 (OFF) to 4 (ON) (maintain ignition in 4 (ON) for at least
one second). This step will program your new key to a coded key.
6. To program additional new unprogrammed key(s), repeat this
procedure from step 1.
If successful, the new coded key(s) will start the vehicle's engine and the
theft indicator will illuminate for three seconds and then go out.
If not successful, the new coded key(s) will not start the vehicle's engine
and the theft indicator will flash on and off and you may repeat steps 1
through 6. If failure repeats, bring your vehicle to your dealership to
have the new spare key(s) programmed.
3
2
1
5
4
Controls and features
88
Page 98 of 272
Adjusting the rear center facing jump seat lap belt (if equipped)
The lap belt will adjust automatically. To fasten, grasp the tongue, and
with a continuous motion, pull out enough webbing to buckle the tongue
into the correct buckle. If you did not pull out enough webbing to reach
the buckle, allow the tongue to retract fully before trying to pull it out
again.
The lap belt should fit snugly and as low as possible around the
hips, not across the waist.
If you need to lengthen the belt, unfasten it and repeat the procedure
above.
To unfasten the belt, push in the release button prior to opening the rear
door.
Safety belt extension assembly
If the safety belt is too short when fully extended, there is a 20 cm
(8 inch) safety belt extension assembly that can be added (part number
611C22). This assembly can be obtained from your dealer at no cost.
Use only extensions manufactured by the same supplier as the safety
belt. Manufacturer identification is located at the end of the webbing on
the label. Also, use the safety belt extension only if the safety belt is too
short for you when fully extended. Do not use extensions to change the
fit of the shoulder belt across the torso.
Safety belt warning light and indicator chime
The seat belt warning light illuminates in the instrument cluster and a
chime sounds to remind the occupants to fasten their safety belts.
Conditions of operation
If... Then...
The driver's safety belt is not
buckled before the ignition switch
is turned to the ON position...The safety belt warning light
illuminates 1-2 minutes and the
warning chime sounds 4-8
seconds.
The driver's safety belt is buckled
while the indicator light is
illuminated and the warning chime
is sounding...The safety belt warning light and
warning chime turn off.
Seating and safety restraints
98
Page 99 of 272

If... Then...
The driver's safety belt is buckled
before the ignition switch is turned
to the ON position...The safety belt warning light and
indicator chime remain off.
Belt minder
The Belt Minder feature is a supplemental warning to the safety belt
warning function. This feature provides additional reminders to the
driver that the driver's safety belt is unbuckled by intermittently
sounding a chime and illuminating the safety belt warning lamp in the
instrument cluster.
If... Then...
The driver's safety belt is not
buckled before the vehicle has
reached at least 5 km/h (3 mph)
and 1-2 minutes have elapsed
since the ignition switch has been
turned to ON...The Belt Minder feature is
activated - the safety belt warning
light illuminates and the warning
chime sounds for 6 seconds every
30 seconds, repeating for
approximately 5 minutes or until
safety belt is buckled.
The driver's safety belt is buckled
while the safety belt indicator light
is illuminated and the safety belt
warning chime is sounding...The Belt Minder feature will not
activate.
The driver's safety belt is buckled
before the ignition switch is turned
to the ON position...The Belt Minder feature will not
activate.
The purpose of the Belt Minder is to remind occasional wearers to wear
safety belts all of the time.
The following are reasons most often given for not wearing safety belts:
(All statistics based on U.S. data)
Reasons given... Consider...
ªCrashes are rare
eventsº36 700 crashes occur every day.
The more we
drive, the more we are exposed to ªrareº events,
even for good drivers.1 in 4 of us will be
seriously injured in a crash during our lifetime.
ªI'm not going farº3of4fatal crashes occur within25miles of home.
Seating and safety restraints
99
Page 100 of 272
Reasons given... Consider...
ªBelts are
uncomfortableºWe design our safety belts to enhance comfort. If
you are uncomfortable - try different positions for
the safety belt upper anchorage and seatback
which should be as upright as possible; this can
improve comfort.
ªI was in a hurryºPrime time for an accident.Belt Minder reminds
us to take a few seconds to buckle up.
ªSeat belts don't
workºSafety belts,when used properly,reduce risk of
deathto front seat occupants by45% in cars,
and by60% in light trucks.
ªTraffic is lightºNearly 1 of 2 deaths occur in single-vehicle
crashes,many when no other vehicles are around.
ªBelts wrinkle my
clothesºPossibly, but a serious crash can do much more
than wrinkle your clothes, particularly if you are
unbelted.
ªThe people I'm
with don't wear
beltsºSet the example, teen deaths occur 4 times more
often in vehicles with TWO or MORE people.
Children and younger brothers/sisters imitate
behavior they see.
ªI have an air bagº Air bags offer greater protection when used with
safety belts. Frontal airbags are not designed to
inflate in rear and side crashes or rollovers.
ªI'd rather be
thrown clearºNot a good idea.Peoplewho areejected are 40
times more likely to DIE.Safety belts help
prevent ejection, WE CAN'T ªPICK OUR CRASHº.
Do not sit on top of a buckled safety belt to avoid the Belt
Minder chime. Sitting on the safety belt will increase the risk of
injury in an accident. To disable (one-time) or deactivate the Belt
Minder feature please follow the directions stated below.
One time disable
Any time the safety belt is buckled and then unbuckled during an
ignition ON cycle, Belt Minder will be disabled for that ignition cycle
only.
Seating and safety restraints
100
Page 101 of 272
Deactivating/activating the belt minder feature
Read steps1-9thoroughly before proceeding with the
deactivation/activation programming procedure.
The Belt Minder feature can be deactivated/activated by performing the
following procedure:
Before following the procedure, make sure that:
²The parking brake is set.
²The gearshift is in P (Park) (automatic transmission) or the neutral
position (manual transmission).
²The ignition switch is in the OFF position.
²All vehicle doors are closed.
²The driver's safety belt is unbuckled.
²The parklamps/headlamps are in OFF position (If vehicle is equipped
with Autolamps, this will not affect the procedure).
To reduce the risk of injury, do not deactivate/activate the Belt
Minder feature while driving the vehicle.
1. Turn the ignition switch to the RUN (or ON) position. (DO NOT
START THE ENGINE.)
2. Wait until the safety belt warning light turns off. (Approximately 1±2
minutes.)
²Steps 3±5 must be completed within 60 seconds or the procedure will
have to be repeated.
3. Buckle then unbuckle the safety belt three times, ending with the
safety belt unbuckled. This can be done before or during Belt Minder
warning activation.
4. Turn on the parklamps/headlamps, turn off the parklamps/headlamps.
5. Buckle then unbuckle the safety belt three times, ending with the
safety belt unbuckled.
²After step 5 the safety belt warning light will be turned on for three
seconds.
6. Within seven seconds of the safety belt warning light turning off,
buckle then unbuckle the safety belt.
Seating and safety restraints
101
Page 107 of 272

²and the electrical wiring which connects the components.
The RCM (restraints control module) monitors its own internal circuits
and the supplemental air bag electrical system warning (including the
passenger air bag deactivation switch, the impact sensors, the system
wiring, the air bag system readiness light, the air bag back up power and
the air bag ignitors).
Determining if the system is operational
The SRS uses readiness lights in the instrument cluster and the
passenger air bag deactivate switch or a tone to indicate the condition of
the system. Refer to theAir bag readinesssection in theInstrument
clusterchapter orPassenger air bag on/off switchsection in this
chapter. Routine maintenance of the air bag is not required.
A difficulty with the system is indicated by one or more of the following:
²The readiness lights will either
flash or stay lit.
²The readiness lights will not
illuminate immediately after
ignition is turned on.
²A series of five beeps will be heard. The tone pattern will repeat
periodically until the problem and/or light are repaired.
If any of these things happen, even intermittently, have the SRS serviced
at your dealership or by a qualified technician immediately. Unless
serviced, the system may not function properly in the event of a
collision.
Disposal of air bags and air bag equipped vehicles
(including pretensioners)
For disposal of air bags or air bag equipped vehicles, see your local
dealership or qualified technician. Air bags MUST BE disposed of by
qualified personnel.
Seating and safety restraints
107
Page 108 of 272
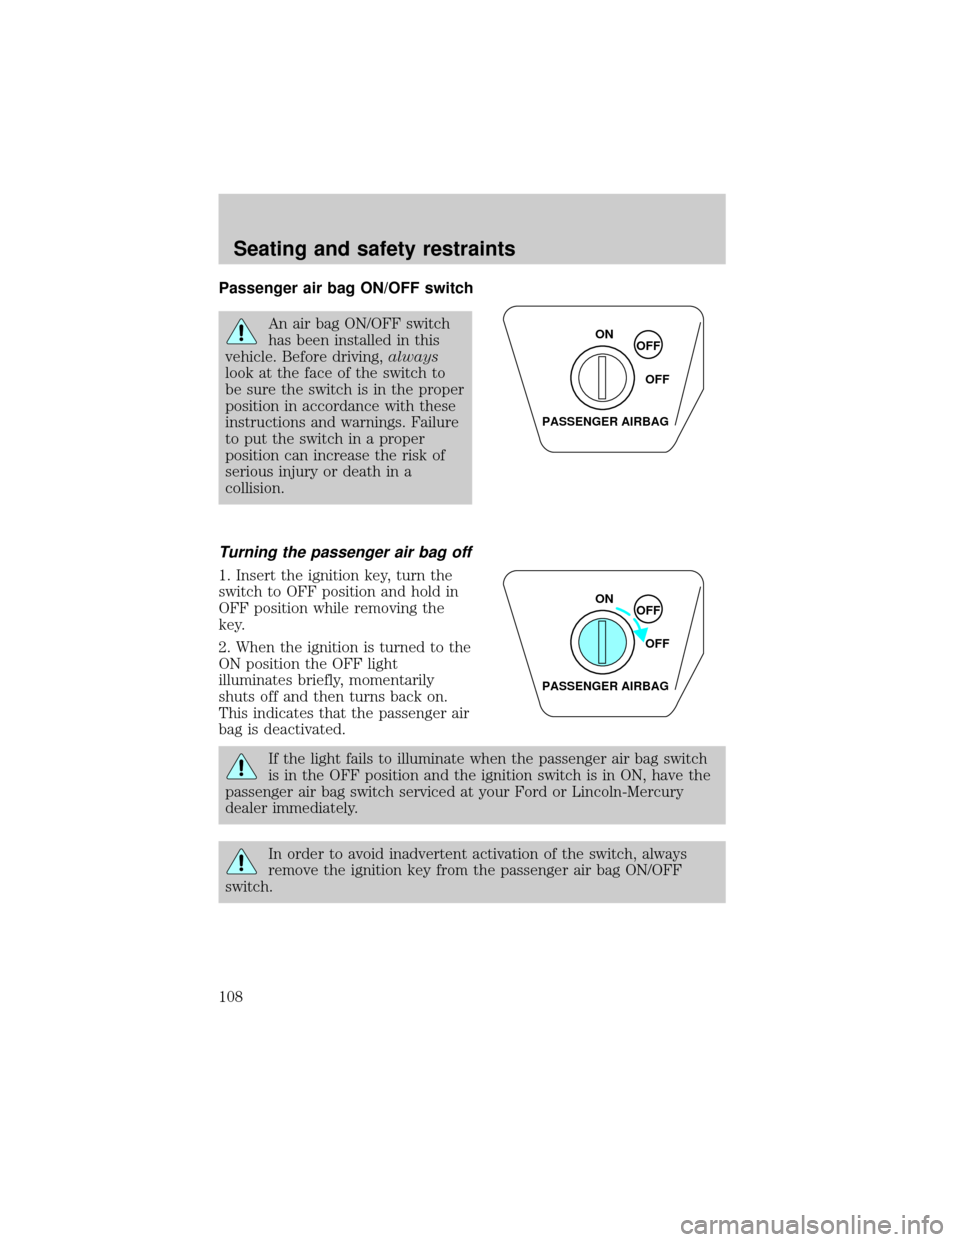
Passenger air bag ON/OFF switch
An air bag ON/OFF switch
has been installed in this
vehicle. Before driving,always
look at the face of the switch to
be sure the switch is in the proper
position in accordance with these
instructions and warnings. Failure
to put the switch in a proper
position can increase the risk of
serious injury or death in a
collision.
Turning the passenger air bag off
1. Insert the ignition key, turn the
switch to OFF position and hold in
OFF position while removing the
key.
2. When the ignition is turned to the
ON position the OFF light
illuminates briefly, momentarily
shuts off and then turns back on.
This indicates that the passenger air
bag is deactivated.
If the light fails to illuminate when the passenger air bag switch
is in the OFF position and the ignition switch is in ON, have the
passenger air bag switch serviced at your Ford or Lincoln-Mercury
dealer immediately.
In order to avoid inadvertent activation of the switch, always
remove the ignition key from the passenger air bag ON/OFF
switch.
ON
OFF
OFF
PASSENGER AIRBAG
ON
OFF
OFF
PASSENGER AIRBAG
Seating and safety restraints
108