2001 FORD F650 lock
[x] Cancel search: lockPage 107 of 240
Although OSHA or other governmental regulations may require use of an
electrical or mechanical back-up alarm to warn bystanders, such an
alarm does not assure that the intended path is clear.
An electrical back-up alarm, if installed, is connected to the back-up
lamp circuit.
HYDRAULIC BRAKES (IF EQUIPPED)
Your service brakes are self-adjusting. Refer to the Scheduled
maintenance guide for scheduled maintenance.
Occasional brake noise is normal and often does not indicate a
performance concern with the vehicle's brake system. In normal
operation, automotive brake systems may emit occasional or intermittent
squeal or groan noises when the brakes are applied. Such noises are
usually heard during the first few brake applications in the morning;
however, they may be heard at any time while braking and can be
aggravated by environmental conditions such as cold, heat, moisture,
road dust, salt or mud. If a ªmetal-to-metal,º ªcontinuous grindingº or
ªcontinuous squealº sound is present while braking, the brake linings
may be worn-out and should be inspected by a qualified service
technician.
If you are driving down a long or steep hill, shift to a lower gear.
Do not apply your brakes continuously, as they may overheat
and become less effective.
Four-wheel anti-lock brake system (ABS) (if equipped)
On vehicles equipped with an anti-lock braking system (ABS), a noise
from the hydraulic pump motor and pulsation in the pedal may be
observed during ABS braking events. Pedal pulsation coupled with noise
while braking under panic conditions or on loose gravel, bumps, wet or
snowy roads is normal and indicates proper functioning of the vehicle's
anti-lock brake system. If the vehicle has continuous vibration or shudder
in the steering wheel while braking, the vehicle should be inspected by a
qualified service technician.
Driving
107
Page 108 of 240
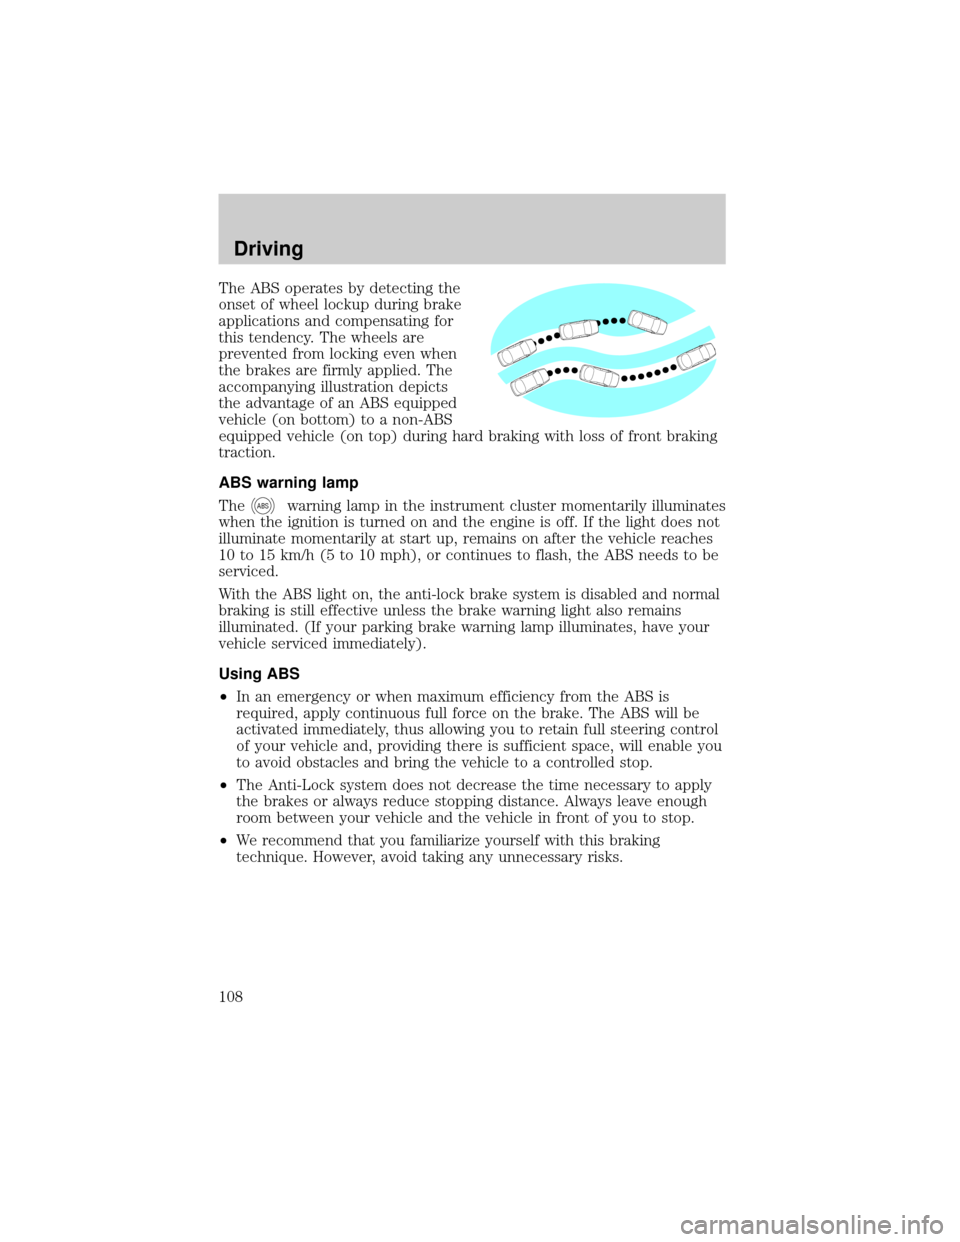
The ABS operates by detecting the
onset of wheel lockup during brake
applications and compensating for
this tendency. The wheels are
prevented from locking even when
the brakes are firmly applied. The
accompanying illustration depicts
the advantage of an ABS equipped
vehicle (on bottom) to a non-ABS
equipped vehicle (on top) during hard braking with loss of front braking
traction.
ABS warning lamp
The
ABSwarning lamp in the instrument cluster momentarily illuminates
when the ignition is turned on and the engine is off. If the light does not
illuminate momentarily at start up, remains on after the vehicle reaches
10 to 15 km/h (5 to 10 mph), or continues to flash, the ABS needs to be
serviced.
With the ABS light on, the anti-lock brake system is disabled and normal
braking is still effective unless the brake warning light also remains
illuminated. (If your parking brake warning lamp illuminates, have your
vehicle serviced immediately).
Using ABS
²In an emergency or when maximum efficiency from the ABS is
required, apply continuous full force on the brake. The ABS will be
activated immediately, thus allowing you to retain full steering control
of your vehicle and, providing there is sufficient space, will enable you
to avoid obstacles and bring the vehicle to a controlled stop.
²The Anti-Lock system does not decrease the time necessary to apply
the brakes or always reduce stopping distance. Always leave enough
room between your vehicle and the vehicle in front of you to stop.
²We recommend that you familiarize yourself with this braking
technique. However, avoid taking any unnecessary risks.
Driving
108
Page 110 of 240
Parking brake
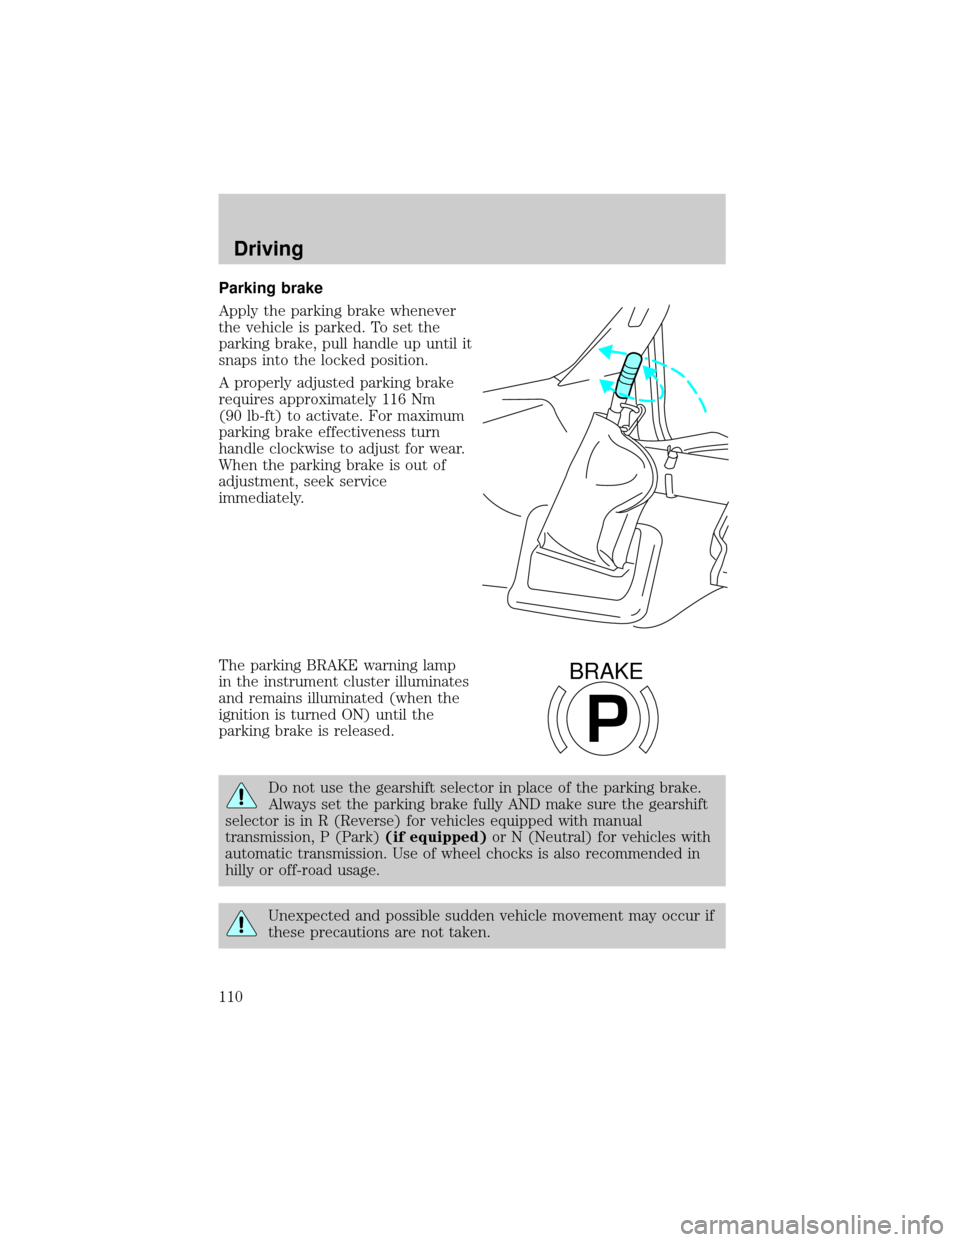
Apply the parking brake whenever
the vehicle is parked. To set the
parking brake, pull handle up until it
snaps into the locked position.
A properly adjusted parking brake
requires approximately 116 Nm
(90 lb-ft) to activate. For maximum
parking brake effectiveness turn
handle clockwise to adjust for wear.
When the parking brake is out of
adjustment, seek service
immediately.
The parking BRAKE warning lamp
in the instrument cluster illuminates
and remains illuminated (when the
ignition is turned ON) until the
parking brake is released.
Do not use the gearshift selector in place of the parking brake.
Always set the parking brake fully AND make sure the gearshift
selector is in R (Reverse) for vehicles equipped with manual
transmission, P (Park)(if equipped)or N (Neutral) for vehicles with
automatic transmission. Use of wheel chocks is also recommended in
hilly or off-road usage.
Unexpected and possible sudden vehicle movement may occur if
these precautions are not taken.
P
BRAKE
Driving
110
Page 112 of 240
Parking brake warning chime Ð F650 SuperCrewzer Only
If a chime sounds when pulling the yellow knob out, your parking brake
is not functioning properly, seek service immediately. This chime will
sound until the yellow knob is pushed in or eight minutes have passed. If
the yellow knob is pulled out again the chime sounds as a reminder that
immediate service is required to the parking brake system.
Releasing spring brake manually Ð F650 SuperCrewzer Only
Do not attempt to disassemble the parking brake chamber under
any circumstances. The high spring load may cause serious
injury if the chamber clamps are removed.
If air pressure is released from the spring brake chamber the power
spring applies the brake and, unless air pressure can be re-established,
the spring brake must be released as follows in order to move the
vehicle.
Block the wheels to prevent the vehicle from moving.
Unexpected and possibly sudden vehicle movement may occur if
these precautions are not taken.
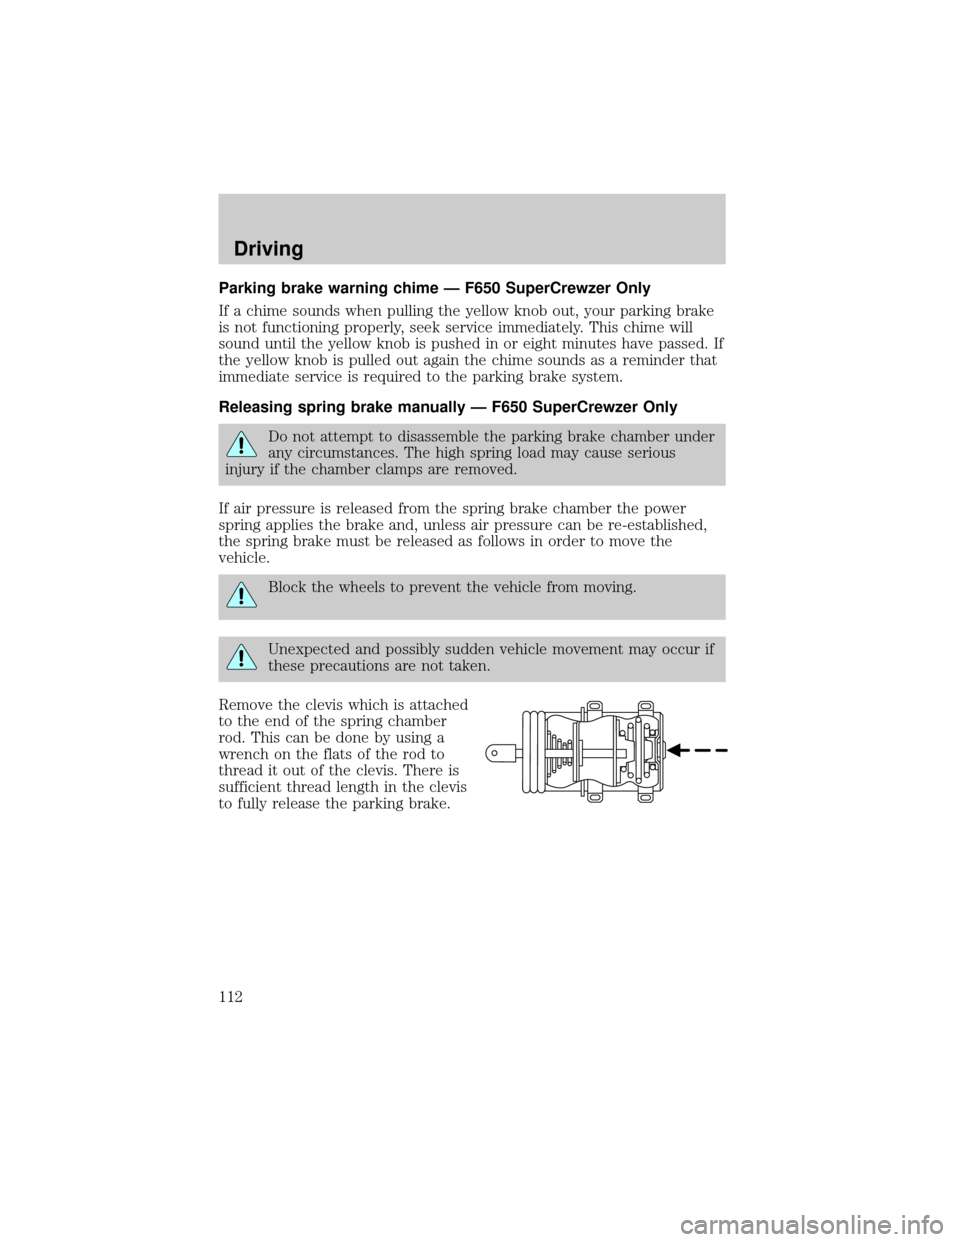
Remove the clevis which is attached
to the end of the spring chamber
rod. This can be done by using a
wrench on the flats of the rod to
thread it out of the clevis. There is
sufficient thread length in the clevis
to fully release the parking brake.
Driving
112
Page 116 of 240
Emergency air brake
All vehicles are equipped with a dual brake system. In the unlikely event
of a failure of one system, the second system will function for emergency
stopping. These systems are all controlled by the brake pedal in the
same manner as for normal stops.
Do not continue to operate the vehicle with a failure of one of
the systems. Take the vehicle to your dealer for service
immediately.
Anti-lock braking system (if equipped)
For information on the anti-lock braking system (ABS), refer to
Hydraulic brakesin this chapter.
Driving with ABS
Maintain a steady brake pedal application; you do not need to pump or
remove your foot from the pedal. The ABS keeps the wheels rolling
during braking to maintain control and reduce stopping distances. For
information on the anti-lock braking system (ABS), refer toHydraulic
brakesin this chapter.
Parking brake
Do not use the gearshift selector in place of the parking brake.
Always set the parking brake fully AND make sure the gearshift
selector is in R (Reverse) for vehicles equipped with manual
transmission or N (Neutral) for vehicles with automatic transmission.
Unexpected and possible sudden vehicle movement may occur if
these precautions are not taken.
If the service brakes should fail to operate while the vehicle is in motion,
you can make an emergency stop with the parking brake. The stopping
distance, however, will be much greater than normal. Repairs should be
made immediately to an inoperative air brake system circuit.
Driving
116
Page 118 of 240
Block the wheels to prevent the vehicle from moving.
Unexpected and possibly sudden vehicle movement may occur if
these precautions are not taken.
Impact wrenches should not be used as they may damage the piston and
prevent proper caging of the spring. Do not apply more than 68 Nm
(50 lb-ft) torque to the release bolt nut.
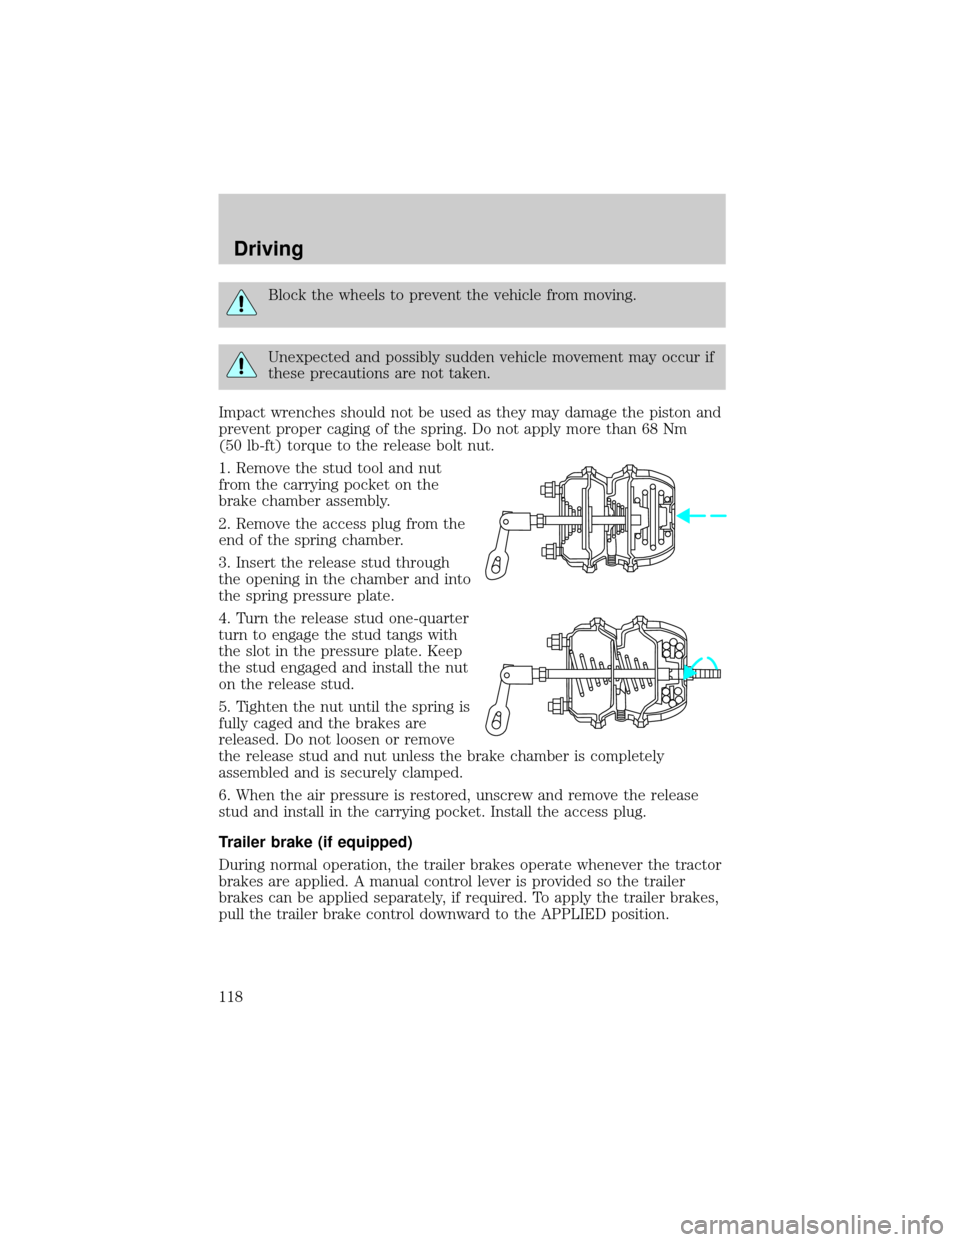
1. Remove the stud tool and nut
from the carrying pocket on the
brake chamber assembly.
2. Remove the access plug from the
end of the spring chamber.
3. Insert the release stud through
the opening in the chamber and into
the spring pressure plate.
4. Turn the release stud one-quarter
turn to engage the stud tangs with
the slot in the pressure plate. Keep
the stud engaged and install the nut
on the release stud.
5. Tighten the nut until the spring is
fully caged and the brakes are
released. Do not loosen or remove
the release stud and nut unless the brake chamber is completely
assembled and is securely clamped.
6. When the air pressure is restored, unscrew and remove the release
stud and install in the carrying pocket. Install the access plug.
Trailer brake (if equipped)
During normal operation, the trailer brakes operate whenever the tractor
brakes are applied. A manual control lever is provided so the trailer
brakes can be applied separately, if required. To apply the trailer brakes,
pull the trailer brake control downward to the APPLIED position.
Driving
118
Page 137 of 240
1 (First)
The transmission has to be manually shifted into 1 (First) and will not
shift into a higher gear. Use this position when pulling through mud or
snow, driving up steep grades, hauling extra heavy loads or where
maximum reduction is required.
Allison 2400 series
This transmission provides five forward speeds in four ranges and one
reverse range.
P (Park)
Use this position when you start the engine. The engine is designed to
start in the P (Park) or N (Neutral) position only.
Always come to a complete stop before shifting into P (Park). Make sure
the gearshift is securely latched in P (Park). This position locks the
transmission and prevents the rear wheels from turning.
Always set the parking brake fully and make sure the gearshift
lever is latched in P (Park). Turn off the ignition whenever you
leave your vehicle.
When parking on hilly or off-road terrains, be sure to set the parking
brake fully and chock the wheels to prevent unexpected and possibly
sudden vehicle movement.
R (Reverse)
Use this position to move the vehicle backwards. Completely stop the
vehicle before shifting from a forward gear (1, 2, 4 or D) to R (Reverse),
or from R (Reverse) to any forward gear. The reverse warning signal will
sound when the selector is in R (Reverse). Reverse has only one gear
and provides the greatest gear reduction.
N (Neutral)
This position can be used when starting the engine. The engine is
designed to start in the P (Park) or N (Neutral) position only. The
engine should be at idle speed when any shift from N (Neutral) to a
drive range is made.
The N (Neutral) position may also be used during stationary operation of
the Power Take-Off (PTO), if equipped.
Driving
137
Page 140 of 240
MAXIMUM VEHICLE LOADING
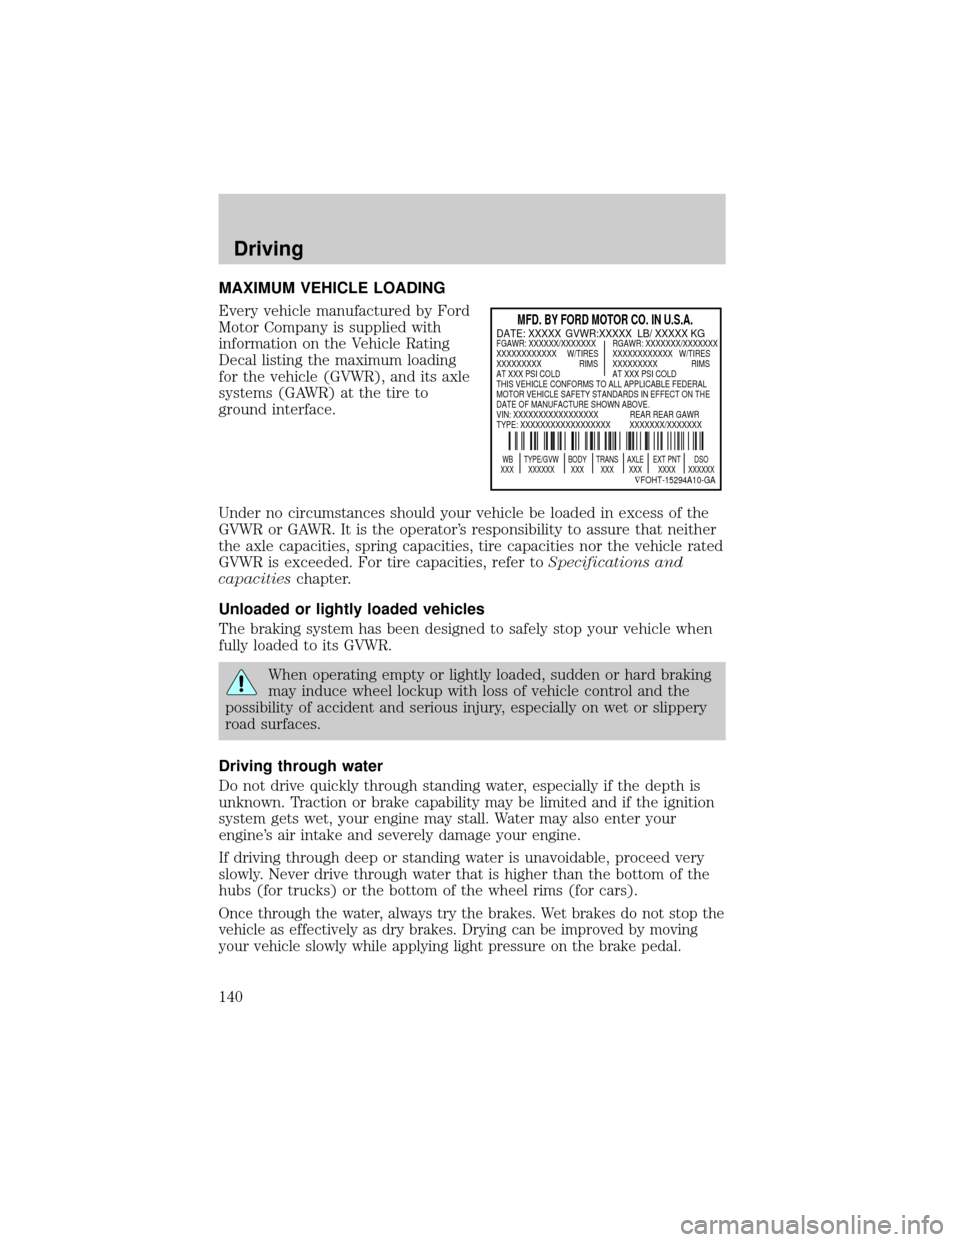
Every vehicle manufactured by Ford
Motor Company is supplied with
information on the Vehicle Rating
Decal listing the maximum loading
for the vehicle (GVWR), and its axle
systems (GAWR) at the tire to
ground interface.
Under no circumstances should your vehicle be loaded in excess of the
GVWR or GAWR. It is the operator's responsibility to assure that neither
the axle capacities, spring capacities, tire capacities nor the vehicle rated
GVWR is exceeded. For tire capacities, refer toSpecifications and
capacitieschapter.
Unloaded or lightly loaded vehicles
The braking system has been designed to safely stop your vehicle when
fully loaded to its GVWR.
When operating empty or lightly loaded, sudden or hard braking
may induce wheel lockup with loss of vehicle control and the
possibility of accident and serious injury, especially on wet or slippery
road surfaces.
Driving through water
Do not drive quickly through standing water, especially if the depth is
unknown. Traction or brake capability may be limited and if the ignition
system gets wet, your engine may stall. Water may also enter your
engine's air intake and severely damage your engine.
If driving through deep or standing water is unavoidable, proceed very
slowly. Never drive through water that is higher than the bottom of the
hubs (for trucks) or the bottom of the wheel rims (for cars).
Once through the water, always try the brakes. Wet brakes do not stop the
vehicle as effectively as dry brakes. Drying can be improved by moving
your vehicle slowly while applying light pressure on the brake pedal.
MFD. BY FORD MOTOR CO. IN U.S.A.
WB TYPE/GVW BODY TRANS AXLE EXT PNT DSO
XXX XXXXXX XXX XXX XXX XXXX XXXXXX
ÑFOHT-15294A10-GA
DATE: XXXXX GVWR:XXXXX LB/ XXXXX KGFGAWR: XXXXXX/XXXXXXX RGAWR: XXXXXXX/XXXXXXX
XXXXXXXXXXXX W/TIRES XXXXXXXXXXXX W/TIRES
XXXXXXXXX RIMS XXXXXXXXX RIMS
AT XXX PSI COLD AT XXX PSI COLD
THIS VEHICLE CONFORMS TO ALL APPLICABLE FEDERAL
MOTOR VEHICLE SAFETY STANDARDS IN EFFECT ON THE
DATE OF MANUFACTURE SHOWN ABOVE.
VIN: XXXXXXXXXXXXXXXXX REAR REAR GAWR
TYPE: XXXXXXXXXXXXXXXXXX XXXXXXX/XXXXXXX
Driving
140