Page 104 of 240
OPERATING THE ENGINE
Do not operate the engine at full throttle below peak torque engine
speed (RPM) for more than one minute at a time (peak torque RPM
varies from 1200-1500 RPM depending on engine rated speed).
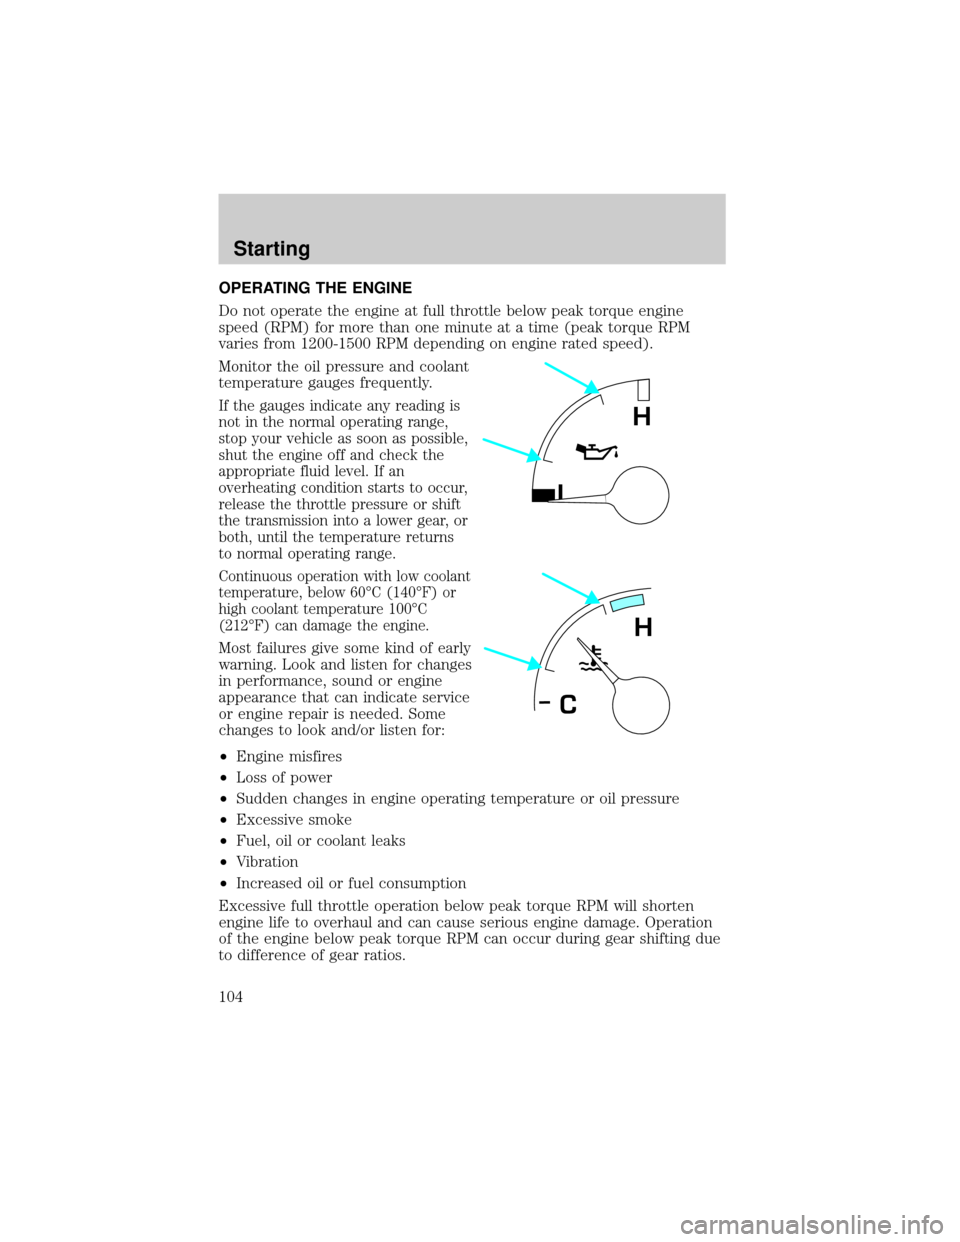
Monitor the oil pressure and coolant
temperature gauges frequently.
If the gauges indicate any reading is
not in the normal operating range,
stop your vehicle as soon as possible,
shut the engine off and check the
appropriate fluid level. If an
overheating condition starts to occur,
release the throttle pressure or shift
the transmission into a lower gear, or
both, until the temperature returns
to normal operating range.
Continuous operation with low coolant
temperature, below 60ÉC (140ÉF) or
high coolant temperature 100ÉC
(212ÉF) can damage the engine.
Most failures give some kind of early
warning. Look and listen for changes
in performance, sound or engine
appearance that can indicate service
or engine repair is needed. Some
changes to look and/or listen for:
²Engine misfires
²Loss of power
²Sudden changes in engine operating temperature or oil pressure
²Excessive smoke
²Fuel, oil or coolant leaks
²Vibration
²Increased oil or fuel consumption
Excessive full throttle operation below peak torque RPM will shorten
engine life to overhaul and can cause serious engine damage. Operation
of the engine below peak torque RPM can occur during gear shifting due
to difference of gear ratios.
L
H
H
C
Starting
104
Page 106 of 240
EXHAUST FUMES
Never idle the engine in closed areas. Never sit in a parked or
stopped vehicle for any amount of time with engine running.
If you ever smell exhaust fumes of any kind inside your vehicle,
have your dealer inspect and fix your vehicle immediately. Do
not drive if you smell exhaust fumes. These fumes are harmful and
could kill you.
In order to guard against fumes entering your vehicle, the exhaust
system and body ventilation system should be checked by a qualified
technician:
²Each time the vehicle is raised for service.
²Whenever a change in exhaust system noise is noted.
²Whenever the vehicle has been damaged by impact from another
vehicle, object or road obstruction.
In order to afford proper operation, all air inlet vents should be kept
clear of snow, leaves and other debris.
If you run the engine while stopped (idled) in an unconfined area, open
the windows at least 2.5 cm (one inch) and adjust the heating or air
conditioning to draw outside air into the vehicle as follows:
²If your vehicle has outside air control vents, open them fully.
²Set fan speed on high with function control to any position except
OFF or MAX A/C and the temperature control on any desired position.
²Adjust air control system to force outside air into the vehicle.
BACKING UP
To avoid the possibility of personal injury while backing the
vehicle, always be sure your vehicle's path is clear.
Before backing your vehicle, be sure you can do so safely. If anything
behind the cab limits your view, do not rely on mirrors alone to assure
that your intended path is clear. If other persons are in the vicinity, have
someone standing well behind the vehicle and outside your intended
path - visible through an exterior mirror - guide you as you back up.
Driving
106
Page 114 of 240
Occasional or intermittent brake squeal may result from environmental
conditions such as cold, hot, wet, snow, salt, mud, etc. This condition will
not affect braking effectiveness. The brakes should be checked only if
squeal occurs continuously with every application.
If brakes do not grip well
²If you have been driving through deep water, gently apply the brakes
several times while the vehicle is moving slowly.
²Let the brakes cool if you have been using them excessively, as in
mountain driving or after several fast, high speed stops.
²Check brake adjustment.
²Check brake linings for excessive wear.
²Check system air pressure.
Air brakes
After starting the engine, give the air compressor time to build up the air
pressure to 414 kPa (60 psi) before moving the vehicle.
Do not drive or continue to drive if the low air pressure buzzer
is sounding or the brake warning light is lit. These warnings
indicate that air pressure is not to normal operating level. Continued
use of the vehicle could result in loss of braking ability.
Avoid repeated light application of the brake pedal. This will
deplete air pressure faster and could result in loss of braking
capability.
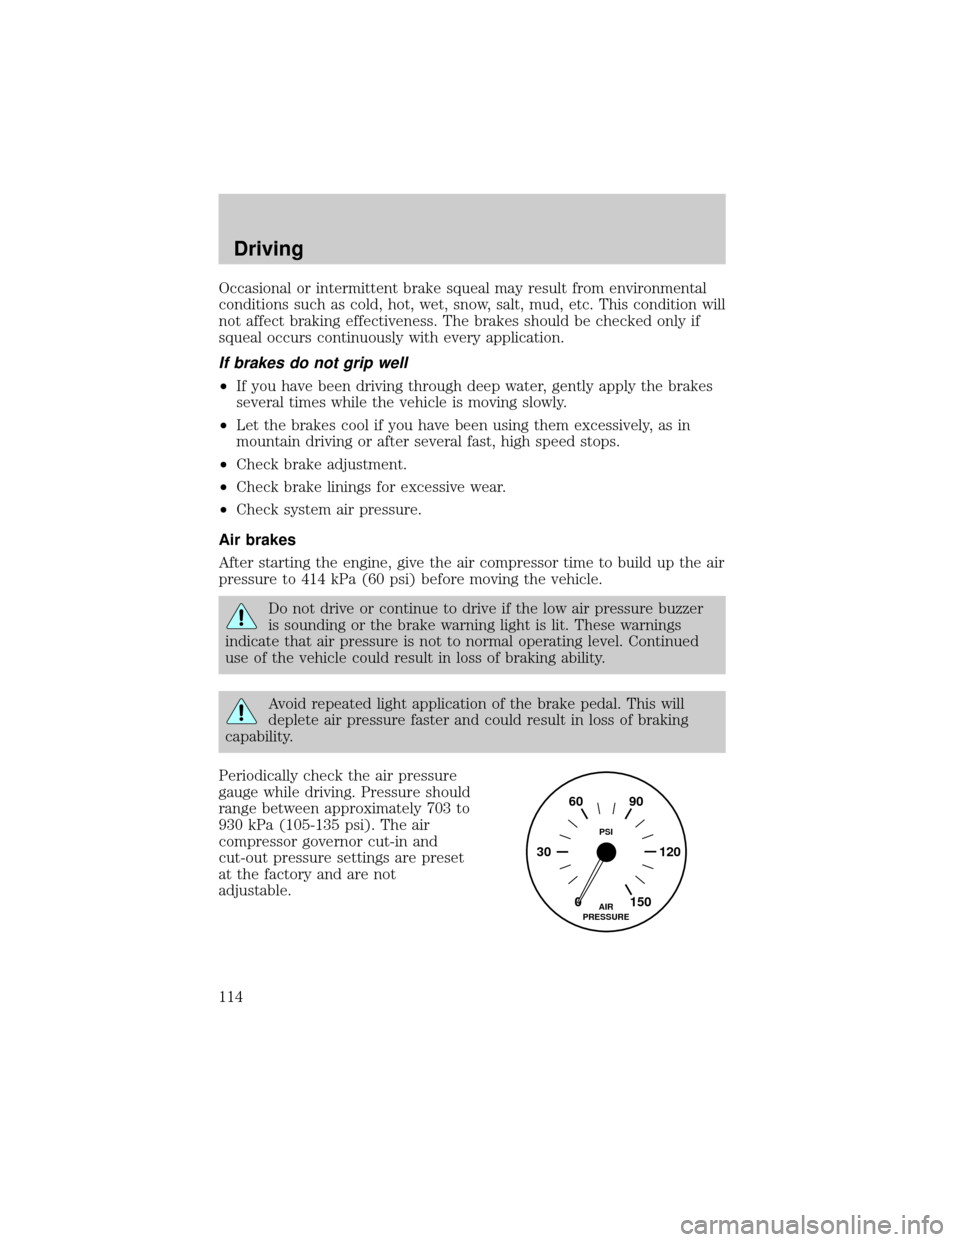
Periodically check the air pressure
gauge while driving. Pressure should
range between approximately 703 to
930 kPa (105-135 psi). The air
compressor governor cut-in and
cut-out pressure settings are preset
at the factory and are not
adjustable.
0 30 12090 60
150AIR
PRESSUREPSI
Driving
114
Page 133 of 240
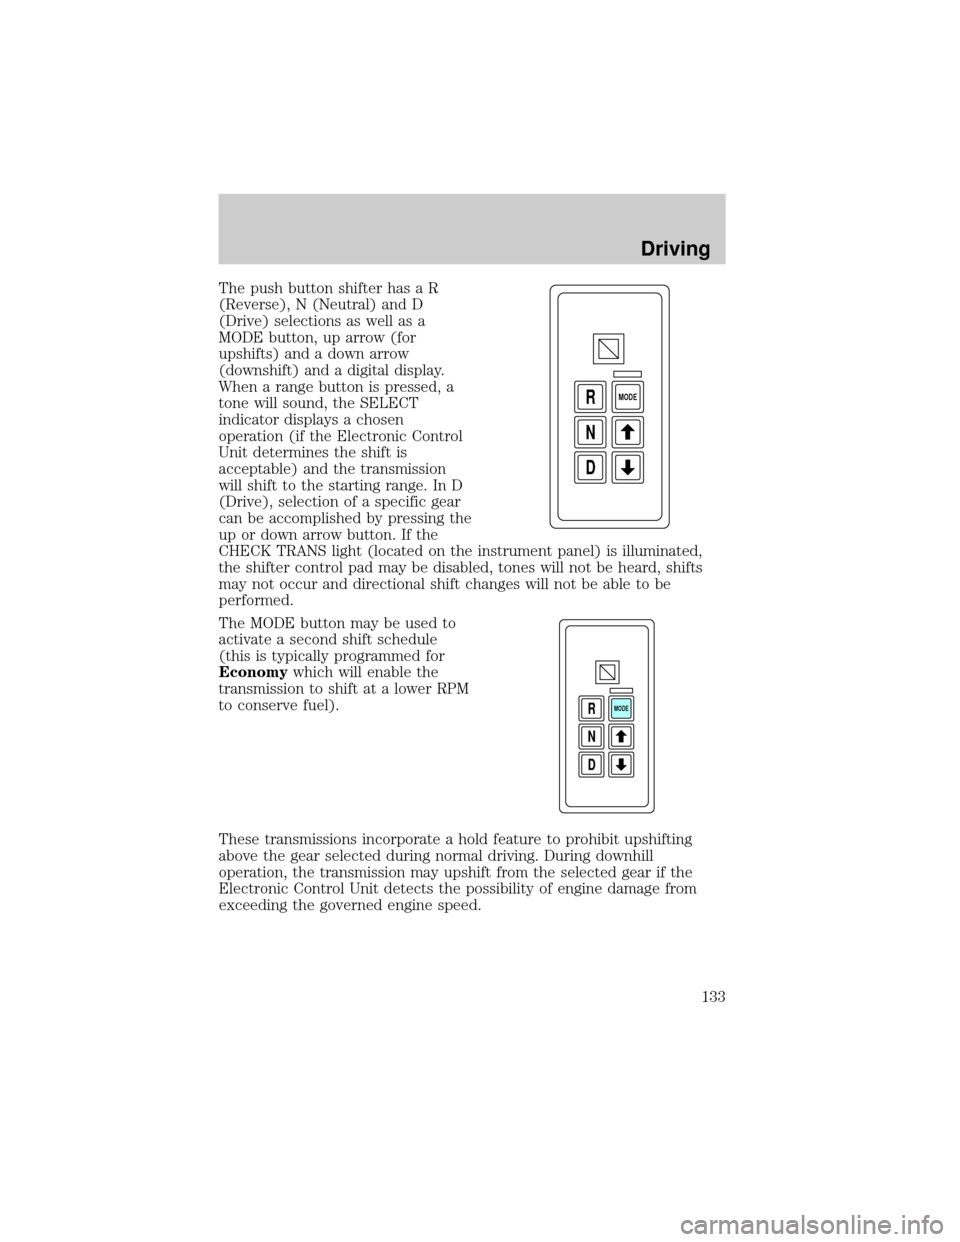
The push button shifter has a R
(Reverse), N (Neutral) and D
(Drive) selections as well as a
MODE button, up arrow (for
upshifts) and a down arrow
(downshift) and a digital display.
When a range button is pressed, a
tone will sound, the SELECT
indicator displays a chosen
operation (if the Electronic Control
Unit determines the shift is
acceptable) and the transmission
will shift to the starting range. In D
(Drive), selection of a specific gear
can be accomplished by pressing the
up or down arrow button. If the
CHECK TRANS light (located on the instrument panel) is illuminated,
the shifter control pad may be disabled, tones will not be heard, shifts
may not occur and directional shift changes will not be able to be
performed.
The MODE button may be used to
activate a second shift schedule
(this is typically programmed for
Economywhich will enable the
transmission to shift at a lower RPM
to conserve fuel).
These transmissions incorporate a hold feature to prohibit upshifting
above the gear selected during normal driving. During downhill
operation, the transmission may upshift from the selected gear if the
Electronic Control Unit detects the possibility of engine damage from
exceeding the governed engine speed.
D N R
MODE
D N R
MODE
Driving
133
Page 154 of 240

JUMP STARTING YOUR VEHICLE
The gases around the battery can explode if exposed to flames,
sparks, or lit cigarettes. An explosion could result in injury or
vehicle damage.
Do not push start your vehicle. You could damage the catalytic
converter.
Batteries contain sulfuric acid which burns skin, eyes, and
clothing.
Preparing your vehicle
Also see the label on the battery.
1. Use only a 12±volt supply to start your vehicle. If you connect your
battery to a 24±volt power supply you can damage your starter, ignition
system and other electrical components. Do not attach the jumper cables
to the glow plug relay as this could severely damage the glow plugs,
injector driver module and PCM.
2. Do not disconnect the battery of the disabled vehicle as this could
damage the vehicle's electrical system.
3. Park the booster vehicle close to the disabled vehicle making sure
theydo nottouch. Set the parking brake on both vehicles and stay clear
of the engine cooling fan and other moving parts.
4. Check all battery terminals and remove any excessive corrosion before
you attach the battery cables.
5. Turn the heater fan on in both vehicles to protect any electrical
surges. Turn all other accessories off.
Roadside emergencies
154
Page 158 of 240
CHECKING UNDER THE HOOD
Opening the hood
The hood and fenders are held in position by a latch located on each
fender.
The parking brake must be fully set before opening the hood or
possible personal injury may occur.
If you must leave the engine running while checking under the
hood, do not allow any loose clothing, jewelry, hair or other
items to get near moving engine components or possible personal
injury may occur.
To open the hood:
1. Set the parking brake, shift into N (Neutral) (automatic transmission)
or 1 (First) (manual transmission) and turn the engine off.
2. Lift upward on the bottom of
each latch.
3. Pull the bottom of each latch
away from the fender.
Maintenance and care
158
Page 159 of 240
4. Tilt the hood forward until
stopped by the retaining cables.
To lower the hood:
1. Push the hood rearward at the top center of the hood above the grille
until closed.
2. Engage the latch on each fender.
3. Push down on the bottom of each latch until locked.
To avoid the possibility of personal injury, never stand beneath
the hood when it is being raised or lowered.
ENGINE OIL
Checking engine oil levelÐCummins B and Caterpillar 3126 B engines
Refer to the appropriate engine operator's manual for information on the
engine oil.
Maintenance and care
159
Page 160 of 240
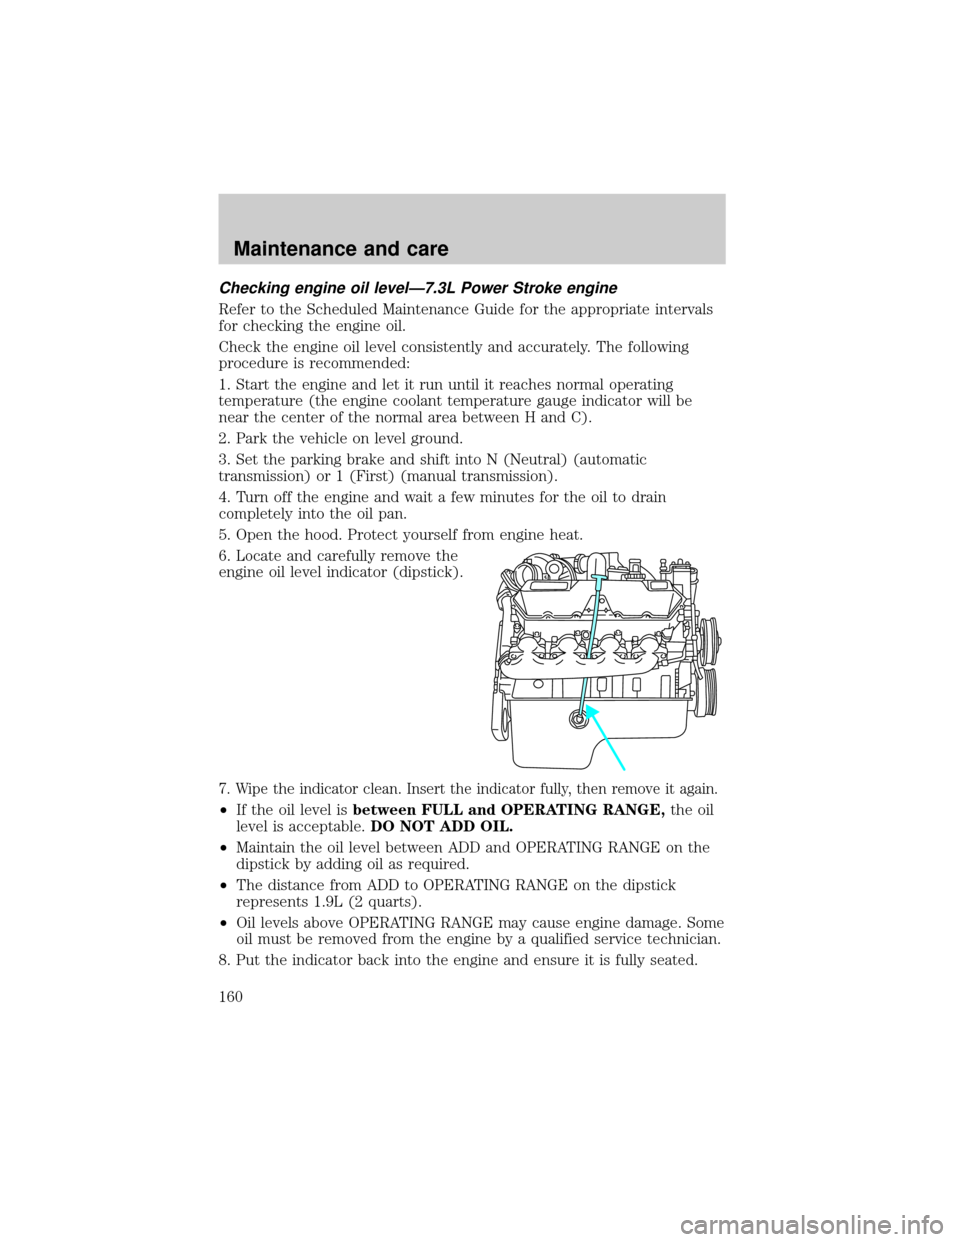
Checking engine oil levelÐ7.3L Power Stroke engine
Refer to the Scheduled Maintenance Guide for the appropriate intervals
for checking the engine oil.
Check the engine oil level consistently and accurately. The following
procedure is recommended:
1. Start the engine and let it run until it reaches normal operating
temperature (the engine coolant temperature gauge indicator will be
near the center of the normal area between H and C).
2. Park the vehicle on level ground.
3. Set the parking brake and shift into N (Neutral) (automatic
transmission) or 1 (First) (manual transmission).
4. Turn off the engine and wait a few minutes for the oil to drain
completely into the oil pan.
5. Open the hood. Protect yourself from engine heat.
6. Locate and carefully remove the
engine oil level indicator (dipstick).
7. Wipe the indicator clean. Insert the indicator fully, then remove it again.
²If the oil level isbetween FULL and OPERATING RANGE,the oil
level is acceptable.DO NOT ADD OIL.
²Maintain the oil level between ADD and OPERATING RANGE on the
dipstick by adding oil as required.
²The distance from ADD to OPERATING RANGE on the dipstick
represents 1.9L (2 quarts).
²Oil levels above OPERATING RANGE may cause engine damage. Some
oil must be removed from the engine by a qualified service technician.
8. Put the indicator back into the engine and ensure it is fully seated.
Maintenance and care
160