2001 FORD F350 towing
[x] Cancel search: towingPage 10 of 288

WARNING LIGHTS AND CHIMES
Low fuel
Illuminates as an early reminder of a
low fuel condition indicated on the
fuel gauge (refer toFuel Gaugein
this chapter for more information).
When refueling, after the light
comes on, the amount of fuel that is added will be less than the
advertised capacity since there is fuel still in the tank. The ignition must
be in the ON position for this lamp to illuminate. The lamp will also
illuminate for several seconds after the ignition is turned to the ON
position regardless of the fuel level to ensure your bulb is working.
Service engine soon
Your vehicle is equipped with a
computer that monitors the engine’s
emission control system. This
system is commonly known as the
On Board Diagnostics System (OBD
II). The OBD II system protects the
environment by ensuring that your vehicle continues to meet
government emission standards. The OBD II system also assists the
service technician in properly servicing your vehicle.
TheService Engine Soonindicator light illuminates when the ignition is
first turned to the ON position to check the bulb. If it comes on after the
engine is started, one of the engine’s emission control systems may be
malfunctioning. The light may illuminate without a driveability concern
being noted. The vehicle will usually be drivable and will not require
towing.
0
000000000
MPH20km/h
406080
100
120
140
160
010 20304050
60
70
80
90
100
LOW
FUEL
DOOR
AJAR
LOW
RANGE4 X 4
CRUISE
BRAKE!
ABS+ -
LEF
H
RPM1000X0123
5
6 4
PRN 218C 18
H
D
FUEL FILL
SERVICE
ENGINE
SOON
LOW
FUEL
SERVICE
ENGINE
SOON
Instrumentation
10
ProCarManuals.com
Page 21 of 288
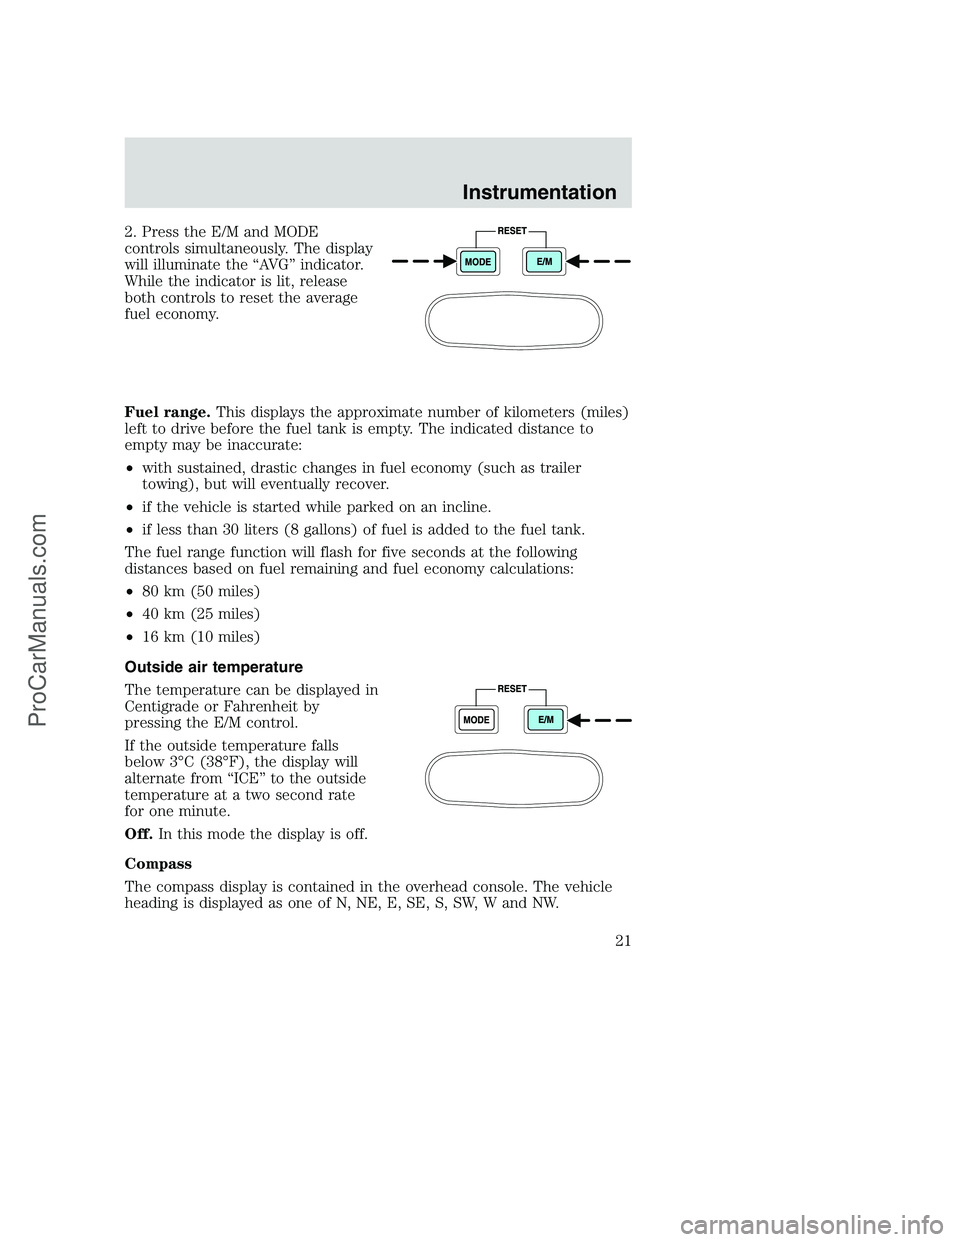
2. Press the E/M and MODE
controls simultaneously. The display
will illuminate the “AVG” indicator.
While the indicator is lit, release
both controls to reset the average
fuel economy.
Fuel range.This displays the approximate number of kilometers (miles)
left to drive before the fuel tank is empty. The indicated distance to
empty may be inaccurate:
•with sustained, drastic changes in fuel economy (such as trailer
towing), but will eventually recover.
•if the vehicle is started while parked on an incline.
•if less than 30 liters (8 gallons) of fuel is added to the fuel tank.
The fuel range function will flash for five seconds at the following
distances based on fuel remaining and fuel economy calculations:
•80 km (50 miles)
•40 km (25 miles)
•16 km (10 miles)
Outside air temperature
The temperature can be displayed in
Centigrade or Fahrenheit by
pressing the E/M control.
If the outside temperature falls
below 3°C (38°F), the display will
alternate from “ICE” to the outside
temperature at a two second rate
for one minute.
Off.In this mode the display is off.
Compass
The compass display is contained in the overhead console. The vehicle
heading is displayed as one of N, NE, E, SE, S, SW, W and NW.
Instrumentation
21
ProCarManuals.com
Page 138 of 288

(Overdrive)
The normal driving position for the
best fuel economy. Transmission
operates in gears one through four.
(Overdrive) can be deactivated
by pressing the transmission control
switch (TCS) on the end of the
gearshift lever.
The transmission control indicator
light (TCIL) (the word OFF) on the
end of the gearshift lever will
illuminate.
Drive– Not shown on the display. Activate by pressing the transmission
control switch (TCS) on the end of the gearshift lever with the gearshift
in the
position. The TCIL (the word OFF) will illuminate on the
gearshift lever. Transmission operates in gears one through three.
(Drive) provides more engine braking than(Overdrive) and is useful
when:
•driving with a heavy load.
•towing a trailer up or down steep hills.
•additional engine downhill braking is desired. If towing a trailer, refer
toDriving while you towin theTrailer towingsection.
To return to
(Overdrive) mode, press the transmission control switch
(TCS). The TCIL (the word OFF) will no longer be illuminated.
Each time the vehicle is started, the transmission will automatically
return to normal overdrive mode.
Every time the vehicle is shut off and restarted, you must press the
transmission control switch to cancel overdrive operation if driving in
overdrive is not desired.
2 (Second)
Use 2 (Second) to start-up on
slippery roads or to provide
additional engine braking on
downgrades.
OVERDRIVEOFF
OVERDRIVE
Driving
138
ProCarManuals.com
Page 149 of 288
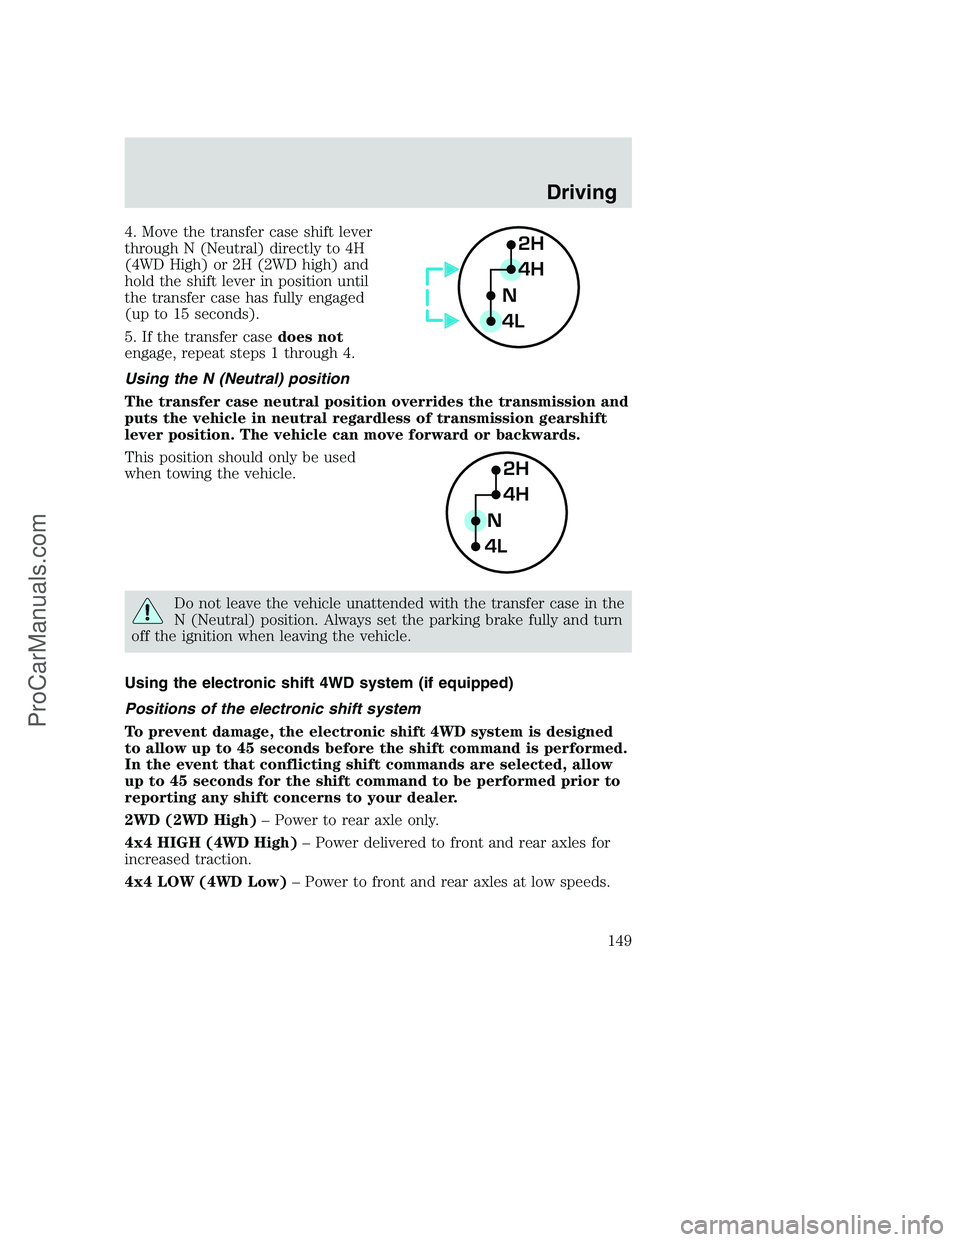
4. Move the transfer case shift lever
through N (Neutral) directly to 4H
(4WD High) or 2H (2WD high) and
hold the shift lever in position until
the transfer case has fully engaged
(up to 15 seconds).
5. If the transfer casedoes not
engage, repeat steps 1 through 4.
Using the N (Neutral) position
The transfer case neutral position overrides the transmission and
puts the vehicle in neutral regardless of transmission gearshift
lever position. The vehicle can move forward or backwards.
This position should only be used
when towing the vehicle.
Do not leave the vehicle unattended with the transfer case in the
N (Neutral) position. Always set the parking brake fully and turn
off the ignition when leaving the vehicle.
Using the electronic shift 4WD system (if equipped)
Positions of the electronic shift system
To prevent damage, the electronic shift 4WD system is designed
to allow up to 45 seconds before the shift command is performed.
In the event that conflicting shift commands are selected, allow
up to 45 seconds for the shift command to be performed prior to
reporting any shift concerns to your dealer.
2WD (2WD High)– Power to rear axle only.
4x4 HIGH (4WD High)– Power delivered to front and rear axles for
increased traction.
4x4 LOW (4WD Low)– Power to front and rear axles at low speeds.
2H
4H
4LN
2H
4H
4LN
Driving
149
ProCarManuals.com
Page 154 of 288
If your vehicle is equipped with a Four Wheel Anti-lock Brake System
(ABS), apply the brakes as you normally would. In order to allow the
ABS to operate properly, keep steady pressure on the brake pedal.
When driving on snow or ice with either braking system, allow more
stopping distance and drive slower than usual. Consider using one of the
lower gears.
VEHICLE LOADING
Before loading a vehicle, familiarize yourself with the following terms:
•Base Curb Weight:Weight of the vehicle including any standard
equipment, fluids, lubricants, etc. It does not include occupants or
aftermarket equipment.
•Payload:Combined maximum allowable weight of cargo, occupants
and optional equipment. The payload equals the gross vehicle weight
rating minus base curb weight.
•GVW (Gross Vehicle Weight):Base curb weight plus payload
weight. The GVW is not a limit or a specification.
•GVWR (Gross Vehicle Weight Rating):Maximum permissable total
weight of the base vehicle, occupants, optional equipment and cargo.
The GVWR is specific to each vehicle and is listed on the Safety
Certification Label on the driver’s door pillar.
•GAWR (Gross Axle Weight Rating):Carrying capacity for each axle
system. The GAWR is specific to each vehicle and is listed on the
Safety Certification Label on the driver’s door pillar.
•GCW (Gross Combined Weight):The combined weight of the
towing vehicle (including occupants and cargo) and the loaded trailer.
•GCWR (Gross Combined Weight Rating):Maximum permissable
combined weight of towing vehicle (including occupants and cargo)
and the loaded trailer
•Maximum Trailer Weight Rating:Maximum weight of a trailer the
vehicle is permitted to tow. The maximum trailer weight rating is
determined by subtracting the vehicle curb weight for each
engine/transmission combination, any required option weight for trailer
towing and the weight of the driver from the GCWR for the towing
vehicle.
Driving
154
ProCarManuals.com
Page 155 of 288
•Maximum Trailer Weight:Maximum weight of a trailer the loaded
vehicle (including occupants and cargo) is permitted to tow. It is
determined by subtracting the weight of the loaded trailer towing
vehicle from the GCWR for the towing vehicle.
•Trailer Weight Range:Specified weight range that the trailer must
fall within that ranges from zero to the maximum trailer weight rating.
Remember to figure in the tongue load of your loaded trailer when
figuring the total weight.
Do not exceed the GVWR or the GAWR specified on the
certification label.
Do not use replacement tires with lower load carrying capacities than the
originals because they may lower the vehicle’s GVWR and GAWR
limitations. Replacement tires with a higher limit than the originals do
not increase the GVWR and GAWR limitations.
The Safety Certification Label, found on the driver’s door pillar, lists
several important vehicle weight rating limitations. Before adding any
additional equipment, refer to these limitations. If you are adding weight
to the front of your vehicle, (potentially including weight added to the
cab), the weight added should not exceed the front axle reserve capacity
(FARC). Additional frontal weight may be added to the front axle reserve
capacity provided you limit your payload in other ways (i.e. restrict the
number of occupants or amount of cargo carried).
Always ensure that the weight of occupants, cargo and equipment being
carried is within the weight limitations that have been established for
your vehicle including both gross vehicle weight and front and rear gross
axle weight rating limits. Under no circumstance should these limitations
be exceeded. Exceeding any vehicle weight rating limitation could result
in serious damage to the vehicle and/or personal injury.
Special loading instructions for owners of pickup trucks and
utility-type vehicles
For important information regarding safe operation of this type
of vehicle, see thePreparing to drive your vehiclesection
intheDrivingchapter of this owner guide.
Driving
155
ProCarManuals.com
Page 157 of 288
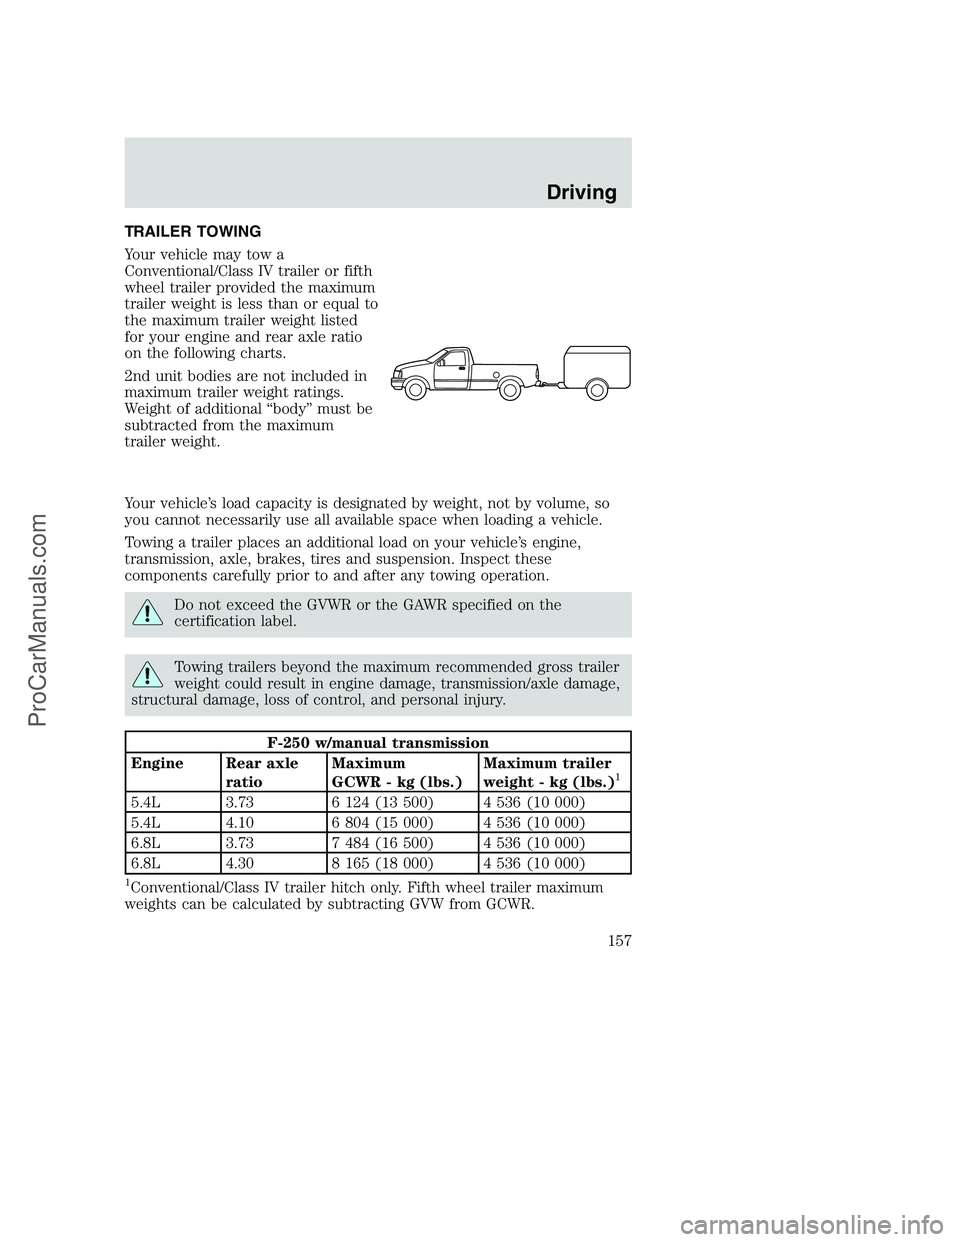
TRAILER TOWING
Your vehicle may tow a
Conventional/Class IV trailer or fifth
wheel trailer provided the maximum
trailer weight is less than or equal to
the maximum trailer weight listed
for your engine and rear axle ratio
on the following charts.
2nd unit bodies are not included in
maximum trailer weight ratings.
Weight of additional “body” must be
subtracted from the maximum
trailer weight.
Your vehicle’s load capacity is designated by weight, not by volume, so
you cannot necessarily use all available space when loading a vehicle.
Towing a trailer places an additional load on your vehicle’s engine,
transmission, axle, brakes, tires and suspension. Inspect these
components carefully prior to and after any towing operation.
Do not exceed the GVWR or the GAWR specified on the
certification label.
Towing trailers beyond the maximum recommended gross trailer
weight could result in engine damage, transmission/axle damage,
structural damage, loss of control, and personal injury.
F-250 w/manual transmission
Engine Rear axle
ratioMaximum
GCWR - kg (lbs.)Maximum trailer
weight - kg (lbs.)
1
5.4L 3.73 6 124 (13 500) 4 536 (10 000)
5.4L 4.10 6 804 (15 000) 4 536 (10 000)
6.8L 3.73 7 484 (16 500) 4 536 (10 000)
6.8L 4.30 8 165 (18 000) 4 536 (10 000)
1Conventional/Class IV trailer hitch only. Fifth wheel trailer maximum
weights can be calculated by subtracting GVW from GCWR.
Driving
157
ProCarManuals.com
Page 159 of 288

F-450 with manual transmission
Engine Rear axle
ratioMaximum
GCWR - kg (lbs.)Maximum trailer
weight - kg (lbs.)
1
6.8L 4.88 9 979 (22 000) 4 536 (10 000)
6.8L 5.38 9 979 (22 000) 4 536 (10 000)
1Conventional/Class IV trailer hitch only. Fifth wheel trailer maximum
weights can be calculated by subtracting GVW from GCWR.
F-450 w/automatic transmission
Engine Rear axle
ratioMaximum
GCWR - kg (lbs.)Maximum trailer
weight - kg (lbs.)
1
6.8L 4.88 10 886 (24 000) 4 536 (10 000)
6.8L 5.38 11 794 (26 000) 4 536 (10 000)
1Conventional/Class IV trailer hitch only. Fifth wheel trailer maximum
weights can be calculated by subtracting GVW from GCWR.
F-550
Engine Rear axle
ratioMaximum
GCWR - kg (lbs.)Maximum trailer
weight - kg
(lbs.)
1
6.8L 4.88 10 886 (24 000) 4 536 (10 000)
6.8L 5.38 11 794 (26 000) 4 536 (10 000)
1Conventional/Class IV trailer hitch only. Fifth wheel trailer maximum
weights can be calculated by subtracting GVW from GCWR.
Towing a Class IV trailer (extra heavy duty) 2 268–4 536 kg
(5 001–10 000 lbs.) trailer weight requires a weight-distributing
or fifth-wheel hitch. Trailers over 4 536 kg (10 000 lbs.) require a
fifth-wheel hitch.
Preparing to tow
Use the proper equipment for towing a trailer, and make sure it is
properly attached to your vehicle. See your dealer or a reliable trailer
dealer if you require assistance.
Driving
159
ProCarManuals.com